| Category | Microsoft Docs article | Related commit history on GitHub | Change details |
|---|---|---|---|
| README | https://github.com/MicrosoftDocs/microsoft-365-docs/commits/public/README.md | Previously updated : 01/04/2018 Last updated : 9/15/2023 + # Overview ## Learn how to contribute -Anyone who is interested can contribute to the topics. When you contribute, your work will go directly into the content set after being merged. It will then be published to [Microsoft Learn](https://learn.microsoft.com/) and you will be listed as a contributor at: <https://github.com/MicrosoftDocs/microsoft-365-docs/graphs/contributors>. +Anyone who is interested can contribute to the articles. When you contribute, your work goes into the content set after it's been reviewed and merged. It's then published to [Microsoft Learn](https://learn.microsoft.com/), and you're listed as a contributor at: <https://github.com/MicrosoftDocs/microsoft-365-docs/graphs/contributors>. ### Quickly update an article using GitHub.com -Contributors who only make infrequent or small updates can edit the file directly on GitHub.com without having to install any additional software. This article shows you how. [This two-minute video](https://www.microsoft.com/videoplayer/embed/RE1XQTG) also covers how to contribute. +Contributors who make infrequent or small updates can edit the file directly on GitHub.com without installing any software. This article shows you how. [This two-minute video](https://www.microsoft.com/videoplayer/embed/RE1XQTG) also covers how to contribute. ++> [!TIP] +> To edit an article, you need to get to it on the GitHub.com backend. If you're already on the GitHub.com page of the article, you're starting at step 4. +> +> Your permissions in the repo determine what you see in step 5 and later. People with no special privileges see the steps as described. People with permissions to approve their own pull requests see a similar experience with different button and page titles (for example, **Commit changes** instead of **Propose changes**), extra options for creating a new branch, and fewer confirmation pages. The point is: click any green buttons that are presented to you until there are no more. ++1. Verify that you're signed in to GitHub.com with your GitHub account. +2. On learn.microsoft.com, find the article that you want to update. +3. Above the title of the article, select  **Edit this document**. ++  ++4. The corresponding article file opens on GitHub. Select  **Edit this file**. -1. Make sure you're signed in to GitHub.com with your GitHub account. -2. Browse to the page you want to edit on Microsoft Learn. -3. On the right-hand side of the page, click **Edit** (pencil icon). +  - 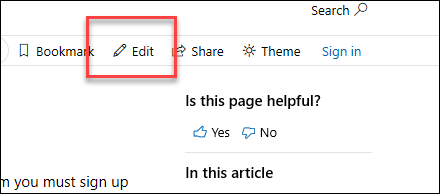 +5. The article file opens in a line-numbered editor page where you can make updates. -4. The corresponding topic file on GitHub opens, where you need to click the **Edit this file** pencil icon. + Articles on learn.microsoft.com are formatted using the Markdown language. For help on using Markdown, see [Mastering Markdown.](https://guides.github.com/features/mastering-markdown/). - 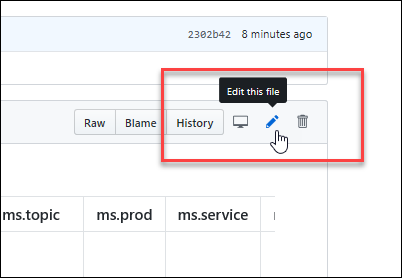 + Select **Preview** to view your changes as you go. Select **Edit** to go back to making updates. -5. The topic opens in a line-numbered editing page where you can make changes to the file. Files in GitHub are written and edited using Markdown language. For help on using Markdown, see [Mastering Markdown](https://guides.github.com/features/mastering-markdown/). Select the **Preview changes** tab to view your changes as you go. + When you're finished making changes, select the green **Commit changes** button. -6. When you're finished making changes, go to the **Propose file change** section at the bottom of the page: +  - - A brief title is required. By default, the title is the name of the file, but you can change it. - - Optionally, you can enter more details in the **Add an optional extended description** box. +6. In the **Propose changes** dialog that opens, review and/or enter the following values: + - **Commit message**: This value is required. You can accept the default value ("Update \<filename\>") or you can change it. + - **Extended description**: This value is optional. For example: + - An explanation of the changes. + - @ include the GitHub alias of someone to review and merge your changes. - When you're ready, click the green **Propose file change** button. + When you're finished on the **Propose changes** dialog, select the green **Propose changes** button. - 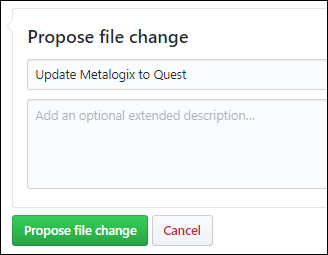 +  -7. On the **Comparing changes** page that appears, click the green **Create pull request** button. +7. On the **Comparing changes** page that opens, select the green **Create pull request** button. - 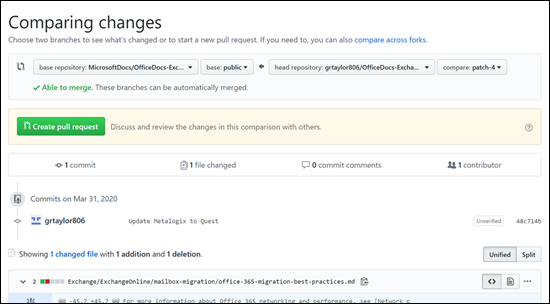 +  -8. On the **Open a pull request** page that appears, click the green **Create pull request** button. +8. On the **Open a pull request** page that opens, review the title and comments, and then select the green **Create pull request** button. - 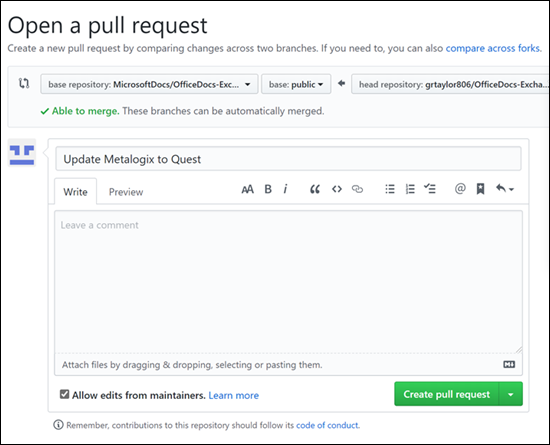 +  -> [!NOTE] -> Your permissions in the repo determine what you see in the last several steps. People with no special privileges will see the **Propose file change** section and subsequent confirmation pages as described. People with permissions to create and approve their own pull requests will see a similar **Commit changes** section with extra options for creating a new branch and fewer confirmation pages.<br/><br/>The point is: click any green buttons that are presented to you until there are no more. +9. That's it. There's nothing more for you to do. -The writer identified in the metadata of the topic will be notified and will eventually review and approve your changes so the topic will be updated on Microsoft Learn. If there are questions or issues with the updates, the writer will contact you. + The article owner (identified in metadata) is notified about the changes to the article. Eventually, the article owner or another party will review, possibly edit, and approve your changes. After your pull request is merged, the article is updated on learn.microsoft.com. ## Microsoft Open Source Code of Conduct This project has adopted the [Microsoft Open Source Code of Conduct](https://opensource.microsoft.com/codeofconduct/). -For more information see the [Code of Conduct FAQ](https://opensource.microsoft.com/codeofconduct/faq/) or contact [opencode@microsoft.com](mailto:opencode@microsoft.com) with any additional questions or comments. +For more information, see the [Code of Conduct FAQ](https://opensource.microsoft.com/codeofconduct/faq/) or contact [opencode@microsoft.com](mailto:opencode@microsoft.com) with any questions or comments. ### Contributing This project welcomes contributions and suggestions. Most contributions require you to agree to a Contributor License Agreement (CLA) declaring that you have the right to, and actually do, grant us the rights to use your contribution. For details, visit <https://cla.microsoft.com>. -When you submit a pull request, a CLA-bot will automatically determine whether you need to provide a CLA and decorate the PR appropriately (e.g., label, comment). Simply follow the instructions provided by the bot. You will only need to do this once across all repos using our CLA. +When you submit a pull request, a CLA-bot automatically determines whether you need to provide a CLA and decorate the PR appropriately (for example, label, comment). Follow the instructions provided by the bot. You only need to do this step once across all repos using our CLA. ### Legal Notices Microsoft and any contributors grant you a license to the Microsoft documentation and other content in this repository under the [Creative Commons Attribution 4.0 International Public License](https://creativecommons.org/licenses/by/4.0/legalcode), see the [LICENSE](LICENSE) file, and grant you a license to any code in the repository under the [MIT License](https://opensource.org/licenses/MIT), see the [LICENSE-CODE](LICENSE-CODE) file. -Microsoft, Windows, Microsoft Azure and/or other Microsoft products and services referenced in the documentation may be either trademarks or registered trademarks of Microsoft in the United States and/or other countries. +Microsoft, Windows, Microsoft Azure and/or other Microsoft products and services referenced in the documentation may be either trademarks or registered trademarks of Microsoft in the United States and/or other countries/regions. -The licenses for this project do not grant you rights to use any Microsoft names, logos, or trademarks. Microsoft's general trademark guidelines can be found at <https://go.microsoft.com/fwlink/?LinkID=254653>. +The licenses for this project don't grant you rights to use any Microsoft names, logos, or trademarks. Microsoft's general trademark guidelines can be found at <https://go.microsoft.com/fwlink/?LinkID=254653>. Privacy information can be found at <https://privacy.microsoft.com/> |
|
| enterprise | Office 365 Network Mac Perf Onboarding Tool | https://github.com/MicrosoftDocs/microsoft-365-docs/commits/public/microsoft-365/enterprise/office-365-network-mac-perf-onboarding-tool.md | Title: "Microsoft 365 network connectivity test tool" Previously updated : 1/18/2022 Last updated : 9/18/2023 audience: Admin The Microsoft 365 network connectivity test tool is located at <https://connecti Network insights in the Microsoft 365 Admin Center are based on regular in-product measurements for your Microsoft 365 tenant, aggregated each day. In comparison, network insights from the Microsoft 365 network connectivity test are run locally in the tool. -In-product testing is limited, and running tests local to the user collects more data resulting in deeper insights. Network insights in the Microsoft 365 Admin Center will show that there's a networking problem at a specific office location. The Microsoft 365 connectivity test can help to identify the root cause of that problem and provide a targeted performance improvement action. +In-product testing is limited, and running tests local to the user collects more data resulting in deeper insights. Network insights in the Microsoft 365 Admin Center show that there's a networking problem at a specific office location. The Microsoft 365 connectivity test can help to identify the root cause of that problem and provide a targeted performance improvement action. -We recommend that these insights be used together where networking quality status can be assessed for each office location in the Microsoft 365 Admin Center and more specifics can be found after deployment of testing based on the Microsoft 365 connectivity test. +We recommend that these insights be used together where networking quality status can be assessed for each office location in the Microsoft 365 Admin Center. More specifics can be found after deployment of testing based on the Microsoft 365 connectivity test. ## What happens at each test step ### Office location identification -When you click the *Run test* button, we show the running test page and identify the office location. You can type in your location by city, state, and country/region or choose to have it detected for you. If you detect the office location, the tool requests the latitude and longitude from the web browser and limits the accuracy to 300 meters by 300 meters before use. It's not necessary to identify the location more accurately than the building to measure network performance. +When you select the *Run test* button, we show the running test page and identify the office location. You can type in your location by city, state, and country/region or choose to have it detected for you. If you detect the office location, the tool requests the latitude and longitude from the web browser and limits the accuracy to 300 meters by 300 meters before use. It's not necessary to identify the location more accurately than the building to measure network performance. ### JavaScript tests After office location identification, we run a TCP latency test in JavaScript an Next, we start the download of the advanced tests client application. We rely on the user to launch the client application and they must also have .NET 6.0 Runtime installed. -There are two parts to the Microsoft 365 network connectivity test: the web site <https://connectivity.office.com> and a downloadable Windows client application that runs advanced network connectivity tests. Most of the tests require the application to be run. It will populate results back into the web page as it runs. +There are two parts to the Microsoft 365 network connectivity test: the web site <https://connectivity.office.com> and a downloadable Windows client application that runs advanced network connectivity tests. Most of the tests require the application to be run. It populates results back into the web page as it runs. You'll be prompted to download the advanced client test application from the web site after the web browser tests have completed. Open and run the file when prompted. You'll be prompted to download the advanced client test application from the web ### Start the advanced tests client application -Once the client application starts, the web page will update to show this result. Test data will start to be received to the web page. The page updates each time new-data is received and you can review the data as it arrives. +Once the client application starts, the web page updates to show this result. Test data starts to be received to the web page. The page updates each time new-data is received and you can review the data as it arrives. ### Advanced tests completed and test report upload -When the tests are completed, the web page and the advanced tests client will both show that. If the user is signed in, the test report will be uploaded to the customer's tenant. +When the tests are completed, the web page and the advanced tests client will both show that. If the user is signed in, the test report is uploaded to the customer's tenant. ## Sharing your test report -The test report requires authentication to your Microsoft 365 account. Your administrator selects how you can share your test report. The default settings allow for sharing of your reports with other user within your organization and the ReportID link is not available. Reports will expire by default after 90 days. +The test report requires authentication to your Microsoft 365 account. Your administrator selects how you can share your test report. The default settings allow for sharing of your reports with other user within your organization and the ReportID link isn't available. Reports will expire by default after 90 days. ### Sharing your report with your administrator The results are shown in the **Summary** and **Details** tabs. The summary tab s > [!div class="mx-imgBorder"] >  -Here's an example of the details tab output. On the details tab we show a green circle check mark if the result was compared favorably. We show a red triangle exclamation point if the result exceeded a threshold indicating a network insight. The following sections describe each of the details tab results rows and explain the thresholds used for network insights. +Here's an example of the details tab output. On the details tab, we show a green circle check mark if the result was compared favorably. We show a red triangle exclamation point if the result exceeded a threshold indicating a network insight. The following sections describe each of the details tab results rows and explain the thresholds used for network insights. > [!div class="mx-imgBorder"] >  The user office location is shown on the map view. #### Network egress location (the location where your network connects to your ISP) -We identify the network egress IP address on the server side. Location databases are used to look up the approximate location for the network egress. These databases typically have an accuracy of about 90% of IP addresses. If the location looked up from the network egress IP address isn't accurate, this would lead to a false result. To validate if this error is occurring for a specific IP address, you can use publicly accessible network IP address location web sites to compare against your actual location. +We identify the network egress IP address on the server side. Location databases are used to look up the approximate location for the network egress. These databases typically have an accuracy of about 90% of IP addresses. If the location looked up from the network egress IP address isn't accurate, this inaccuracy would lead to a false result. To validate if this error is occurring for a specific IP address, you can use publicly accessible network IP address location web sites to compare against your actual location. #### Your distance from the network egress location -We determine the distance from that location to the office location. This is shown as a network insight if the distance is greater than **500 miles** (800 kilometers) since that is likely to increase the TCP latency by more than 25 ms and may affect user experience. +We determine the distance from that location to the office location. This distance is shown as a network insight if the distance is greater than **500 miles** (800 kilometers) since that is likely to increase the TCP latency by more than 25 ms and may affect user experience. The map shows the network egress location in relation to the user office location indicating the network backhaul inside of the enterprise WAN. The distance is tested first by ICMP ping. If that fails, we test with TCP ping #### Virtual private network (VPN) you use to connect to your organization -This test detects if you're using a VPN to connect to Microsoft 365. A passing result will show if you have no VPN, or if you have a VPN with recommended split tunnel configuration for Microsoft 365. +This test detects if you're using a VPN to connect to Microsoft 365. A passing result shows if you have no VPN, or if you have a VPN with recommended split tunnel configuration for Microsoft 365. #### VPN Split Tunnel -Each **Optimize** category route for Exchange Online, SharePoint Online, and Microsoft Teams is tested to see if It's tunneled on the VPN. A split out workload avoids the VPN entirely. A tunneled workload is sent over the VPN. A selective tunneled workload has some routes sent over the VPN and some split out. A passing result will show if all workloads are split out or selective tunneled. +Each **Optimize** category route for Exchange Online, SharePoint Online, and Microsoft Teams is tested to see if It's tunneled on the VPN. A split out workload avoids the VPN entirely. A tunneled workload is sent over the VPN. A selective tunneled workload has some routes sent over the VPN and some split out. A passing result shows if all workloads are split out or selective tunneled. #### Customers in your metropolitan area with better performance -Network latency between the user office location and the Exchange Online service is compared to other Microsoft 365 customers in the same metro area. A network insight is shown if 10% or more of customers in the same metro area have better performance. This means their users will have better performance in the Microsoft 365 user interface. +Network latency between the user office location and the Exchange Online service is compared to other Microsoft 365 customers in the same metro area. A network insight is shown if 10% or more of customers in the same metro area have better performance. This means their users have better performance in the Microsoft 365 user interface. This network insight is generated on the basis that all users in a city have access to the same telecommunications infrastructure and the same proximity to Internet circuits and Microsoft's network. This network insight is generated on the basis that all users in a city have acc This shows the DNS server configured on the client machine that ran the tests. It might be a DNS Recursive Resolver server however this is uncommon. It's more likely to be a DNS forwarder server, which caches DNS results and forwards any uncached DNS requests to another DNS server. -This is provided for information only and does not contribute to any network insight. +This is provided for information only and doesn't contribute to any network insight. #### Your distance from and/or time to connect to a DNS recursive resolver -The in-use DNS Recursive Resolver is identified by making a specific DNS request and then asking the DNS Name Server for the IP Address that it received the same request from. This IP Address is the DNS Recursive Resolver and it will be looked up in IP Address location databases to find the location. The distance from the user office location to the DNS Recursive Resolver server location is then calculated. This is shown as a network insight if the distance is greater than **500 miles** (800 kilometers). +The in-use DNS Recursive Resolver is identified by making a specific DNS request and then asking the DNS Name Server for the IP Address that it received the same request from. This IP Address is the DNS Recursive Resolver and it is looked up in IP Address location databases to find the location. The distance from the user office location to the DNS Recursive Resolver server location is then calculated. This is shown as a network insight if the distance is greater than **500 miles** (800 kilometers). -The location looked up from the network egress IP Address may not be accurate and this would lead to a false result from this test. To validate if this error is occurring for a specific IP Address, you can use publicly accessible network IP Address location web sites. +The location looked up from the network egress IP Address may not be accurate and this inaccuracy would lead to a false result from this test. To validate if this error is occurring for a specific IP Address, you can use publicly accessible network IP Address location web sites. -This network insight will specifically impact the selection of the Exchange Online service front door. To address this insight local and direct network egress should be a pre-requisite and then DNS Recursive Resolver should be located close to that network egress. +This network insight affects the selection of the Exchange Online service front door. To address this insight local and direct network egress should be a prerequisite and then DNS Recursive Resolver should be located close to that network egress. ### Exchange Online This section shows test results related to SharePoint Online and OneDrive. #### The service front door location -The in-use SharePoint service front door is identified in the same way that the OneDrive client does and we measure the network TCP latency from the user office location to it. +The in-use SharePoint service front door is identified in the same way that the OneDrive client does. We measure the network TCP latency from the user office location to it. #### Download speed -We measure the download speed for a 15 Mb file from the SharePoint service front door. The result is shown in megabytes per second to indicate what size file in megabytes can be downloaded from SharePoint or OneDrive in **one second**. The number should be similar to one tenth of the minimum circuit bandwidth in megabits per second. For example if you have a 100mbps internet connection, you may expect 10 megabytes per second (10 MBps). +We measure the download speed for a 15-Mb file from the SharePoint service front door. The result is shown in megabytes per second to indicate what size file in megabytes can be downloaded from SharePoint or OneDrive in **one second**. The number should be similar to one tenth of the minimum circuit bandwidth in megabits per second. For example if you have a 100mbps internet connection, you may expect 10 megabytes per second (10 MBps). #### Buffer bloat -During the 15Mb download we measure the TCP latency to the SharePoint service front door. This is the latency under load and it's compared to the latency when not under load. The increase in latency when under load is often attributable to consumer network device buffers being loaded (or bloated). A network insight is shown for any bloat of 100ms or more. +During the 15 Mb download, we measure the TCP latency to the SharePoint service front door. This is the latency under load and it's compared to the latency when not under load. The increase in latency when under load is often attributable to consumer network device buffers being loaded (or bloated). A network insight is shown for any bloat of 100 ms or more. #### Service front door recorded in the client DNS Shows the measured UDP jitter, which should be lower than **30ms**. #### Connectivity -We test for HTTP connectivity from the user office location to all of the required Microsoft 365 network endpoints. These are published at [https://aka.ms/o365ip](./urls-and-ip-address-ranges.md). A network insight is shown for any required network endpoints, which cannot be connected to. +We test for HTTP connectivity from the user office location to all of the required Microsoft 365 network endpoints. These are published at [https://aka.ms/o365ip](./urls-and-ip-address-ranges.md). A network insight is shown for any required network endpoints, which can't be connected to. -Connectivity may be blocked by a proxy server, a firewall, or another network security device on the enterprise network perimeter. Connectivity to TCP port 80 is tested with an HTTP request and connectivity to TCP port 443 is tested with an HTTPS request. If there's no response the FQDN is marked as a failure. If there's an HTTP response code 407 the FQDN is marked as a failure. If there's an HTTP response code 403 then we check the Server attribute of the response and if it appears to be a proxy server we mark this as a failure. You can simulate the tests we perform with the Windows command-line tool curl.exe. +Connectivity may be blocked by a proxy server, a firewall, or another network security device on the enterprise network perimeter. Connectivity to TCP port 80 is tested with an HTTP request and connectivity to TCP port 443 is tested with an HTTPS request. If there's no response the FQDN is marked as a failure. If there's an HTTP response code 407 the FQDN is marked as a failure. If there's an HTTP response code 403, then we check the Server attribute of the response and if it appears to be a proxy server we mark this as a failure. You can simulate the tests we perform with the Windows command-line tool curl.exe. -We test the SSL certificate at each required Microsoft 365 network endpoint that is in the optimize or allow category as defined at [https://aka.ms/o365ip](./urls-and-ip-address-ranges.md). If any tests do not find a Microsoft SSL certificate, then the encrypted network connected must have been intercepted by an intermediary network device. A network insight is shown on any intercepted encrypted network endpoints. +We test the TLS/SSL certificate at each required Microsoft 365 network endpoint that is in the optimize or allow category as defined at [https://aka.ms/o365ip](./urls-and-ip-address-ranges.md). If any tests don't find a Microsoft TLS/SSL certificate, then the encrypted network connected must have been intercepted by an intermediary network device. A network insight is shown on any intercepted encrypted network endpoints. -Where an SSL certificate is found that isn't provided by Microsoft, we show the FQDN for the test and the in-use SSL certificate owner. This SSL certificate owner may be a proxy server vendor, or it may be an enterprise self-signed certificate. +Where an TLS/SSL certificate is found that isn't provided by Microsoft, we show the FQDN for the test and the in-use TLS/SSL certificate owner. This TLS/SSL certificate owner may be a proxy server vendor, or it may be an enterprise self-signed certificate. #### Network path -This section shows the results of an ICMP traceroute to the Exchange Online service front door, the SharePoint Online service front door, and the Microsoft Teams service front door. It's provided for information only and there's no associated network insight. There are three traceroutes provided. A traceroute to _outlook.office365.com_, a traceroute to the customers SharePoint front end or to _microsoft.sharepoint.com_ if one was not provided, and a traceroute to _world.tr.teams.microsoft.com_. +This section shows the results of an ICMP traceroute to the Exchange Online service front door, the SharePoint Online service front door, and the Microsoft Teams service front door. It's provided for information only and there's no associated network insight. There are three traceroutes provided. A traceroute to _outlook.office365.com_, a traceroute to the customers SharePoint front end or to _microsoft.sharepoint.com_ if one wasn't provided, and a traceroute to _world.tr.teams.microsoft.com_. ## Connectivity reports -When you are signed in you can review previous reports that you have run. You can also share them or delete them from the list. +When you're signed in you can review previous reports that you have run. You can also share them or delete them from the list. > [!div class="mx-imgBorder"] >  ## Network health status -This shows any significant health issues with Microsoft's global network, which might impact Microsoft 365 customers. +This shows any significant health issues with Microsoft's global network, which might affect Microsoft 365 customers. > [!div class="mx-imgBorder"] >  ## Testing from the Command Line -We provide a command line executable that can be used by your remote deployment and execution tools and run the same tests as are available in the Microsoft 365 network connectivity test tool web site. +We provide a command line executable that can be used by your remote deployment, execution tools and run the same tests as are available in the Microsoft 365 network connectivity test tool web site. The command line test tool can be downloaded here: [Command Line Tool](https://connectivity.office.com/api/AnonymousConnectivityTest/DownloadStandAloneRichClient) You can run it by double clicking the executable in Windows File Explorer, or you can start it from a command prompt, or you can schedule it with task scheduler. -The first time you launch the executable you will be prompted to accept the end user license agreement (EULA) before testing is performed. If you have already read and accepted the EULA you can create an empty file called Microsoft-365-Network-Connectivity-Test-EULA-accepted.txt in the current working directory for the executable process when it is launched. To accept the EULA you can type 'y' and press enter in the command line window when prompted. +The first time you launch the executable you'll be prompted to accept the end user license agreement (EULA) before testing is performed. If you have already read and accepted the EULA, you can create an empty file called Microsoft-365-Network-Connectivity-Test-EULA-accepted.txt in the current working directory for the executable process when it's launched. To accept the EULA, you can type 'y' and press enter in the command line window when prompted. The executable accepts the following command line parameters: - -h to show a link to this help documentation - -testlist <test> Specifies tests to run. By default only basic tests are run. Valid test names include: all, dnsConnectivityPerf, dnsResolverIdentification, bufferBloat, traceroute, proxy, vpn, skype, connectivity, networkInterface - -filepath <filedir> Directory path of test result files. Allowed value is absolute or relative path of an accessible directory-- -city <city> For the city, state, and country/region fields the specified value will be used if provided. If not provided then Windows Location Services (WLS) will be queried. If WLS fails the location will be detected fromthe machines network egress +- -city <city> For the city, state, and country/region fields the specified value will be used if provided. If not provided then Windows Location Services (WLS) will be queried. If WLS fails the location will be detected from the machines network egress - -state <state> - -country <country> - -proxy <account> <password> Proxy account name and password can be provided if you require a proxy to access the Internet ### Results-Output of results are written to a JSON file in a folder called TestResults which is created in the current working directory of the process unless it already exists. The filename format for the output is connectivity_test_result_YYYY-MM-DD-HH-MM-SS.json. The results are in JSON nodes that match the output shown on the web page for the Microsoft 365 network connectivity test tool web site. A new result file is created each time you run it and the standalone executable does not upload results to your Microsoft tenant for viewing in the Admin Center Network Connectivity pages. Front door codes, longitudes, and latitudes are not included in the result file. +Output of results is written to a JSON file in a folder called TestResults, which is created in the current working directory of the process unless it already exists. The filename format for the output is connectivity_test_result_YYYY-MM-DD-HH-MM-SS.json. The results are in JSON nodes that match the output shown on the web page for the Microsoft 365 network connectivity test tool web site. A new result file is created each time you run it and the standalone executable doesn't upload results to your Microsoft tenant for viewing in the Admin Center Network Connectivity pages. Front door codes, longitudes, and latitudes aren't included in the result file. ### Launching from Windows File Explorer-You can simply double click on the executable to start the testing and a command prompt window will appear. +You can double select on the executable to start the testing and a command prompt window will appear. ### Launching from the Command Prompt On a CMD.EXE command prompt window you can type the path and name of the executable to run it. The filename is Microsoft.Connectivity.Test.exe ### Launching from Windows Task Scheduler-In Windows Task Scheduler you can add a task to launch the standalone test executable. You should specify the current working directory of the task to be where you have created the EULA accepted file since the executable will block until the EULA is accepted. You cannot interactively accept the EULA if the process is started in the background with no console. +In Windows Task Scheduler you can add a task to launch the standalone test executable. You should specify the current working directory of the task to be where you have created the EULA accepted file since the executable blocks until the EULA is accepted. You can't interactively accept the EULA if the process is started in the background with no console. ### More details on the standalone executable-The commandline tool uses Windows Location Services to find the users City State Country/region information for determining some distances. If Windows Location Services is disabled in the control panel then user location based assessments will be blank. In Windows Settings "Location services" must be on and "Let desktop apps access your location" must also be on. +The commandline tool uses Windows Location Services to find the users City State Country/region information for determining some distances. If Windows Location Services is disabled in the control panel, then user location based assessments are blank. In Windows Settings "Location services" must be on and "Let desktop apps access your location" must also be on. -The commandline tool will attempt to install the .NET Framework if it is not already installed. It will also download the main testing executable from the Microsoft 365 network connectivity test tool and launch that. +The commandline tool attempts to install the .NET Framework if it isn't already installed. It also downloads the main testing executable from the Microsoft 365 network connectivity test tool and launch that. ## Test using the Microsoft Support and Recovery Assistant The commandline tool will attempt to install the .NET Framework if it is not alr Reports can be accessed in the following ways: -The reports will be available on the below screen once the Assistant has finished scanning the user's machine. To access these reports, simply click on the “View log” option to view them. +The reports are available on the below screen once the Assistant has finished scanning the user's machine. To access these reports, simply select on the “View log” option to view them. > [!div class="mx-imgBorder"] >  To view the information about the test results and telemetry, double-click and o Microsoft Support and Recovery Assistant creates 2 files: 1. Network Connectivity Report (CSV)-This report runs the raw JSON file against a rule engine to make sure defined thresholds are being met and if they are not met a “warning” or “error” is displayed in the output column of the CSV file. You can view the NetworkConnectivityReport.csv file to be informed about any detected issues or defects. Please see [What happens at each test step](office-365-network-mac-perf-onboarding-tool.md#what-happens-at-each-test-step) for details on each test and the thresholds for warnings. +This report runs the raw JSON file against a rule engine to make sure defined thresholds are being met and if they aren't met a “warning” or “error” is displayed in the output column of the CSV file. You can view the NetworkConnectivityReport.csv file to be informed about any detected issues or defects. See [What happens at each test step](office-365-network-mac-perf-onboarding-tool.md#what-happens-at-each-test-step) for details on each test and the thresholds for warnings. 1. Network Connectivity Scan Report (JSON) This file provides the raw output test results from the command-line version of the Microsoft 365 network connectivity test tool (MicrosoftConnectivityTest.exe). Here are answers to some of our frequently asked questions. ### What is required to run the advanced test client? -The advanced test client requires .NET 6.0 Runtime. If you run the advanced test client without that installed you will be directed to [the .NET 6.0 installer page](https://dotnet.microsoft.com/en-us/download/dotnet/6.0/runtime?utm_source=getdotnetcore). Be sure to install from the Run desktop apps column for Windows. Administrator permissions on the machine are required to install .NET 6.0 Runtime. +The advanced test client requires .NET 6.0 Runtime. If you run the advanced test client without that installed you'll be directed to [the .NET 6.0 installer page](https://dotnet.microsoft.com/en-us/download/dotnet/6.0/runtime?utm_source=getdotnetcore). Be sure to install from the Run desktop apps column for Windows. Administrator permissions on the machine are required to install .NET 6.0 Runtime. -The advanced test client uses SignalR to communicate to the web page. For this you must ensure that TCP port 443 connectivity to **connectivity.service.signalr.net** is open. This URL isn't published in the <https://aka.ms/o365ip> because that connectivity isn't required for a Microsoft 365 client application user. +The advanced test client uses SignalR to communicate to the web page. For this, you must ensure that TCP port 443 connectivity to **connectivity.service.signalr.net** is open. This URL isn't published in the <https://aka.ms/o365ip> because that connectivity isn't required for a Microsoft 365 client application user. ### What is Microsoft 365 service front door? A best Microsoft 365 service front door (formerly known as an optimal service fr The internet egress Location is the location where your network traffic exits your enterprise network and connects to the Internet. This is also identified as the location where you have a Network Address Translation (NAT) device and usually where you connect with an Internet Service Provider (ISP). If you see a long distance between your location and your internet egress location, then this may identify a significant WAN backhaul. -## Related topics +## Related articles [Network connectivity in the Microsoft 365 Admin Center](office-365-network-mac-perf-overview.md) |
| frontline | Virtual Appointments App | https://github.com/MicrosoftDocs/microsoft-365-docs/commits/public/microsoft-365/frontline/virtual-appointments-app.md | Title: Use the Virtual Appointments app in Microsoft Teams -+ audience: ITPro description: Get an overview of how to use the Virtual Appointments app in Teams appliesto: - Microsoft Teams - Microsoft 365 for frontline workers Previously updated : 03/27/2023 Last updated : 09/18/2023 -# Set up the Virtual Appointments app in Microsoft Teams +# Use the Virtual Appointments app in Microsoft Teams  **Some features described in this article require [Teams Premium](/microsoftteams/teams-add-on-licensing/licensing-enhance-teams)**. -## Overview +## Before you begin -The [Virtual Appointments app](https://support.microsoft.com/topic/22df0079-e6d9-4225-bc65-22747fb2cb5f) provides a central hub for all your virtual appointments needs in Microsoft Teams. The app enables a seamless end-to-end experience for business-to-customer engagements, integrating Bookings schedules, analytics, and management options, all in one place. +This article is intended primarily for users in your organization who will set up the Virtual Appointments app for staff members on their team. This can include managers, supervisors, schedulers, or other employees. Users who initially create a shared appointment calendar are automatically assigned the Virtual Appointments admin role for that calendar and can perform most of the tasks in this article. -You can schedule, view, and manage virtual appointments, get real-time status updates in a queue view, send appointment reminders, view analytics and reports to gain insight into virtual appointments activity, and configure calendar, staff, and booking page settings +If youΓÇÖre an IT admin, see [Manage the Virtual Appointments app](/microsoftteams/manage-virtual-appointments-app?bc=/microsoft-365/frontline/breadcrumb/toc.json&toc=/microsoft-365/frontline/toc.json) to learn how to control access to the app in your organization. -Use it to schedule and manage appointments such as financial consultations, healthcare visits, virtual fittings and consultations, interviews, customer support, education office hours, and more. You can also publish an online booking page for your clients, customers, and patients to book appointments with your staff. +Team members can find the app in the Teams app store, or you can share the [installation link](https://teams.microsoft.com/l/app/6e106207-4565-4312-b3ea-bbe9b3ed0a02?source=app-details-dialog) to help them find it. IT admins can use an [app setup policy](/microsoftteams/teams-app-setup-policies) to pin the app for your organization, or team members can [pin the app themselves](https://support.microsoft.com/office/pin-an-app-for-easy-access-3045fd44-6604-4ba7-8ecc-1c0d525e89ec). -The Virtual Appointments app makes it easy to manage the complex scheduling demands of any organization. Schedulers can manage multiple department and staff calendars, as well as communications with internal and external attendees, from a single experience. +## Overview of the app -The virtual appointments are held through Microsoft Teams meetings, which offer robust video conferencing capabilities. For example, a doctor can share their screen and review test results with a patient. Or, a banking advisor can request electronic signatures on documents, allowing them to close transactions remotely. +Use the [Virtual Appointments app](https://support.microsoft.com/topic/22df0079-e6d9-4225-bc65-22747fb2cb5f) in Microsoft Teams for all your virtual appointment needs. The app enables a seamless end-to-end experience for business-to-customer engagements, integrating schedules, analytics, and management options, all in one place. -You get an experience that's tailored to your industry. Here's a few examples of how you can use it in your organization: +You can schedule, view, and manage virtual appointments, get real-time status updates in a queue view, send appointment reminders, view analytics and reports on virtual appointments activity, and configure calendar, staff, and booking page settings. -|Industry|Examples| -||| -|Financial services|Virtual appointments for remote sales and service<br/>Schedule and manage appointments for bank relationship managers, financial advisors, and claims adjusters, just to name a few, to serve your customers with increased efficiency and convenience.| -|Retail|Virtual fittings and consultations <br/>Schedule and manage appointments for your sales associates, product experts, and design consultants to conduct virtual shopping experiences with customers.| -|Healthcare|Virtual appointments for patient care <br/>Schedule and manage appointments for your care team members to meet with patients or other healthcare providers to discuss medical care.| +Use it to schedule and manage appointments such as financial consultations, healthcare visits, virtual fittings, interviews, customer support, education office hours, and more. You can also publish an online booking page for your clients, customers, and patients to book appointments with your staff. -With any Microsoft 365 license, you can use basic Virtual Appointments capabilities that make it easy to schedule and join business-to-customer meetings. For example, you can schedule appointments in the Bookings calendar and external attendees can [join through a browser](browser-join.md) without having to download Teams. [Teams Premium](/microsoftteams/teams-add-on-licensing/licensing-enhance-teams) unlocks advanced Virtual Appointments capabilities to manage and personalize the experience. These include a queue view of scheduled and on-demand appointments, SMS notifications, custom waiting rooms, and analytics. +The app makes it easy to manage the complex scheduling demands of any organization. Schedulers can manage multiple department and staff calendars, as well as communications with internal and external attendees, from a single experience. -This article gives you an overview of how to schedule, manage, and conduct virtual appointments using the Virtual Appointments app in Teams. +The virtual appointments are held through Teams meetings, which offer robust video conferencing capabilities. For example, a doctor can share their screen and review test results with a patient. Or, a banking advisor can request electronic signatures on documents, allowing them to close transactions remotely. -## Before you get started +You get an experience that's tailored to your industry. Here are some examples of how you can use it in your organization. -If youΓÇÖre an admin, see [Manage the Virtual Appointments app](/microsoftteams/manage-virtual-appointments-app?bc=/microsoft-365/frontline/breadcrumb/toc.json&toc=/microsoft-365/frontline/toc.json) to learn about how to control access to the app in your organization. +|Healthcare |Financial services |Retail|Sales|HR| +|||||| +|<ul><li>Diagnosis or post-op follow-up sessions</li><li>Consultations with clinicians and insurance providers</li><li>Therapy sessions</li></ul>|<ul><li>Financial consultations</li><li>Insurance policy and claim support</li><li>Loan advisory/management</li></ul>|<ul><li>Showcase products</li><li>Virtual fittings or tour showrooms</li><li>Provide technical advice and resolve conflicts</li></ul>|<ul><li>High trust sales calls</li><li>Issue resolution</li><li>Customer service</li></ul>|<ul><li>Custom waiting rooms for applicants</li><li>Engage multiple interviewers</li><li>Post-interview action</li></ul>| -Users can find the Virtual Appointments app in the Teams app store, or you can share the [installation link](https://teams.microsoft.com/l/app/6e106207-4565-4312-b3ea-bbe9b3ed0a02?source=app-details-dialog) to help them find it. You can use an [app setup policy](/microsoftteams/teams-app-setup-policies) to pin the app for your organization, or your users can [pin the app themselves](https://support.microsoft.com/office/pin-an-app-for-easy-access-3045fd44-6604-4ba7-8ecc-1c0d525e89ec). +With any Microsoft 365 license, you can use basic Virtual Appointments capabilities that make it easy to schedule and join business-to-customer meetings. For example, you can schedule appointments in the calendar and external attendees can [join through a browser](browser-join.md) without having to download Teams. [Teams Premium](/microsoftteams/teams-add-on-licensing/licensing-enhance-teams) unlocks advanced Virtual Appointments capabilities to manage and personalize the experience. These include a queue view of scheduled and on-demand appointments, SMS notifications, custom waiting rooms, and analytics. -## Set up a new booking calendar +## Set up an appointment calendar -You must be a Bookings admin to set up and manage booking calendar settings. +To schedule and manage appointments in the app, you must first set up an appointment calendar. You must have the Virtual Appointments admin role to set up and manage most appointment calendar settings. -### Create the booking calendar +### Step 1: Create a new appointment calendar or connect an existing calendar -On the **Home** tab or the **Bookings schedule** tab of the Virtual Appointments app, choose **Create a calendar**. Complete the form and be sure to choose the relevant business type for your organization. +To get started, [create a new appointment calendar](#to-create-a-new-appointment-calendar) or [connect an existing one](#to-work-with-an-existing-appointment-calendar) that you previously created. +#### To create a new appointment calendar -If youΓÇÖre a larger organization, consider creating separate booking calendars for specific departments within your organization. To learn more, see [Create a Bookings calendar in Virtual Appointments](https://support.microsoft.com/topic/0efc10f6-6152-42db-9cbd-0f939c57d8be). +1. On the **Home** tab or **Schedule** tab of the app, choose **Create appointment calendar**. +1. Complete the form and choose the relevant service category for your organization. If youΓÇÖre part of a larger organization, consider creating separate calendars for specific departments within your organization. -> [!NOTE] -> If you want to work in an existing booking calendar, choose **Connect a calendar**, and then search for and add an existing booking calendar. + :::image type="content" source="media/virtual-appointments-app-new-appointment-calendar.png" alt-text="Screenshot of the new appointment calendar page." lightbox="media/virtual-appointments-app-new-appointment-calendar.png"::: ++ To learn more, see [Create a calendar in Virtual Appointments](https://support.microsoft.com/topic/0efc10f6-6152-42db-9cbd-0f939c57d8be). ++#### To work with an existing appointment calendar -### Add staff +1. On the **Home** tab or **Schedule** tab of the app, choose **Connect existing calendar**. +1. Search for the calendar that you want, select it, and then choose **Done**. -On the **Manage** tab, select **Staff**. Add staff members and assign a role to each person you add. You can add up to 100 staff members to a booking calendar. +### Step 2: Add staff -After you add staff, youΓÇÖll be able to view their availability in the Teams and Outlook calendars and schedule bookings for them. To learn more, see [Add and manage staff to make scheduling a breeze](https://support.microsoft.com/topic/9953defc-509d-4427-a2b9-8a2837495db7). +You can add up to 100 staff members to an appointment calendar. Each person you add will have their calendar displayed on the **Schedule** tab. Schedulers can then view their availability in the app and schedule appointments for them. -### Create appointment types +1. On the **Manage** tab, select **Staff**. +1. Add staff members and assign a role to each person you add. -Create specific appointment types to represent the services offered by your organization and to tailor the booking experience. The appointment type can then be used to book appointments. To learn more, see [Create and edit appointment types](https://support.microsoft.com/topic/5a153902-f5f8-449e-890d-0443db547704). + To learn more, see [Add and manage staff to make scheduling a breeze](https://support.microsoft.com/topic/9953defc-509d-4427-a2b9-8a2837495db7). -On the **Manage** tab, select **Appointment types**, and then choose **Add appointment type**. Specify whether the service is for [Scheduled](#scheduled-appointment-type) or [On-demand](#on-demand-appointment-type) appointments. +### Step 3: Add services using appointment types -#### Scheduled appointment type +Next, add services to the calendar using the appropriate appointment type. Before you do that, it's important to understand the two different appointment types so that you can choose the appointment type that best represents the services offered by your organization: -Enter a name for the service. For example, Account opening, Prescription renewal, Loan consultation, Tax preparation. +- **Scheduled appointment type**: Used by schedulers to book scheduled appointments for staff and attendees. These appointments are scheduled for a specific date, time, and duration. +- **On-demand appointment type**: Used by your customers, clients, and patients for on-demand appointments. On-demand appointments are for services that are provided upon request, similar to a walk-in waiting room. This feature requires [Teams Premium](/microsoftteams/teams-add-on-licensing/licensing-enhance-teams). -Specify any other information and settings you want. Schedulers can then use the appointment type to schedule an appointment. The information that you add is included in the email confirmation that's sent to attendees every time this type of appointment is booked. +1. To add a service, on the **Manage** tab, select **Services**, and then under **Scheduled** or **On-demand**, select **Add service**. + :::image type="content" source="media/virtual-appointments-app-services.png" alt-text="Screenshot of the Services tab." lightbox="media/virtual-appointments-app-services.png"::: +1. Do one of the following: + - If you chose **Scheduled**, follow the steps in [Scheduled appointments](#scheduled-appointments). + - If you chose **On-demand**, follow the steps in [On-demand appointments](#on-demand-appointments). -You can configure options such as whether attendees can [join from a a desktop or mobile browser](browser-join.md) without having to download Teams, add an email reminder, [set up SMS text notifications](#set-up-sms-text-notifications), and [link forms](#link-forms). +#### Scheduled appointments ++1. Enter a name for the service. For example, Account opening, Prescription renewal, Loan consultation, or Tax preparation. +1. Specify any other information and settings you want. Schedulers can then use the appointment type to schedule an appointment. The information that you add is included in the email confirmation that's sent to attendees every time this type of appointment is booked. ++ You can configure options such as whether attendees can [join from a desktop or mobile browser](browser-join.md) without having to download Teams, add an email reminder, [set up SMS text notifications](#set-up-sms-text-notifications), and [link forms](#link-forms). ##### Set up SMS text notifications You can configure options such as whether attendees can [join from a a desktop o Attendees need a valid United States, Canada, or United Kingdom phone number before they can receive SMS notifications. -To send SMS notifications to attendees by default, turn on **Send them text messages**. Attendees will receive confirmation and reminder text messages that include the Teams meeting link and scheduled appointment details. They can opt out of receiving the messages by replying STOP, or resume receiving them by replying START. +To send SMS notifications to attendees by default, turn on **Send them text messages**. Attendees receive confirmation and reminder text messages that include the Teams meeting link and scheduled appointment details. They can opt out of receiving the messages by replying STOP, or resume receiving them by replying START. Keep in mind that schedulers can later choose to turn off the setting on an as-needed basis when they use the appointment type to schedule an appointment. -You can use the [SMS notifications usage report](sms-notifications-usage-report.md) to gain insight into how your workforce is using SMS notifications with virtual appointments. - To learn more, see [Use text messages to remind customers of their appointment](https://support.microsoft.com/topic/adda1e2a-03b8-4db2-864d-0a5a3f3a874a). +> [!NOTE] +> Admins can use the [SMS notifications usage report](sms-notifications-usage-report.md) to see how your workforce is using SMS notifications with virtual appointments. + ##### Link forms -You can link up to four forms for attendees to fill out each time this scheduled appointment type is booked. For example, you may require attendees to complete a registration form before they join an appointment. To link a form, choose **Link a form**. Enter the URL of the form, and then choose **Link**. (If it's the first time that you're linking a form, you'll be prompted to create a Microsoft 365 group to store forms. Choose **Create group** to create the group. You only have to do this one time for the booking calendar.) +You can link up to four forms for attendees to fill out each time a scheduled appointment type is booked. For example, you may require attendees to complete a registration form before they join an appointment. ++1. To link a form, choose **Link a form**. +1. Enter the URL of the form, and then choose **Link**. ++ If this is the first time you're linking a form, you're prompted to create a Microsoft 365 group to store forms. Choose **Create group** to create the group. You only have to do this one time for the booking calendar. When working with forms, keep in mind that: When a scheduler uses the appointment type to schedule an appointment, they can > [!NOTE] > If you're a healthcare provider, any information provided by you or patients in Teams (including the Forms app, Virtual Appointments app, meeting recordings if enabled by you, or any other Teams virtual appointments services) that's necessary for medical records continuity or retention purposes should be downloaded, copied, and/or notated directly in such records by you. This service does not maintain legal medical records or a designated record set. -#### On-demand appointment type +#### On-demand appointments  **This feature requires [Teams Premium](/microsoftteams/teams-add-on-licensing/licensing-enhance-teams).** -Enter a name for the service. For example, Drop-in appointment, Account opening, Prescription renewal, Loan consultation, Tax preparation. +Enter a name for the service. For example, Drop-in appointment, Account opening, Prescription renewal, Loan consultation, or Tax preparation. -Your customers, clients, and patients can then choose the appointment type on your booking page to request an on-demand appointment with your staff. +Your customers, clients, and patients can then choose the appointment type on your [booking page](#publish-a-booking-page) to request an on-demand appointment with your staff. ## Publish a booking page - **The on-demand scheduling feature requires [Teams Premium](/microsoftteams/teams-add-on-licensing/licensing-enhance-teams).** --Booking admins can publish an online booking page where people can book scheduled and on-demand appointments with your staff. --1. On the **Manage** tab, select **Booking page**. -2. Turn on **Publish booking page**. - :::image type="content" source="media/virtual-appointments-app-booking-page-settings.png" alt-text="Screenshot of booking page settings." lightbox="media/virtual-appointments-app-booking-page-settings.png"::: -3. To enable people to request on-demand appointments on your booking page, turn on **Show option for On-demand scheduling**. --You can customize and manage your booking page settings in the Bookings web app. To learn more, see [Customize and publish your booking page for customers to schedule appointments](https://support.microsoft.com/topic/72fc8c8c-325b-4a16-b7ab-87bc1f324e4f) and [Customize and publish your booking page](/microsoft-365/bookings/customize-booking-page). --## Book an appointment --### Scheduled appointments --Schedulers use scheduled appointment types to book appointments for your staff and attendees. On the **Bookings schedule** tab, select **New booking**. Choose a scheduled appointment type, and then fill out the relevant information. +If you're a Virtual Appointments admin, you can publish an online booking page where people can book scheduled and on-demand appointments with your staff. -This includes attendee contact information, the staff member who will be providing the service, internal notes that only staff can see, whether the attendee can join from a browser, email reminders, and whether to send SMS notifications. If a form is linked to the appointment type, you can choose to include it, remove it, or add any other linked forms. +1. On the **Manage** tab, select **Publish your booking page**. +1. Turn on **Publish booking page**. +1. To enable people to request on-demand appointments on your booking page, turn on **Allow requests for On-demand services**. -Each scheduled appointment includes a Teams meeting link thatΓÇÖs sent to attendees in email where they can easily join from a web browser (if enabled for the appointment) or in Teams on any device. The email confirmation also includes an attachment so they can add the appointment to their calendar. Staff also receive an email confirmation and meeting invite. +  **This feature requires [Teams Premium](/microsoftteams/teams-add-on-licensing/licensing-enhance-teams).** -If a form was included in the appointment, Bookings admins and schedulers can see whether the form was completed by the attendee before the appointment, and can view the attendee's response. --### On-demand appointments --Your customers, clients, and patients can go to your online booking page to request an appointment with your staff. --## Conduct an appointment --For scheduled appointments, do one of the following actions: + :::image type="content" source="media/virtual-appointments-app-booking-page-settings.png" alt-text="Screenshot of booking page settings." lightbox="media/virtual-appointments-app-booking-page-settings.png"::: -- In your Teams or Outlook calendar, go to the booking, and then select **Join** or the Teams meeting link. -- In the Virtual Appointments app, go to the **Queue** tab, and then under **Scheduled**, select **Join** next to the appointment.+Here's an example of what a published booking page looks like. -For on-demand appointments, in the Virtual Appointments app, go to the **Queue** tab, and then under **On-demand**, select **Join** next to the appointment. -To learn more, see [Conduct a virtual appointment (organizer)](https://support.microsoft.com/topic/c5ec4285-154c-491c-9525-d517c621c7f9). +You can customize and manage your booking page settings in the Bookings web app. To learn more, see [Customize and publish your booking page for customers to schedule appointments](https://support.microsoft.com/topic/72fc8c8c-325b-4a16-b7ab-87bc1f324e4f) and [Customize and publish your booking page](/microsoft-365/bookings/customize-booking-page). ## Monitor appointments and get real-time status updates in the queue view From the queue, schedulers can add a new booking, view relevant appointment deta When an attendee joins the waiting room, the status changes, and their wait time is displayed and tracked. The view automatically refreshes with color-coded updates so that changes can easily be identified. -## Get insight into Virtual Appointments usage +## View analytics The Virtual Appointments usage report in the **Analytics** tab gives you an overview of virtual appointments activity in your organization. The report provides key metrics such as total number of appointments, appointment duration, lobby wait time, and no shows. You can view detailed activity for virtual appointments scheduled and conducted through multiple scheduling entry points and drill down into individual appointment data. The Virtual Appointments usage report in the **Analytics** tab gives you an over The analytics experience depends on user role: -- Admins get organizational analytics. If you're an admin, you'll see an org-level report showing aggregated analytics across all departments in your organization. To learn more, see [Virtual Appointments usage report](virtual-appointments-usage-report.md).+- Virtual Appointments admins get organizational analytics. If you're an admin, you'll see an org-level report showing aggregated analytics across all departments in your organization. To learn more, see [Virtual Appointments usage report](virtual-appointments-usage-report.md). - Non-admins get either departmental or individual analytics. Staff members who are associated with a department see a report that shows data for the given department. If a person isnΓÇÖt associated with a department, the report shows data for the appointments that they conducted. To learn more, see [Analyze your Virtual Appointment usage](https://support.microsoft.com/topic/3214fd14-a860-4870-b30c-e8f87e182ce0). ## Related articles +- [What is Virtual Appointments?](https://support.microsoft.com/topic/22df0079-e6d9-4225-bc65-22747fb2cb5f) help documentation for your users - [Virtual Appointments with Teams](virtual-appointments.md) - [Manage the join experience for Teams Virtual Appointments on browsers](browser-join.md) - [Teams Premium licensing](/microsoftteams/teams-add-on-licensing/licensing-enhance-teams) |
| frontline | Virtual Appointments | https://github.com/MicrosoftDocs/microsoft-365-docs/commits/public/microsoft-365/frontline/virtual-appointments.md | Title: Virtual Appointments with Microsoft Teams -+ With Virtual Appointments in Microsoft Teams, you have a complete meeting platfo This article gives you an overview of the capabilities available in Teams for scheduling and managing virtual appointments. - [The Virtual Appointments app](#the-virtual-appointments-app), for every organization-- [The Bookings app](#the-bookings-app), for every organization - [The Teams Electronic Health Record (EHR) connector](#teams-electronic-health-record-ehr-connector), for healthcare organizations who use an EHR system - [Virtual appointment meeting template](#virtual-appointment-meeting-template), for every organization - [Virtual Appointment Graph API](#virtual-appointment-graph-api), for developers in your organization ## The Virtual Appointments app -The Virtual Appointments app provides a central hub for all your virtual appointment needs. The app enables a seamless end-to-end experience for business-to-customer engagements, integrating Bookings schedules, analytics, and management options, all in one place. +Use the Virtual Appointments app for all your virtual appointment needs. The app enables a seamless end-to-end experience for business-to-customer engagements, integrating schedules, analytics, and management options, all in one place. -You can schedule, view, and manage virtual appointments, get real-time status updates in a queue view, send appointment reminders, view analytics and reports to gain insight into virtual appointments activity, and configure calendar, staff, and booking page settings. +You can schedule, view, and manage virtual appointments, get real-time status updates in a queue view, send appointment reminders, view analytics and reports on virtual appointments activity, and configure calendar, staff, and booking page settings. ++With Microsoft 365 A3, A5, E3, E5, F1, F3, Business Basic, Business Standard, and Business Premium licenses, you can use basic Virtual Appointments capabilities that make it easy to schedule and join business-to-customer meetings. For example, you can schedule appointments in the appointment calendar and external attendees can [join through a browser](browser-join.md) without having to download Teams. [Teams Premium](/microsoftteams/teams-add-on-licensing/licensing-enhance-teams) unlocks advanced Virtual Appointments capabilities that your organization can use to manage and customize the experience. These include a queue view of scheduled and on-demand appointments, SMS text notifications, custom waiting rooms, and analytics. -With Microsoft 365 A3, A5, E3, E5, F1, F3, Business Basic, Business Standard, and Business Premium licenses, you can use basic Virtual Appointments capabilities that make it easy to schedule and join business-to-customer meetings. For example, you can schedule appointments in the Bookings calendar and external attendees can [join through a browser](browser-join.md) without having to download Teams. [Teams Premium](/microsoftteams/teams-add-on-licensing/licensing-enhance-teams) unlocks advanced Virtual Appointments capabilities that your organization can use to manage and personalize the experience. These include a queue view of scheduled and on-demand appointments, SMS text notifications, custom waiting rooms, and analytics. To learn more, see: - [Virtual Appointments guided tour](https://guidedtour.microsoft.com/guidedtour/industry-longform/virtual-appointments/1/1) To learn more, see: Users can find the Virtual Appointments app in the Teams app store, or you can share the [installation link](https://teams.microsoft.com/l/app/6e106207-4565-4312-b3ea-bbe9b3ed0a02?source=app-details-dialog) to help them find it. You can use an [app setup policy](/microsoftteams/teams-app-setup-policies) to pin the app for your organization, or your users can [pin the app themselves](https://support.microsoft.com/office/pin-an-app-for-easy-access-3045fd44-6604-4ba7-8ecc-1c0d525e89ec). -## The Bookings app --The [Bookings app](https://support.microsoft.com/office/what-is-bookings-42d4e852-8e99-4d8f-9b70-d7fc93973cb5) in Teams offers a simple way to schedule and manage virtual appointments. Use it to schedule virtual appointments such as financial consultations, healthcare visits, interviews, customer support, virtual fittings and consultations, and education office hours. --Schedulers can manage multiple department and staff calendars, as well as communications with internal and external attendees. --Each scheduled virtual appointment contains a Teams meeting link thatΓÇÖs sent to attendees in email where they can easily join from a browser or in Teams on any device. --With any Microsoft 365 license, you can use basic Virtual Appointments capabilities that make it easy to schedule and join business-to-customer meetings. For example, attendees can wait in a pre-appointment waiting room and [join through a browser](browser-join.md) without having to download Teams. With [Teams Premium](/microsoftteams/teams-add-on-licensing/licensing-enhance-teams), your organization gets advanced Virtual Appointments capabilities on top of Bookings to manage and personalize the experience. These include a queue view of scheduled and on-demand appointments, SMS text notifications, custom waiting rooms, and analytics. --To learn more, see: --- [What is Bookings?](https://support.microsoft.com/office/what-is-bookings-42d4e852-8e99-4d8f-9b70-d7fc93973cb5)-- [Manage the Bookings app](/microsoftteams/bookings-app-admin?bc=/microsoft-365/frontline/breadcrumb/toc.json&toc=/microsoft-365/frontline/toc.json)-- [Help your clients and customers use Bookings for virtual appointments](virtual-appointments-toolkit.md)- ## Teams Electronic Health Record (EHR) connector If your healthcare organization uses an EHR system, you can use the Teams EHR connector to integrate Teams for a more seamless virtual care experience. The Teams EHR connector requires an active subscription to Microsoft Cloud for Healthcare or a subscription to Microsoft Teams EHR connector standalone offer. Currently, the Teams EHR connector supports integration with the Oracle Health E ## Virtual appointment meeting template -The Virtual appointment template is a default meeting template in Teams that your users can use to schedule virtual appointments with customers, clients and other people outside your organization. The template allows you to specify values for meeting settings that meeting organizers typically control. Use it to apply default settings and enforce settings. +The Virtual appointment template is a default meeting template in Teams that your users can use to schedule virtual appointments with customers, clients and other people outside your organization. -With this template, you can enable a consistent experience across your organization for virtual appointments scheduled directly within Teams and help enforce compliance requirements. +With this template, you can enable a consistent experience across your organization for virtual appointments scheduled directly within Teams. To learn more, see [Virtual appointment meeting template in Teams](/microsoftteams/virtual-appointment-meeting-template). |
| includes | Microsoft 365 Content Updates | https://github.com/MicrosoftDocs/microsoft-365-docs/commits/public/microsoft-365/includes/microsoft-365-content-updates.md | +## Week of September 11, 2023 +++| Published On |Topic title | Change | +|||--| +| 9/11/2023 | [Use the Centralized Deployment PowerShell cmdlets to manage add-ins](/microsoft-365/enterprise/use-the-centralized-deployment-powershell-cmdlets-to-manage-add-ins?view=o365-worldwide) | modified | +| 9/11/2023 | [What's new in Microsoft Defender for Endpoint on Linux](/microsoft-365/security/defender-endpoint/linux-whatsnew?view=o365-worldwide) | modified | +| 9/11/2023 | [Get relevant info about an entity with go hunt](/microsoft-365/security/defender/advanced-hunting-go-hunt?view=o365-worldwide) | modified | +| 9/11/2023 | Coin miners | removed | +| 9/11/2023 | Exploits and exploit kits | removed | +| 9/11/2023 | Fileless threats | removed | +| 9/11/2023 | Macro malware | removed | +| 9/11/2023 | Phishing trends and techniques | removed | +| 9/11/2023 | How to protect against phishing attacks | removed | +| 9/11/2023 | Prevent malware infection | removed | +| 9/11/2023 | Rootkits | removed | +| 9/11/2023 | Supply chain attacks | removed | +| 9/11/2023 | Tech Support Scams | removed | +| 9/11/2023 | Trojan malware | removed | +| 9/11/2023 | Understanding malware & other threats | removed | +| 9/11/2023 | Unwanted software | removed | +| 9/11/2023 | Worms | removed | +| 9/11/2023 | Protection features in Azure Information Protection rolling out to existing tenants | removed | +| 9/11/2023 | [Order and precedence of email protection](/microsoft-365/security/office-365-security/how-policies-and-protections-are-combined?view=o365-worldwide) | modified | +| 9/11/2023 | [Overview of the Microsoft Feed](/microsoft-365/ms-feed/m365-feed?view=o365-worldwide) | modified | +| 9/11/2023 | Help and support for EOP | removed | +| 9/12/2023 | [Manage Microsoft Defender for Endpoint using Intune](/microsoft-365/security/defender-endpoint/manage-mde-post-migration-intune?view=o365-worldwide) | modified | +| 9/12/2023 | Manage spoofed senders using the spoof intelligence policy and spoof intelligence insight | removed | +| 9/12/2023 | [What's new in Microsoft Secure Score](/microsoft-365/security/defender/microsoft-secure-score-whats-new?view=o365-worldwide) | modified | +| 9/13/2023 | [Onboard non-persistent virtual desktop infrastructure (VDI) devices](/microsoft-365/security/defender-endpoint/configure-endpoints-vdi?view=o365-worldwide) | modified | +| 9/13/2023 | [What's new in Microsoft Defender for Endpoint on Linux](/microsoft-365/security/defender-endpoint/linux-whatsnew?view=o365-worldwide) | modified | +| 9/13/2023 | [Set up and configure Microsoft Defender for Endpoint Plan 1](/microsoft-365/security/defender-endpoint/mde-p1-setup-configuration?view=o365-worldwide) | modified | +| 9/13/2023 | [Minimum requirements for Microsoft Defender for Endpoint](/microsoft-365/security/defender-endpoint/minimum-requirements?view=o365-worldwide) | modified | +| 9/13/2023 | Maintain your Microsoft Defender for Business environment | removed | +| 9/13/2023 | [Use network protection to help prevent connections to bad sites](/microsoft-365/security/defender-endpoint/network-protection?view=o365-worldwide) | modified | +| 9/13/2023 | Specify additional definition sets for network traffic inspection for Microsoft Defender Antivirus | removed | +| 9/13/2023 | [Quarantine policies](/microsoft-365/security/office-365-security/quarantine-policies?view=o365-worldwide) | modified | +| 9/13/2023 | [Understanding overrides within the email entity page in Microsoft Defender for Office 365](/microsoft-365/security/office-365-security/step-by-step-guides/understand-overrides-in-email-entity?view=o365-worldwide) | modified | +| 9/14/2023 | [Validate apps against a custom image](/microsoft-365/test-base/validate-apps-against-a-custom-image?view=o365-worldwide) | added | +| 9/14/2023 | Get help and support for Microsoft Defender for Business | removed | +| 9/14/2023 | [Quarantined email messages](/microsoft-365/security/office-365-security/quarantine-about?view=o365-worldwide) | modified | +| 9/14/2023 | [Quarantined messages FAQ](/microsoft-365/security/office-365-security/quarantine-faq?view=o365-worldwide) | modified | +| 9/14/2023 | [Overview of optical character recognition in Microsoft Syntex (Preview)](/microsoft-365/syntex/ocr-overview) | modified | +| 9/14/2023 | [Remove a former employee - Overview](/microsoft-365/admin/add-users/remove-former-employee?view=o365-worldwide) | modified | +| 9/14/2023 | [Add a user or contact to a distribution group](/microsoft-365/admin/email/add-user-or-contact-to-distribution-list?view=o365-worldwide) | modified | +| 9/14/2023 | [Send email as a distribution list](/microsoft-365/admin/manage/send-email-as-distribution-list?view=o365-worldwide) | modified | +| 9/14/2023 | [Use a QR code to sign-in to the Outlook mobile apps](/microsoft-365/admin/manage/use-qr-code-download-outlook?view=o365-worldwide) | modified | +| 9/14/2023 | [Create distribution lists](/microsoft-365/admin/setup/create-distribution-lists?view=o365-worldwide) | modified | +| 9/14/2023 | [Add staff to Bookings](/microsoft-365/bookings/add-staff?view=o365-worldwide) | modified | +| 9/14/2023 | [Turn Microsoft Bookings on or off](/microsoft-365/bookings/turn-bookings-on-or-off?view=o365-worldwide) | modified | +| 9/14/2023 | [Deploy frontline dynamic teams at scale](/microsoft-365/frontline/deploy-dynamic-teams-at-scale?view=o365-worldwide) | modified | +| 9/14/2023 | [What's new in Microsoft Defender for Endpoint on Mac](/microsoft-365/security/defender-endpoint/mac-whatsnew?view=o365-worldwide) | modified | +| 9/14/2023 | [Manage endpoint security policies in Microsoft Defender for Endpoint](/microsoft-365/security/defender-endpoint/manage-security-policies?view=o365-worldwide) | modified | +| 9/15/2023 | [Advanced hunting in multi-tenant management in Microsoft 365 Defender](/microsoft-365/security/defender/mto-advanced-hunting?view=o365-worldwide) | added | +| 9/15/2023 | [Vulnerability management in multi-tenant management](/microsoft-365/security/defender/mto-dashboard?view=o365-worldwide) | added | +| 9/15/2023 | [View and manage incidents and alerts in multi-tenant management in Microsoft 365 Defender](/microsoft-365/security/defender/mto-incidents-alerts?view=o365-worldwide) | added | +| 9/15/2023 | [Multi-tenant management in Microsoft 365 Defender](/microsoft-365/security/defender/mto-overview?view=o365-worldwide) | added | +| 9/15/2023 | [Set up multi-tenant management in Microsoft 365 Defender](/microsoft-365/security/defender/mto-requirements?view=o365-worldwide) | added | +| 9/15/2023 | [Devices in multi-tenant management](/microsoft-365/security/defender/mto-tenant-devices?view=o365-worldwide) | added | +| 9/15/2023 | [Manage tenants with multi-tenant management in Microsoft 365 Defender](/microsoft-365/security/defender/mto-tenants?view=o365-worldwide) | added | +| 9/15/2023 | How to opt out of Microsoft Defender Experts for XDR preview | removed | +| 9/15/2023 | [List machines API](/microsoft-365/security/defender-endpoint/get-machines?view=o365-worldwide) | modified | ++ ## Week of September 04, 2023 | 8/18/2023 | [Professional services supported by Microsoft 365 Defender](/microsoft-365/security/defender-endpoint/professional-services?view=o365-worldwide) | modified | | 8/18/2023 | [How Microsoft names malware](/microsoft-365/security/intelligence/malware-naming?view=o365-worldwide) | modified | | 8/18/2023 | [Prevent malware infection](/microsoft-365/security/intelligence/prevent-malware-infection?view=o365-worldwide) | modified |---## Week of August 07, 2023 ---| Published On |Topic title | Change | -|||--| -| 8/7/2023 | [Microsoft Bookings Frequently Asked Questions](/microsoft-365/bookings/bookings-faq?view=o365-worldwide) | modified | -| 8/7/2023 | [Manage Loop workspaces in Syntex repository services](/microsoft-365/loop/loop-workspaces-configuration?view=o365-worldwide) | modified | -| 8/7/2023 | [What's new in Microsoft Defender for Endpoint](/microsoft-365/security/defender-endpoint/whats-new-in-microsoft-defender-endpoint?view=o365-worldwide) | modified | -| 8/7/2023 | [Activate Microsoft 365 Defender Unified role-based access control (RBAC)](/microsoft-365/security/defender/activate-defender-rbac?view=o365-worldwide) | modified | -| 8/7/2023 | [Map Microsoft 365 Defender Unified role-based access control (RBAC) permissions](/microsoft-365/security/defender/compare-rbac-roles?view=o365-worldwide) | modified | -| 8/7/2023 | [Create custom roles with Microsoft 365 Defender Unified role-based access control (RBAC)](/microsoft-365/security/defender/create-custom-rbac-roles?view=o365-worldwide) | modified | -| 8/7/2023 | [Details of custom permissions in Microsoft 365 Defender Unified role-based access control (RBAC)](/microsoft-365/security/defender/custom-permissions-details?view=o365-worldwide) | modified | -| 8/7/2023 | [Edit or delete roles Microsoft 365 Defender Unified role-based access control (RBAC)](/microsoft-365/security/defender/edit-delete-rbac-roles?view=o365-worldwide) | modified | -| 8/7/2023 | [Import roles to Microsoft 365 Defender Unified role-based access control (RBAC)](/microsoft-365/security/defender/import-rbac-roles?view=o365-worldwide) | modified | -| 8/7/2023 | [Microsoft 365 Defender Unified role-based access control (RBAC)](/microsoft-365/security/defender/manage-rbac?view=o365-worldwide) | modified | -| 8/7/2023 | [What's new in Microsoft Secure Score](/microsoft-365/security/defender/microsoft-secure-score-whats-new?view=o365-worldwide) | modified | -| 8/7/2023 | [Microsoft Secure Score](/microsoft-365/security/defender/microsoft-secure-score?view=o365-worldwide) | modified | -| 8/7/2023 | [What's new in Microsoft 365 Defender Unified role-based access control (RBAC)](/microsoft-365/security/defender/whats-new-in-microsoft-defender-urbac?view=o365-worldwide) | modified | -| 8/8/2023 | [Set up and manage structured and freeform document processing in Microsoft Syntex](/microsoft-365/syntex/structured-freeform-setup) | added | -| 8/8/2023 | [Onboard devices to Microsoft Defender for Business](/microsoft-365/security/defender-business/mdb-onboard-devices?view=o365-worldwide) | modified | -| 8/8/2023 | [Take response actions on a file in Microsoft Defender for Endpoint](/microsoft-365/security/defender-endpoint/respond-file-alerts?view=o365-worldwide) | modified | -| 8/8/2023 | [Office 365 Security including Microsoft Defender for Office 365 and Exchange Online Protection](/microsoft-365/security/office-365-security/microsoft-defender-for-office-365-product-overview?view=o365-worldwide) | modified | -| 8/8/2023 | [What's new in Microsoft Defender for Endpoint](/microsoft-365/security/defender-endpoint/whats-new-in-microsoft-defender-endpoint?view=o365-worldwide) | modified | -| 8/8/2023 | [Create, review, and sign signature requests using Microsoft Syntex eSignature (Preview)](/microsoft-365/syntex/esignature-send-requests) | added | -| 8/8/2023 | [Set up Microsoft Syntex eSignature (Preview)](/microsoft-365/syntex/esignature-setup) | added | -| 8/8/2023 | [Understand your invoice for your Microsoft MCA billing account](/microsoft-365/commerce/billing-and-payments/understand-your-invoice?view=o365-worldwide) | modified | -| 8/8/2023 | [Understand your invoice for your Microsoft MOSA billing account](/microsoft-365/commerce/billing-and-payments/understand-your-invoice2?view=o365-worldwide) | modified | -| 8/8/2023 | [View your invoice in the Microsoft 365 admin center](/microsoft-365/commerce/billing-and-payments/view-your-bill-or-invoice?view=o365-worldwide) | modified | -| 8/9/2023 | [Create Package from App Gallery](/microsoft-365/test-base/createpackagefromappgallery?view=o365-worldwide) | added | -| 8/9/2023 | [Microsoft Defender Antivirus security intelligence and product updates](/microsoft-365/security/defender-endpoint/microsoft-defender-antivirus-updates?view=o365-worldwide) | modified | -| 8/9/2023 | [Microsoft Defender Antivirus updates - Previous versions for technical upgrade support](/microsoft-365/security/defender-endpoint/msda-updates-previous-versions-technical-upgrade-support?view=o365-worldwide) | modified | -| 8/9/2023 | [Create and manage roles for role-based access control](/microsoft-365/security/defender-endpoint/user-roles?view=o365-worldwide) | modified | -| 8/9/2023 | [Prerequisites & permissions for Microsoft Defender Vulnerability Management](/microsoft-365/security/defender-vulnerability-management/tvm-prerequisites?view=o365-worldwide) | modified | -| 8/9/2023 | [Map Microsoft 365 Defender Unified role-based access control (RBAC) permissions](/microsoft-365/security/defender/compare-rbac-roles?view=o365-worldwide) | modified | -| 8/9/2023 | [Details of custom permissions in Microsoft 365 Defender Unified role-based access control (RBAC)](/microsoft-365/security/defender/custom-permissions-details?view=o365-worldwide) | modified | -| 8/9/2023 | [What's new in Microsoft 365 Defender Unified role-based access control (RBAC)](/microsoft-365/security/defender/whats-new-in-microsoft-defender-urbac?view=o365-worldwide) | modified | -| 8/9/2023 | [Order and precedence of email protection](/microsoft-365/security/office-365-security/how-policies-and-protections-are-combined?view=o365-worldwide) | modified | -| 8/9/2023 | [Microsoft Defender for Office 365 Plan 2 support for Microsoft Teams](/microsoft-365/security/office-365-security/mdo-support-teams-about?view=o365-worldwide) | modified | -| 8/9/2023 | [Zero-hour auto purge in Microsoft Defender for Office 365](/microsoft-365/security/office-365-security/zero-hour-auto-purge?view=o365-worldwide) | modified | -| 8/9/2023 | [Configure Microsoft Syntex for pay-as-you-go billing](/microsoft-365/syntex/syntex-azure-billing) | modified | -| 8/9/2023 | [Add staff to Bookings](/microsoft-365/bookings/add-staff?view=o365-worldwide) | modified | -| 8/10/2023 | [Step 5 - Give another employee access to OneDrive and Outlook data](/microsoft-365/admin/add-users/remove-former-employee-step-5?view=o365-worldwide) | modified | -| 8/10/2023 | [Set preferences for Microsoft Defender for Endpoint on Linux](/microsoft-365/security/defender-endpoint/linux-preferences?view=o365-worldwide) | modified | -| 8/10/2023 | [Microsoft Defender Antivirus security intelligence and product updates](/microsoft-365/security/defender-endpoint/microsoft-defender-antivirus-updates?view=o365-worldwide) | modified | -| 8/10/2023 | [List of fixed customer reported inaccuracies](/microsoft-365/security/defender-vulnerability-management/fixed-reported-inaccuracies?view=o365-worldwide) | modified | -| 8/10/2023 | [Change the billing addresses for your Microsoft business subscription](/microsoft-365/commerce/billing-and-payments/change-your-billing-addresses?view=o365-worldwide) | modified | -| 8/10/2023 | [Tax information for Microsoft 365 for business products and services](/microsoft-365/commerce/billing-and-payments/tax-information?view=o365-worldwide) | modified | -| 8/10/2023 | [Cross-tenant OneDrive migration overview](/microsoft-365/enterprise/cross-tenant-onedrive-migration?view=o365-worldwide) | modified | -| 8/11/2023 | [Alert classification for malicious exchange connectors](/microsoft-365/security/defender/alert-classification-malicious-exchange-connectors?view=o365-worldwide) | renamed | -| 8/11/2023 | [What's new in Microsoft Defender for Endpoint on Android](/microsoft-365/security/defender-endpoint/android-whatsnew?view=o365-worldwide) | modified | |
| includes | Sit Link List | https://github.com/MicrosoftDocs/microsoft-365-docs/commits/public/microsoft-365/includes/sit-link-list.md | +- [Taiwanese identification number](../compliance/sit-defn-taiwan-national-identification-number.md) - [Taiwan passport number](../compliance/sit-defn-taiwan-passport-number.md) - [Taiwan-resident certificate (ARC/TARC) number](../compliance/sit-defn-taiwan-resident-certificate-number.md) - [Thai population identification code](../compliance/sit-defn-thai-population-identification-code.md) |
| lighthouse | M365 Lighthouse Sales Advisor Overview | https://github.com/MicrosoftDocs/microsoft-365-docs/commits/public/microsoft-365/lighthouse/m365-lighthouse-sales-advisor-overview.md | To view Sales Advisor, select **Sales Advisor \> Opportunities** in the left nav ## Watch: What is Sales Advisor? -Video: [Preview: Microsoft 365 Lighthouse Sales Advisory](https://cloudpartners.transform.microsoft.com/download?assetname=assets%2FM365-Lighthouse-Sales-Advisor-Sizzle-Video.mp4) +Video: [Preview: Microsoft 365 Lighthouse Sales Advisor](https://cloudpartners.transform.microsoft.com/download?assetname=assets%2FM365-Lighthouse-Sales-Advisor-Sizzle-Video.mp4) ## Sales Advisor benefits -Ensure your customers’ success by using AI-driven customer insights, actionable recommendations, and prescriptive guidance. Maximize your customers’ investment in Microsoft 365 and deliver value at every stage of their journey. +Ensure your customers' success by using AI-driven customer insights, actionable recommendations, and prescriptive guidance. Maximize your customers' investment in Microsoft 365 and deliver value at every stage of their journey. :::image type="content" source="../media/m365-lighthouse-sales-advisor/m365-lighthouse-opportunities-page.png" alt-text="Screenshot of Lighthouse Opportunities page." lightbox="../media/m365-lighthouse-sales-advisor/m365-lighthouse-opportunities-page.png"::: Ensure your customers’ success by using AI-driven customer insights, actionabl - Know your customers and where they are in their cloud journey. -- Take advantage of Microsoft’s best-practice recommendations.+- Take advantage of Microsoft's best-practice recommendations. - Access opportunity-specific resources to drive action. |
| security | Configure Endpoints Gp | https://github.com/MicrosoftDocs/microsoft-365-docs/commits/public/microsoft-365/security/defender-endpoint/configure-endpoints-gp.md | Title: Onboard Windows devices to Microsoft Defender for Endpoint via Group Policy description: Use Group Policy to deploy the configuration package on Windows devices so that they are onboarded to the service. -keywords: configure devices using group policy, device management, configure Microsoft Defender for Endpoint devices, onboard Microsoft Defender for Endpoint devices, group policy -ms.sitesec: library -ms.pagetype: security ms.localizationpriority: medium For security reasons, the package used to Offboard devices will expire 30 days a 5. Right-click **Scheduled tasks**, point to **New**, and then click **Immediate task**. -6. In the **Task** window that opens, go to the **General** tab. Choose the local SYSTEM user account (BUILTIN\SYSTEM) under **Security options**. +6. In the **Task** window that opens, go to the **General** tab under **Security options** and select **Change User or Group**, enter SYSTEM, then select **Check Names** and then **OK**. NT AUTHORITY\SYSTEM appears as the user account that the task will run as. 7. Select **Run whether user is logged on or not** and check the **Run with highest privileges** check-box. |
| security | Before You Begin Defender Experts | https://github.com/MicrosoftDocs/microsoft-365-docs/commits/public/microsoft-365/security/defender/before-you-begin-defender-experts.md | Microsoft Defender Experts for Hunting is a separate service from your existing ### Eligibility and licensing -Defender Experts for Hunting customers are assigned 10 **Ask Defender Experts** credits, which you can use to submit questions, at the start of each calendar quarter. Unused credits from the current quarter roll up to the next one. You can use up to 20 credits only per quarter. All unused credits expire by the end of the calendar year or at the end of your subscription term, whichever is shortest. +Defender Experts for Hunting customers are assigned 10 **Ask Defender Experts** credits, which you can use to submit questions, at the start of each calendar quarter. Unused credits from the current quarter roll up to the next one. You can use up to 20 credits only per quarter. All unused credits expire by the end of the calendar year or at the end of your subscription term, whichever comes first. For more information about Microsoft's commercial licensing terms, visit [this page](https://www.microsoft.com/licensing/terms/productoffering/Microsoft365/MCA). |
| security | Before You Begin Xdr | https://github.com/MicrosoftDocs/microsoft-365-docs/commits/public/microsoft-365/security/defender/before-you-begin-xdr.md | Defender Experts for XDR also covers serversΓÇöwhether on premises or on a hyper ### Ask Defender Experts -As part of the service's built-in [Microsoft Defender Experts for Hunting](defender-experts-for-hunting.md), you're also assigned 10 **Ask Defender Experts** credits, which you can use to submit questions, at the start of each calendar quarter. Unused credits from the current quarter roll up to the next one. You can use up to 20 credits only per quarter. All unused credits expire by the end of the calendar year or at the end of your subscription term, whichever is shortest. +As part of the service's built-in [Microsoft Defender Experts for Hunting](defender-experts-for-hunting.md), you're also assigned 10 **Ask Defender Experts** credits, which you can use to submit questions, at the start of each calendar quarter. Unused credits from the current quarter roll up to the next one. You can use up to 20 credits only per quarter. All unused credits expire by the end of the calendar year or at the end of your subscription term, whichever comes first. [Learn more about Microsoft's commercial licensing terms](https://www.microsoft.com/licensing/terms/productoffering/Microsoft365/MCA). |
| security | Edit Delete Rbac Roles | https://github.com/MicrosoftDocs/microsoft-365-docs/commits/public/microsoft-365/security/defender/edit-delete-rbac-roles.md | -# Edit or delete roles in Microsoft 365 Defender Unified role-based access control (RBAC) +# Edit, delete and export roles in Microsoft 365 Defender Unified role-based access control (RBAC) [!INCLUDE [Microsoft 365 Defender rebranding](../../includes/microsoft-defender.md)] The following steps guide you on how to edit roles in Microsoft 365 Defender Uni 4. Select the role you want to edit. You can only edit one role at a time. 5. Select the **Edit** button or select **Edit** from the action menu next to the role name. This opens a flyout pane where you can edit the role: - :::image type="content" source="../../media/defender/m365-defender-rbac-edit-roles.png" alt-text="Screenshot of the activate workloads page" lightbox="../../media/defender/m365-defender-rbac-edit-roles.png"::: + :::image type="content" source="../../media/defender/m365-defender-rbac-edit-roles.png" alt-text="Screenshot of the edit roles flyout page" lightbox="../../media/defender/m365-defender-rbac-edit-roles.png"::: > [!NOTE] > After editing an imported role, the changes made in Microsoft 365 Defender Unified RBAC will not be reflected back in the individual product RBAC model. -## Delete Roles +## Delete roles To delete roles in Microsoft 365 Defender Unified RBAC, select the role or roles you want to delete and select **Delete roles**. If the workload is active, by removing the role all assigned user permission wil > [!NOTE] > After deleting an imported role, the role won't be deleted from the individual product RBAC model. If needed, you can re-import it to the Microsoft 365 Defender Unified RBAC list of roles. +## Export roles ++The Export feature enables you to export the following roles data: ++- Role name +- Role description +- Permissions included in the role +- The assignment name +- The assigned data sources +- The assigned users or user groups ++When a role has multiple assignments, each assignment will be represented as a separate row in the CSV file. ++The CSV also includes a snapshot of the Unified RBAC activation status for each workload available on the tenant. ++The following steps guide you on how to export roles in Microsoft 365 Defender Unified RBAC: ++>[!Note] +>To export roles, you must be a Global Administrator or Security Administrator in Azure Active Directory, or have the **Authorization (manage)** permission assigned for all data sources in Microsoft 365 Defender Unified RBAC and have at least one workload activated for Unified RBAC. +> +>For more information on permissions, see [Permission pre-requisites](../defender/manage-rbac.md#permissions-pre-requisites). ++1. Sign in to the [Microsoft 365 Defender portal](https://security.microsoft.com) with the required roles or permissions. +2. In the navigation pane, select **Permissions**. +3. Select **Roles** under Microsoft 365 Defender to get to the Permissions and roles page. +4. Select the **Export** button. ++ :::image type="content" source="../../media/defender/m365-defender-rbac-export-roles.png" alt-text="Screenshot of the export roles page" lightbox="../../media/defender/m365-defender-rbac-export-roles.png"::: ++A CSV file containing all the roles data will be generated and downloaded to the local machine. + ## Next steps - [Learn about RBAC permissions](custom-permissions-details.md) |
| security | Whats New In Microsoft Defender Urbac | https://github.com/MicrosoftDocs/microsoft-365-docs/commits/public/microsoft-365/security/defender/whats-new-in-microsoft-defender-urbac.md | This article provides information about new features and important product updat [!include[Prerelease information](../../includes/prerelease.md)] +## September 2023 ++### Export roles for Microsoft 365 Defender Unified role-based access control (RBAC) ++Now you can easily export your existing roles in Unified RBAC to a CSV file. The exported file will include details such as the role name, the included permissions, the assigned users or user groups, and assigned data sources. When a role has multiple assignments, each assignment will be listed on a separate row in the CSV file. The CSV also includes a snapshot of the Unified RBAC activation status for each workload available on the tenant. For more information, see [Edit, delete and export roles](./edit-delete-rbac-roles.md#export-roles). + ## August 2023 ### Detection tuning and Security settings permissions |
| security | How Policies And Protections Are Combined | https://github.com/MicrosoftDocs/microsoft-365-docs/commits/public/microsoft-365/security/office-365-security/how-policies-and-protections-are-combined.md | description: Admins can learn how the order of protection settings and the prior search.appverid: met150 Previously updated : 8/14/2023 Last updated : 9/18/2023 appliesto: - ✅ <a href="https://learn.microsoft.com/microsoft-365/security/office-365-security/eop-about" target="_blank">Exchange Online Protection</a> - ✅ <a href="https://learn.microsoft.com/microsoft-365/security/office-365-security/microsoft-defender-for-office-365-product-overview#microsoft-defender-for-office-365-plan-1-vs-plan-2-cheat-sheet" target="_blank">Microsoft Defender for Office 365 plan 1 and plan 2</a> To make sure that recipients get the protection settings that you want, use the ## Appendix -It's important to understand how user allows and blocks, tenant allows and blocks, and filtering stack verdicts in EOP and Defender for Office 365 compliment or contradict each other. +It's important to understand how user allows and blocks, tenant allows and blocks, and filtering stack verdicts in EOP and Defender for Office 365 complement or contradict each other. - For information about filtering stacks and how they're combined, see [Step-by-step threat protection in Microsoft Defender for Office 365](protection-stack-microsoft-defender-for-office365.md). - After the filtering stack determines a verdict, only then are tenant policies and their configured actions evaluated. Tenant allows and blocks are able to override some filtering stack verdicts as d |Bulk|**Tenant wins**: Email delivered to mailbox| |Not spam|**Tenant wins**: Email delivered to mailbox| -- [Enhanced Filtering for Connectors](/exchange/mail-flow-best-practices/use-connectors-to-configure-mail-flow/enhanced-filtering-for-connectors) (skip listing):+- [Exchange mail flow rules](/exchange/security-and-compliance/mail-flow-rules/mail-flow-rules) (also known as transport rules): - |Filtering stack verdict|Enhanced Filtering| - ||| - |Malware|**Filter wins**: Email quarantined| - |High confidence phishing|**Tenant wins**: Email delivered to mailbox| - |Phishing|**Tenant wins**: Email delivered to mailbox| - |High confidence spam|**Tenant wins**: Email delivered to mailbox| - |Spam|**Tenant wins**: Email delivered to mailbox| - |Bulk|**Tenant wins**: Email delivered to mailbox| - |Not spam|**Tenant wins**: Email delivered to mailbox| + |Filtering stack verdict|Mail flow rule allows<sup>\*</sup>|Mail flow rule blocks| + |||| + |Malware|**Filter wins**: Email quarantined|**Filter wins**: Email quarantined| + |High confidence phishing|**Filter wins**: Email quarantined except in complex routing|**Filter wins**: Email quarantined| + |Phishing|**Tenant wins**: Email delivered to mailbox|**Tenant wins**: Phishing action in the applicable anti-spam policy| + |High confidence spam|**Tenant wins**: Email delivered to mailbox|**Tenant wins**: Email delivered to user's Junk Email folder| + |Spam|**Tenant wins**: Email delivered to mailbox|**Tenant wins**: Email delivered to user's Junk Email folder| + |Bulk|**Tenant wins**: Email delivered to mailbox|**Tenant wins**: Email delivered to user's Junk Email folder| + |Not spam|**Tenant wins**: Email delivered to mailbox|**Tenant wins**: Email delivered to user's Junk Email folder| ++ <sup>\*</sup> Organizations that use a third-party security service or device in front of Microsoft 365 should consider using [Authenticated Received Chain (ARC)](use-arc-exceptions-to-mark-trusted-arc-senders.md) (contact the third-party for availability) and [Enhanced Filtering for Connectors (also known as skip listing)](/exchange/mail-flow-best-practices/use-connectors-to-configure-mail-flow/enhanced-filtering-for-connectors) instead of an SCL=-1 mail flow rule. These improved methods reduce email authentication issues and encourage [defense-in-depth](step-by-step-guides/defense-in-depth-guide.md) email security. - IP Allow List and IP Block List in [connection filter policies](connection-filter-policies-configure.md): Tenant allows and blocks are able to override some filtering stack verdicts as d |Bulk|**Tenant wins**: Email delivered to mailbox|**Tenant wins**: Email silently dropped| |Not spam|**Tenant wins**: Email delivered to mailbox|**Tenant wins**: Email silently dropped| -- [Exchange mail flow rules](/exchange/security-and-compliance/mail-flow-rules/mail-flow-rules) (also known as transport rules):-- |Filtering stack verdict|Mail flow rule allows|Mail flow rule blocks| - |||| - |Malware|**Filter wins**: Email quarantined|**Filter wins**: Email quarantined| - |High confidence phishing|**Filter wins**: Email quarantined except in complex routing|**Filter wins**: Email quarantined| - |Phishing|**Tenant wins**: Email delivered to mailbox|**Tenant wins**: Phishing action in the applicable anti-spam policy| - |High confidence spam|**Tenant wins**: Email delivered to mailbox|**Tenant wins**: Email delivered to user's Junk Email folder| - |Spam|**Tenant wins**: Email delivered to mailbox|**Tenant wins**: Email delivered to user's Junk Email folder| - |Bulk|**Tenant wins**: Email delivered to mailbox|**Tenant wins**: Email delivered to user's Junk Email folder| - |Not spam|**Tenant wins**: Email delivered to mailbox|**Tenant wins**: Email delivered to user's Junk Email folder| - - Allow and block settings in [anti-spam policies](anti-spam-policies-configure.md): - Allowed sender and domain list. - Blocked sender and domain list.- - Block messages from specific countries or in specific languages. + - Block messages from specific countries/regions or in specific languages. - Block messages based on [Advanced Spam Filter (ASF) settings](anti-spam-policies-asf-settings-about.md). |Filtering stack verdict|Anti-spam policy allows|Anti-spam policy blocks| |
| security | Security Posture Solution Overview | https://github.com/MicrosoftDocs/microsoft-365-docs/commits/public/microsoft-365/security/security-posture-solution-overview.md | Title: "Strengthen your security posture" + Title: "Strengthen your security posture with Microsoft 365 Defender" f1.keywords: - security posture - strengthen security posture+- ContentEnagagementFY24 Last updated : 09/18/2023 -# Strengthen your security posture +# Strengthen your security posture with Microsoft 365 Defender It has never been more important to be able to detect and defend your organization against cyber security threats. Knowing your assets, using the built-in configurations available to you, and taking recommended actions helps you build great security posture and resilience while also empowering you to respond rapidly to new and evolving threats. |
| security | Strengthen Security Posture Assess Protect | https://github.com/MicrosoftDocs/microsoft-365-docs/commits/public/microsoft-365/security/strengthen-security-posture-assess-protect.md | +- ContentEnagagementFY24 Last updated : 09/18/2023 # Strengthen your security posture - Assess and protect |
| security | Strengthen Security Posture Configure Capabilities | https://github.com/MicrosoftDocs/microsoft-365-docs/commits/public/microsoft-365/security/strengthen-security-posture-configure-capabilities.md | +- ContentEnagagementFY24 Last updated : 09/18/2023 # Strengthen your security posture - Configure capabilities |
| security | Strengthen Security Posture Investigate Improve | https://github.com/MicrosoftDocs/microsoft-365-docs/commits/public/microsoft-365/security/strengthen-security-posture-investigate-improve.md | +- ContentEnagagementFY24 Last updated : 09/18/2023 # Strengthen your security posture - Investigate and improve |
| security | Strengthen Security Posture Track Maintain | https://github.com/MicrosoftDocs/microsoft-365-docs/commits/public/microsoft-365/security/strengthen-security-posture-track-maintain.md | +- ContentEnagagementFY24 Last updated : 09/18/2023 # Strengthen your security posture - Track and maintain |