| Service | Microsoft Docs article | Related commit history on GitHub | Change details |
|---|---|---|---|
| active-directory-b2c | Whats New Docs | https://github.com/MicrosoftDocs/azure-docs/commits/main/articles/active-directory-b2c/whats-new-docs.md | Title: "What's new in Azure Active Directory business-to-customer (B2C)" description: "New and updated documentation for the Azure Active Directory business-to-customer (B2C)." Previously updated : 10/04/2022 Last updated : 10/31/2022 +## October 2022 ++### New articles ++- [Edit Azure Active Directory B2C Identity Experience Framework (IEF) XML with Grit Visual IEF Editor](partner-grit-editor.md) +- [Register apps in Azure Active Directory B2C](register-apps.md) ++### Updated articles ++- [Set up sign-in for a specific Azure Active Directory organization in Azure Active Directory B2C](identity-provider-azure-ad-single-tenant.md) +- [Set up a password reset flow in Azure Active Directory B2C](add-password-reset-policy.md) +- [Azure Active Directory B2C documentation landing page](index.yml) +- [Publish your Azure Active Directory B2C app to the Azure Active Directory app gallery](publish-app-to-azure-ad-app-gallery.md) +- [JSON claims transformations](json-transformations.md) + ## September ### New articles |
| active-directory | Howto Authentication Temporary Access Pass | https://github.com/MicrosoftDocs/azure-docs/commits/main/articles/active-directory/authentication/howto-authentication-temporary-access-pass.md | To configure the Temporary Access Pass authentication method policy: ||||| | Minimum lifetime | 1 hour | 10 ΓÇô 43,200 Minutes (30 days) | Minimum number of minutes that the Temporary Access Pass is valid. | | Maximum lifetime | 8 hours | 10 ΓÇô 43,200 Minutes (30 days) | Maximum number of minutes that the Temporary Access Pass is valid. |- | Default lifetime | 1 hour | 10 ΓÇô 43,200 Minutes (30 days) | Default values can be override by the individual passes, within the minimum and maximum lifetime configured by the policy. | + | Default lifetime | 1 hour | 10 ΓÇô 43,200 Minutes (30 days) | Default values can be overridden by the individual passes, within the minimum and maximum lifetime configured by the policy. | | One-time use | False | True / False | When the policy is set to false, passes in the tenant can be used either once or more than once during its validity (maximum lifetime). By enforcing one-time use in the Temporary Access Pass policy, all passes created in the tenant will be created as one-time use. | | Length | 8 | 8-48 characters | Defines the length of the passcode. | |
| active-directory | Quickstart Register App | https://github.com/MicrosoftDocs/azure-docs/commits/main/articles/active-directory/develop/quickstart-register-app.md | Client secrets are considered less secure than certificate credentials. Applicat For application security recommendations, see [Microsoft identity platform best practices and recommendations](identity-platform-integration-checklist.md#security). ++### Add a federated credential ++Federated identity credentials are a type of credential that allows workloads, such as GitHub Actions, workloads running on Kubernetes, or workloads running in compute platforms outside of Azure access Azure AD protected resources without needing to manage secrets using [workload identity federation](workload-identity-federation.md). ++To add a federated credential, follow these steps: ++1. In the Azure portal, in **App registrations**, select your application. +1. Select **Certificates & secrets** > **Federated credentials** > **Add a credential**. +1. In the **Federated credential scenario** drop-down box, select one of the supported scenarios, and follow the corresponding guidance to complete the configuration. ++ - **Customer managed keys** for encrypt data in your tenant using Azure Key Vault in another tenant. + - **GitHub actions deploying Azure resources** to [configure a GitHub workflow](workload-identity-federation-create-trust.md#github-actions) to get tokens for your application and deploy assets to Azure. + - **Kubernetes accessing Azure resources** to configure a [Kubernetes service account](workload-identity-federation-create-trust.md#kubernetes) to get tokens for your application and access Azure resources. + - **Other issuer** to configure an identity managed by an external [OpenID Connect provider](workload-identity-federation-create-trust.md#other-identity-providers) to get tokens for your application and access Azure resources. + ++For more information, how to get an access token with a federated credential, check out the [Microsoft identity platform and the OAuth 2.0 client credentials flow](v2-oauth2-client-creds-grant-flow.md#third-case-access-token-request-with-a-federated-credential) article. ++ ## Next steps Client applications typically need to access resources in a web API. You can protect your client application by using the Microsoft identity platform. You can also use the platform for authorizing scoped, permissions-based access to your web API. |
| active-directory | Workload Identity Federation Create Trust User Assigned Managed Identity | https://github.com/MicrosoftDocs/azure-docs/commits/main/articles/active-directory/develop/workload-identity-federation-create-trust-user-assigned-managed-identity.md | zone_pivot_groups: identity-wif-mi-methods # Configure a user-assigned managed identity to trust an external identity provider (preview) -This article describes how to manage a federated identity credential on a user-assigned managed identity in Azure Active Directory (Azure AD). The federated identity credential creates a trust relationship between a user-assigned managed identity and an external identity provider (IdP). Configuring a federated identity credential on a system-assigned managed identity is not supported. +This article describes how to manage a federated identity credential on a user-assigned managed identity in Azure Active Directory (Azure AD). The federated identity credential creates a trust relationship between a user-assigned managed identity and an external identity provider (IdP). Configuring a federated identity credential on a system-assigned managed identity isn't supported. After you configure your user-assigned managed identity to trust an external IdP, configure your external software workload to exchange a token from the external IdP for an access token from Microsoft identity platform. The external workload uses the access token to access Azure AD protected resources without needing to manage secrets (in supported scenarios). To learn more about the token exchange workflow, read about [workload identity federation](workload-identity-federation.md). In the **Federated credential scenario** dropdown box, select your scenario. ### GitHub Actions deploying Azure resources -For **Entity type**, select **Environment**, **Branch**, **Pull request**, or **Tag** and specify the value. The values must exactly match the configuration in the [GitHub workflow](https://docs.github.com/actions/using-workflows/workflow-syntax-for-github-actions#on). For more info, read the [examples](#entity-type-examples). +To add a federated identity for GitHub actions, follow these steps: -Add a **Name** for the federated credential. +1. For **Entity type**, select **Environment**, **Branch**, **Pull request**, or **Tag** and specify the value. The values must exactly match the configuration in the [GitHub workflow](https://docs.github.com/actions/using-workflows/workflow-syntax-for-github-actions#on). For more info, read the [examples](#entity-type-examples). -The **Issuer**, **Audiences**, and **Subject identifier** fields autopopulate based on the values you entered. +1. Add a **Name** for the federated credential. -Click **Add** to configure the federated credential. +1. The **Issuer**, **Audiences**, and **Subject identifier** fields autopopulate based on the values you entered. ++1. Select **Add** to configure the federated credential. ++Use the following values from your Azure AD Managed Identity for your GitHub workflow: ++- `AZURE_CLIENT_ID` the managed identity **Client ID** ++- `AZURE_SUBSCRIPTION_ID` the **Subscription ID**. ++ The following screenshot demonstrates how to copy the managed identity ID and subscription ID. ++ [](./media/workload-identity-federation-create-trust-user-assigned-managed-identity/copy-managed-identity-id.png#lightbox) ++- `AZURE_TENANT_ID` the **Directory (tenant) ID**. Learn [how to find your Azure Active Directory tenant ID](../fundamentals/active-directory-how-to-find-tenant.md). #### Entity type examples Fill in the **Cluster issuer URL**, **Namespace**, **Service account name**, and - **Namespace** is the service account namespace. - **Name** is the name of the federated credential, which can't be changed later. -Click **Add** to configure the federated credential. +Select **Add** to configure the federated credential. ### Other Specify the following fields (using a software workload running in Google Cloud - **Subject identifier**: must match the `sub` claim in the token issued by the external identity provider. In this example using Google Cloud, *subject* is the Unique ID of the service account you plan to use. - **Issuer**: must match the `iss` claim in the token issued by the external identity provider. A URL that complies with the OIDC Discovery spec. Azure AD uses this issuer URL to fetch the keys that are necessary to validate the token. For Google Cloud, the *issuer* is "https://accounts.google.com". -Click **Add** to configure the federated credential. +Select **Add** to configure the federated credential. ## List federated identity credentials on a user-assigned managed identity Federated identity credential and parent user assigned identity can be created o All of the template parameters are mandatory. -There is a limit of 3-120 characters for a federated identity credential name length. It must be alphanumeric, dash, underscore. First symbol is alphanumeric only. +There's a limit of 3-120 characters for a federated identity credential name length. It must be alphanumeric, dash, underscore. First symbol is alphanumeric only. -You must add exactly 1 audience to a federated identity credential. The audience is verified during token exchange. Use ΓÇ£api://AzureADTokenExchangeΓÇ¥ as the default value. +You must add exactly one audience to a federated identity credential. The audience is verified during token exchange. Use ΓÇ£api://AzureADTokenExchangeΓÇ¥ as the default value. -List, Get, and Delete operations are not available with template. Refer to Azure CLI for these operations. By default, all child federated identity credentials are created in parallel, which triggers concurrency detection logic and causes the deployment to fail with a 409-conflict HTTP status code. To create them sequentially, specify a chain of dependencies using the *dependsOn* property. +List, Get, and Delete operations aren't available with template. Refer to Azure CLI for these operations. By default, all child federated identity credentials are created in parallel, which triggers concurrency detection logic and causes the deployment to fail with a 409-conflict HTTP status code. To create them sequentially, specify a chain of dependencies using the *dependsOn* property. Make sure that any kind of automation creates federated identity credentials under the same parent identity sequentially. Federated identity credentials under different managed identities can be created in parallel without any restrictions. |
| active-directory | Workload Identity Federation Create Trust | https://github.com/MicrosoftDocs/azure-docs/commits/main/articles/active-directory/develop/workload-identity-federation-create-trust.md | Get the *subject* and *issuer* information for your external IdP and software wo ## Configure a federated identity credential on an app ### GitHub Actions-Find your app registration in the [App Registrations](https://aka.ms/appregistrations) experience of the Azure portal. Select **Certificates & secrets** in the left nav pane, select the **Federated credentials** tab, and select **Add credential**. -In the **Federated credential scenario** drop-down box, select **GitHub actions deploying Azure resources**. +To add a federated identity for GitHub actions, follow these steps: ++1. Find your app registration in the [App Registrations](https://aka.ms/appregistrations) experience of the Azure portal. Select **Certificates & secrets** in the left nav pane, select the **Federated credentials** tab, and select **Add credential**. ++1. In the **Federated credential scenario** drop-down box, select **GitHub actions deploying Azure resources**. ++1. Specify the **Organization** and **Repository** for your GitHub Actions workflow. ++1. For **Entity type**, select **Environment**, **Branch**, **Pull request**, or **Tag** and specify the value. The values must exactly match the configuration in the [GitHub workflow](https://docs.github.com/actions/using-workflows/workflow-syntax-for-github-actions#on). Pattern matching isn't supported for branches and tags. Specify an environment if your on-push workflow runs against many branches or tags. For more info, read the [examples](#entity-type-examples). ++1. Add a **Name** for the federated credential. ++1. The **Issuer**, **Audiences**, and **Subject identifier** fields autopopulate based on the values you entered. ++1. Select **Add** to configure the federated credential. ++ :::image type="content" source="media/workload-identity-federation-create-trust/add-credential.png" alt-text="Screenshot of the Add a credential window, showing sample values." ::: -Specify the **Organization** and **Repository** for your GitHub Actions workflow. -For **Entity type**, select **Environment**, **Branch**, **Pull request**, or **Tag** and specify the value. The values must exactly match the configuration in the [GitHub workflow](https://docs.github.com/actions/using-workflows/workflow-syntax-for-github-actions#on). Pattern matching is not supported for branches and tags. Specify an environment if your on-push workflow runs against many branches or tags. For more info, read the [examples](#entity-type-examples). +Use the following values from your Azure AD application registration for your GitHub workflow: -Add a **Name** for the federated credential. +- `AZURE_CLIENT_ID` the **Application (client) ID** -The **Issuer**, **Audiences**, and **Subject identifier** fields autopopulate based on the values you entered. +- `AZURE_TENANT_ID` the **Directory (tenant) ID** + + The following screenshot demonstrates how to copy the application ID and tenant ID. -Click **Add** to configure the federated credential. +  +- `AZURE_SUBSCRIPTION_ID` your subscription ID. To get the subscription ID, open **Subscriptions** in Azure portal and find your subscription. Then, copy the **Subscription ID**. #### Entity type examples To delete a federated identity credential, select the **Delete** icon for the cr Run the [az ad app federated-credential create](/cli/azure/ad/app/federated-credential) command to create a new federated identity credential on your app. -The *id* parameter specifies the identifier URI, application ID, or object ID of the application. *parameters* specifies the parameters, in JSON format, for creating the federated identity credential. +The `id` parameter specifies the identifier URI, application ID, or object ID of the application. The `parameters` parameter specifies the parameters, in JSON format, for creating the federated identity credential. ### GitHub Actions example |
| active-directory | Workload Identity Federation | https://github.com/MicrosoftDocs/azure-docs/commits/main/articles/active-directory/develop/workload-identity-federation.md | You can use workload identity federation in scenarios such as GitHub Actions, wo ## Why use workload identity federation? -Typically, a software workload (such as an application, service, script, or container-based application) needs an identity in order to authenticate and access resources or communicate with other services. When these workloads run on Azure, you can use managed identities and the Azure platform manages the credentials for you. For a software workload running outside of Azure, you need to use application credentials (a secret or certificate) to access Azure AD protected resources (such as Azure, Microsoft Graph, Microsoft 365, or third-party resources). These credentials pose a security risk and have to be stored securely and rotated regularly. You also run the risk of service downtime if the credentials expire. +Typically, a software workload (such as an application, service, script, or container-based application) needs an identity in order to authenticate and access resources or communicate with other services. When these workloads run on Azure, you can use [managed identities](../managed-identities-azure-resources/overview.md) and the Azure platform manages the credentials for you. For a software workload running outside of Azure, you need to use application credentials (a secret or certificate) to access Azure AD protected resources (such as Azure, Microsoft Graph, Microsoft 365, or third-party resources). These credentials pose a security risk and have to be stored securely and rotated regularly. You also run the risk of service downtime if the credentials expire. -You use workload identity federation to configure an Azure AD app registration or user-assigned managed identity to trust tokens from an external identity provider (IdP), such as GitHub. Once that trust relationship is created, your software workload can exchange trusted tokens from the external IdP for access tokens from Microsoft identity platform. Your software workload then uses that access token to access the Azure AD protected resources to which the workload has been granted access. This eliminates the maintenance burden of manually managing credentials and eliminates the risk of leaking secrets or having certificates expire. +You use workload identity federation to configure an Azure AD app registration or [user-assigned managed identity](../managed-identities-azure-resources/how-manage-user-assigned-managed-identities.md) to trust tokens from an external identity provider (IdP), such as GitHub. Once that trust relationship is created, your software workload can exchange trusted tokens from the external IdP for access tokens from Microsoft identity platform. Your software workload then uses that access token to access the Azure AD protected resources to which the workload has been granted access. This eliminates the maintenance burden of manually managing credentials and eliminates the risk of leaking secrets or having certificates expire. ## Supported scenarios The following scenarios are supported for accessing Azure AD protected resources ## How it works -Create a trust relationship between the external IdP and an app or user-assigned managed identity in Azure AD by configuring a [federated identity credential](/graph/api/resources/federatedidentitycredentials-overview?view=graph-rest-beta&preserve-view=true). The federated identity credential is used to indicate which token from the external IdP should be trusted by your application or managed identity. You configure the federated identity credential on an app registration in the Azure portal or through Microsoft Graph. A federated credential is configured on a user-assigned managed identity through the Azure portal, Azure CLI, Azure PowerShell, Azure SDK, and Azure Resource Manager (ARM) templates. The steps for configuring the trust relationship will differ, depending on the scenario and external IdP. +Create a trust relationship between the external IdP and an app registration or user-assigned managed identity in Azure AD. The federated identity credential is used to indicate which token from the external IdP should be trusted by your application or managed identity. You configure a federated identity either: ++- On an Azure AD [App registration](/azure/active-directory/develop/quickstart-register-app) in the Azure portal or through Microsoft Graph. This configuration allows you to get an access token for your application without needing to manage secrets outside Azure. For more information, learn how to [configure an app to trust an external identity provider](workload-identity-federation-create-trust.md). +- On a user-assigned managed identity through the Azure portal, Azure CLI, Azure PowerShell, Azure SDK, and Azure Resource Manager (ARM) templates. The external workload uses the access token to access Azure AD protected resources without needing to manage secrets (in supported scenarios). The [steps for configuring the trust relationship](workload-identity-federation-create-trust-user-assigned-managed-identity.md) will differ, depending on the scenario and external IdP. The workflow for exchanging an external token for an access token is the same, however, for all scenarios. The following diagram shows the general workflow of a workload exchanging an external token for an access token and then accessing Azure AD protected resources. Learn more about how workload identity federation works: - How to create, delete, get, or update [federated identity credentials](workload-identity-federation-create-trust.md) on an app registration. - How to create, delete, get, or update [federated identity credentials](workload-identity-federation-create-trust-user-assigned-managed-identity.md) on a user-assigned managed identity. - Read the [GitHub Actions documentation](https://docs.github.com/actions/deployment/security-hardening-your-deployments/configuring-openid-connect-in-azure) to learn more about configuring your GitHub Actions workflow to get an access token from Microsoft identity provider and access Azure resources.-- For information about the required format of JWTs created by external identity providers, read about the [assertion format](active-directory-certificate-credentials.md#assertion-format).+- For information about the required format of JWTs created by external identity providers, read about the [assertion format](active-directory-certificate-credentials.md#assertion-format). |
| active-directory | Multi Tenant User Management Introduction | https://github.com/MicrosoftDocs/azure-docs/commits/main/articles/active-directory/fundamentals/multi-tenant-user-management-introduction.md | These terms are used throughout this content: * **Home tenant**: The Azure AD tenant containing users requiring access to the resources in the resource tenant. -* **User lifecycle management**: the process of provisioning, managing, and deprovisioning user access to resources. +* **User lifecycle management**: The process of provisioning, managing, and deprovisioning user access to resources. * **Unified GAL**: Each user in each tenant can see users from each organization in their Global Address List (GAL). |
| active-directory | Whats New Archive | https://github.com/MicrosoftDocs/azure-docs/commits/main/articles/active-directory/fundamentals/whats-new-archive.md | The What's new in Azure Active Directory? release notes provide information abou +## April 2022 +++### General Availability - Entitlement management separation of duties checks for incompatible access packages ++**Type:** Changed feature +**Service category:** Other +**Product capability:** Identity Governance ++In Azure AD entitlement management, an administrator can now configure the incompatible access packages and groups of an access package in the Azure portal. This prevents a user who already has one of those incompatible access rights from being able to request further access. For more information, see: [Configure separation of duties checks for an access package in Azure AD entitlement management](../governance/entitlement-management-access-package-incompatible.md). +++++### General Availability - Microsoft Defender for Endpoint Signal in Identity Protection ++**Type:** New feature +**Service category:** Identity Protection +**Product capability:** Identity Security & Protection + ++Identity Protection now integrates a signal from Microsoft Defender for Endpoint (MDE) that will protect against PRT theft detection. To learn more, see: [What is risk? Azure AD Identity Protection | Microsoft Docs](../identity-protection/concept-identity-protection-risks.md). + ++++### General Availability - Entitlement management 3 stages of approval ++**Type:** Changed feature +**Service category:** Other +**Product capability:** Entitlement Management ++ ++This update extends the Azure AD entitlement management access package policy to allow a third approval stage. This will be able to be configured via the Azure portal or Microsoft Graph. For more information, see: [Change approval and requestor information settings for an access package in Azure AD entitlement management](../governance/entitlement-management-access-package-approval-policy.md). + ++++### General Availability - Improvements to Azure AD Smart Lockout ++**Type:** Changed feature +**Service category:** Identity Protection +**Product capability:** User Management ++ ++With a recent improvement, Smart Lockout now synchronizes the lockout state across Azure AD data centers, so the total number of failed sign-in attempts allowed before an account is locked out will match the configured lockout threshold. For more information, see: [Protect user accounts from attacks with Azure Active Directory smart lockout](../authentication/howto-password-smart-lockout.md). + +++++### Public Preview - Integration of Microsoft 365 App Certification details into Azure Active Directory UX and Consent Experiences ++**Type:** New feature +**Service category:** User Access Management +**Product capability:** AuthZ/Access Delegation +++Microsoft 365 Certification status for an app is now available in Azure AD consent UX, and custom app consent policies. The status will later be displayed in several other Identity-owned interfaces such as enterprise apps. For more information, see: [Understanding Azure AD application consent experiences](../develop/application-consent-experience.md). +++++### Public preview - Use Azure AD access reviews to review access of B2B direct connect users in Teams shared channels ++**Type:** New feature +**Service category:** Access Reviews +**Product capability:** Identity Governance ++Use Azure AD access reviews to review access of B2B direct connect users in Teams shared channels. For more information, see: [Include B2B direct connect users and teams accessing Teams Shared Channels in access reviews (preview)](../governance/create-access-review.md#include-b2b-direct-connect-users-and-teams-accessing-teams-shared-channels-in-access-reviews). ++++### Public Preview - New MS Graph APIs to configure federated settings when federated with Azure AD ++**Type:** New feature +**Service category:** MS Graph +**Product capability:** Identity Security & Protection +++We're announcing the public preview of following MS Graph APIs and PowerShell cmdlets for configuring federated settings when federated with Azure AD: ++|Action |MS Graph API |PowerShell cmdlet | +|||| +|Get federation settings for a federated domain | [Get internalDomainFederation](/graph/api/internaldomainfederation-get?view=graph-rest-beta&preserve-view=true) | [Get-MgDomainFederationConfiguration](/powershell/module/microsoft.graph.identity.directorymanagement/get-mgdomainfederationconfiguration?view=graph-powershell-beta&preserve-view=true) | +|Create federation settings for a federated domain | [Create internalDomainFederation](/graph/api/domain-post-federationconfiguration?view=graph-rest-beta&preserve-view=true) | [New-MgDomainFederationConfiguration](/powershell/module/microsoft.graph.identity.directorymanagement/new-mgdomainfederationconfiguration?view=graph-powershell-beta&preserve-view=true) | +|Remove federation settings for a federated domain | [Delete internalDomainFederation](/graph/api/internaldomainfederation-delete?view=graph-rest-beta&preserve-view=true) | [Remove-MgDomainFederationConfiguration](/powershell/module/microsoft.graph.identity.directorymanagement/remove-mgdomainfederationconfiguration?view=graph-powershell-beta&preserve-view=true) | +|Update federation settings for a federated domain | [Update internalDomainFederation](/graph/api/internaldomainfederation-update?view=graph-rest-beta&preserve-view=true) | [Update-MgDomainFederationConfiguration](/powershell/module/microsoft.graph.identity.directorymanagement/update-mgdomainfederationconfiguration?view=graph-powershell-beta&preserve-view=true) | +++If using older MSOnline cmdlets ([Get-MsolDomainFederationSettings](/powershell/module/msonline/get-msoldomainfederationsettings?view=azureadps-1.0&preserve-view=true) and [Set-MsolDomainFederationSettings](/powershell/module/msonline/set-msoldomainfederationsettings?view=azureadps-1.0&preserve-view=true)), we highly recommend transitioning to the latest MS Graph APIs and PowerShell cmdlets. ++For more information, see [internalDomainFederation resource type - Microsoft Graph beta | Microsoft Docs](/graph/api/resources/internaldomainfederation?view=graph-rest-beta&preserve-view=true). ++++### Public Preview ΓÇô Ability to force reauthentication on Intune enrollment, risky sign-ins, and risky users ++**Type:** New feature +**Service category:** RBAC role +**Product capability:** AuthZ/Access Delegation +++Added functionality to session controls allowing admins to reauthenticate a user on every sign-in if a user or particular sign-in event is deemed risky, or when enrolling a device in Intune. For more information, see [Configure authentication session management with conditional Access](../conditional-access/howto-conditional-access-session-lifetime.md). ++++### Public Preview ΓÇô Protect against by-passing of cloud Azure AD Multi-Factor Authentication when federated with Azure AD ++**Type:** New feature +**Service category:** MS Graph +**Product capability:** Identity Security & Protection +++We're delighted to announce a new security protection that prevents bypassing of cloud Azure AD Multi-Factor Authentication when federated with Azure AD. When enabled for a federated domain in your Azure AD tenant, it ensures that a compromised federated account can't bypass Azure AD Multi-Factor Authentication by imitating that a multi factor authentication has already been performed by the identity provider. The protection can be enabled via new security setting, [federatedIdpMfaBehavior](/graph/api/resources/internaldomainfederation?view=graph-rest-beta#federatedidpmfabehavior-values&preserve-view=true). ++We highly recommend enabling this new protection when using Azure AD Multi-Factor Authentication as your multi factor authentication for your federated users. To learn more about the protection and how to enable it, visit [Enable protection to prevent by-passing of cloud Azure AD Multi-Factor Authentication when federated with Azure AD](/windows-server/identity/ad-fs/deployment/best-practices-securing-ad-fs#enable-protection-to-prevent-by-passing-of-cloud-azure-ad-multi-factor-authentication-when-federated-with-azure-ad). ++++### New Federated Apps available in Azure AD Application gallery - April 2022 ++**Type:** New feature +**Service category:** Enterprise Apps +**Product capability:** Third Party Integration ++In April 2022 we added the following 24 new applications in our App gallery with Federation support: +[X-1FBO](https://www.x1fbo.com/), [select Armor](https://app.clickarmor.c) ++You can also find the documentation of all the applications from here https://aka.ms/AppsTutorial. ++For listing your application in the Azure AD app gallery, please read the details here https://aka.ms/AzureADAppRequest ++++### General Availability - Customer data storage for Japan customers in Japanese data centers ++**Type:** New feature +**Service category:** App Provisioning +**Product capability:** GoLocal ++From April 15, 2022, Microsoft began storing Azure ADΓÇÖs Customer Data for new tenants with a Japan billing address within the Japanese data centers. For more information, see: [Customer data storage for Japan customers in Azure Active Directory](active-directory-data-storage-japan.md). +++++### Public Preview - New provisioning connectors in the Azure AD Application Gallery - April 2022 ++**Type:** New feature +**Service category:** App Provisioning +**Product capability:** Third Party Integration ++You can now automate creating, updating, and deleting user accounts for these newly integrated apps: +- [Adobe Identity Management (OIDC)](../saas-apps/adobe-identity-management-provisioning-oidc-tutorial.md) +- [embed signage](../saas-apps/embed-signage-provisioning-tutorial.md) +- [KnowBe4 Security Awareness Training](../saas-apps/knowbe4-security-awareness-training-provisioning-tutorial.md) +- [NordPass](../saas-apps/nordpass-provisioning-tutorial.md) ++For more information about how to better secure your organization by using automated user account provisioning, see: [Automate user provisioning to SaaS applications with Azure AD](../app-provisioning/user-provisioning.md) +++++ ## March 2022 |
| active-directory | Whats New | https://github.com/MicrosoftDocs/azure-docs/commits/main/articles/active-directory/fundamentals/whats-new.md | Azure AD receives improvements on an ongoing basis. To stay up to date with the This page is updated monthly, so revisit it regularly. If you're looking for items older than six months, you can find them in [Archive for What's new in Azure Active Directory](whats-new-archive.md). +## October 2022 ++### General Availability - Upgrade Azure AD Provisioning agent to the latest version (version number: 1.1.977.0) ++++**Type:** Plan for change +**Service category:** Provisioning +**Product capability:** AAD Connect Cloud Sync ++Microsoft will stop support for Azure AD provisioning agent with versions 1.1.818.0 and below starting Feb 1,2023. If you are using Azure AD cloud sync, please make sure you have the latest version of the agent. You can info about the agent release history [here](../app-provisioning/provisioning-agent-release-version-history.md). You can download the latest version [here](https://download.msappproxy.net/Subscription/d3c8b69d-6bf7-42be-a529-3fe9c2e70c90/Connector/provisioningAgentInstaller) ++You can find out which version of the agent you are using as follows: ++1. Going to the domain server which you have the agent installed +1. Right-click on the Microsoft Azure AD Connect Provisioning Agent app +1. Click on ΓÇ£DetailsΓÇ¥ tab and you can find the version number there ++> [!NOTE] +> Azure Active Directory (AD) Connect follows the [Modern Lifecycle Policy](/lifecycle/policies/modern). Changes for products and services under the Modern Lifecycle Policy may be more frequent and require customers to be alert for forthcoming modifications to their product or service. +Product governed by the Modern Policy follow a [continuous support and servicing model](/lifecycle/overview/product-end-of-support-overview). Customers must take the latest update to remain supported. For products and services governed by the Modern Lifecycle Policy, Microsoft's policy is to provide a minimum 30 days' notification when customers are required to take action in order to avoid significant degradation to the normal use of the product or service. ++++### General Availability - Add multiple domains to the same SAML/Ws-Fed based identity provider configuration for your external users ++++**Type:** New feature +**Service category:** B2B +**Product capability:** B2B/B2C ++An IT admin can now add multiple domains to a single SAML/WS-Fed identity provider configuration to invite users from multiple domains to authenticate from the same identity provider endpoint. For more information, see: [Federation with SAML/WS-Fed identity providers for guest users](../external-identities/direct-federation.md). +++++### General Availability - Limits on the number of configured API permissions for an application registration will be enforced starting in October 2022 ++++**Type:** Plan for change +**Service category:** Other +**Product capability:** Developer Experience ++In the end of October, the total number of required permissions for any single application registration must not exceed 400 permissions across all APIs. Applications exceeding the limit won't be able to increase the number of permissions they're configured for. The existing limit on the number of distinct APIs for which permissions are required remains unchanged and may not exceed 50 APIs. ++In the Azure portal, the required permissions are listed under API Permissions within specific applications in the application registration menu. When using Microsoft Graph or Microsoft Graph PowerShell, the required permissions are listed in the requiredResourceAccess property of an [application](/graph/api/resources/application) entity. For more information, see: [Validation differences by supported account types (signInAudience)](../develop/supported-accounts-validation.md). +++++### Public Preview - Conditional access Authentication strengths ++++**Type:** New feature +**Service category:** Conditional Access +**Product capability:** User Authentication ++Announcing Public preview of Authentication strength, a Conditional Access control that allows administrators to specify which authentication methods can be used to access a resource. For more information, see: [Conditional Access authentication strength (preview)](../authentication/concept-authentication-strengths.md). You can use custom authentication strengths to restrict access by requiring specific FIDO2 keys using the Authenticator Attestation GUIDs (AAGUIDs), and apply this through conditional access policies. For more information, see: [FIDO2 security key advanced options](../authentication/concept-authentication-strengths.md#fido2-security-key-advanced-options). ++++### Public Preview - Conditional access authentication strengths for external identities +++**Type:** New feature +**Service category:** B2B +**Product capability:** B2B/B2C ++You can now require your business partner (B2B) guests across all Microsoft clouds to use specific authentication methods to access your resources with **Conditional Access Authentication Strength policies**. For more information, see: [Conditional Access: Require an authentication strength for external users](../conditional-access/howto-conditional-access-policy-authentication-strength-external.md). +++++### Generally Availability - Windows Hello for Business, Cloud Kerberos Trust deployment ++++**Type:** New feature +**Service category:** Authentications (Logins) +**Product capability:** User Authentication ++We're excited to announce the general availability of hybrid cloud Kerberos trust, a new Windows Hello for Business deployment model to enable a password-less sign-in experience. With this new model, weΓÇÖve made Windows Hello for Business much easier to deploy than the existing key trust and certificate trust deployment models by removing the need for maintaining complicated public key infrastructure (PKI), and Azure Active Directory (AD) Connect synchronization wait times. For more information, see: [Hybrid Cloud Kerberos Trust Deployment](/windows/security/identity-protection/hello-for-business/hello-hybrid-cloud-kerberos-trust). ++++### General Availability - Device-based conditional access on Linux Desktops ++++**Type:** New feature +**Service category:** Conditional Access +**Product capability:** SSO ++This feature empowers users on Linux clients to register their devices with Azure AD, enroll into Intune management, and satisfy device-based Conditional Access policies when accessing their corporate resources. ++- Users can register their Linux devices with Azure AD +- Users can enroll in Mobile Device Management (Intune), which can be used to provide compliance decisions based upon policy definitions to allow device based conditional access on Linux Desktops +- If compliant, users can use Edge Browser to enable Single-Sign on to M365/Azure resources and satisfy device-based Conditional Access policies. +++For more information, see: +[Azure AD registered devices](../devices/concept-azure-ad-register.md). +[Plan your Azure Active Directory device deployment](../devices/plan-device-deployment.md) ++++### General Availability - Deprecation of Azure Multi-Factor Authentication Server ++++**Type:** Deprecated +**Service category:** MFA +**Product capability:** Identity Security & Protection ++Beginning September 30, 2024, Azure Multi-Factor Authentication Server deployments will no longer service multi-factor authentication (MFA) requests, which could cause authentications to fail for your organization. To ensure uninterrupted authentication services, and to remain in a supported state, organizations should migrate their usersΓÇÖ authentication data to the cloud-based Azure AD Multi-Factor Authentication service using the latest Migration Utility included in the most recent Azure AD Multi-Factor Authentication Server update. For more information, see: [Migrate from MFA Server to Azure AD Multi-Factor Authentication](../authentication/how-to-migrate-mfa-server-to-azure-mfa.md). ++++### General Availability - Change of Default User Consent Settings ++++**Type:** New feature +**Service category:** Enterprise Apps +**Product capability:** Developer Experience ++Starting Sept 30th, 2022, Microsoft will require all new tenants to follow a new user consent configuration. While this won't impact any existing tenants that were created before September 30, 2022, all new tenants created after September 30, 2022, will have the default setting of ΓÇ£Enable automatic updates (Recommendation)ΓÇ¥ under User consent settings. This change reduces the risk of malicious applications attempting to trick users into granting them access to your organization's data. For more information, see: [Configure how users consent to applications](../manage-apps/configure-user-consent.md). ++++### Public Preview - Lifecycle Workflows is now available ++++**Type:** New feature +**Service category:** Lifecycle Workflows +**Product capability:** Identity Governance +++We're excited to announce the public preview of Lifecycle Workflows, a new Identity Governance capability that allows customers to extend the user provisioning process, and adds enterprise grade user lifecycle management capabilities, in Azure AD to modernize your identity lifecycle management process. With Lifecycle Workflows, you can: ++- Confidently configure and deploy custom workflows to onboard and offboard cloud employees at scale replacing your manual processes. +- Automate out-of-the-box actions critical to required Joiner and Leaver scenarios and get rich reporting insights. +- Extend workflows via Logic Apps integrations with custom tasks extensions for more complex scenarios. ++For more information, see: [What are Lifecycle Workflows? (Public Preview)](../governance/what-are-lifecycle-workflows.md). ++++### Public Preview - User-to-Group Affiliation recommendation for group Access Reviews ++++**Type:** New feature +**Service category:** Access Reviews +**Product capability:** Identity Governance ++This feature provides Machine Learning based recommendations to the reviewers of Azure AD Access Reviews to make the review experience easier and more accurate. The recommendation detects user affiliation with other users within the group, and leverages the scoring mechanism we built by computing the userΓÇÖs average distance with other users in the group. For more information, see: [Review recommendations for Access reviews](../governance/review-recommendations-access-reviews.md). ++++### General Availability - Group assignment for SuccessFactors Writeback application ++++**Type:** New feature +**Service category:** Provisioning +**Product capability:** Outbound to SaaS Applications ++When configuring writeback of attributes from Azure AD to SAP SuccessFactors Employee Central, you can now specify the scope of users using Azure AD group assignment. For more information, see: [Tutorial: Configure attribute write-back from Azure AD to SAP SuccessFactors](../saas-apps/sap-successfactors-writeback-tutorial.md). ++++### General Availability - Number Matching for Microsoft Authenticator notifications ++++**Type:** New feature +**Service category:** Microsoft Authenticator App +**Product capability:** User Authentication ++To prevent accidental notification approvals, admins can now require users to enter the number displayed on the sign-in screen when approving an MFA notification in the Microsoft Authenticator app. We've also refreshed the Azure portal admin UX and Microsoft Graph APIs to make it easier for customers to manage Authenticator app feature roll-outs. As part of this update we have also added the highly requested ability for admins to exclude user groups from each feature. ++The number matching feature greatly up-levels the security posture of the Microsoft Authenticator app and protects organizations from MFA fatigue attacks. We highly encourage our customers to adopt this feature leveraging the rollout controls we have built. Number Matching will begin to be enabled for all users of the Microsoft Authenticator app starting 27th of February 2023. +++For more information, see: [How to use number matching in multifactor authentication (MFA) notifications - Authentication methods policy](../authentication/how-to-mfa-number-match.md). ++++### General Availability - Additional context in Microsoft Authenticator notifications ++++**Type:** New feature +**Service category:** Microsoft Authenticator App +**Product capability:** User Authentication ++Reduce accidental approvals by showing users additional context in Microsoft Authenticator app notifications. Customers can enhance notifications with the following: ++- Application Context: This feature will show users which application they're signing into. +- Geographic Location Context: This feature will show users their sign-in location based on the IP address of the device they're signing into. ++The feature is available for both MFA and Password-less Phone Sign-in notifications and greatly increases the security posture of the Microsoft Authenticator app. We've also refreshed the Azure portal Admin UX and Microsoft Graph APIs to make it easier for customers to manage Authenticator app feature roll-outs. As part of this update, we've also added the highly requested ability for admins to exclude user groups from certain features. ++We highly encourage our customers to adopt these critical security features to reduce accidental approvals of Authenticator notifications by end users. +++For more information, see: [How to use additional context in Microsoft Authenticator notifications - Authentication methods policy](../authentication/how-to-mfa-additional-context.md). ++++### New Federated Apps available in Azure AD Application gallery - October 2022 ++++**Type:** New feature +**Service category:** Enterprise Apps +**Product capability:** 3rd Party Integration ++++In October 2022 we've added the following 15 new applications in our App gallery with Federation support: ++[Unifii](https://www.unifii.com.au/), [WaitWell Staff App](https://waitwell.c) ++You can also find the documentation of all the applications from here https://aka.ms/AppsTutorial, ++For listing your application in the Azure AD app gallery, please read the details here https://aka.ms/AzureADAppRequest ++++++### Public preview - New provisioning connectors in the Azure AD Application Gallery - October 2022 ++**Type:** New feature +**Service category:** App Provisioning +**Product capability:** 3rd Party Integration ++You can now automate creating, updating, and deleting user accounts for these newly integrated apps: ++- [LawVu](../saas-apps/lawvu-provisioning-tutorial.md) ++For more information about how to better secure your organization by using automated user account provisioning, see: [Automate user provisioning to SaaS applications with Azure AD](../app-provisioning/user-provisioning.md). ++++++ ## September 2022 ### General Availability - SSPR writeback is now available for disconnected forests using Azure AD Connect cloud sync Smart Lockout now synchronizes the lockout state across Azure AD data centers, s --## April 2022 ---### General Availability - Entitlement management separation of duties checks for incompatible access packages --**Type:** Changed feature -**Service category:** Other -**Product capability:** Identity Governance --In Azure AD entitlement management, an administrator can now configure the incompatible access packages and groups of an access package in the Azure portal. This prevents a user who already has one of those incompatible access rights from being able to request further access. For more information, see: [Configure separation of duties checks for an access package in Azure AD entitlement management](../governance/entitlement-management-access-package-incompatible.md). -----### General Availability - Microsoft Defender for Endpoint Signal in Identity Protection --**Type:** New feature -**Service category:** Identity Protection -**Product capability:** Identity Security & Protection - --Identity Protection now integrates a signal from Microsoft Defender for Endpoint (MDE) that will protect against PRT theft detection. To learn more, see: [What is risk? Azure AD Identity Protection | Microsoft Docs](../identity-protection/concept-identity-protection-risks.md). - ----### General Availability - Entitlement management 3 stages of approval --**Type:** Changed feature -**Service category:** Other -**Product capability:** Entitlement Management -- --This update extends the Azure AD entitlement management access package policy to allow a third approval stage. This will be able to be configured via the Azure portal or Microsoft Graph. For more information, see: [Change approval and requestor information settings for an access package in Azure AD entitlement management](../governance/entitlement-management-access-package-approval-policy.md). - ----### General Availability - Improvements to Azure AD Smart Lockout --**Type:** Changed feature -**Service category:** Identity Protection -**Product capability:** User Management -- --With a recent improvement, Smart Lockout now synchronizes the lockout state across Azure AD data centers, so the total number of failed sign-in attempts allowed before an account is locked out will match the configured lockout threshold. For more information, see: [Protect user accounts from attacks with Azure Active Directory smart lockout](../authentication/howto-password-smart-lockout.md). - -----### Public Preview - Integration of Microsoft 365 App Certification details into Azure Active Directory UX and Consent Experiences --**Type:** New feature -**Service category:** User Access Management -**Product capability:** AuthZ/Access Delegation ---Microsoft 365 Certification status for an app is now available in Azure AD consent UX, and custom app consent policies. The status will later be displayed in several other Identity-owned interfaces such as enterprise apps. For more information, see: [Understanding Azure AD application consent experiences](../develop/application-consent-experience.md). -----### Public preview - Use Azure AD access reviews to review access of B2B direct connect users in Teams shared channels --**Type:** New feature -**Service category:** Access Reviews -**Product capability:** Identity Governance --Use Azure AD access reviews to review access of B2B direct connect users in Teams shared channels. For more information, see: [Include B2B direct connect users and teams accessing Teams Shared Channels in access reviews (preview)](../governance/create-access-review.md#include-b2b-direct-connect-users-and-teams-accessing-teams-shared-channels-in-access-reviews). ----### Public Preview - New MS Graph APIs to configure federated settings when federated with Azure AD --**Type:** New feature -**Service category:** MS Graph -**Product capability:** Identity Security & Protection ---We're announcing the public preview of following MS Graph APIs and PowerShell cmdlets for configuring federated settings when federated with Azure AD: --|Action |MS Graph API |PowerShell cmdlet | -|||| -|Get federation settings for a federated domain | [Get internalDomainFederation](/graph/api/internaldomainfederation-get?view=graph-rest-beta&preserve-view=true) | [Get-MgDomainFederationConfiguration](/powershell/module/microsoft.graph.identity.directorymanagement/get-mgdomainfederationconfiguration?view=graph-powershell-beta&preserve-view=true) | -|Create federation settings for a federated domain | [Create internalDomainFederation](/graph/api/domain-post-federationconfiguration?view=graph-rest-beta&preserve-view=true) | [New-MgDomainFederationConfiguration](/powershell/module/microsoft.graph.identity.directorymanagement/new-mgdomainfederationconfiguration?view=graph-powershell-beta&preserve-view=true) | -|Remove federation settings for a federated domain | [Delete internalDomainFederation](/graph/api/internaldomainfederation-delete?view=graph-rest-beta&preserve-view=true) | [Remove-MgDomainFederationConfiguration](/powershell/module/microsoft.graph.identity.directorymanagement/remove-mgdomainfederationconfiguration?view=graph-powershell-beta&preserve-view=true) | -|Update federation settings for a federated domain | [Update internalDomainFederation](/graph/api/internaldomainfederation-update?view=graph-rest-beta&preserve-view=true) | [Update-MgDomainFederationConfiguration](/powershell/module/microsoft.graph.identity.directorymanagement/update-mgdomainfederationconfiguration?view=graph-powershell-beta&preserve-view=true) | ---If using older MSOnline cmdlets ([Get-MsolDomainFederationSettings](/powershell/module/msonline/get-msoldomainfederationsettings?view=azureadps-1.0&preserve-view=true) and [Set-MsolDomainFederationSettings](/powershell/module/msonline/set-msoldomainfederationsettings?view=azureadps-1.0&preserve-view=true)), we highly recommend transitioning to the latest MS Graph APIs and PowerShell cmdlets. --For more information, see [internalDomainFederation resource type - Microsoft Graph beta | Microsoft Docs](/graph/api/resources/internaldomainfederation?view=graph-rest-beta&preserve-view=true). ----### Public Preview ΓÇô Ability to force reauthentication on Intune enrollment, risky sign-ins, and risky users --**Type:** New feature -**Service category:** RBAC role -**Product capability:** AuthZ/Access Delegation ---Added functionality to session controls allowing admins to reauthenticate a user on every sign-in if a user or particular sign-in event is deemed risky, or when enrolling a device in Intune. For more information, see [Configure authentication session management with conditional Access](../conditional-access/howto-conditional-access-session-lifetime.md). ----### Public Preview ΓÇô Protect against by-passing of cloud Azure AD Multi-Factor Authentication when federated with Azure AD --**Type:** New feature -**Service category:** MS Graph -**Product capability:** Identity Security & Protection ---We're delighted to announce a new security protection that prevents bypassing of cloud Azure AD Multi-Factor Authentication when federated with Azure AD. When enabled for a federated domain in your Azure AD tenant, it ensures that a compromised federated account can't bypass Azure AD Multi-Factor Authentication by imitating that a multi factor authentication has already been performed by the identity provider. The protection can be enabled via new security setting, [federatedIdpMfaBehavior](/graph/api/resources/internaldomainfederation?view=graph-rest-beta#federatedidpmfabehavior-values&preserve-view=true). --We highly recommend enabling this new protection when using Azure AD Multi-Factor Authentication as your multi factor authentication for your federated users. To learn more about the protection and how to enable it, visit [Enable protection to prevent by-passing of cloud Azure AD Multi-Factor Authentication when federated with Azure AD](/windows-server/identity/ad-fs/deployment/best-practices-securing-ad-fs#enable-protection-to-prevent-by-passing-of-cloud-azure-ad-multi-factor-authentication-when-federated-with-azure-ad). ----### New Federated Apps available in Azure AD Application gallery - April 2022 --**Type:** New feature -**Service category:** Enterprise Apps -**Product capability:** Third Party Integration --In April 2022 we added the following 24 new applications in our App gallery with Federation support: -[X-1FBO](https://www.x1fbo.com/), [select Armor](https://app.clickarmor.c) --You can also find the documentation of all the applications from here https://aka.ms/AppsTutorial. --For listing your application in the Azure AD app gallery, please read the details here https://aka.ms/AzureADAppRequest ----### General Availability - Customer data storage for Japan customers in Japanese data centers --**Type:** New feature -**Service category:** App Provisioning -**Product capability:** GoLocal --From April 15, 2022, Microsoft began storing Azure ADΓÇÖs Customer Data for new tenants with a Japan billing address within the Japanese data centers. For more information, see: [Customer data storage for Japan customers in Azure Active Directory](active-directory-data-storage-japan.md). -----### Public Preview - New provisioning connectors in the Azure AD Application Gallery - April 2022 --**Type:** New feature -**Service category:** App Provisioning -**Product capability:** Third Party Integration --You can now automate creating, updating, and deleting user accounts for these newly integrated apps: -- [Adobe Identity Management (OIDC)](../saas-apps/adobe-identity-management-provisioning-oidc-tutorial.md)-- [embed signage](../saas-apps/embed-signage-provisioning-tutorial.md)-- [KnowBe4 Security Awareness Training](../saas-apps/knowbe4-security-awareness-training-provisioning-tutorial.md)-- [NordPass](../saas-apps/nordpass-provisioning-tutorial.md)--For more information about how to better secure your organization by using automated user account provisioning, see: [Automate user provisioning to SaaS applications with Azure AD](../app-provisioning/user-provisioning.md) ----- |
| active-directory | Howto Identity Protection Configure Mfa Policy | https://github.com/MicrosoftDocs/azure-docs/commits/main/articles/active-directory/identity-protection/howto-identity-protection-configure-mfa-policy.md | For more information on Azure AD multifactor authentication, see [What is Azure 1. Browse to **Azure Active Directory** > **Security** > **Identity Protection** > **MFA registration policy**. 1. Under **Assignments** 1. **Users** - Choose **All users** or **Select individuals and groups** if limiting your rollout.- 1. Optionally you can choose to exclude users from the policy. + 1. Optionally you can choose to exclude users or groups from the policy. 1. **Enforce Policy** - **On** 1. **Save** |
| active-directory | Managed Identities Status | https://github.com/MicrosoftDocs/azure-docs/commits/main/articles/active-directory/managed-identities-azure-resources/managed-identities-status.md | The following Azure services support managed identities for Azure resources: | Azure Service Fabric | [Using Managed identities for Azure with Service Fabric](../../service-fabric/concepts-managed-identity.md) | | Azure SignalR Service | [Managed identities for Azure SignalR Service](../../azure-signalr/howto-use-managed-identity.md) | | Azure Spring Apps | [Enable system-assigned managed identity for an application in Azure Spring Apps](../../spring-apps/how-to-enable-system-assigned-managed-identity.md) |-| Azure SQL | [Azure SQL Transparent Data Encryption with customer-managed key](/azure/azure-sql/database/transparent-data-encryption-byok-overview) | -| Azure SQL Managed Instance | [Azure SQL Transparent Data Encryption with customer-managed key](/azure/azure-sql/database/transparent-data-encryption-byok-overview) | +| Azure SQL | [Managed identities in Azure AD for Azure SQL](/azure/azure-sql/database/authentication-azure-ad-user-assigned-managed-identity) | +| Azure SQL Managed Instance | [Managed identities in Azure AD for Azure SQL](/azure/azure-sql/database/authentication-azure-ad-user-assigned-managed-identity) | | Azure Stack Edge | [Manage Azure Stack Edge secrets using Azure Key Vault](../../databox-online/azure-stack-edge-gpu-activation-key-vault.md#recover-managed-identity-access) | Azure Static Web Apps | [Securing authentication secrets in Azure Key Vault](../../static-web-apps/key-vault-secrets.md) | Azure Stream Analytics | [Authenticate Stream Analytics to Azure Data Lake Storage Gen1 using managed identities](../../stream-analytics/stream-analytics-managed-identities-adls.md) | |
| active-directory | Recommendation Integrate Third Party Apps | https://github.com/MicrosoftDocs/azure-docs/commits/main/articles/active-directory/reports-monitoring/recommendation-integrate-third-party-apps.md | Title: Azure Active Directory recommendation - Integrate third party apps with Azure AD | Microsoft Docs description: Learn why you should integrate third party apps with Azure AD -+ Previously updated : 08/26/2022- Last updated : 10/31/2022+ -# Azure AD recommendation: Integrate your third party apps +# Azure AD recommendation: Integrate third party apps -[Azure AD recommendations](overview-recommendations.md) is a feature that provides you with personalized insights and actionable guidance to align your tenant with recommended best practices. --This article covers the recommendation to integrate third party apps. +[Azure Active Directory (Azure AD) recommendations](overview-recommendations.md) is a feature that provides you with personalized insights and actionable guidance to align your tenant with recommended best practices. +This article covers the recommendation to integrate your third party apps with Azure AD. ## Description -As an Azure AD admin responsible for managing applications, you want to use the Azure AD security features with your third party apps. Integrating these apps into Azure AD enables: --- You to use one unified method to manage access to your third party apps.-- Your users to benefit from using single sign-on to access all your apps with a single password.-+As an Azure AD admin responsible for managing applications, you want to use the Azure AD security features with your third party apps. Integrating these apps into Azure AD enables you to use one unified method to manage access to your third party apps. Your users also benefit from using single sign-on to access all your apps with a single password. -## Logic --If Azure AD determines that none of your users are using Azure AD to authenticate to your third party apps, this recommendation shows up. +If Azure AD determines that none of your users are using Azure AD to authenticate to your third party apps, this recommendation shows up. ## Value -Integrating third party apps with Azure AD allows you to use Azure AD's security features. -The integration: +Integrating third party apps with Azure AD allows you to utilize the core identity and access features provided by Azure AD. Manage access, single sign-on, and other properties. Add an extra security layer by using [Conditional Access](../conditional-access/overview.md) to control how your users can access your apps. ++Integrating third party apps with Azure AD: - Improves the productivity of your users. - Lowers your app management cost. -You can then add an extra security layer by using conditional access to control how your users can access your apps. - ## Action plan 1. Review the configuration of your apps. -2. For each app that isn't integrated into Azure AD yet, verify whether an integration is possible. +2. For each app that isn't integrated into Azure AD, verify whether an integration is possible. ## Next steps -- [Tutorials for integrating SaaS applications with Azure Active Directory](../saas-apps/tutorial-list.md)-- [Azure AD reports overview](overview-reports.md)+- [Explore tutorials for integrating SaaS applications with Azure AD](../saas-apps/tutorial-list.md) |
| active-directory | Recommendation Mfa From Known Devices | https://github.com/MicrosoftDocs/azure-docs/commits/main/articles/active-directory/reports-monitoring/recommendation-mfa-from-known-devices.md | Title: Azure Active Directory recommendation - Minimize MFA prompts from known devices in Azure AD | Microsoft Docs description: Learn why you should minimize MFA prompts from known devices in Azure AD. -+ - Previously updated : 08/26/2022- Last updated : 10/31/2022+ This article covers the recommendation to convert minimize multi-factor authenti ## Description -As an admin, you want to maintain security for my companyΓÇÖs resources, but you also want your employees to easily access resources as needed. +As an admin, you want to maintain security for your companyΓÇÖs resources, but you also want your employees to easily access resources as needed. MFA enables you to enhance the security posture of your tenant. While enabling MFA is a good practice, you should try to keep the number of MFA prompts your users have to go through at a minimum. One option you have to accomplish this goal is to **allow users to remember multi-factor authentication on devices they trust**. |
| active-directory | Recommendation Migrate Apps From Adfs To Azure Ad | https://github.com/MicrosoftDocs/azure-docs/commits/main/articles/active-directory/reports-monitoring/recommendation-migrate-apps-from-adfs-to-azure-ad.md | Title: Azure Active Directory recommendation - Migrate apps from ADFS to Azure AD in Azure AD | Microsoft Docs description: Learn why you should migrate apps from ADFS to Azure AD in Azure AD -+ - Previously updated : 08/26/2022- Last updated : 10/31/2022+ -This article covers the recommendation to migrate apps from ADFS to Azure AD. +This article covers the recommendation to migrate apps from ADFS to Azure Active Directory (Azure AD). ## Description |
| active-directory | Recommendation Migrate To Authenticator | https://github.com/MicrosoftDocs/azure-docs/commits/main/articles/active-directory/reports-monitoring/recommendation-migrate-to-authenticator.md | Title: Azure Active Directory recommendation - Migrate to Microsoft authenticator | Microsoft Docs description: Learn why you should migrate your users to the Microsoft authenticator app in Azure AD. -+ - Previously updated : 08/26/2022- Last updated : 10/31/2022+ |
| active-directory | Recommendation Turn Off Per User Mfa | https://github.com/MicrosoftDocs/azure-docs/commits/main/articles/active-directory/reports-monitoring/recommendation-turn-off-per-user-mfa.md | Title: Azure Active Directory recommendation - Turn off per user MFA in Azure AD | Microsoft Docs description: Learn why you should turn off per user MFA in Azure AD -+ Previously updated : 08/26/2022- Last updated : 10/31/2022+ -# Azure AD recommendation: Turn off per user MFA +# Azure AD recommendation: Convert per-user MFA to Conditional Access MFA [Azure AD recommendations](overview-recommendations.md) is a feature that provides you with personalized insights and actionable guidance to align your tenant with recommended best practices. --This article covers the recommendation to turn off per user MFA. -+This article covers the recommendation to convert per-user Multi-factor authentication (MFA) accounts to Conditional Access (CA) MFA accounts. ## Description -As an admin, you want to maintain security for my companyΓÇÖs resources, but you also want your employees to easily access resources as needed. --Multi-factor authentication (MFA) enables you to enhance the security posture of your tenant. In your tenant, you can enable MFA on a per-user basis. In this scenario, your users perform MFA each time they sign in (with some exceptions, such as when they sign in from trusted IP addresses or when the remember MFA on trusted devices feature is turned on). --While enabling MFA is a good practice, you can reduce the number of times your users are prompted for MFA by converting per-user MFA to MFA based on conditional access. -+As an admin, you want to maintain security for your companyΓÇÖs resources, but you also want your employees to easily access resources as needed. MFA enables you to enhance the security posture of your tenant. -## Logic +In your tenant, you can enable MFA on a per-user basis. In this scenario, your users perform MFA each time they sign in, with some exceptions, such as when they sign in from trusted IP addresses or when the remember MFA on trusted devices feature is turned on. While enabling MFA is a good practice, converting per-user MFA to MFA based on [Conditional Access](../conditional-access/overview.md) can reduce the number of times your users are prompted for MFA. -This recommendation shows up, if: +This recommendation shows up if: -- You have per-user MFA configured for at least 5% of your users-- Conditional access policies are active for more than 1% of your users (indicating familiarity with CA policies).+- You have per-user MFA configured for at least 5% of your users. +- Conditional Access policies are active for more than 1% of your users (indicating familiarity with CA policies). ## Value -This recommendation improves your user's productivity and minimizes the sign-in time with fewer MFA prompts. Ensure that your most sensitive resources can have the tightest controls, while your least sensitive resources can be more freely accessible. +This recommendation improves your user's productivity and minimizes the sign-in time with fewer MFA prompts. CA and MFA used together help ensure that your most sensitive resources can have the tightest controls, while your least sensitive resources can be more freely accessible. ## Action plan -1. To get started, confirm that there's an existing conditional access policy with an MFA requirement. Ensure that you're covering all resources and users you would like to secure with MFA. Review your [conditional access policies](https://portal.azure.com/?Microsoft_AAD_IAM_enableAadvisorFeaturePreview=true&%3BMicrosoft_AAD_IAM_enableAadvisorFeature=true#blade/Microsoft_AAD_IAM/PoliciesTemplateBlade). +1. Confirm that there's an existing CA policy with an MFA requirement. Ensure that you're covering all resources and users you would like to secure with MFA. + - Review your [Conditional Access policies](https://portal.azure.com/?Microsoft_AAD_IAM_enableAadvisorFeaturePreview=true&%3BMicrosoft_AAD_IAM_enableAadvisorFeature=true#blade/Microsoft_AAD_IAM/PoliciesTemplateBlade). -2. To require MFA using a conditional access policy, follow the steps in [Secure user sign-in events with Azure AD Multi-Factor Authentication](../authentication/tutorial-enable-azure-mfa.md). +2. Require MFA using a Conditional Access policy. + - [Secure user sign-in events with Azure AD Multi-Factor Authentication](../authentication/tutorial-enable-azure-mfa.md). 3. Ensure that the per-user MFA configuration is turned off. - +After all users have been migrated to CA MFA accounts, the recommendation status automatically updates the next time the service runs. Continue to review your CA policies to improve the overall health of your tenant. ## Next steps -- [Tutorials for integrating SaaS applications with Azure Active Directory](../saas-apps/tutorial-list.md)-- [Azure AD reports overview](overview-reports.md)+- [Learn about requiring MFA for all users using Conditional Access](../conditional-access/howto-conditional-access-policy-all-users-mfa.md) +- [View the MFA CA policy tutorial](../authentication/tutorial-enable-azure-mfa.md) |
| active-directory | Reference Azure Ad Sla Performance | https://github.com/MicrosoftDocs/azure-docs/commits/main/articles/active-directory/reports-monitoring/reference-azure-ad-sla-performance.md | For each month, we truncate the SLA attainment at three places after the decimal | June | 99.999% | 99.999% | | July | 99.999% | 99.999% | | August | 99.999% | 99.999% |-| September | 99.999% | | +| September | 99.999% | 99.998% | | October | 99.999% | | | November | 99.998% | | | December | 99.978% | | |
| active-directory | Tutorial Access Api With Certificates | https://github.com/MicrosoftDocs/azure-docs/commits/main/articles/active-directory/reports-monitoring/tutorial-access-api-with-certificates.md | Title: Tutorial for AD Reporting API with certificates | Microsoft Docs description: This tutorial explains how to use the Azure AD Reporting API with certificate credentials to get data from directories without user intervention. -+ - Previously updated : 08/26/2022- Last updated : 10/31/2022+ - -# Customer intent: As a developer, I want to learn how to access the Azure AD reporting API using certificates so that I can create an application that does not require user intervention to access reports. ++# Customer intent: As a developer, I want to learn how to access the Azure AD reporting API using certificates so that I can create an application that does not require user intervention to access reports. + # Tutorial: Get data using the Azure Active Directory reporting API with certificates -The [Azure Active Directory (Azure AD) reporting APIs](concept-reporting-api.md) provide you with programmatic access to the data through a set of REST-based APIs. You can call these APIs from a variety of programming languages and tools. If you want to access the Azure AD Reporting API without user intervention, you must configure your access to use certificates. +The [Azure Active Directory (Azure AD) reporting APIs](concept-reporting-api.md) provide you with programmatic access to the data through a set of REST-based APIs. You can call these APIs from various programming languages and tools. If you want to access the Azure AD Reporting API without user intervention, you must configure your access to use certificates. In this tutorial, you learn how to use a test certificate to access the MS Graph API for reporting. We don't recommend using test certificates in a production environment. ## Prerequisites -1. To access sign-in data, make sure you have an Azure Active Directory tenant with a premium (P1/P2) license. See [Getting started with Azure Active Directory Premium](../fundamentals/active-directory-get-started-premium.md) to upgrade your Azure Active Directory edition. Note that if you did not have any activities data prior to the upgrade, it will take a couple of days for the data to show up in the reports after you upgrade to a premium license. +1. To access sign-in data, make sure you have an Azure AD tenant with a premium (P1/P2) license. See [Getting started with Azure Active Directory Premium](../fundamentals/active-directory-get-started-premium.md) to upgrade your Azure AD edition. If you didn't have any activities data prior to the upgrade, it will take a couple of days for the data to show up in the reports after you upgrade to a premium license. -2. Create or switch to a user account in the **global administrator**, **security administrator**, **security reader** or **report reader** role for the tenant. +2. Create or switch to a user account in the **Global Administrator**, **Security Administrator**, **Security Reader** or **Report Reader** role for the tenant. 3. Complete the [prerequisites to access the Azure Active Directory reporting API](howto-configure-prerequisites-for-reporting-api.md). 4. Download and install [Azure AD PowerShell V2](https://github.com/Azure/azure-docs-powershell-azuread/blob/master/docs-conceptual/azureadps-2.0/install-adv2.md). 5. Install [MSCloudIdUtils](https://www.powershellgallery.com/packages/MSCloudIdUtils/). This module provides several utility cmdlets including:- - The ADAL libraries needed for authentication - - Access tokens from user, application keys, and certificates using ADAL + - The Microsoft Authentication Library libraries needed for authentication + - Access tokens from user, application keys, and certificates using Microsoft Authentication Library - Graph API handling paged results 6. If it's your first time using the module run **Install-MSCloudIdUtilsModule**, otherwise import it using the **Import-Module** PowerShell command. Your session should look similar to this screen: In this tutorial, you learn how to use a test certificate to access the MS Graph ## Get data using the Azure Active Directory reporting API with certificates -1. Navigate to the [Azure portal](https://portal.azure.com), select **Azure Active Directory**, then select **App registrations** and choose your application from the list. +1. Go to the [Azure portal](https://portal.azure.com) > **Azure Active Directory** > **App registrations** and choose your application from the list. -2. Select **Certificates & secrets** under **Manage** section on Application registration blade and select **Upload Certificate**. +2. From the Application registration area, select **Certificates & secrets** under the **Manage** section, and then select **Upload Certificate**. 3. Select the certificate file from the previous step and select **Add**. -4. Note the Application ID, and the thumbprint of the certificate you just registered with your application. To find the thumbprint, from your application page in the portal, go to **Certificates & secrets** under **Manage** section. The thumbprint will be under the **Certificates** list. +4. Note the Application ID, and the thumbprint of the certificate you registered with your application. To find the thumbprint, from your application page in the portal, go to **Certificates & secrets** under **Manage** section. The thumbprint will be under the **Certificates** list. 5. Open the application manifest in the inline manifest editor and verify the *keyCredentials* property is updated with your new certificate information as shown below - In this tutorial, you learn how to use a test certificate to access the MS Graph  -7. Use the access token in your PowerShell script to query the Graph API. Use the **Invoke-MSCloudIdMSGraphQuery** cmdlet from the MSCloudIDUtils to enumerate the signins and directoryAudits endpoint. This cmdlet handles multi-paged results, and sends those results to the PowerShell pipeline. +7. Use the access token in your PowerShell script to query the Graph API. Use the **Invoke-MSCloudIdMSGraphQuery** cmdlet from the MSCloudIDUtils to enumerate the `signins` and `directoryAudits` endpoint. This cmdlet handles multi-paged results, and sends those results to the PowerShell pipeline. -8. Query the directoryAudits endpoint to retrieve the audit logs. +8. Query the `directoryAudits` endpoint to retrieve the audit logs.  -9. Query the signins endpoint to retrieve the sign-in logs. +9. Query the `signins` endpoint to retrieve the sign-in logs.  |
| active-directory | Tutorial Azure Monitor Stream Logs To Event Hub | https://github.com/MicrosoftDocs/azure-docs/commits/main/articles/active-directory/reports-monitoring/tutorial-azure-monitor-stream-logs-to-event-hub.md | Title: Tutorial - Stream logs to an Azure event hub | Microsoft Docs description: Learn how to set up Azure Diagnostics to push Azure Active Directory logs to an event hub -+ - Previously updated : 08/26/2022- Last updated : 10/31/2022+ + # Customer intent: As an IT administrator, I want to learn how to route Azure AD logs to an event hub so I can integrate it with my third party SIEM system.- # Tutorial: Stream Azure Active Directory logs to an Azure event hub To use this feature, you need: * An Azure subscription. If you don't have an Azure subscription, you can [sign up for a free trial](https://azure.microsoft.com/free/). * An Azure AD tenant.-* A user who's a *global administrator* or *security administrator* for the Azure AD tenant. +* A user who's a *Global Administrator* or *Security Administrator* for the Azure AD tenant. * An Event Hubs namespace and an event hub in your Azure subscription. Learn how to [create an event hub](../../event-hubs/event-hubs-create.md). ## Stream logs to an event hub After data is displayed in the event hub, you can access and read the data in tw * [Integrate Azure Active Directory logs with ArcSight using Azure Monitor](howto-integrate-activity-logs-with-arcsight.md) * [Integrate Azure AD logs with Splunk by using Azure Monitor](./howto-integrate-activity-logs-with-splunk.md) * [Integrate Azure AD logs with SumoLogic by using Azure Monitor](howto-integrate-activity-logs-with-sumologic.md)-* [Integrate Azure AD logs with Elastic using an event hub](https://github.com/Microsoft/azure-docs/blob/master/articles/active-directory/reports-monitoring/tutorial-azure-monitor-stream-logs-to-event-hub.md) * [Interpret audit logs schema in Azure Monitor](./overview-reports.md) * [Interpret sign-in logs schema in Azure Monitor](reference-azure-monitor-sign-ins-log-schema.md) |
| active-directory | Tutorial Log Analytics Wizard | https://github.com/MicrosoftDocs/azure-docs/commits/main/articles/active-directory/reports-monitoring/tutorial-log-analytics-wizard.md | In this tutorial, you learn how to: - An Azure subscription with at least one P1 licensed admin. If you don't have an Azure subscription, you can [sign up for a free trial](https://azure.microsoft.com/free/). -- An Azure AD tenant.+- An Azure Active Directory (Azure AD) tenant. -- A user who's a global administrator or security administrator for the Azure AD tenant.+- A user who's a Global Administrator or Security Administrator for the Azure AD tenant. Familiarize yourself with these articles: |
| advisor | Azure Advisor Score | https://github.com/MicrosoftDocs/azure-docs/commits/main/articles/advisor/azure-advisor-score.md | Title: Optimize Azure workloads by using Advisor Score -description: Use Azure Advisor Score to get the most out of Azure. + Title: Optimize Azure workloads by using Advisor score +description: Use Azure Advisor score to get the most out of Azure. Last updated 09/09/2020 -# Optimize Azure workloads by using Advisor Score +# Optimize Azure workloads by using Advisor score -## Introduction to Advisor Score +## Introduction to Advisor score Azure Advisor provides best practice recommendations for your workloads. These recommendations are personalized and actionable to help you: Azure Advisor provides best practice recommendations for your workloads. These r * Proactively prevent top issues by following best practices. * Assess your Azure workloads against the five pillars of the [Microsoft Azure Well-Architected Framework](/azure/architecture/framework/). -As a core feature of Advisor, Advisor Score can help you achieve these goals effectively and efficiently. +As a core feature of Advisor, Advisor score can help you achieve these goals effectively and efficiently. To get the most out of Azure, it's crucial to understand where you are in your workload optimization journey. You need to know which services or resources are consumed well and which are not. Further, you'll want to know how to prioritize your actions, based on recommendations, to maximize the outcome. -It's also important to track and report the progress you're making in this optimization journey. With Advisor Score, you can easily do all these things with the new gamification experience. +It's also important to track and report the progress you're making in this optimization journey. With Advisor score, you can easily do all these things with the new gamification experience. As your personalized cloud consultant, Azure Advisor continually assesses your usage telemetry and resource configuration to check for industry best practices. Advisor then aggregates its findings into a single score. With this score, you can tell at a glance if you're taking the necessary steps to build reliable, secure, and cost-efficient solutions. The Advisor score consists of an overall score, which can be further broken down You can track the progress you make over time by viewing your overall score and category score with daily, weekly, and monthly trends. You can also set benchmarks to help you achieve your goals. -  +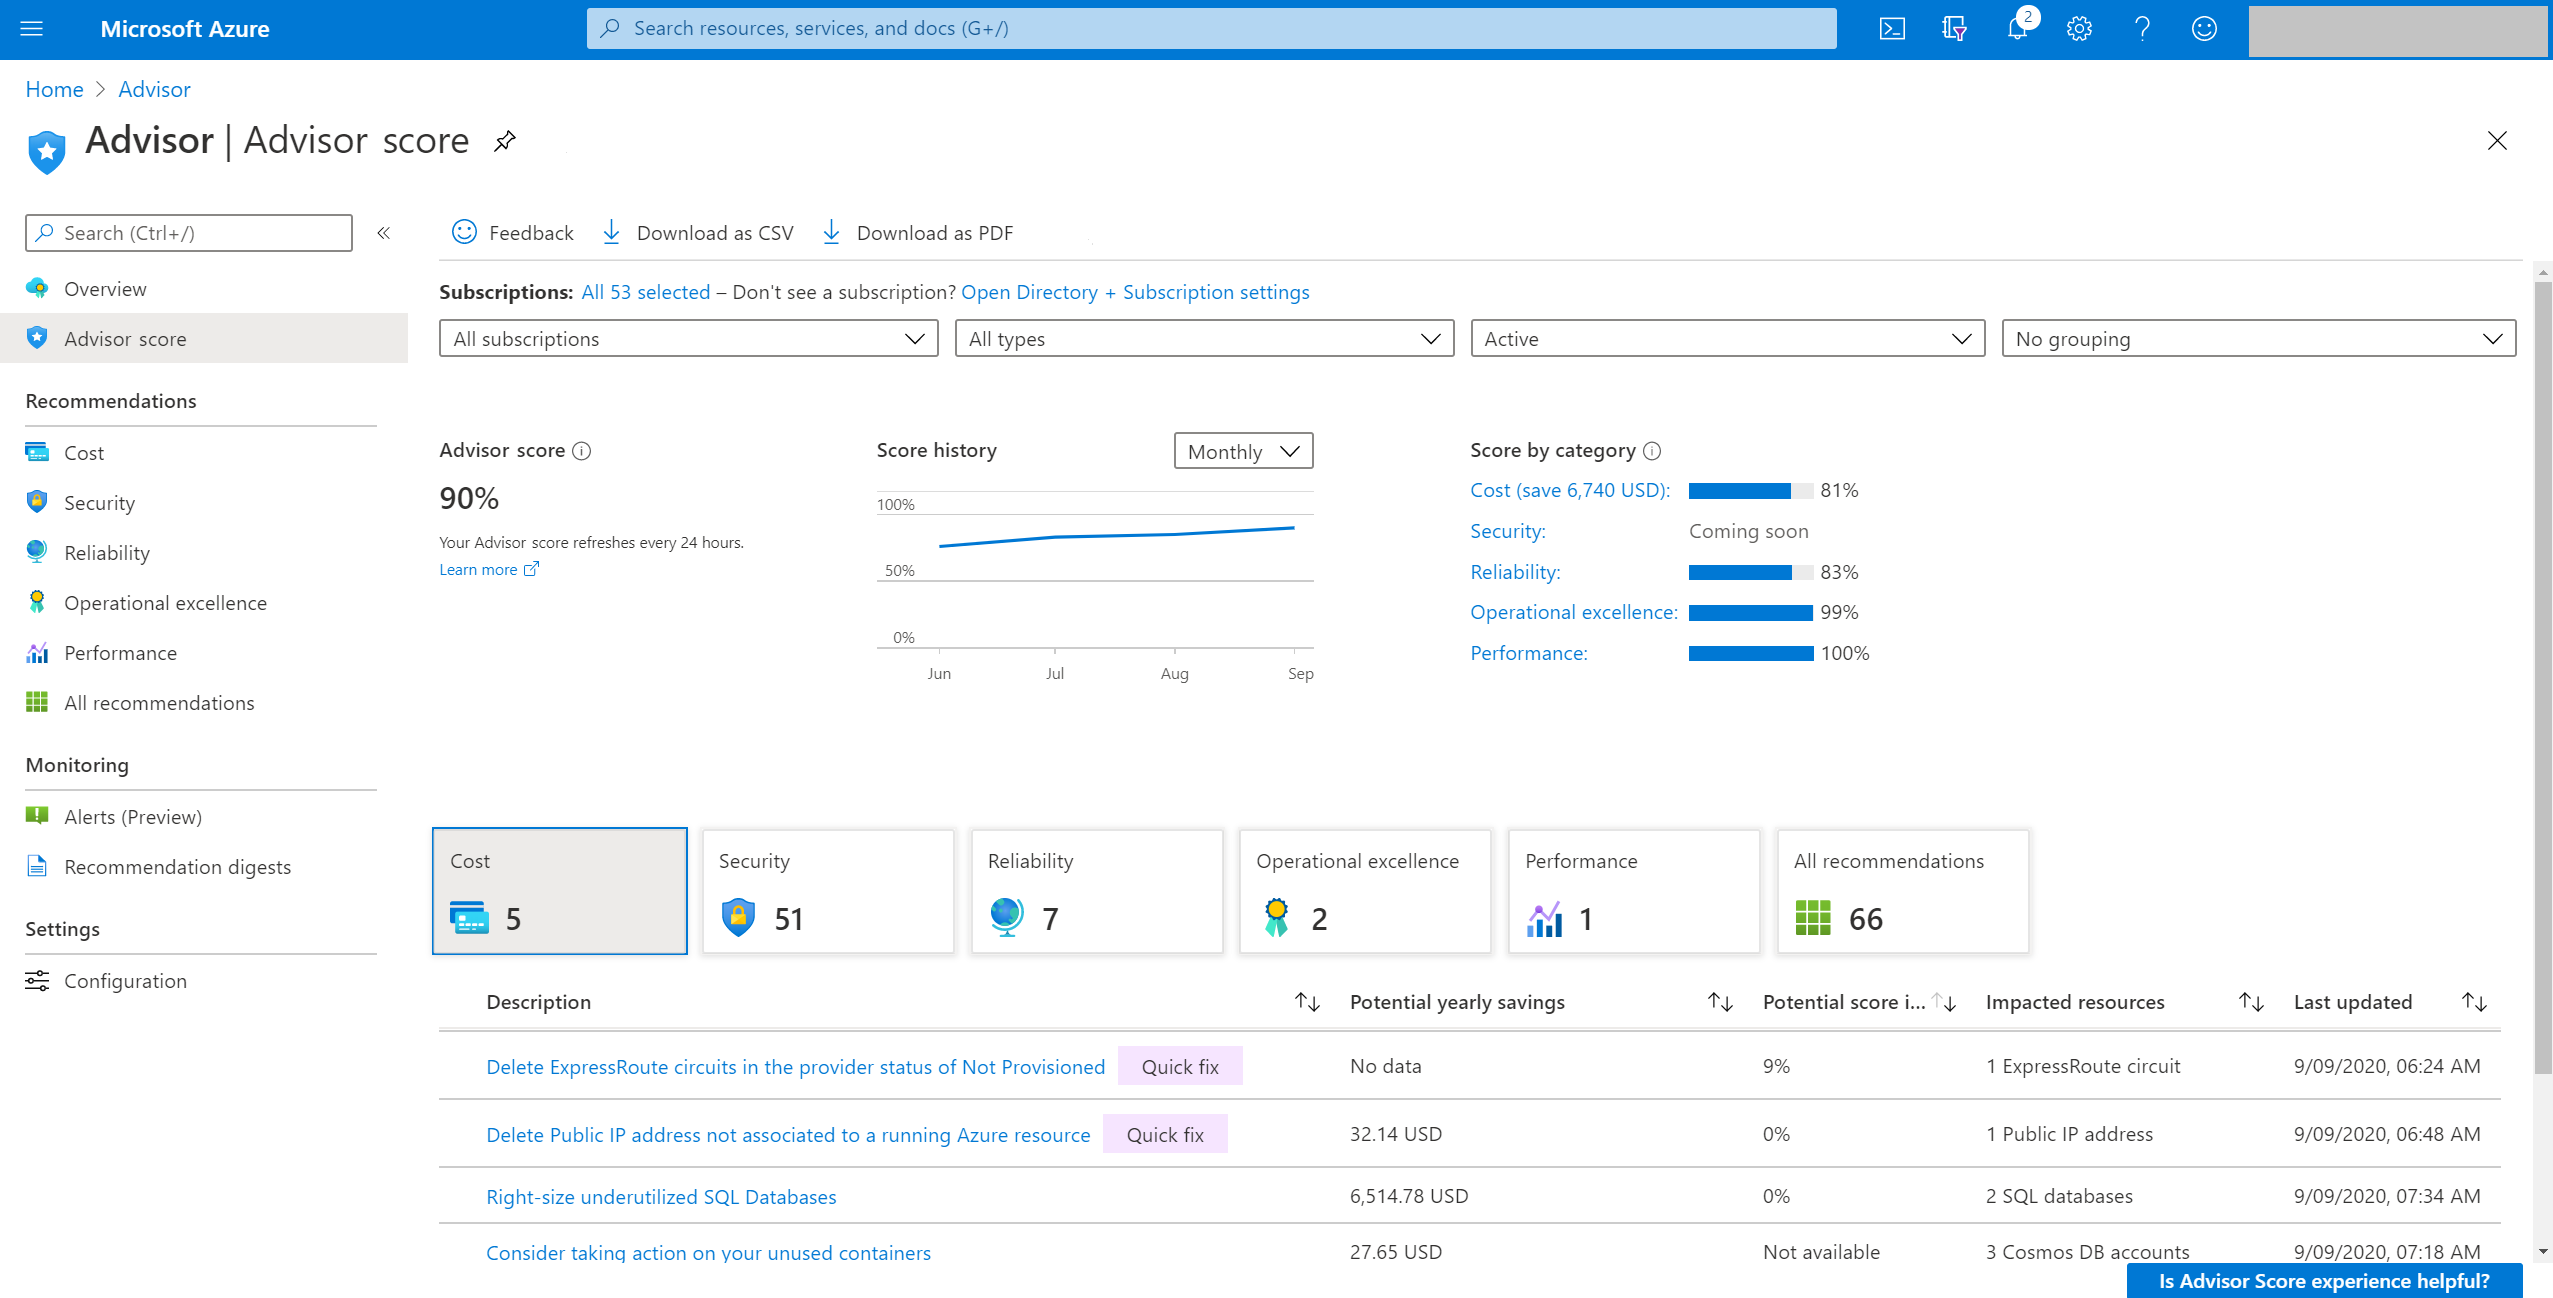 ## Interpret an Advisor score Advisor displays your overall Advisor score and a breakdown for Advisor categories, in percentages. A score of 100% in any category means all your resources assessed by Advisor follow the best practices that Advisor recommends. On the other end of the spectrum, a score of 0% means that none of your resources assessed by Advisor follow Advisor's recommendations. Using these score grains, you can easily achieve the following flow: -* **Advisor Score** helps you baseline how your workload or subscriptions are doing based on an Advisor score. You can also see the historical trends to understand what your trend is. +* **Advisor score** helps you baseline how your workload or subscriptions are doing based on an Advisor score. You can also see the historical trends to understand what your trend is. * **Score by category** for each recommendation tells you which outstanding recommendations will improve your score the most. These values reflect both the weight of the recommendation and the predicted ease of implementation. These factors help to make sure you can get the most value with your time. They also help you with prioritization. * **Category score impact** for each recommendation helps you prioritize your remediation actions for each category. -The contribution of each recommendation to your category score is shown clearly on the **Advisor Score** page in the Azure portal. You can increase each category score by the percentage point listed in the **Potential score increase** column. This value reflects both the weight of the recommendation within the category and the predicted ease of implementation to address the potentially easiest tasks. Focusing on the recommendations with the greatest score impact will help you make the most progress with time. +The contribution of each recommendation to your category score is shown clearly on the **Advisor score** page in the Azure portal. You can increase each category score by the percentage point listed in the **Potential score increase** column. This value reflects both the weight of the recommendation within the category and the predicted ease of implementation to address the potentially easiest tasks. Focusing on the recommendations with the greatest score impact will help you make the most progress with time. - + If any Advisor recommendations aren't relevant for an individual resource, you can postpone or dismiss those recommendations. They'll be excluded from the score calculation with the next refresh. Advisor will also use this input as additional feedback to improve the model. No. Your score isn't necessarily a reflection of how much you spend. Unnecessary ## Access Advisor Score -Advisor Score is in public preview in the Azure portal. In the left pane, under the **Advisor** section, see **Advisor Score**. +In the left pane, under the **Advisor** section, see **Advisor score**. ++ - ## Next steps |
| aks | Concepts Sustainable Software Engineering | https://github.com/MicrosoftDocs/azure-docs/commits/main/articles/aks/concepts-sustainable-software-engineering.md | Azure Font Door and Application Gateway help manage traffic from web application Many attacks on cloud infrastructure seek to misuse deployed resources for the attacker's direct gain leading to an unnecessary spike in usage and cost. Vulnerability scanning tools help minimize the window of opportunity for attackers and mitigate any potential malicious usage of resources. -* Follow recommendations from [Microsoft Defender for Cloud](/security/benchmark/azure/security-control-vulnerability-management) and run automated vulnerability scanning tools such as [Defender for Containers](/azure/defender-for-cloud/defender-for-containers-va-acr) to avoid unnecessary resource usage by identifying vulnerabilities in your images and minimizing the window of opportunity for attackers. +* Follow recommendations from [Microsoft Defender for Cloud](/security/benchmark/azure/security-control-vulnerability-management) and run automated vulnerability scanning tools such as [Defender for Containers](/azure/defender-for-cloud/defender-for-containers-vulnerability-assessment-azure) to avoid unnecessary resource usage by identifying vulnerabilities in your images and minimizing the window of opportunity for attackers. ## Next steps |
| aks | Configure Kube Proxy | https://github.com/MicrosoftDocs/azure-docs/commits/main/articles/aks/configure-kube-proxy.md | az aks update -g <resourceGroup> -n <clusterName> --kube-proxy-config kube-proxy ## Next steps -Learn more about utilizing the Standard Load Balancer for inbound traffic at the [AKS Standard Load Balancer documentation][load-balancer-standard.md]. +Learn more about utilizing the Standard Load Balancer for inbound traffic at the [AKS Standard Load Balancer documentation](load-balancer-standard.md). Learn more about using Internal Load Balancer for Inbound traffic at the [AKS Internal Load Balancer documentation](internal-lb.md). |
| aks | Kubernetes Action | https://github.com/MicrosoftDocs/azure-docs/commits/main/articles/aks/kubernetes-action.md | The following shows an example output from the above command. ``` In your GitHub repository, create the below secrets for your action to use. To create a secret:-1. Navigate to the repository's settings, and click *Secrets* then *Actions*. -1. For each secret, click *New Repository Secret* and enter the name and value of the secret. +1. Navigate to the repository's settings, and select **Security > Secrets and variables > Actions**. +1. For each secret, click **New Repository Secret** and enter the name and value of the secret. For more details on creating secrets, see [Encrypted Secrets][github-actions-secrets]. |
| aks | Use Pod Security Policies | https://github.com/MicrosoftDocs/azure-docs/commits/main/articles/aks/use-pod-security-policies.md | Last updated 03/25/2021 # Preview - Secure your cluster using pod security policies in Azure Kubernetes Service (AKS) -> [!WARNING] -> **The feature described in this document, pod security policy (preview), will begin [deprecation](https://kubernetes.io/blog/2021/04/06/podsecuritypolicy-deprecation-past-present-and-future/) with Kubernetes version 1.21, with its removal in version 1.25.** You can now [Migrate Pod Security Policy to Pod Security Admission Controller](https://kubernetes.io/docs/tasks/configure-pod-container/migrate-from-psp/) ahead of the deprecation. -> -> After pod security policy (preview) is deprecated, you must have already migrated to Pod Security Admission controller or disabled the feature on any existing clusters using the deprecated feature to perform future cluster upgrades and stay within Azure support. +[!Important] +The feature described in this document, pod security policy (preview), will begin deprecation with Kubernetes version 1.21, with its removal in version 1.25. AKS will mark Pod Security Policy as "Deprecated" in the AKS API on 04-01-2023. You can now Migrate Pod Security Policy to Pod Security Admission Controller ahead of the deprecation. -To improve the security of your AKS cluster, you can limit what pods can be scheduled. Pods that request resources you don't allow can't run in the AKS cluster. You define this access using pod security policies. This article shows you how to use pod security policies to limit the deployment of pods in AKS. +After pod security policy (preview) is deprecated, you must have already migrated to Pod Security Admission controller or disabled the feature on any existing clusters using the deprecated feature to perform future cluster upgrades and stay within Azure support. [!INCLUDE [preview features callout](./includes/preview/preview-callout.md)] |
| analysis-services | Analysis Services Create Bicep File | https://github.com/MicrosoftDocs/azure-docs/commits/main/articles/analysis-services/analysis-services-create-bicep-file.md | Title: Quickstart - Create an Azure Analysis Services server resource by using B description: Quickstart showing how to an Azure Analysis Services server resource by using a Bicep file. Last updated 03/08/2022 -+ tags: azure-resource-manager, bicep |
| analysis-services | Analysis Services Overview | https://github.com/MicrosoftDocs/azure-docs/commits/main/articles/analysis-services/analysis-services-overview.md | Azure Analysis Services is a fully managed platform as a service (PaaS) that pro  -**Video:** Check out [Azure Analysis Services Overview](https://sec.ch9.ms/ch9/d6dd/a1cda46b-ef03-4cea-8f11-68da23c5d6dd/AzureASoverview_high.mp4) to learn how Azure Analysis Services fits in with Microsoft's overall BI capabilities. +**Video:** Check out [Azure Analysis Services Overview](https://www.youtube.com/watch?v=m1jnG1zIvTo&t=31s) to learn how Azure Analysis Services fits in with Microsoft's overall BI capabilities. ## Get up and running quickly |
| app-service | App Service Sql Asp Github Actions | https://github.com/MicrosoftDocs/azure-docs/commits/main/articles/app-service/app-service-sql-asp-github-actions.md | In the example, replace the placeholders with your subscription ID, resource gro ## Configure the GitHub secret for authentication -In [GitHub](https://github.com/), browse your repository, select **Settings > Secrets > Add a new secret**. --To use [user-level credentials](#generate-deployment-credentials), paste the entire JSON output from the Azure CLI command into the secret's value field. Name the secret `AZURE_CREDENTIALS`. ## Add GitHub secrets for your build |
| app-service | App Service Sql Github Actions | https://github.com/MicrosoftDocs/azure-docs/commits/main/articles/app-service/app-service-sql-github-actions.md | In the example, replace the placeholders with your subscription ID, resource gro ## Configure the GitHub secret for authentication -In [GitHub](https://github.com/), browse your repository, select **Settings > Secrets > Add a new secret**. --To use [user-level credentials](#generate-deployment-credentials), paste the entire JSON output from the Azure CLI command into the secret's value field. Give the secret the name `AZURE_CREDENTIALS`. ## Add a SQL Server secret |
| app-service | Deploy Container Github Action | https://github.com/MicrosoftDocs/azure-docs/commits/main/articles/app-service/deploy-container-github-action.md | OpenID Connect is an authentication method that uses short-lived tokens. Setting # [Publish profile](#tab/publish-profile) -In [GitHub](https://github.com/), browse your repository, select **Settings > Secrets > Add a new secret**. +In [GitHub](https://github.com/), browse your repository. Select **Settings > Security > Secrets and variables > Actions > New repository secret**. To use [app-level credentials](#generate-deployment-credentials), paste the contents of the downloaded publish profile file into the secret's value field. Name the secret `AZURE_WEBAPP_PUBLISH_PROFILE`. When you configure your GitHub workflow, you use the `AZURE_WEBAPP_PUBLISH_PROFI # [Service principal](#tab/service-principal) -In [GitHub](https://github.com/), browse your repository, select **Settings > Secrets > Add a new secret**. +In [GitHub](https://github.com/), browse your repository. Select **Settings > Security > Secrets and variables > Actions > New repository secret**. To use [user-level credentials](#generate-deployment-credentials), paste the entire JSON output from the Azure CLI command into the secret's value field. Give the secret the name like `AZURE_CREDENTIALS`. When you configure the workflow file later, you use the secret for the input `cr You need to provide your application's **Client ID**, **Tenant ID** and **Subscription ID** to the login action. These values can either be provided directly in the workflow or can be stored in GitHub secrets and referenced in your workflow. Saving the values as GitHub secrets is the more secure option. -1. Open your GitHub repository and go to **Settings**. +1. Open your GitHub repository and go to **Settings > Security > Secrets and variables > Actions > New repository secret**. 1. Create secrets for `AZURE_CLIENT_ID`, `AZURE_TENANT_ID`, and `AZURE_SUBSCRIPTION_ID`. Use these values from your Active Directory application for your GitHub secrets. You can find these values in the Azure portal by searching for your active directory application. |
| app-service | Deploy Github Actions | https://github.com/MicrosoftDocs/azure-docs/commits/main/articles/app-service/deploy-github-actions.md | To learn how to create a Create an active directory application, service princip # [Publish profile](#tab/applevel) -In [GitHub](https://github.com/), browse your repository, select **Settings > Secrets > Add a new secret**. +In [GitHub](https://github.com/), browse your repository. Select **Settings > Security > Secrets and variables > Actions > New repository secret**. To use [app-level credentials](#generate-deployment-credentials), paste the contents of the downloaded publish profile file into the secret's value field. Name the secret `AZURE_WEBAPP_PUBLISH_PROFILE`. When you configure your GitHub workflow, you use the `AZURE_WEBAPP_PUBLISH_PROFI # [Service principal](#tab/userlevel) -In [GitHub](https://github.com/), browse your repository, select **Settings > Secrets > Add a new secret**. +In [GitHub](https://github.com/), browse your repository. Select **Settings > Security > Secrets and variables > Actions > New repository secret**. To use [user-level credentials](#generate-deployment-credentials), paste the entire JSON output from the Azure CLI command into the secret's value field. Give the secret the name `AZURE_CREDENTIALS`. When you configure the workflow file later, you use the secret for the input `cr You need to provide your application's **Client ID**, **Tenant ID** and **Subscription ID** to the login action. These values can either be provided directly in the workflow or can be stored in GitHub secrets and referenced in your workflow. Saving the values as GitHub secrets is the more secure option. -1. Open your GitHub repository and go to **Settings**. +1. Open your GitHub repository and go to **Settings > Security > Secrets and variables > Actions > New repository secret**. 1. Create secrets for `AZURE_CLIENT_ID`, `AZURE_TENANT_ID`, and `AZURE_SUBSCRIPTION_ID`. Use these values from your Active Directory application for your GitHub secrets: |
| app-service | Tutorial Custom Container | https://github.com/MicrosoftDocs/azure-docs/commits/main/articles/app-service/tutorial-custom-container.md | To deploy a container to Azure App Service, you first create a web app on App Se An App Service plan corresponds to the virtual machine that hosts the web app. By default, the previous command uses an inexpensive [B1 pricing tier](https://azure.microsoft.com/pricing/details/app-service/linux/) that is free for the first month. You can control the tier with the `--sku` parameter. -1. Create the web app with the [`az webpp create`](/cli/azure/webapp#az-webapp-create) command: +1. Create the web app with the [`az webapp create`](/cli/azure/webapp#az-webapp-create) command: ```azurecli-interactive az webapp create --resource-group myResourceGroup --plan myAppServicePlan --name <app-name> --deployment-container-image-name <registry-name>.azurecr.io/appsvc-tutorial-custom-image:latest |
| application-gateway | Ingress Controller Install New | https://github.com/MicrosoftDocs/azure-docs/commits/main/articles/application-gateway/ingress-controller-install-new.md | This step will add the following components to your subscription: wget https://raw.githubusercontent.com/Azure/application-gateway-kubernetes-ingress/master/deploy/azuredeploy.json -O template.json ``` -1. Deploy the Azure Resource Manager template using `az cli`. The deployment might take up to 5 minutes. +1. Deploy the Azure Resource Manager template using the Azure CLI. The deployment might take up to 5 minutes. + ```azurecli resourceGroupName="MyResourceGroup" location="westus2" |
| applied-ai-services | Concept Read | https://github.com/MicrosoftDocs/azure-docs/commits/main/articles/applied-ai-services/form-recognizer/concept-read.md | recommendations: false Optical Character Recognition (OCR) for documents is optimized for large text-heavy documents in multiple file formats and global languages. It should include features like higher-resolution scanning of document images for better handling of smaller and dense text, paragraphs detection, handling fillable forms, and advanced forms and document scenarios like single character boxes and accurate extraction of key fields commonly found in invoices, receipts, and other prebuilt scenarios. -## Form Recognizer Read model +## OCR in Form Recognizer - Read model Form Recognizer v3.0ΓÇÖs Read Optical Character Recognition (OCR) model runs at a higher resolution than Computer Vision Read and extracts print and handwritten text from PDF documents and scanned images. It also includes preview support for extracting text from Microsoft Word, Excel, PowerPoint, and HTML documents. It detects paragraphs, text lines, words, locations, and languages, and is the underlying OCR engine for other Form Recognizer models like Layout, General Document, Invoice, Receipt, Identity (ID) document, and other prebuilt models, as well as custom models. -## Supported document types +## OCR supported document types > [!NOTE] > Try extracting text from forms and documents using the Form Recognizer Studio. Y ## Supported languages and locales -Form Recognizer v3.0 version supports several languages for the read model. *See* our [Language Support](language-support.md) for a complete list of supported handwritten and printed languages. +Form Recognizer v3.0 version supports several languages for the read OCR model. *See* our [Language Support](language-support.md) for a complete list of supported handwritten and printed languages. ## Data detection and extraction |
| applied-ai-services | Overview | https://github.com/MicrosoftDocs/azure-docs/commits/main/articles/applied-ai-services/form-recognizer/overview.md | Title: Intelligent document processing - Form Recognizer + Title: Form Recognizer overview -description: Machine-learning based OCR and document understanding service to automate extraction of text, table and structure, and key-value pairs from your forms and documents. +description: Machine-learning based OCR and intelligent document processing understanding service to automate extraction of text, table and structure, and key-value pairs from your forms and documents. Previously updated : 10/20/2022 Last updated : 10/31/2022 recommendations: false recommendations: false <!-- markdownlint-disable MD024 --> <!-- markdownlint-disable MD036 --> -# What is Intelligent Document Processing? --Intelligent Document Processing (IDP) refers to capturing, transforming, and processing data from documents (e.g., PDF, or scanned documents including Microsoft Office and HTML documents). It typically uses advanced machine-learning based technologies like computer vision, Optical Character Recognition (OCR), document layout analysis, and Natural Language Processing (NLP) to extract meaningful information, process and integrate with other systems. --IDP solutions can extract data from structured documents with pre-defined layouts like a tax form, unstructured or free-form documents like a contract, and semi-structured documents. They have a wide variety of benefits spanning knowledge mining, business process automation, and industry-specific applications. Examples include invoice processing, medical claims processing, and contracts workflow automation. --## What is Azure Form Recognizer? +# What is Azure Form Recognizer? ::: moniker range="form-recog-3.0.0" [!INCLUDE [applies to v3.0](includes/applies-to-v3-0.md)] |
| applied-ai-services | Tutorial Azure Function | https://github.com/MicrosoftDocs/azure-docs/commits/main/articles/applied-ai-services/form-recognizer/tutorial-azure-function.md | Next, you'll add your own code to the Python script to call the Form Recognizer import time from requests import get, post import os+ import requests from collections import OrderedDict import numpy as np import pandas as pd Next, you'll add your own code to the Python script to call the Form Recognizer if resp.status_code != 202: print("POST analyze failed:\n%s" % resp.text)- quit() + quit() print("POST analyze succeeded:\n%s" % resp.headers) get_url = resp.headers["operation-location"] Next, you'll add your own code to the Python script to call the Form Recognizer results = resp_json else: print("GET Layout results failed:\n%s")- quit() + quit() results = resp_json In this tutorial, you learned how to use an Azure Function written in Python to > [Microsoft Power BI](https://powerbi.microsoft.com/integrations/azure-table-storage/) * [What is Form Recognizer?](overview.md)-* Learn more about the [layout model](concept-layout.md) +* Learn more about the [layout model](concept-layout.md) |
| automation | Automation Child Runbooks | https://github.com/MicrosoftDocs/azure-docs/commits/main/articles/automation/automation-child-runbooks.md | Title: Create modular runbooks in Azure Automation description: This article explains how to create a runbook that another runbook calls. Previously updated : 10/29/2021 Last updated : 10/16/2022 #Customer intent: As a developer, I want create modular runbooks so that I can be more efficient. Currently, PowerShell 5.1 is supported and only certain runbook types can call e * The PowerShell types and the PowerShell Workflow types can't call each other inline. They must use `Start-AzAutomationRunbook`. > [!IMPORTANT]-> Executing child scripts using `.\child-runbook.ps1` is not supported in PowerShell 7.1 preview. +> Executing child scripts using `.\child-runbook.ps1` is not supported in PowerShell 7.1 and PowerShell 7.2 (preview). **Workaround**: Use `Start-AutomationRunbook` (internal cmdlet) or `Start-AzAutomationRunbook` (from *Az.Automation* module) to start another runbook from parent runbook. The publish order of runbooks matters only for PowerShell Workflow and graphical PowerShell Workflow runbooks. |
| automation | Automation Powershell Workflow | https://github.com/MicrosoftDocs/azure-docs/commits/main/articles/automation/automation-powershell-workflow.md | Title: Learn PowerShell Workflow for Azure Automation description: This article teaches you the differences between PowerShell Workflow and PowerShell and concepts applicable to Automation runbooks. Previously updated : 10/29/2018 Last updated : 10/16/2022 Runbooks in Azure Automation are implemented as Windows PowerShell workflows, Wi While a workflow is written with Windows PowerShell syntax and launched by Windows PowerShell, it is processed by Windows Workflow Foundation. The benefits of a workflow over a normal script include simultaneous performance of an action against multiple devices and automatic recovery from failures. > [!NOTE]-> This article is applicable for PowerShell 5.1; PowerShell 7.1 (preview) does not support workflows. -> A PowerShell Workflow script is very similar to a Windows PowerShell script but has some significant differences that can be confusing to a new user. Therefore, we recommend that you write your runbooks using PowerShell Workflow only if you need to use [checkpoints](#use-checkpoints-in-a-workflow). +> This article is applicable for PowerShell 5.1; PowerShell 7.1 (preview) and PowerShell 7.2 (preview) does not support workflows. A PowerShell Workflow script is very similar to a Windows PowerShell script but has some significant differences that can be confusing to a new user. Therefore, we recommend that you write your runbooks using PowerShell Workflow only if you need to use [checkpoints](#use-checkpoints-in-a-workflow). For complete details of the topics in this article, see [Getting Started with Windows PowerShell Workflow](/previous-versions/windows/it-pro/windows-server-2012-R2-and-2012/jj134242(v=ws.11)). |
| automation | Automation Runbook Gallery | https://github.com/MicrosoftDocs/azure-docs/commits/main/articles/automation/automation-runbook-gallery.md | Title: Use Azure Automation runbooks and modules in PowerShell Gallery description: This article tells how to use runbooks and modules from Microsoft GitHub repos and the PowerShell Gallery. Previously updated : 10/29/2021 Last updated : 10/27/2022 # Use existing runbooks and modules |
| automation | Automation Runbook Types | https://github.com/MicrosoftDocs/azure-docs/commits/main/articles/automation/automation-runbook-types.md | Title: Azure Automation runbook types description: This article describes the types of runbooks that you can use in Azure Automation and considerations for determining which type to use. Previously updated : 11/17/2021-- Last updated : 10/28/2022++ # Azure Automation runbook types The Azure Automation Process Automation feature supports several types of runboo | Type | Description | |: |: |+| [PowerShell](#powershell-runbooks) |Textual runbook based on Windows PowerShell scripting. The currently supported versions are: PowerShell 5.1 (GA), PowerShell 7.1 (preview), and PowerShell 7.2 (preview).| +| [PowerShell Workflow](#powershell-workflow-runbooks)|Textual runbook based on Windows PowerShell Workflow scripting. | +| [Python](#python-runbooks) |Textual runbook based on Python scripting. The currently supported versions are: Python 2.7 (GA), Python 3.8 (preview), and Python 3.10 (preview). | | [Graphical](#graphical-runbooks)|Graphical runbook based on Windows PowerShell and created and edited completely in the graphical editor in Azure portal. | | [Graphical PowerShell Workflow](#graphical-runbooks)|Graphical runbook based on Windows PowerShell Workflow and created and edited completely in the graphical editor in Azure portal. |-| [PowerShell](#powershell-runbooks) |Textual runbook based on Windows PowerShell scripting. | -| [PowerShell Workflow](#powershell-workflow-runbooks)|Textual runbook based on Windows PowerShell Workflow scripting. | -| [Python](#python-runbooks) |Textual runbook based on Python scripting. | Take into account the following considerations when determining which type to use for a particular runbook. * You can't convert runbooks from graphical to text type, or the other way around. * There are limitations when using runbooks of different types as child runbooks. For more information, see [Child runbooks in Azure Automation](automation-child-runbooks.md). -## Graphical runbooks --You can create and edit graphical and graphical PowerShell Workflow runbooks using the graphical editor in the Azure portal. However, you can't create or edit this type of runbook with another tool. Main features of graphical runbooks: --* Exported to files in your Automation account and then imported into another Automation account. -* Generate PowerShell code. -* Converted to or from graphical PowerShell Workflow runbooks during import. --### Advantages --* Use visual insert-link-configure authoring model. -* Focus on how data flows through the process. -* Visually represent management processes. -* Include other runbooks as child runbooks to create high-level workflows. -* Encourage modular programming. --### Limitations --* Can't create or edit outside the Azure portal. -* Might require a code activity containing PowerShell code to execute complex logic. -* Can't convert to one of the [text formats](automation-runbook-types.md), nor can you convert a text runbook to graphical format. -* Can't view or directly edit PowerShell code that the graphical workflow creates. You can view the code you create in any code activities. -* Can't run runbooks on a Linux Hybrid Runbook Worker. See [Automate resources in your datacenter or cloud by using Hybrid Runbook Worker](automation-hybrid-runbook-worker.md). -* Graphical runbooks can't be digitally signed. ## PowerShell runbooks PowerShell runbooks are based on Windows PowerShell. You directly edit the code of the runbook using the text editor in the Azure portal. You can also use any offline text editor and [import the runbook](manage-runbooks.md) into Azure Automation. --The PowerShell version is determined by the **Runtime version** specified (that is version 7.1 preview or 5.1). The Azure Automation service supports the latest PowerShell runtime. +The PowerShell version is determined by the **Runtime version** specified (that is version 7.2 (preview), 7.1 (preview) or 5.1). The Azure Automation service supports the latest PowerShell runtime. -The same Azure sandbox and Hybrid Runbook Worker can execute **PowerShell 5.1** and **PowerShell 7.1** runbooks side by side. +The same Azure sandbox and Hybrid Runbook Worker can execute **PowerShell 5.1** and **PowerShell 7.1 (preview)** runbooks side by side. > [!NOTE]-> At the time of runbook execution, if you select **Runtime Version** as **7.1 (preview)**, PowerShell modules targeting 7.1 runtime version is used and if you select **Runtime Version** as **5.1**, PowerShell modules targeting 5.1 runtime version are used. +> - Currently, PowerShell 7.2 (preview) runtime version is supported in five regions for Cloud jobs only: West Central US, East US, South Africa North, North Europe, Australia Southeast +> - At the time of runbook execution, if you select **Runtime Version** as **7.1 (preview)**, PowerShell modules targeting 7.1 (preview) runtime version are used and if you select **Runtime Version** as **5.1**, PowerShell modules targeting 5.1 runtime version are used. This applies for PowerShell 7.2 (preview) modules and runbooks. Ensure that you select the right Runtime Version for modules. For example : if you are executing a runbook for a SharePoint automation scenari :::image type="content" source="./media/automation-runbook-types/runbook-types.png" alt-text="runbook Types."::: +> [!NOTE] +> Currently, PowerShell 5.1, PowerShell 7.1 (preview) and PowerShell 7.2 (preview) are supported. -Currently, PowerShell 5.1 and 7.1 (preview) are supported. +### Advantages +- Implement all complex logic with PowerShell code without the other complexities of PowerShell Workflow. +- Start faster than PowerShell Workflow runbooks, since they don't need to be compiled before running. +- Run in Azure and on Hybrid Runbook Workers for both Windows and Linux. -### Advantages +### Limitations and Known issues -* Implement all complex logic with PowerShell code without the other complexities of PowerShell Workflow. -* Start faster than PowerShell Workflow runbooks, since they don't need to be compiled before running. -* Run in Azure and on Hybrid Runbook Workers for both Windows and Linux. +The following are the current limitations and known issues with PowerShell runbooks: -### Limitations - version 5.1 +# [PowerShell 5.1](#tab/lps51) -* You must be familiar with PowerShell scripting. -* Runbooks can't use [parallel processing](automation-powershell-workflow.md#use-parallel-processing) to execute multiple actions in parallel. -* Runbooks can't use [checkpoints](automation-powershell-workflow.md#use-checkpoints-in-a-workflow) to resume runbook if there's an error. -* You can include only PowerShell, PowerShell Workflow runbooks, and graphical runbooks as child runbooks by using the [Start-AzAutomationRunbook](/powershell/module/az.automation/start-azautomationrunbook) cmdlet, which creates a new job. -* Runbooks can't use the PowerShell [#Requires](/powershell/module/microsoft.powershell.core/about/about_requires) statement, it is not supported in Azure sandbox or on Hybrid Runbook Workers and might cause the job to fail. +**Limitations** -### Known issues - version 5.1 +- You must be familiar with PowerShell scripting. +- Runbooks can't use [parallel processing](automation-powershell-workflow.md#use-parallel-processing) to execute multiple actions in parallel. +- Runbooks can't use [checkpoints](automation-powershell-workflow.md#use-checkpoints-in-a-workflow) to resume runbook if there's an error. +- You can include only PowerShell, PowerShell Workflow runbooks, and graphical runbooks as child runbooks by using the [Start-AzAutomationRunbook](/powershell/module/az.automation/start-azautomationrunbook) cmdlet, which creates a new job. +- Runbooks can't use the PowerShell [#Requires](/powershell/module/microsoft.powershell.core/about/about_requires) statement, it is not supported in Azure sandbox or on Hybrid Runbook Workers and might cause the job to fail. -The following are current known issues with PowerShell runbooks: +**Known issues** * PowerShell runbooks can't retrieve an unencrypted [variable asset](./shared-resources/variables.md) with a null value. * PowerShell runbooks can't retrieve a variable asset with `*~*` in the name. * A [Get-Process](/powershell/module/microsoft.powershell.management/get-process) operation in a loop in a PowerShell runbook can crash after about 80 iterations. * A PowerShell runbook can fail if it tries to write a large amount of data to the output stream at once. You can typically work around this issue by having the runbook output just the information needed to work with large objects. For example, instead of using `Get-Process` with no limitations, you can have the cmdlet output just the required parameters as in `Get-Process | Select ProcessName, CPU`. -### Limitations - 7.1 (preview) -- The Azure Automation internal PowerShell cmdlets are not supported on a Linux Hybrid Runbook Worker. You must import the `automationassets` module at the beginning of your Python runbook to access the Automation account shared resources (assets) functions. -- For the PowerShell 7 runtime version, the module activities are not extracted for the imported modules.-- *PSCredential* runbook parameter type is not supported in PowerShell 7 runtime version.-- PowerShell 7.x does not support workflows. See [this](/powershell/scripting/whats-new/differences-from-windows-powershell?view=powershell-7.1#powershell-workflow&preserve-view=true) for more details.-- PowerShell 7.x currently does not support signed runbooks.-- Source control integration doesn't support PowerShell 7.1. Also, PowerShell 7.1 runbooks in source control gets created in Automation account as Runtime 5.1.+# [PowerShell 7.1 (preview)](#tab/lps71) ++**Limitations** -### Known Issues - 7.1 (preview) +- You must be familiar with PowerShell scripting. +- The Azure Automation internal PowerShell cmdlets are not supported on a Linux Hybrid Runbook Worker. You must import the `automationassets` module at the beginning of your Python runbook to access the Automation account shared resources (assets) functions. +- For the PowerShell 7 runtime version, the module activities are not extracted for the imported modules. +- *PSCredential* runbook parameter type is not supported in PowerShell 7 runtime version. +- PowerShell 7.x does not support workflows. See [this](/powershell/scripting/whats-new/differences-from-windows-powershell?view=powershell-7.1#powershell-workflow&preserve-view=true) for more details. +- PowerShell 7.x currently does not support signed runbooks. +- Source control integration doesn't support PowerShell 7.1 (preview) Also, PowerShell 7.1 (preview) runbooks in source control gets created in Automation account as Runtime 5.1. ++**Known issues** - Executing child scripts using `.\child-runbook.ps1` is not supported in this preview. **Workaround**: Use `Start-AutomationRunbook` (internal cmdlet) or `Start-AzAutomationRunbook` (from *Az.Automation* module) to start another runbook from parent runbook. The following are current known issues with PowerShell runbooks: - When you import a PowerShell 7.1 module that’s dependent on other modules, you may find that the import button is gray even when PowerShell 7.1 version of the dependent module is installed. For example, Az.Compute version 4.20.0, has a dependency on Az.Accounts being >= 2.6.0. This issue occurs when an equivalent dependent module in PowerShell 5.1 doesn't meet the version requirements. For example, 5.1 version of Az.Accounts was < 2.6.0. - When you start PowerShell 7 runbook using the webhook, it auto-converts the webhook input parameter to an invalid JSON. ++# [PowerShell 7.2 (preview)](#tab/lps72) ++**Limitations** ++> [!NOTE] +> Currently, PowerShell 7.2 (preview) runtime version is supported in five regions for Cloud jobs only: West Central US, East US, South Africa North, North Europe, and Australia Southeast. ++- You must be familiar with PowerShell scripting. +- For the PowerShell 7 runtime version, the module activities are not extracted for the imported modules. +- *PSCredential* runbook parameter type is not supported in PowerShell 7 runtime version. +- PowerShell 7.x does not support workflows. See [this](/powershell/scripting/whats-new/differences-from-windows-powershell?view=powershell-7.1#powershell-workflow&preserve-view=true) for more details. +- PowerShell 7.x currently does not support signed runbooks. +- Source control integration doesn't support PowerShell 7.2 (preview). Also, PowerShell 7.2 (preview) runbooks in source control gets created in Automation account as Runtime 5.1. +- Currently, only cloud jobs are supported for PowerShell 7.2 (preview) runtime versions. +- Logging job operations to the Log Analytics workspace through linked workspace or diagnostics settings are not supported. +- Currently, PowerShell 7.2 (preview) runbooks are only supported from Azure portal. Rest API and PowerShell is not supported. +- Az module 8.3.0 is installed by default and cannot be managed at the automation account level. Use custom modules to override the Az module to the desired version. +- The imported PowerShell 7.2 (preview) module would be validated during job execution. Ensure that all dependencies for the selected module are also imported for successful job execution. ++**Known issues** ++- Executing child scripts using `.\child-runbook.ps1` is not supported in this preview. + **Workaround**: Use `Start-AutomationRunbook` (internal cmdlet) or `Start-AzAutomationRunbook` (from *Az.Automation* module) to start another runbook from parent runbook. +- Runbook properties defining logging preference is not supported in PowerShell 7 runtime. + **Workaround**: Explicitly set the preference at the start of the runbook as below - + ``` + $VerbosePreference = "Continue" ++ $ProgressPreference = "Continue" + ``` ++ ## PowerShell Workflow runbooks PowerShell Workflow runbooks are text runbooks based on [Windows PowerShell Workflow](automation-powershell-workflow.md). You directly edit the code of the runbook using the text editor in the Azure portal. You can also use any offline text editor and [import the runbook](manage-runbooks.md) into Azure Automation. ->[!NOTE] -> PowerShell 7.1 does not support workflow runbooks. +> [!NOTE] +> PowerShell 7.1 (preview) and PowerShell 7.2 (preview) do not support Workflow runbooks. ### Advantages PowerShell Workflow runbooks are text runbooks based on [Windows PowerShell Work ## Python runbooks -Python runbooks compile under Python 2 and Python 3. Python 3 runbooks are currently in preview. You can directly edit the code of the runbook using the text editor in the Azure portal. You can also use an offline text editor and [import the runbook](manage-runbooks.md) into Azure Automation. --Python 3 runbooks are supported in the following Azure global infrastructures: +Python runbooks compile under Python 2, Python 3.8 (preview) and Python 3.10 (preview). You can directly edit the code of the runbook using the text editor in the Azure portal. You can also use an offline text editor and [import the runbook](manage-runbooks.md) into Azure Automation. -* Azure global -* Azure Government +* Python 3.10 (preview) runbooks are currently supported in five regions for cloud jobs only: + - West Central US + - East US + - South Africa North + - North Europe + - Australia Southeast ### Advantages -* Use the robust Python libraries. -* Can run in Azure or on Hybrid Runbook Workers. -* For Python 2, Windows Hybrid Runbook Workers are supported with [python 2.7](https://www.python.org/downloads/release/latest/python2) installed. -* For Python 3 Cloud Jobs, Python 3.8 version is supported. Scripts and packages from any 3.x version might work if the code is compatible across different versions. -* For Python 3 Hybrid jobs on Windows machines, you can choose to install any 3.x version you may want to use. -* For Python 3 Hybrid jobs on Linux machines, we depend on the Python 3 version installed on the machine to run DSC OMSConfig and the Linux Hybrid Worker. Different versions should work if there are no breaking changes in method signatures or contracts between versions of Python 3. +> [!NOTE] +> Importing a Python package may take several minutes. + +- Uses the robust Python libraries. +- Can run in Azure or on Hybrid Runbook Workers. +- For Python 2, Windows Hybrid Runbook Workers are supported with [python 2.7](https://www.python.org/downloads/release/latest/python2) installed. +- For Python 3.8 (preview) Cloud Jobs, Python 3.8 (preview) version is supported. Scripts and packages from any 3.x version might work if the code is compatible across different versions. +- For Python 3.8 (preview) Hybrid jobs on Windows machines, you can choose to install any 3.x version you may want to use. +- For Python 3.8 (preview) Hybrid jobs on Linux machines, we depend on the Python 3 version installed on the machine to run DSC OMSConfig and the Linux Hybrid Worker. Different versions should work if there are no breaking changes in method signatures or contracts between versions of Python 3. + ### Limitations -* You must be familiar with Python scripting. -* To use third-party libraries, you must [import the packages](python-packages.md) into the Automation account. -* Using **Start-AutomationRunbook** cmdlet in PowerShell/PowerShell Workflow to start a Python 3 runbook (preview) doesn't work. You can use **Start-AzAutomationRunbook** cmdlet from Az.Automation module or **Start-AzureRmAutomationRunbook** cmdlet from AzureRm.Automation module to work around this limitation.  -* Azure Automation doesn't support **sys.stderr**. -* The Python **automationassets** package is not available on pypi.org, so it's not available for import onto a Windows machine. +Following are the limitations of Python runbooks ++# [Python 2.7](#tab/py27) ++- You must be familiar with Python scripting. +- For Python 2.7.12 modules use wheel files cp27-amd6. +- To use third-party libraries, you must [import the packages](python-packages.md) into the Automation account. +- Azure Automation doesn't support **sys.stderr**. +- The Python **automationassets** package is not available on pypi.org, so it's not available for import onto a Windows machine. +++# [Python 3.8 (preview)](#tab/py38) ++- You must be familiar with Python scripting. +- For Python 3.8 (preview) modules, use wheel files targeting cp38-amd64. +- To use third-party libraries, you must [import the packages](python-packages.md) into the Automation account. +- Using **Start-AutomationRunbook** cmdlet in PowerShell/PowerShell Workflow to start a Python 3.8 (preview) runbook (preview) doesn't work. You can use **Start-AzAutomationRunbook** cmdlet from Az.Automation module or **Start-AzureRmAutomationRunbook** cmdlet from AzureRm.Automation module to work around this limitation.  +- Azure Automation doesn't support **sys.stderr**. +- The Python **automationassets** package is not available on pypi.org, so it's not available for import onto a Windows machine. ++# [Python 3.10 (preview)](#tab/py10) ++**Limitations** ++- For Python 3.10 (preview) modules, currently, only the wheel files targeting cp310 Linux OS are supported. [Learn more](./python-3-packages.md) +- Currently, only cloud jobs are supported for Python 3.10 (preview) runtime versions. +- Custom packages for Python 3.10 (preview) are only validated during job runtime. Job is expected to fail if the package is not compatible in the runtime or if required dependencies of packages are not imported into automation account. +- Currently, Python 3.10 (preview) runbooks are only supported from Azure portal. Rest API and PowerShell is not supported. ++ ### Multiple Python versions -For a Windows Runbook Worker, when running a Python 2 runbook it looks for the environment variable `PYTHON_2_PATH` first and validates whether it points to a valid executable file. For example, if the installation folder is `C:\Python2`, it would check if `C:\Python2\python.exe` is a valid path. If not found, then it looks for the `PATH` environment variable to do a similar check. +It is applicable for Windows Hybrid workers. For a Windows Runbook Worker, when running a Python 2 runbook it looks for the environment variable `PYTHON_2_PATH` first and validates whether it points to a valid executable file. For example, if the installation folder is `C:\Python2`, it would check if `C:\Python2\python.exe` is a valid path. If not found, then it looks for the `PATH` environment variable to do a similar check. For Python 3, it looks for the `PYTHON_3_PATH` env variable first and then falls back to the `PATH` environment variable. When using only one version of Python, you can add the installation path to the ### Known issues -For cloud jobs, Python 3 jobs sometimes fail with an exception message `invalid interpreter executable path`. You might see this exception if the job is delayed, starting more than 10 minutes, or using **Start-AutomationRunbook** to start Python 3 runbooks. If the job is delayed, restarting the runbook should be sufficient. Hybrid jobs should work without any issue if using the following steps: +For cloud jobs, Python 3.8 jobs sometimes fail with an exception message `invalid interpreter executable path`. You might see this exception if the job is delayed, starting more than 10 minutes, or using **Start-AutomationRunbook** to start Python 3.8 runbooks. If the job is delayed, restarting the runbook should be sufficient. Hybrid jobs should work without any issue if using the following steps: 1. Create a new environment variable called `PYTHON_3_PATH` and specify the installation folder. For example, if the installation folder is `C:\Python3`, then this path needs to be added to the variable. 1. Restart the machine after setting the environment variable. +## Graphical runbooks ++You can create and edit graphical and graphical PowerShell Workflow runbooks using the graphical editor in the Azure portal. However, you can't create or edit this type of runbook with another tool. Main features of graphical runbooks: ++* Exported to files in your Automation account and then imported into another Automation account. +* Generate PowerShell code. +* Converted to or from graphical PowerShell Workflow runbooks during import. ++### Advantages ++* Use visual insert-link-configure authoring model. +* Focus on how data flows through the process. +* Visually represent management processes. +* Include other runbooks as child runbooks to create high-level workflows. +* Encourage modular programming. ++### Limitations ++* Can't create or edit outside the Azure portal. +* Might require a code activity containing PowerShell code to execute complex logic. +* Can't convert to one of the [text formats](automation-runbook-types.md), nor can you convert a text runbook to graphical format. +* Can't view or directly edit PowerShell code that the graphical workflow creates. You can view the code you create in any code activities. +* Can't run runbooks on a Linux Hybrid Runbook Worker. See [Automate resources in your datacenter or cloud by using Hybrid Runbook Worker](automation-hybrid-runbook-worker.md). +* Graphical runbooks can't be digitally signed. ++ ## Next steps * To learn about PowerShell runbooks, see [Tutorial: Create a PowerShell runbook](./learn/powershell-runbook-managed-identity.md). |
| automation | Automation Webhooks | https://github.com/MicrosoftDocs/azure-docs/commits/main/articles/automation/automation-webhooks.md | Consider the following strategies: ## Create a webhook > [!NOTE]-> When you use the webhook with PowerShell 7 runbook, it auto-converts the webhook input parameter to an invalid JSON. For more information, see [Known issues - 7.1 (preview)](./automation-runbook-types.md#known-issues71-preview). We recommend that you use the webhook with PowerShell 5 runbook. +> When you use the webhook with PowerShell 7 runbook, it auto-converts the webhook input parameter to an invalid JSON. For more information, see [Known issues - PowerShell 7.1 (preview)](./automation-runbook-types.md#limitations-and-known-issues). We recommend that you use the webhook with PowerShell 5 runbook. 1. Create PowerShell runbook with the following code: |
| automation | Automation Tutorial Runbook Textual | https://github.com/MicrosoftDocs/azure-docs/commits/main/articles/automation/learn/automation-tutorial-runbook-textual.md | Title: Tutorial - Create a PowerShell Workflow runbook in Azure Automation description: This tutorial teaches you to create, test, and publish a PowerShell Workflow runbook. Previously updated : 10/28/2021 Last updated : 10/16/2022 #Customer intent: As a developer, I want use workflow runbooks so that I can automate the parallel starting of VMs.-> This article is applicable for PowerShell 5.1; PowerShell 7.1 (preview) does not support workflows. +> This article is applicable for PowerShell 5.1; PowerShell 7.1 (preview) and PowerShell 7.2 (preview) don't support workflows. In this tutorial, you learn how to: |
| automation | Python 3 Packages | https://github.com/MicrosoftDocs/azure-docs/commits/main/articles/automation/python-3-packages.md | Title: Manage Python 3 packages in Azure Automation description: This article tells how to manage Python 3 packages (preview) in Azure Automation. Previously updated : 11/01/2021 Last updated : 10/26/2022 -+ # Manage Python 3 packages (preview) in Azure Automation -This article describes how to import, manage, and use Python 3 (preview) packages in Azure Automation running on the Azure sandbox environment and Hybrid Runbook Workers.To help simplify runbooks, you can use Python packages to import the modules you need. --To support Python 3 runbooks in the Automation service, Azure package 4.0.0 is installed by default in the Automation account. The default version can be overridden by importing Python packages into your Automation account. - Preference is given to the imported version in your Automation account. To import a single package, see [Import a package](#import-a-package). To import a package with multiple packages, see [Import a package with dependencies](#import-a-package-with-dependencies). +This article describes how to import, manage, and use Python 3 (preview) packages in Azure Automation running on the Azure sandbox environment and Hybrid Runbook Workers. Python packages should be downloaded on Hybrid Runbook workers for successful job execution. To help simplify runbooks, you can use Python packages to import the modules you need. For information on managing Python 2 packages, see [Manage Python 2 packages](./python-packages.md). +## Default Python packages ++To support Python 3.8 (preview) runbooks in the Automation service, Azure package 4.0.0 is installed by default in the Automation account. The default version can be overridden by importing Python packages into your Automation account. ++Preference is given to the imported version in your Automation account. To import a single package, see [Import a package](#import-a-package). To import a package with multiple packages, see [Import a package with dependencies](#import-a-package-with-dependencies). ++There are no default packages installed for Python 3.10 (preview). + ## Packages as source files -Azure Automation supports only a Python package that only contains Python code and doesn't include other language extensions or code in other languages. However, the Azure Sandbox environment might not have the required compilers for C/C++ binaries, so it's recommended to use [wheel files](https://pythonwheels.com/) instead. The [Python Package Index](https://pypi.org/) (PyPI) is a repository of software for the Python programming language. When selecting a Python 3 package to import into your Automation account from PyPI, note the following filename parts: +Azure Automation supports only a Python package that only contains Python code and doesn't include other language extensions or code in other languages. However, the Azure Sandbox environment might not have the required compilers for C/C++ binaries, so it's recommended to use [wheel files](https://pythonwheels.com/) instead. ++> [!NOTE] +> Currently, Python 3.10 (preview) only supports wheel files. ++The [Python Package Index](https://pypi.org/) (PyPI) is a repository of software for the Python programming language. When selecting a Python 3 package to import into your Automation account from PyPI, note the following filename parts: ++Select a Python version: ++#### [Python 3.8 (preview)](#tab/py3) | Filename part | Description | |||-|cp38|Automation supports **Python 3.8.x** for Cloud Jobs.| +|cp38|Automation supports **Python 3.8 (preview)** for Cloud jobs.| |amd64|Azure sandbox processes are **Windows 64-bit** architecture.| -For example, if you wanted to import pandas, you could select a wheel file with a name similar as `pandas-1.2.3-cp38-win_amd64.whl`. +For example: +- To import pandas - select a wheel file with a name similar as `pandas-1.2.3-cp38-win_amd64.whl`. -Some Python packages available on PyPI don't provide a wheel file. In this case, download the source (.zip or .tar.gz file) and generate the wheel file using `pip`. For example, perform the following steps using a 64-bit machine with Python 3.8.x and wheel package installed: +Some Python packages available on PyPI don't provide a wheel file. In this case, download the source (.zip or .tar.gz file) and generate the wheel file using `pip`. ++Perform the following steps using a 64-bit Windows machine with Python 3.8.x and wheel package installed: 1. Download the source file `pandas-1.2.4.tar.gz`.-1. Run pip to get the wheel file with the following command: `pip wheel --no-deps pandas-1.2.4.tar.gz`. +1. Run pip to get the wheel file with the following command: `pip wheel --no-deps pandas-1.2.4.tar.gz` ++#### [Python 3.10 (preview)](#tab/py10) ++| Filename part | Description | +||| +|cp310|Automation supports **Python 3.10 (preview)** for Cloud jobs.| +|manylinux_x86_64|Azure sandbox processes are Linux based 64-bit architecture for Python 3.10 (preview) runbooks. +++For example: +- To import pandas - select a wheel file with a name similar as `pandas-1.5.0-cp310-cp310-manylinux_2_17_x86_64.manylinux2014_x86_64.whl` +++Some Python packages available on PyPI don't provide a wheel file. In this case, download the source (.zip or .tar.gz file) and generate the wheel file using pip. ++Perform the following steps using a 64-bit Linux machine with Python 3.10.x and wheel package installed: ++1. Download the source file `pandas-1.2.4.tar.gz.` +1. Run pip to get the wheel file with the following command: `pip wheel --no-deps pandas-1.2.4.tar.gz` +++ ## Import a package Some Python packages available on PyPI don't provide a wheel file. In this case, :::image type="content" source="media/python-3-packages/add-python-3-package.png" alt-text="Screenshot of the Python packages page shows Python packages in the left menu and Add a Python package highlighted."::: -1. On the **Add Python Package** page, select a local package to upload. The package can be a **.whl** or **.tar.gz** file. -1. Enter a name and select the **Runtime Version** as Python 3.8.x (preview) +1. On the **Add Python Package** page, select a local package to upload. The package can be a **.whl** or **.tar.gz** file for Python 3.8 (preview) and **.whl** file for Python 3.10 (preview). +1. Enter a name and select the **Runtime Version** as Python 3.8 (preview) or Python 3.10 (preview). + > [!NOTE] + > Python 3.10 (preview) runtime version is currently supported in five regions for Cloud jobs only: West Central US, East US, South Africa North, North Europe, Australia Southeast. 1. Select **Import** - :::image type="content" source="media/python-3-packages/upload-package.png" alt-text="Screenshot shows the Add Python 3.8.x Package page with an uploaded tar.gz file selected."::: + :::image type="content" source="media/python-3-packages/upload-package.png" alt-text="Screenshot shows the Add Python 3.8 (preview) Package page with an uploaded tar.gz file selected."::: After a package has been imported, it's listed on the Python packages page in your Automation account. To remove a package, select the package and click **Delete**. ### Import a package with dependencies -You can import a Python 3 package and its dependencies by importing the following Python script into a Python 3 runbook, and then running it. +You can import a Python 3.8 (preview) package and its dependencies by importing the following Python script into a Python 3 runbook, and then running it. ```cmd https://github.com/azureautomation/runbooks/blob/master/Utility/Python/import_py3package_from_pypi.py https://github.com/azureautomation/runbooks/blob/master/Utility/Python/import_py #### Importing the script into a runbook For information on importing the runbook, see [Import a runbook from the Azure portal](manage-runbooks.md#import-a-runbook-from-the-azure-portal). Copy the file from GitHub to storage that the portal can access before you run the import. +> [!NOTE] +> Currently, importing a runbook from Azure Portal isn't supported for Python 3.10 (preview). ++ The **Import a runbook** page defaults the runbook name to match the name of the script. If you have access to the field, you can change the name. **Runbook type** may default to **Python 2**. If it does, make sure to change it to **Python 3**. :::image type="content" source="media/python-3-packages/import-python-3-package.png" alt-text="Screenshot shows the Python 3 runbook import page."::: For more information on using parameters with runbooks, see [Work with runbook p With the package imported, you can use it in a runbook. Add the following code to list all the resource groups in an Azure subscription. ```python-import os -import azure.mgmt.resource -import automationassets --def get_automation_runas_credential(runas_connection): - from OpenSSL import crypto - import binascii - from msrestazure import azure_active_directory - import adal -- # Get the Azure Automation RunAs service principal certificate - cert = automationassets.get_automation_certificate("AzureRunAsCertificate") - pks12_cert = crypto.load_pkcs12(cert) - pem_pkey = crypto.dump_privatekey(crypto.FILETYPE_PEM,pks12_cert.get_privatekey()) -- # Get run as connection information for the Azure Automation service principal - application_id = runas_connection["ApplicationId"] - thumbprint = runas_connection["CertificateThumbprint"] - tenant_id = runas_connection["TenantId"] -- # Authenticate with service principal certificate - resource ="https://management.core.windows.net/" - authority_url = ("https://login.microsoftonline.com/"+tenant_id) - context = adal.AuthenticationContext(authority_url) - return azure_active_directory.AdalAuthentication( - lambda: context.acquire_token_with_client_certificate( - resource, - application_id, - pem_pkey, - thumbprint) - ) --# Authenticate to Azure using the Azure Automation RunAs service principal -runas_connection = automationassets.get_automation_connection("AzureRunAsConnection") -azure_credential = get_automation_runas_credential(runas_connection) --# Intialize the resource management client with the RunAs credential and subscription -resource_client = azure.mgmt.resource.ResourceManagementClient( - azure_credential, - str(runas_connection["SubscriptionId"])) --# Get list of resource groups and print them out -groups = resource_client.resource_groups.list() -for group in groups: - print(group.name) +#!/usr/bin/env python3 +import os +import requests +# printing environment variables +endPoint = os.getenv('IDENTITY_ENDPOINT')+"?resource=https://management.azure.com/" +identityHeader = os.getenv('IDENTITY_HEADER') +payload={} +headers = { + 'X-IDENTITY-HEADER': identityHeader, + 'Metadata': 'True' +} +response = requests.request("GET", endPoint, headers=headers, data=payload) +print(response.text) + ``` > [!NOTE]-> The Python `automationassets` package is not available on pypi.org, so it's not available for import onto a Windows machine. +> The Python `automationassets` package is not available on pypi.org, so it's not available for import on to a Windows hybrid runbook worker. + ## Identify available packages in sandbox for package in installed_packages_list: print(package) ``` +### Python 3.8 (preview) PowerShell cmdlets ++#### Add new Python 3.8 (preview) package ++```python +New-AzAutomationPython3Package -AutomationAccountName tarademo -ResourceGroupName mahja -Name requires.io -ContentLinkUri https://files.pythonhosted.org/packages/7f/e2/85dfb9f7364cbd7a9213caea0e91fc948da3c912a2b222a3e43bc9cc6432/requires.io-0.2.6-py2.py3-none-any.whl ++Response +ResourceGroupName : mahja +AutomationAccountName : tarademo +Name : requires.io +IsGlobal : False +Version : +SizeInBytes : 0 +ActivityCount : 0 +CreationTime : 9/26/2022 1:37:13 PM +05:30 +LastModifiedTime : 9/26/2022 1:37:13 PM +05:30 +ProvisioningState : Creating +``` ++#### List all Python 3.8 (preview) packages ++```python +Get-AzAutomationPython3Package -AutomationAccountName tarademo -ResourceGroupName mahja ++Response : +ResourceGroupName : mahja +AutomationAccountName : tarademo +Name : cryptography +IsGlobal : False +Version : +SizeInBytes : 0 +ActivityCount : 0 +CreationTime : 9/26/2022 11:52:28 AM +05:30 +LastModifiedTime : 9/26/2022 12:11:00 PM +05:30 +ProvisioningState : Failed +ResourceGroupName : mahja +AutomationAccountName : tarademo +Name : requires.io +IsGlobal : False +Version : +SizeInBytes : 0 +ActivityCount : 0 +CreationTime : 9/26/2022 1:37:13 PM +05:30 +LastModifiedTime : 9/26/2022 1:39:04 PM +05:30 +ProvisioningState : ContentValidated +ResourceGroupName : mahja +AutomationAccountName : tarademo +Name : sockets +IsGlobal : False +Version : 1.0.0 +SizeInBytes : 4495 +ActivityCount : 0 +CreationTime : 9/20/2022 12:46:28 PM +05:30 +LastModifiedTime : 9/22/2022 5:03:42 PM +05:30 +ProvisioningState : Succeeded +``` ++#### Obtain details about specific package ++```python +Get-AzAutomationPython3Package -AutomationAccountName tarademo -ResourceGroupName mahja -Name sockets +++Response +ResourceGroupName : mahja +AutomationAccountName : tarademo +Name : sockets +IsGlobal : False +Version : 1.0.0 +SizeInBytes : 4495 +ActivityCount : 0 +CreationTime : 9/20/2022 12:46:28 PM +05:30 +LastModifiedTime : 9/22/2022 5:03:42 PM +05:30 +ProvisioningState : Succeeded +``` ++#### Remove Python 3.8 (preview) package ++```python +Remove-AzAutomationPython3Package -AutomationAccountName tarademo -ResourceGroupName mahja -Name sockets +``` ++#### Update Python 3.8 (preview) package ++```python +Set-AzAutomationPython3Package -AutomationAccountName tarademo -ResourceGroupName mahja -Name requires.io -ContentLinkUri https://files.pythonhosted.org/packages/7f/e2/85dfb9f7364cbd7a9213caea0e91fc948da3c912a2b222a3e43bc9cc6432/requires.io-0.2.6-py2.py3-none-any.whl +++ResourceGroupName : mahja +AutomationAccountName : tarademo +Name : requires.io +IsGlobal : False +Version : 0.2.6 +SizeInBytes : 10109 +ActivityCount : 0 +CreationTime : 9/26/2022 1:37:13 PM +05:30 +LastModifiedTime : 9/26/2022 1:43:12 PM +05:30 +ProvisioningState : Creating +``` + ## Next steps To prepare a Python runbook, see [Create a Python runbook](learn/automation-tutorial-runbook-textual-python-3.md). |
| azure-app-configuration | Quickstart Python Provider | https://github.com/MicrosoftDocs/azure-docs/commits/main/articles/azure-app-configuration/quickstart-python-provider.md | + + Title: Quickstart for using Azure App Configuration with Python apps using the Python provider | Microsoft Docs +description: In this quickstart, create a Python app with the Azure App Configuration Python provider to centralize storage and management of application settings separate from your code. ++++ms.devlang: python ++ Last updated : 10/31/2022++#Customer intent: As a Python developer, I want to manage all my app settings in one place. ++# Quickstart: Create a Python app with the Azure App Configuration Python provider ++In this quickstart, you will use the Python provider for Azure App Configuration to centralize storage and management of application settings using the [Azure App Configuration Python provider client library](https://github.com/Azure/azure-sdk-for-python/tree/main/sdk/appconfiguration/azure-appconfiguration-provider). ++The Python App Configuration provider is a library running on top of the Azure SDK for Python, helping Python developers easily consume the App Configuration service. It enables configuration settings to be used like a dictionary. ++## Prerequisites ++- Azure subscription - [create one for free](https://azure.microsoft.com/free/) +- Python 3.6 or later - for information on setting up Python on Windows, see the [Python on Windows documentation](/windows/python/) ++## Create an App Configuration store +++9. Select **Configuration Explorer** > **Create** > **Key-value** to add the following key-value pairs: ++ | Key | Value | Label | Content type | + |-|-|-|--| + | *message* | *Hello* | Leave empty | Leave empty | + | *test.message* | *Hello test* | Leave empty | Leave empty | + | *my_json* | *{"key":"value"}* | Leave empty | *application/json* | ++10. Select **Apply**. ++## Set up the Python app ++1. Create a new directory for the project named *app-configuration-quickstart*. ++ ```console + mkdir app-configuration-quickstart + ``` ++1. Switch to the newly created *app-configuration-quickstart* directory. ++ ```console + cd app-configuration-quickstart + ``` ++1. Install the Azure App Configuration provider by using the `pip install` command. ++ ```console + pip install azure-appconfiguration-provider + ``` ++1. Create a new file called *app-configuration-quickstart.py* in the *app-configuration-quickstart* directory and add the following code: ++ ```python + from azure.appconfiguration.provider import ( + AzureAppConfigurationProvider, + SettingSelector + ) + import os ++ connection_string = os.environ.get("AZURE_APPCONFIG_CONNECTION_STRING") ++ # Connect to Azure App Configuration using a connection string. + config = AzureAppConfigurationProvider.load( + connection_string=connection_string) ++ # Find the key "message" and print its value. + print(config["message"]) + # Find the key "my_json" and print the value for "key" from the dictionary. + print(config["my_json"]["key"]) ++ # Connect to Azure App Configuration using a connection string and trimmed key prefixes. + trimmed = {"test."} + config = AzureAppConfigurationProvider.load( + connection_string=connection_string, trimmed_key_prefixes=trimmed) + # From the keys with trimmed prefixes, find a key with "message" and print its value. + print(config["message"]) ++ # Connect to Azure App Configuration using SettingSelector. + selects = {SettingSelector("message*", "\0")} + config = AzureAppConfigurationProvider.load( + connection_string=connection_string, selects=selects) ++ # Print True or False to indicate if "message" is found in Azure App Configuration. + print("message found: " + str("message" in config)) + print("test.message found: " + str("test.message" in config)) + ``` ++## Configure your App Configuration connection string ++1. Set an environment variable named **AZURE_APPCONFIG_CONNECTION_STRING**, and set it to the connection string of your App Configuration store. At the command line, run the following command: ++ ### [Windows command prompt](#tab/windowscommandprompt) ++ To build and run the app locally using the Windows command prompt, run the following command and replace `<app-configuration-store-connection-string>` with the connection string of your app configuration store: ++ ```cmd + setx AZURE_APPCONFIG_CONNECTION_STRING "connection-string-of-your-app-configuration-store" + ``` ++ ### [PowerShell](#tab/powershell) ++ If you use Windows PowerShell, run the following command and replace `<app-configuration-store-connection-string>` with the connection string of your app configuration store: ++ ```azurepowershell + $Env:AZURE_APPCONFIG_CONNECTION_STRING = "<app-configuration-store-connection-string>" + ``` ++ ### [macOS](#tab/unix) ++ If you use macOS, run the following command and replace `<app-configuration-store-connection-string>` with the connection string of your app configuration store: ++ ```console + export AZURE_APPCONFIG_CONNECTION_STRING='<app-configuration-store-connection-string>' + ``` ++ ### [Linux](#tab/linux) ++ If you use Linux, run the following command and replace `<app-configuration-store-connection-string>` with the connection string of your app configuration store: ++ ```console + export AZURE_APPCONFIG_CONNECTION_STRING='<app-configuration-store-connection-string>' + ``` ++1. Restart the command prompt to allow the change to take effect. Print out the value of the environment variable to validate that it is set properly with the command below. ++ ### [Windows command prompt](#tab/windowscommandprompt) ++ Using the Windows command prompt, run the following command: ++ ```cmd + printenv AZURE_APPCONFIG_CONNECTION_STRING + ``` ++ ### [PowerShell](#tab/powershell) ++ If you use Windows PowerShell, run the following command: ++ ```azurepowershell + $Env:AZURE_APPCONFIG_CONNECTION_STRING + ``` ++ ### [macOS](#tab/unix) ++ If you use macOS, run the following command: ++ ```console + echo "$AZURE_APPCONFIG_CONNECTION_STRING" + ``` ++ ### [Linux](#tab/linux) ++ If you use Linux, run the following command: ++ ```console + echo "$AZURE_APPCONFIG_CONNECTION_STRING" ++1. After the build successfully completes, run the following command to run the app locally: ++ ```python + python app-configuration-quickstart.py + ``` ++ You should see the following output: ++ ```Output + Hello + value + Hello test + message found: True + test.message found: False + ``` ++## Clean up resources +++## Next steps ++In this quickstart, you created a new App Configuration store and learned how to access key-values from a Python app. ++For additional code samples, visit: ++> [!div class="nextstepaction"] +> [Azure App Configuration Python provider](https://github.com/Azure/azure-sdk-for-python/tree/main/sdk/appconfiguration/azure-appconfiguration-provider) |
| azure-app-configuration | Quickstart Python | https://github.com/MicrosoftDocs/azure-docs/commits/main/articles/azure-app-configuration/quickstart-python.md | - Title: Quickstart for using Azure App Configuration with Python apps | Microsoft Docs -description: In this quickstart, create a Python app with Azure App Configuration to centralize storage and management of application settings separate from your code. + + Title: Quickstart for using Azure App Configuration with Python apps using the Azure SDK for Python | Microsoft Docs +description: In this quickstart, create a Python app with the Azure SDK for Python to centralize storage and management of application settings separate from your code. ms.devlang: python - Previously updated : 9/17/2020+ Last updated : 10/21/2022 #Customer intent: As a Python developer, I want to manage all my app settings in one place. -# Quickstart: Create a Python app with Azure App Configuration +# Quickstart: Create a Python app with the Azure SDK for Python ++In this quickstart, you will use the Azure SDK for Python to centralize storage and management of application settings using the [Azure App Configuration client library for Python](https://github.com/Azure/azure-sdk-for-python/tree/main/sdk/appconfiguration/azure-appconfiguration). -In this quickstart, you will use Azure App Configuration to centralize storage and management of application settings using the [Azure App Configuration client library for Python](https://github.com/Azure/azure-sdk-for-python/tree/master/sdk/appconfiguration/azure-appconfiguration). +To use Azure App Configuration with the Python provider instead of the SDK, go to [Python provider](./quickstart-python-provider.md). The Python provider enables loading configuration settings from an Azure App Configuration store in a managed way. ## Prerequisites - Azure subscription - [create one for free](https://azure.microsoft.com/free/)-- Python 2.7, or 3.6 or later - For information on setting up Python on Windows, see the [Python on Windows documentation](/windows/python/)+- Python 3.6 or later - for information on setting up Python on Windows, see the [Python on Windows documentation](/windows/python/) ## Create an App Configuration store [!INCLUDE [azure-app-configuration-create](../../includes/azure-app-configuration-create.md)] -7. Select **Configuration Explorer** > **Create** > **Key-value** to add the following key-value pairs: +9. Select **Configuration Explorer** > **Create** > **Key-value** to add the following key-value pairs: - | Key | Value | - ||| - | TestApp:Settings:Message | Data from Azure App Configuration | + | Key | Value | + |-|-| + | *TestApp:Settings:Message* | *Data from Azure App Configuration* | Leave **Label** and **Content Type** empty for now. -8. Select **Apply**. +10. Select **Apply**. ## Setting up the Python app In this quickstart, you will use Azure App Configuration to centralize storage a ``` > [!NOTE]-> The code snippets in this quickstart will help you get started with the App Configuration client library for Python. For your application, you should also consider handling exceptions according to your needs. To learn more about exception handling, please refer to our [Python SDK documentation](https://github.com/Azure/azure-sdk-for-python/tree/master/sdk/appconfiguration/azure-appconfiguration). +> The code snippets in this quickstart will help you get started with the App Configuration client library for Python. For your application, you should also consider handling exceptions according to your needs. To learn more about exception handling, please refer to our [Python SDK documentation](https://github.com/Azure/azure-sdk-for-python/tree/main/sdk/appconfiguration/azure-appconfiguration). ## Configure your App Configuration connection string -1. Set an environment variable named **AZURE_APP_CONFIG_CONNECTION_STRING**, and set it to the access key to your App Configuration store. At the command line, run the following command: +1. Set an environment variable named **AZURE_APPCONFIG_CONNECTION_STRING**, and set it to the connection string of your App Configuration store. At the command line, run the following command: ++ ### [Windows command prompt](#tab/windowscommandprompt) ++ To build and run the app locally using the Windows command prompt, run the following command and replace `<app-configuration-store-connection-string>` with the connection string of your app configuration store: ```cmd- setx AZURE_APP_CONFIG_CONNECTION_STRING "connection-string-of-your-app-configuration-store" + setx AZURE_APPCONFIG_CONNECTION_STRING "connection-string-of-your-app-configuration-store" + ``` ++ ### [PowerShell](#tab/powershell) ++ If you use Windows PowerShell, run the following command and replace `<app-configuration-store-connection-string>` with the connection string of your app configuration store: ++ ```azurepowershell + $Env:AZURE_APPCONFIG_CONNECTION_STRING = "<app-configuration-store-connection-string>" ``` + ### [macOS](#tab/unix) ++ If you use macOS, run the following command and replace `<app-configuration-store-connection-string>` with the connection string of your app configuration store: ++ ```console + export AZURE_APPCONFIG_CONNECTION_STRING='<app-configuration-store-connection-string>' + ``` ++ ### [Linux](#tab/linux) ++ If you use Linux, run the following command and replace `<app-configuration-store-connection-string>` with the connection string of your app configuration store: ++ ```console + export AZURE_APPCONFIG_CONNECTION_STRING='<app-configuration-store-connection-string>' + ``` ++1. Restart the command prompt to allow the change to take effect. Print out the value of the environment variable to validate that it is set properly with the command below. ++ ### [Windows command prompt](#tab/windowscommandprompt) ++ Using the Windows command prompt, run the following command: ++ ```cmd + printenv AZURE_APPCONFIG_CONNECTION_STRING + ``` ++ ### [PowerShell](#tab/powershell) + If you use Windows PowerShell, run the following command: ```azurepowershell- $Env:AZURE_APP_CONFIG_CONNECTION_STRING = "connection-string-of-your-app-configuration-store" + $Env:AZURE_APPCONFIG_CONNECTION_STRING ``` - If you use macOS or Linux, run the following command: + ### [macOS](#tab/unix) ++ If you use macOS, run the following command: ```console- export AZURE_APP_CONFIG_CONNECTION_STRING='connection-string-of-your-app-configuration-store' + echo "$AZURE_APPCONFIG_CONNECTION_STRING" ``` -2. Restart the command prompt to allow the change to take effect. Print out the value of the environment variable to validate that it is set properly. + ### [Linux](#tab/linux) ++ If you use Linux, run the following command: ++ ```console + echo "$AZURE_APPCONFIG_CONNECTION_STRING" + ``` ++1. Restart the command prompt to allow the change to take effect. Print out the value of the environment variable to validate that it is set properly. ## Code samples The sample code snippets in this section show you how to perform common operatio > [!NOTE] > The App Configuration client library refers to a key-value object as `ConfigurationSetting`. Therefore, in this article, the **key-values** in App Configuration store will be referred to as **configuration settings**. -* [Connect to an App Configuration store](#connect-to-an-app-configuration-store) -* [Get a configuration setting](#get-a-configuration-setting) -* [Add a configuration setting](#add-a-configuration-setting) -* [Get a list of configuration settings](#get-a-list-of-configuration-settings) -* [Lock a configuration setting](#lock-a-configuration-setting) -* [Unlock a configuration setting](#unlock-a-configuration-setting) -* [Update a configuration setting](#update-a-configuration-setting) -* [Delete a configuration setting](#delete-a-configuration-setting) +Learn below how to: ++- [Connect to an App Configuration store](#connect-to-an-app-configuration-store) +- [Get a configuration setting](#get-a-configuration-setting) +- [Add a configuration setting](#add-a-configuration-setting) +- [Get a list of configuration settings](#get-a-list-of-configuration-settings) +- [Lock a configuration setting](#lock-a-configuration-setting) +- [Unlock a configuration setting](#unlock-a-configuration-setting) +- [Update a configuration setting](#update-a-configuration-setting) +- [Delete a configuration setting](#delete-a-configuration-setting) ### Connect to an App Configuration store The following code snippet creates an instance of **AzureAppConfigurationClient** using the connection string stored in your environment variables. ```python- connection_string = os.getenv('AZURE_APP_CONFIG_CONNECTION_STRING') + connection_string = os.getenv('AZURE_APPCONFIG_CONNECTION_STRING') app_config_client = AzureAppConfigurationClient.from_connection_string(connection_string) ``` The following code snippet retrieves a configuration setting by `key` name. ### Add a configuration setting -The following code snippet creates a `ConfigurationSetting` object with `key` and `value` fields and invokes the `add_configuration_setting` method. +The following code snippet creates a `ConfigurationSetting` object with `key` and `value` fields and invokes the `add_configuration_setting` method. This method will throw an exception if you try to add a configuration setting that already exists in your store. If you want to avoid this exception, the [set_configuration_setting](#update-a-configuration-setting) method can be used instead. ```python The `set_configuration_setting` method can be used to update an existing setting The following code snippet deletes a configuration setting by `key` name. ```python+ deleted_config_setting = app_config_client.delete_configuration_setting(key="TestApp:Settings:NewSetting") print("\nDeleted configuration setting:") print("Key: " + deleted_config_setting.key + ", Value: " + deleted_config_setting.value) try: print("Azure App Configuration - Python Quickstart") # Quickstart code goes here - connection_string = os.getenv('AZURE_APP_CONFIG_CONNECTION_STRING') + connection_string = os.getenv('AZURE_APPCONFIG_CONNECTION_STRING') app_config_client = AzureAppConfigurationClient.from_connection_string(connection_string) retrieved_config_setting = app_config_client.get_configuration_setting(key='TestApp:Settings:Message') Key: TestApp:Settings:NewSetting, Value: Value has been updated! ## Clean up resources - [!INCLUDE [azure-app-configuration-cleanup](../../includes/azure-app-configuration-cleanup.md)] ## Next steps In this quickstart, you created a new App Configuration store and learned how to For additional code samples, visit: > [!div class="nextstepaction"]-> [Azure App Configuration client library samples](https://github.com/Azure/azure-sdk-for-python/tree/master/sdk/appconfiguration/azure-appconfiguration/samples) +> [Azure App Configuration client library samples](https://github.com/Azure/azure-sdk-for-python/tree/main/sdk/appconfiguration/azure-appconfiguration/samples) |
| azure-arc | Troubleshooting | https://github.com/MicrosoftDocs/azure-docs/commits/main/articles/azure-arc/kubernetes/troubleshooting.md | az extension add --name k8s-configuration > [!NOTE] > Eventually Azure will stop supporting GitOps with Flux v1, so begin using [Flux v2](./tutorial-use-gitops-flux2.md) as soon as possible. -To help troubleshoot issues with `sourceControlConfigurations` resource (Flux v1), run these az commands with `--debug` parameter specified: +To help troubleshoot issues with `sourceControlConfigurations` resource (Flux v1), run these Azure CLI commands with `--debug` parameter specified: ```azurecli az provider show -n Microsoft.KubernetesConfiguration --debug metadata: ### Flux v2 - General -To help troubleshoot issues with `fluxConfigurations` resource (Flux v2), run these az commands with `--debug` parameter specified: +To help troubleshoot issues with `fluxConfigurations` resource (Flux v2), run these Azure CLI commands with the `--debug` parameter specified: ```azurecli az provider show -n Microsoft.KubernetesConfiguration --debug |
| azure-functions | Create First Function Vs Code Python | https://github.com/MicrosoftDocs/azure-docs/commits/main/articles/azure-functions/create-first-function-vs-code-python.md | Before you begin, make sure that you have the following requirements in place: + The [Python extension](https://marketplace.visualstudio.com/items?itemName=ms-python.python) for Visual Studio Code. ::: zone pivot="python-mode-configuration" -+ The [Azure Functions extension](https://marketplace.visualstudio.com/items?itemName=ms-azuretools.vscode-azurefunctions) for Visual Studio Code. ++ The [Azure Functions extension](https://marketplace.visualstudio.com/items?itemName=ms-azuretools.vscode-azurefunctions) for Visual Studio Code, version 1.8.3 or a later version. ::: zone-end ::: zone pivot="python-mode-decorators" + The [Azure Functions extension](https://marketplace.visualstudio.com/items?itemName=ms-azuretools.vscode-azurefunctions) for Visual Studio Code, version 1.8.1 or later. |
| azure-functions | Functions How To Github Actions | https://github.com/MicrosoftDocs/azure-docs/commits/main/articles/azure-functions/functions-how-to-github-actions.md | To download the publishing profile of your function app: ### Add the GitHub secret -1. In [GitHub](https://github.com), browse to your repository, select **Settings** > **Secrets** > **Add a new secret**. +1. In [GitHub](https://github.com/), go to your repository. - :::image type="content" source="media/functions-how-to-github-actions/add-secret.png" alt-text="Add Secret"::: +1. Select **Security > Secrets and variables > Actions**. -1. Add a new secret using `AZURE_FUNCTIONAPP_PUBLISH_PROFILE` for **Name**, the content of the publishing profile file for **Value**, and then select **Add secret**. +1. Select **New repository secret**. ++1. Add a new secret with the name `AZURE_FUNCTIONAPP_PUBLISH_PROFILE` and the value set to the contents of the publishing profile file. ++1. Select **Add secret**. GitHub can now authenticate to your function app in Azure. |
| azure-functions | Functions Reference Python | https://github.com/MicrosoftDocs/azure-docs/commits/main/articles/azure-functions/functions-reference-python.md | As a Python developer, you may also be interested in one of the following articl | <ul><li>[Python function using Visual Studio Code](./create-first-function-vs-code-python.md?pivots=python-mode-configuration)</li><li>[Python function with terminal/command prompt](./create-first-function-cli-python.md?pivots=python-mode-configuration)</li></ul> | <ul><li>[Developer guide](functions-reference.md)</li><li>[Hosting options](functions-scale.md)</li><li>[Performance considerations](functions-best-practices.md)</li></ul> | <ul><li>[Image classification with PyTorch](machine-learning-pytorch.md)</li><li>[Azure Automation sample](/samples/azure-samples/azure-functions-python-list-resource-groups/azure-functions-python-sample-list-resource-groups/)</li><li>[Machine learning with TensorFlow](functions-machine-learning-tensorflow.md)</li><li>[Browse Python samples](/samples/browse/?products=azure-functions&languages=python)</li></ul> | ::: zone-end ::: zone pivot="python-mode-decorators" -| Getting started | Concepts| +| Getting started | Concepts| Samples | |--|--|--|-| <ul><li>[Python function using Visual Studio Code](./create-first-function-vs-code-python.md?pivots=python-mode-decorators)</li><li>[Python function with terminal/command prompt](./create-first-function-cli-python.md?pivots=python-mode-decorators)</li></ul> | <ul><li>[Developer guide](functions-reference.md)</li><li>[Hosting options](functions-scale.md)</li><li>[Performance considerations](functions-best-practices.md)</li></ul> | +| <ul><li>[Python function using Visual Studio Code](./create-first-function-vs-code-python.md?pivots=python-mode-decorators)</li><li>[Python function with terminal/command prompt](./create-first-function-cli-python.md?pivots=python-mode-decorators)</li></ul> | <ul><li>[Developer guide](functions-reference.md)</li><li>[Hosting options](functions-scale.md)</li><li>[Performance considerations](functions-best-practices.md)</li></ul> | <li>[Code Examples](functions-bindings-triggers-python.md)</li> | ::: zone-end > [!NOTE] def main(req: azure.functions.HttpRequest) -> str: return f'Hello, {user}!' ``` -At this time, only specific triggers and bindings are supported by the v2 programming model. Supported triggers and bindings are as follows. --| Type | Trigger | Input Binding | Output Binding | -| | | | | -| HTTP | x | | | -| Timer | x | | | -| Azure Queue Storage | x | | x | -| Azure Service Bus Topic | x | | x | -| Azure Service Bus Queue | x | | x | -| Azure Cosmos DB | x | x | x | -| Azure Blob Storage | x | x | x | -| Azure Event Grid | x | | x | +At this time, only specific triggers and bindings are supported by the v2 programming model. For more information, see [Triggers and inputs](#triggers-and-inputs). To learn about known limitations with the v2 model and their workarounds, see [Troubleshoot Python errors in Azure Functions](./recover-python-functions.md?pivots=python-mode-decorators). ::: zone-end app.register_functions(bp) ``` ::: zone-end - ## Import behavior You can import modules in your function code using both absolute and relative references. Based on the folder structure shown above, the following imports work from within the function file *<project_root>\my\_first\_function\\_\_init\_\_.py*: ```python When the function is invoked, the HTTP request is passed to the function as `req ::: zone pivot="python-mode-decorators" Inputs are divided into two categories in Azure Functions: trigger input and other input. Although they're defined using different decorators, usage is similar in Python code. Connection strings or secrets for trigger and input sources map to values in the `local.settings.json` file when running locally, and the application settings when running in Azure. -As an example, the following code demonstrates the difference between the two: +As an example, the following code demonstrates how to define a Blob storage input binding: ```json // local.settings.json As an example, the following code demonstrates the difference between the two: "IsEncrypted": false, "Values": { "FUNCTIONS_WORKER_RUNTIME": "python",- "AzureWebJobsStorage": "<azure-storage-connection-string>" + "AzureWebJobsStorage": "<azure-storage-connection-string>", + "AzureWebJobsFeatureFlags": "EnableWorkerIndexing" } } ``` At this time, only specific triggers and bindings are supported by the v2 progra | Type | Trigger | Input Binding | Output Binding | | | | | |-| HTTP | x | | | -| Timer | x | | | -| Azure Queue Storage | x | | x | -| Azure Service Bus topic | x | | x | -| Azure Service Bus queue | x | | x | -| Azure Cosmos DB | x | x | x | -| Azure Blob Storage | x | x | x | -| Azure Event Grid | x | | x | +| [HTTP](functions-bindings-triggers-python.md#http-trigger) | x | | | +| [Timer](functions-bindings-triggers-python.md#timer-trigger) | x | | | +| [Azure Queue Storage](functions-bindings-triggers-python.md#azure-queue-storage-trigger) | x | | x | +| [Azure Service Bus topic](functions-bindings-triggers-python.md#azure-service-bus-topic-trigger) | x | | x | +| [Azure Service Bus queue](functions-bindings-triggers-python.md#azure-service-bus-queue-trigger) | x | | x | +| [Azure Cosmos DB](functions-bindings-triggers-python.md#azure-eventhub-trigger) | x | x | x | +| [Azure Blob Storage](functions-bindings-triggers-python.md#blob-trigger) | x | x | x | +| [Azure Hub](functions-bindings-triggers-python.md#azure-eventhub-trigger) | x | | x | -To learn more about defining triggers and bindings in the v2 model, see this [documentation](https://github.com/Azure/azure-functions-python-library/blob/dev/docs/ProgModelSpec.pyi). +For more examples, see [Python V2 model Azure Functions triggers and bindings (preview)](functions-bindings-triggers-python.md). ::: zone-end The host.json file must also be updated to include an HTTP `routePrefix`, as sho "extensionBundle": { "id": "Microsoft.Azure.Functions.ExtensionBundle",- "version": "[2.*, 3.0.0)" + "version": "[3.*, 4.0.0)" }, "extensions": { For a full example, see [Using Flask Framework with Azure Functions](/samples/az ::: zone-end ::: zone pivot="python-mode-decorators" -You can use ASGI and WSGI-compatible frameworks such as Flask and FastAPI with your HTTP-triggered Python functions, which is shown in the following example: +You can use ASGI and WSGI-compatible frameworks such as Flask and FastAPI with your HTTP-triggered Python functions. You must first update the host.json file to include an HTTP `routePrefix`, as shown in the following example: ++```json +{ + "version": "2.0", + "logging": + { + "applicationInsights": + { + "samplingSettings": + { + "isEnabled": true, + "excludedTypes": "Request" + } + } + }, + "extensionBundle": + { + "id": "Microsoft.Azure.Functions.ExtensionBundle", + "version": "[2.*, 3.0.0)" + }, + "extensions": + { + "http": + { + "routePrefix": "" + } + } +} +``` ++The framework code looks like the following example: # [ASGI](#tab/asgi) For a list of preinstalled system libraries in Python worker Docker images, see | Functions runtime | Debian version | Python versions | ||||-| Version 3.x | Buster | [Python 3.6](https://github.com/Azure/azure-functions-docker/blob/master/host/3.0/buster/amd64/python/python36/python36.Dockerfile)<br/>[Python 3.7](https://github.com/Azure/azure-functions-docker/blob/master/host/3.0/buster/amd64/python/python37/python37.Dockerfile)<br />[Python 3.8](https://github.com/Azure/azure-functions-docker/blob/master/host/3.0/buster/amd64/python/python38/python38.Dockerfile)<br/> [Python 3.9](https://github.com/Azure/azure-functions-docker/blob/master/host/3.0/buster/amd64/python/python39/python39.Dockerfile)| +| Version 3.x | Buster | [Python 3.7](https://github.com/Azure/azure-functions-docker/blob/master/host/3.0/buster/amd64/python/python37/python37.Dockerfile)<br />[Python 3.8](https://github.com/Azure/azure-functions-docker/blob/master/host/3.0/buster/amd64/python/python38/python38.Dockerfile)<br/> [Python 3.9](https://github.com/Azure/azure-functions-docker/blob/master/host/3.0/buster/amd64/python/python39/python39.Dockerfile)| ## Python worker extensions For more information, see the following resources: [HttpRequest]: /python/api/azure-functions/azure.functions.httprequest-[HttpResponse]: /python/api/azure-functions/azure.functions.httpresponse +[HttpResponse]: /python/api/azure-functions/azure.functions.httpresponse |
| azure-functions | Language Support Policy | https://github.com/MicrosoftDocs/azure-docs/commits/main/articles/azure-functions/language-support-policy.md | There are few exceptions to the retirement policy outlined above. Here is a list |Language Versions |EOL Date |Retirement Date| |--|--|-| |Node 12|30 Apr 2022|13 December 2022|-|Python 3.6 |23 December 2021|30 September 2022| ## Language version support timeline |
| azure-functions | Recover Python Functions | https://github.com/MicrosoftDocs/azure-docs/commits/main/articles/azure-functions/recover-python-functions.md | The following is a list of troubleshooting sections for common issues in Python * [Python exited with code 139](#troubleshoot-python-exited-with-code-139) * [Troubleshoot errors with Protocol Buffers](#troubleshoot-errors-with-protocol-buffers) ::: zone-end+ ::: zone pivot="python-mode-decorators" +Specifically with the v2 model, here are some known issues and their workarounds: ++* [Multiple Python workers not supported](#multiple-python-workers-not-supported) +* [Could not load file or assembly](#troubleshoot-could-not-load-file-or-assembly) +* [Unable to resolve the Azure Storage connection named Storage](#troubleshoot-unable-to-resolve-the-azure-storage-connection) +* [Issues with deployment](#issue-with-deployment) ++General troubleshooting guides for Python Functions include: + * [ModuleNotFoundError and ImportError](#troubleshoot-modulenotfounderror) * [Cannot import 'cygrpc'](#troubleshoot-cannot-import-cygrpc) * [Python exited with code 137](#troubleshoot-python-exited-with-code-137) * [Python exited with code 139](#troubleshoot-python-exited-with-code-139) * [Troubleshoot errors with Protocol Buffers](#troubleshoot-errors-with-protocol-buffers)-* [Multiple Python workers not supported](#multiple-python-workers-not-supported) -* [Could not load file or assembly](#troubleshoot-could-not-load-file-or-assembly) -* [Unable to resolve the Azure Storage connection named Storage](#troubleshoot-unable-to-resolve-the-azure-storage-connection) -* [Issues with deployment](#issue-with-deployment) ::: zone-end + ## Troubleshoot ModuleNotFoundError This section helps you troubleshoot module-related errors in your Python function app. These errors typically result in the following Azure Functions error message: |
| azure-government | Documentation Government Impact Level 5 | https://github.com/MicrosoftDocs/azure-docs/commits/main/articles/azure-government/documentation-government-impact-level-5.md | Virtual machine scale sets aren't currently supported on Azure Dedicated Host. B > [!IMPORTANT] > As new hardware generations become available, some VM types might require reconfiguration (scale up or migration to a new VM SKU) to ensure they remain on properly dedicated hardware. For more information, see **[Virtual machine isolation in Azure](../virtual-machines/isolation.md).** -#### Disk encryption options +#### Disk encryption for virtual machines -There are several types of encryption available for your managed disks supporting virtual machines and virtual machine scale sets: +You can encrypt the storage that supports these virtual machines in one of two ways to support necessary encryption standards. -- Azure Disk Encryption-- Server-side encryption of Azure Disk Storage-- Encryption at host-- Confidential disk encryption+- Use Azure Disk Encryption to encrypt the drives by using dm-crypt (Linux) or BitLocker (Windows): + - [Enable Azure Disk Encryption for Linux](../virtual-machines/linux/disk-encryption-overview.md) + - [Enable Azure Disk Encryption for Windows](../virtual-machines/windows/disk-encryption-overview.md) +- Use Azure Storage service encryption for storage accounts with your own key to encrypt the storage account that holds the disks: + - [Storage service encryption with customer-managed keys](../storage/common/customer-managed-keys-configure-key-vault.md) -All these options enable you to have sole control over encryption keys. For more information, see [Overview of managed disk encryption options](../virtual-machines/disk-encryption-overview.md). +#### Disk encryption for virtual machine scale sets +You can encrypt disks that support virtual machine scale sets by using Azure Disk Encryption: ++- [Encrypt disks in virtual machine scale sets](../virtual-machine-scale-sets/disk-encryption-key-vault.md) ## Containers |
| azure-monitor | Action Groups | https://github.com/MicrosoftDocs/azure-docs/commits/main/articles/azure-monitor/alerts/action-groups.md | You may have a limited number of Logic Apps actions per action group. ### Secure webhook -When you use a secure webhook action, you can use Azure AD to secure the connection between your action group and your protected web API, which is your webhook endpoint. For an overview of Azure AD applications and service principals, see [Microsoft identity platform (v2.0) overview](../../active-directory/develop/v2-overview.md). Follow these steps to take advantage of the secure webhook functionality. +When you use a secure webhook action, you must use Azure AD to secure the connection between your action group and your protected web API, which is your webhook endpoint. For an overview of Azure AD applications and service principals, see [Microsoft identity platform (v2.0) overview](../../active-directory/develop/v2-overview.md). Follow these steps to take advantage of the secure webhook functionality. ++> [!NOTE] +> +> Basic authentication is not supported for SecureWebhok. To use basic authentication you must use Webhook. > [!NOTE] > |
| azure-monitor | Resource Manager Alerts Metric | https://github.com/MicrosoftDocs/azure-docs/commits/main/articles/azure-monitor/alerts/resource-manager-alerts-metric.md | resource metricAlert 'Microsoft.Insights/metricAlerts@2018-03-01' = { } ``` +> [!NOTE] +> +> Using "All" as a dimension value is equivalent to selecting "\*" (all current and future values). ++ ## Multiple dimensions, dynamic thresholds A single dynamic thresholds alert rule can create tailored thresholds for hundreds of metric time series (even different types) at a time, which results in fewer alert rules to manage. The following sample creates a dynamic thresholds metric alert rule on dimensional metrics. |
| azure-monitor | Api Custom Events Metrics | https://github.com/MicrosoftDocs/azure-docs/commits/main/articles/azure-monitor/app/api-custom-events-metrics.md | Title: Application Insights API for custom events and metrics | Microsoft Docs description: Insert a few lines of code in your device or desktop app, webpage, or service to track usage and diagnose issues. Previously updated : 10/24/2022 Last updated : 10/31/2022 ms.devlang: csharp, java, javascript, vb To determine how long data is kept, see [Data retention and privacy](./data-rete ## Frequently asked questions +### Why am I missing telemetry data? ++Both [TelemetryChannels](telemetry-channels.md#what-are-telemetry-channels) will lose buffered telemetry if it isn't flushed before an application shuts down. ++To avoid data loss, flush the TelemetryClient when an application is shutting down. ++For more information, see [Flushing data](#flushing-data). + ### What exceptions might `Track_()` calls throw? None. You don't need to wrap them in try-catch clauses. If the SDK encounters problems, it will log messages in the debug console output and, if the messages get through, in Diagnostic Search. |
| azure-monitor | Azure Ad Authentication | https://github.com/MicrosoftDocs/azure-docs/commits/main/articles/azure-monitor/app/azure-ad-authentication.md | Application Insights .NET SDK supports the credential classes provided by [Azure Below is an example of manually creating and configuring a `TelemetryConfiguration` using .NET: ```csharp-var config = new TelemetryConfiguration -{ - ConnectionString = "InstrumentationKey=00000000-0000-0000-0000-000000000000;IngestionEndpoint=https://xxxx.applicationinsights.azure.com/" -} +TelemetryConfiguration.Active.ConnectionString = "InstrumentationKey=00000000-0000-0000-0000-000000000000;IngestionEndpoint=https://xxxx.applicationinsights.azure.com/"; var credential = new DefaultAzureCredential();-config.SetAzureTokenCredential(credential); +TelemetryConfiguration.Active.SetAzureTokenCredential(credential); ``` Below is an example of configuring the `TelemetryConfiguration` using .NET Core: |
| azure-monitor | Azure Vm Vmss Apps | https://github.com/MicrosoftDocs/azure-docs/commits/main/articles/azure-monitor/app/azure-vm-vmss-apps.md | Title: Monitor performance on Azure VMs - Azure Application Insights description: Application performance monitoring for Azure VM and Azure virtual machine scale sets. Chart load and response time, dependency information, and set alerts on performance. Previously updated : 08/19/2022 Last updated : 10/31/2022 ms.devlang: csharp, java, javascript, python Enabling monitoring for your .NET or Java based web applications running on [Azu This article walks you through enabling Application Insights monitoring using the Application Insights Agent and provides preliminary guidance for automating the process for large-scale deployments. > [!IMPORTANT]-> **Java** based applications running on Azure VMs and VMSS are monitored with **[Application Insights Java 3.0 agent](./java-in-process-agent.md)**, which is generally available. +> **Java** based applications running on Azure VMs and VMSS are monitored with the **[Application Insights Java 3.0 agent](./java-in-process-agent.md)**, which is generally available. > [!IMPORTANT] > Azure Application Insights Agent for ASP.NET and ASP.NET Core applications running on **Azure VMs and VMSS** is currently in public preview. For monitoring your ASP.NET applications running **on-premises**, use the [Azure Application Insights Agent for on-premises servers](./status-monitor-v2-overview.md), which is generally available and fully supported. For a complete list of supported auto-instrumentation scenarios, see [Supported > [!NOTE] > Auto-instrumentation is available for ASP.NET, ASP.NET Core IIS-hosted applications and Java. Use an SDK to instrument Node.js and Python applications hosted on an Azure virtual machines and virtual machine scale sets. -### [.NET](#tab/net) +### [.NET Framework](#tab/net) -The Application Insights Agent auto-collects the same dependency signals out-of-the-box as the .NET SDK. See [Dependency auto-collection](./auto-collect-dependencies.md#net) to learn more. +The Application Insights Agent auto-collects the same dependency signals out-of-the-box as the SDK. See [Dependency auto-collection](./auto-collect-dependencies.md#net) to learn more. ++### [.NET Core / .NET](#tab/core) ++The Application Insights Agent auto-collects the same dependency signals out-of-the-box as the SDK. See [Dependency auto-collection](./auto-collect-dependencies.md#net) to learn more. ### [Java](#tab/Java) Get-AzResource -ResourceId /subscriptions/<mySubscriptionId>/resourceGroups/<myR Find troubleshooting tips for Application Insights Monitoring Agent Extension for .NET applications running on Azure virtual machines and virtual machine scale sets. > [!NOTE]-> .NET Core, Node.js, and Python applications are only supported on Azure virtual machines and Azure virtual machine scale sets via manual SDK based instrumentation and therefore the steps below do not apply to these scenarios. +> The steps below do not apply to Node.js and Python applications, which require SDK instrumentation. Extension execution output is logged to files found in the following directories: ```Windows |
| azure-monitor | Transaction Diagnostics | https://github.com/MicrosoftDocs/azure-docs/commits/main/articles/azure-monitor/app/transaction-diagnostics.md | Title: Application Insights transaction diagnostics | Microsoft Docs description: This article explains Application Insights end-to-end transaction diagnostics. Previously updated : 01/19/2018 Last updated : 10/31/2022 This view has four key parts: a results list, a cross-component transaction char This chart provides a timeline with horizontal bars during requests and dependencies across components. Any exceptions that are collected are also marked on the timeline. -* The top row on this chart represents the entry point. It's the incoming request to the first component called in this transaction. The duration is the total time taken for the transaction to complete. -* Any calls to external dependencies are simple noncollapsible rows, with icons that represent the dependency type. -* Calls to other components are collapsible rows. Each row corresponds to a specific operation invoked at the component. -* By default, the request, dependency, or exception that you selected appears on the right side. -* Select any row to see its [details on the right](#details-of-the-selected-telemetry). +1. The top row on this chart represents the entry point. It's the incoming request to the first component called in this transaction. The duration is the total time taken for the transaction to complete. +1. Any calls to external dependencies are simple noncollapsible rows, with icons that represent the dependency type. +1. Calls to other components are collapsible rows. Each row corresponds to a specific operation invoked at the component. +1. By default, the request, dependency, or exception that you selected appears on the right side. Select any row to see its [details](#details-of-the-selected-telemetry). > [!NOTE] > Calls to other components have two rows. One row represents the outbound call (dependency) from the caller component. The other row corresponds to the inbound request at the called component. The leading icon and distinct styling of the duration bars help differentiate between them. If all calls were instrumented, in process is the likely root cause for the time ### What if I see the message ***Error retrieving data*** while navigating Application Insights in the Azure portal? -This error indicates that the browser was unable to call into a required API or the API returned a failure response. To troubleshoot the behavior, open a browser [InPrivate window](https://support.microsoft.com/microsoft-edge/browse-inprivate-in-microsoft-edge-cd2c9a48-0bc4-b98e-5e46-ac40c84e27e2) and [disable any browser extensions](https://support.microsoft.com/microsoft-edge/add-turn-off-or-remove-extensions-in-microsoft-edge-9c0ec68c-2fbc-2f2c-9ff0-bdc76f46b026) that are running, then identify if you can still reproduce the portal behavior. If the portal error still occurs, try testing with other browsers, or other machines, investigate DNS or other network related issues from the client machine where the API calls are failing. If the portal error persists and requires further investigations, then [collect a browser network trace](https://learn.microsoft.com/azure/azure-portal/capture-browser-trace) while you reproduce the unexpected portal behavior and open a support case from the Azure portal. +This error indicates that the browser was unable to call into a required API or the API returned a failure response. To troubleshoot the behavior, open a browser [InPrivate window](https://support.microsoft.com/microsoft-edge/browse-inprivate-in-microsoft-edge-cd2c9a48-0bc4-b98e-5e46-ac40c84e27e2) and [disable any browser extensions](https://support.microsoft.com/microsoft-edge/add-turn-off-or-remove-extensions-in-microsoft-edge-9c0ec68c-2fbc-2f2c-9ff0-bdc76f46b026) that are running, then identify if you can still reproduce the portal behavior. If the portal error still occurs, try testing with other browsers, or other machines, investigate DNS or other network related issues from the client machine where the API calls are failing. If the portal error persists and requires further investigations, then [collect a browser network trace](../../azure-portal/capture-browser-trace.md#capture-a-browser-trace-for-troubleshooting) while you reproduce the unexpected portal behavior and open a support case from the Azure portal. |
| azure-monitor | Container Insights Prometheus Metrics Addon | https://github.com/MicrosoftDocs/azure-docs/commits/main/articles/azure-monitor/containers/container-insights-prometheus-metrics-addon.md | The output will be similar to the following: - Register the `AKS-PrometheusAddonPreview` feature flag in the Azure Kubernetes clusters subscription with the following command in Azure CLI: `az feature register --namespace Microsoft.ContainerService --name AKS-PrometheusAddonPreview`. - The Azure Monitor workspace and Azure Managed Grafana workspace must already be created.-- The template needs to be deployed in the same resource group as the cluster.+- The template needs to be deployed in the Azure Managed Grafana workspaces resource group. ### Retrieve list of Grafana integrations If you're using an existing Azure Managed Grafana instance that already has been linked to an Azure Monitor workspace then you need the list of Grafana integrations. Open the **Overview** page for the Azure Managed Grafana instance and select the JSON view. Copy the value of the `azureMonitorWorkspaceIntegrations` field. If it doesn't exist, then the instance hasn't been linked with any Azure Monitor workspace. If you're using an existing Azure Managed Grafana instance that already has been ``` ### Retrieve System Assigned identity for Grafana resource-If you're using an existing Azure Managed Grafana instance that already has been linked to an Azure Monitor workspace then you need the list of Grafana integrations. Open the **Overview** page for the Azure Managed Grafana instance and select the JSON view. Copy the value of the `principalId` field for the `SystemAssigned` identity. +The system assigned identity for the Azure Managed Grafana resource is also required. To get to it, open the **Overview** page for the Azure Managed Grafana instance and select the JSON view. Copy the value of the `principalId` field for the `SystemAssigned` identity. ```json "identity": { If you're using an existing Azure Managed Grafana instance that already has been "type": "SystemAssigned" }, ```--Assign the `Monitoring Data Reader` role to the Grafana System Assigned Identity. This is the principalId on the Azure Monitor Workspace resource. This will let the Azure Managed Grafana resource read data from the Azure Monitor Workspace and is a requirement for viewing the metrics. +Please assign the `Monitoring Data Reader` on the Azure Monitor Workspace for the Grafana System Identity i.e. take the principal ID that you got from the Azure Managed Grafana Resource, open the Access Control Blade for the Azure Monitor Workspace and assign the `Monitoring Data Reader` Built-In role to the principal ID (System Assigned MSI for the Azure Managed Grafana resource). This will let the Azure Managed Grafana resource read data from the Azure Monitor Workspace and is a requirement for viewing the metrics. ### Download and edit template and parameter file Assign the `Monitoring Data Reader` role to the Grafana System Assigned Identity }, { "azureMonitorWorkspaceResourceId": "full_resource_id_2"- } + }, {- "azureMonitorWorkspaceResourceId": "[parameters('azureMonitorWorkspaceResourceId')]" + "azureMonitorWorkspaceResourceId": "[parameters('azureMonitorWorkspaceResourceId')]" } ] } } ````+ For e.g. In the above code snippet `full_resource_id_1` and `full_resource_id_2` were already present on the Azure Managed Grafana resource and we're manually adding them to the ARM template. The final `azureMonitorWorkspaceResourceId` already exists in the template and is being used to link to the Azure Monitor Workspace resource ID provided in the parameters file. Please note, You do not have to replace `full_resource_id_1` and `full_resource_id_2` and any other resource id's if no integrations are found in the retrieval step. ### Deploy template ama-metrics-ksm-5fcf8dffcd 1 1 1 11h ## Uninstall metrics addon-Currently, Azure CLI is the only option to remove the metrics addon and stop sending Prometheus metrics to Azure Monitor managed service for Prometheus. The following command removes the agent from the cluster nodes and deletes the recording rules created for the data being collected from the cluster, it doesn't remove the DCE, DCR, or the data already collected and stored in your Azure Monitor workspace. ++Currently, Azure CLI is the only option to remove the metrics addon and stop sending Prometheus metrics to Azure Monitor managed service for Prometheus. +The aks-preview extension needs to be installed using the command `az extension add --name aks-preview`. For more information on how to install a CLI extension, see [Use and manage extensions with the Azure CLI](/azure/azure-cli-extensions-overview). The following command removes the agent from the cluster nodes and deletes the recording rules created for the data being collected from the cluster, it doesn't remove the DCE, DCR, or the data already collected and stored in your Azure Monitor workspace. ```azurecli az aks update --disable-azuremonitormetrics -n <cluster-name> -g <cluster-resource-group> |
| azure-monitor | Diagnostic Settings | https://github.com/MicrosoftDocs/azure-docs/commits/main/articles/azure-monitor/essentials/diagnostic-settings.md | Each Azure resource requires its own diagnostic setting, which defines the follo A single diagnostic setting can define no more than one of each of the destinations. If you want to send data to more than one of a particular destination type (for example, two different Log Analytics workspaces), create multiple settings. Each resource can have up to five diagnostic settings. > [!WARNING]-> If you need to delete a resource, you should first delete its diagnostic settings. Otherwise, if you recreate this resource using the same name, the previous diagnostic settings will be included with the new resource. This will resume the collection of resource logs for the new resource as defined in a diagnostic setting and send the applicable metric and log data to the previously configured destination. +> If you need to delete a resource, you should first delete its diagnostic settings. Otherwise, if you recreate this resource, the diagnostic settings for the deleted resource could be included with the new resource, depending on the resource configuration for each resource. If the diagnostics settings are included with the new resource, this resumes the collection of resource logs as defined in the diagnostic setting and sends the applicable metric and log data to the previously configured destination. +> +>Also, itΓÇÖs a good practice to delete the diagnostic settings for a resource you're going to delete and don't plan on using again to keep your environment clean. The following video walks you through routing resource platform logs with diagnostic settings. The video was done at an earlier time. Be aware of the following changes: |
| azure-netapp-files | Understand Guidelines Active Directory Domain Service Site | https://github.com/MicrosoftDocs/azure-docs/commits/main/articles/azure-netapp-files/understand-guidelines-active-directory-domain-service-site.md | The required network ports are as follows: *DNS running on AD DS domain controller -### Network requirements +### DNS requirements Azure NetApp Files SMB, dual-protocol, and Kerberos NFSv4.1 volumes require reliable access to Domain Name System (DNS) services and up-to-date DNS records. Poor network connectivity between Azure NetApp Files and DNS servers can cause client access interruptions or client timeouts. Incomplete or incorrect DNS records for AD DS or Azure NetApp Files can cause client access interruptions or client timeouts. |
| azure-netapp-files | Use Availability Zones | https://github.com/MicrosoftDocs/azure-docs/commits/main/articles/azure-netapp-files/use-availability-zones.md | -# Use availability zones for high availability in Azure NetApp Files +# Use availability zones for high availability in Azure NetApp Files (preview) Azure [availability zones](../availability-zones/az-overview.md#availability-zones) are physically separate locations within each supporting Azure region that are tolerant to local failures. Failures can range from software and hardware failures to events such as earthquakes, floods, and fires. Tolerance to failures is achieved because of redundancy and logical isolation of Azure services. To ensure resiliency, a minimum of three separate availability zones are present in all [availability zone-enabled regions](../availability-zones/az-overview.md#azure-regions-with-availability-zones). You can co-locate your compute, storage, networking, and data resources across a Latency is subject to availability zone latency for within availability zone access and the regional latency envelope for cross-availability zone access. +>[!IMPORTANT] +>Availability zone volume placement in Azure NetApp Files is currently in preview. Refer to [Manage availability zone volume placement](manage-availability-zone-volume-placement.md#register-the-feature) for details on registering the feature. + ## Azure regions with availability zones For a list of regions that that currently support availability zones, refer to [Azure regions with availability zones](../availability-zones/az-overview.md#azure-regions-with-availability-zones). |
| azure-resource-manager | Deploy Github Actions | https://github.com/MicrosoftDocs/azure-docs/commits/main/articles/azure-resource-manager/bicep/deploy-github-actions.md | Create secrets for your Azure credentials, resource group, and subscriptions. 1. In [GitHub](https://github.com/), navigate to your repository. -1. Select **Settings > Secrets > New secret**. +1. Select **Security > Secrets and variables > Actions > New repository secret**. 1. Paste the entire JSON output from the Azure CLI command into the secret's value field. Name the secret `AZURE_CREDENTIALS`. |
| azure-resource-manager | Deploy Github Actions | https://github.com/MicrosoftDocs/azure-docs/commits/main/articles/azure-resource-manager/templates/deploy-github-actions.md | The file has two sections: ## Generate deployment credentials -# [Service principal](#tab/userlevel) -You can create a [service principal](../../active-directory/develop/app-objects-and-service-principals.md#service-principal-object) with the [az ad sp create-for-rbac](/cli/azure/ad/sp#az-ad-sp-create-for-rbac) command in the [Azure CLI](/cli/azure/). Run this command with [Azure Cloud Shell](https://shell.azure.com/) in the Azure portal or by selecting the **Try it** button. --Create a resource group if you do not already have one. --```azurecli-interactive - az group create -n {MyResourceGroup} -l {location} -``` --Replace the placeholder `myApp` with the name of your application. --```azurecli-interactive - az ad sp create-for-rbac --name {myApp} --role contributor --scopes /subscriptions/{subscription-id}/resourceGroups/{MyResourceGroup} --sdk-auth -``` --In the example above, replace the placeholders with your subscription ID and resource group name. The output is a JSON object with the role assignment credentials that provide access to your App Service app similar to below. Copy this JSON object for later. You will only need the sections with the `clientId`, `clientSecret`, `subscriptionId`, and `tenantId` values. --```output - { - "clientId": "<GUID>", - "clientSecret": "<GUID>", - "subscriptionId": "<GUID>", - "tenantId": "<GUID>", - (...) - } -``` --> [!IMPORTANT] -> It is always a good practice to grant minimum access. The scope in the previous example is limited to the resource group. --# [OpenID Connect](#tab/openid) ---OpenID Connect is an authentication method that uses short-lived tokens. Setting up [OpenID Connect with GitHub Actions](https://docs.github.com/en/actions/deployment/security-hardening-your-deployments/about-security-hardening-with-openid-connect) is more complex process that offers hardened security. --1. If you do not have an existing application, register a [new Active Directory application and service principal that can access resources](../../active-directory/develop/howto-create-service-principal-portal.md). Create the Active Directory application. -- ```azurecli-interactive - az ad app create --display-name myApp - ``` -- This command will output JSON with an `appId` that is your `client-id`. Save the value to use as the `AZURE_CLIENT_ID` GitHub secret later. -- You'll use the `objectId` value when creating federated credentials with Graph API and reference it as the `APPLICATION-OBJECT-ID`. --1. Create a service principal. Replace the `$appID` with the appId from your JSON output. -- This command generates JSON output with a different `objectId` and will be used in the next step. The new `objectId` is the `assignee-object-id`. - - Copy the `appOwnerTenantId` to use as a GitHub secret for `AZURE_TENANT_ID` later. -- ```azurecli-interactive - az ad sp create --id $appId - ``` --1. Create a new role assignment by subscription and object. By default, the role assignment will be tied to your default subscription. Replace `$subscriptionId` with your subscription ID, `$resourceGroupName` with your resource group name, and `$assigneeObjectId` with the generated `assignee-object-id`. Learn [how to manage Azure subscriptions with the Azure CLI](/cli/azure/manage-azure-subscriptions-azure-cli). -- ```azurecli-interactive - az role assignment create --role contributor --subscription $subscriptionId --assignee-object-id $assigneeObjectId --assignee-principal-type ServicePrincipal --scopes /subscriptions/$subscriptionId/resourceGroups/$resourceGroupName/providers/Microsoft.Web/sites/ - ``` --1. Run the following command to [create a new federated identity credential](/graph/api/application-post-federatedidentitycredentials?view=graph-rest-beta&preserve-view=true) for your active directory application. -- * Replace `APPLICATION-OBJECT-ID` with the **objectId (generated while creating app)** for your Active Directory application. - * Set a value for `CREDENTIAL-NAME` to reference later. - * Set the `subject`. The value of this is defined by GitHub depending on your workflow: - * Jobs in your GitHub Actions environment: `repo:< Organization/Repository >:environment:< Name >` - * For Jobs not tied to an environment, include the ref path for branch/tag based on the ref path used for triggering the workflow: `repo:< Organization/Repository >:ref:< ref path>`. For example, `repo:n-username/ node_express:ref:refs/heads/my-branch` or `repo:n-username/ node_express:ref:refs/tags/my-tag`. - * For workflows triggered by a pull request event: `repo:< Organization/Repository >:pull_request`. - - ```azurecli - az rest --method POST --uri 'https://graph.microsoft.com/beta/applications/<APPLICATION-OBJECT-ID>/federatedIdentityCredentials' --body '{"name":"<CREDENTIAL-NAME>","issuer":"https://token.actions.githubusercontent.com","subject":"repo:organization/repository:ref:refs/heads/main","description":"Testing","audiences":["api://AzureADTokenExchange"]}' - ``` - - To learn how to create a Create an active directory application, service principal, and federated credentials in Azure portal, see [Connect GitHub and Azure](/azure/developer/github/connect-from-azure#use-the-azure-login-action-with-openid-connect). - -- ## Configure the GitHub secrets -# [Service principal](#tab/userlevel) --You need to create secrets for your Azure credentials, resource group, and subscriptions. --1. In [GitHub](https://github.com/), browse your repository. --1. Select **Settings > Secrets > New secret**. --1. Paste the entire JSON output from the Azure CLI command into the secret's value field. Give the secret the name `AZURE_CREDENTIALS`. -1. Create another secret named `AZURE_RG`. Add the name of your resource group to the secret's value field (example: `myResourceGroup`). --1. Create an additional secret named `AZURE_SUBSCRIPTION`. Add your subscription ID to the secret's value field (example: `90fd3f9d-4c61-432d-99ba-1273f236afa2`). --# [OpenID Connect](#tab/openid) --You need to provide your application's **Client ID**, **Tenant ID**, and **Subscription ID** to the login action. These values can either be provided directly in the workflow or can be stored in GitHub secrets and referenced in your workflow. Saving the values as GitHub secrets is the more secure option. --1. Open your GitHub repository and go to **Settings**. --1. Select **Settings > Secrets > New secret**. --1. Create secrets for `AZURE_CLIENT_ID`, `AZURE_TENANT_ID`, and `AZURE_SUBSCRIPTION_ID`. Use these values from your Active Directory application for your GitHub secrets: -- |GitHub Secret | Active Directory Application | - ||| - |AZURE_CLIENT_ID | Application (client) ID | - |AZURE_TENANT_ID | Directory (tenant) ID | - |AZURE_SUBSCRIPTION_ID | Subscription ID | --1. Save each secret by selecting **Add secret**. -- ## Add Resource Manager template Add a Resource Manager template to your GitHub repository. This template creates a storage account. |
| azure-vmware | Attach Azure Netapp Files To Azure Vmware Solution Hosts | https://github.com/MicrosoftDocs/azure-docs/commits/main/articles/azure-vmware/attach-azure-netapp-files-to-azure-vmware-solution-hosts.md | There are some important best practices to follow for optimal performance of NFS - Create multiple datastores of 4-TB size for better performance. The default limit is 64 but it can be increased up to a maximum of 256 by submitting a support ticket. To submit a support ticket, go to [Create an Azure support request](../azure-portal/supportability/how-to-create-azure-support-request.md). - Work with your Microsoft representative to ensure that the Azure VMware Solution private cloud and the Azure NetApp Files volumes are deployed within same [Availability Zone](../availability-zones/az-overview.md#availability-zones). +> [!IMPORTANT] +>Changing the Azure NetApp Files volumes tier after creating the datastore will result in unexpected behavior in portal and API due to metadata mismatch. Set your performance tier of the Azure NetApp Files volume when creating the datastore. If you need to change tier during run time, detach the datastore, change the performance tier of the volume and attach the datastore. We are working on improvements to make this seamless. + ## Attach an Azure NetApp Files volume to your private cloud ### [Portal](#tab/azure-portal) |
| azure-vmware | Configure Alerts For Azure Vmware Solution | https://github.com/MicrosoftDocs/azure-docs/commits/main/articles/azure-vmware/configure-alerts-for-azure-vmware-solution.md | description: Learn how to use alerts to receive notifications. Also learn how to Previously updated : 07/23/2021 Last updated : 10/26/2022 # Configure Azure Alerts in Azure VMware Solution |
| azure-vmware | Deploy Disaster Recovery Using Jetstream | https://github.com/MicrosoftDocs/azure-docs/commits/main/articles/azure-vmware/deploy-disaster-recovery-using-jetstream.md | Azure VMware Solution supports the installation of JetStream using either static | **Datastore** | Name of the datastore where you'll deploy the JetStream MSA. | | **VMName** | Name of JetStream MSA VM, for example, **jetstreamServer**. | | **Cluster** | Name of the Azure VMware Solution private cluster where the JetStream MSA is deployed, for example, **Cluster-1**. |- | **Netmask** | Netmask of the MSA to be deployed, for example, **22** or **24**. | + | **Netmask** | Netmask of the MSA to be deployed, for example, **255.255.255.0**. | | **MSIp** | IP address of the JetStream MSA VM. | | **Dns** | DNS IP that the JetStream MSA VM should use. | | **Gateway** | IP address of the network gateway for the JetStream MSA VM. | |
| azure-vmware | Integrate Azure Native Services | https://github.com/MicrosoftDocs/azure-docs/commits/main/articles/azure-vmware/integrate-azure-native-services.md | Title: Monitor and protect VMs with Azure native services description: Learn how to integrate and deploy Microsoft Azure native tools to monitor and manage your Azure VMware Solution workloads. Previously updated : 08/15/2021 Last updated : 10/26/2022+ # Monitor and protect VMs with Azure native services Microsoft Azure native services let you monitor, manage, and protect your virtua The Azure native services that you can integrate with Azure VMware Solution include: -- **Azure Arc** extends Azure management to any infrastructure, including Azure VMware Solution, on-premises, or other cloud platforms. [Azure Arc-enabled servers](../azure-arc/servers/overview.md) lets you manage your Windows and Linux physical servers and virtual machines hosted *outside* of Azure, on your corporate network, or another cloud provider. You can attach a Kubernetes cluster hosted in your Azure VMware Solution environment using [Azure Arc enabled Kubernetes](../azure-arc/kubernetes/overview.md). +- **Azure Arc** extends Azure management to any infrastructure, including Azure VMware Solution, on-premises, or other cloud platforms. [Azure Arc-enabled servers](../azure-arc/servers/overview.md) lets you manage your Windows and Linux physical servers and virtual machines hosted *outside* of Azure, on your corporate network, or another cloud provider. You can attach a Kubernetes cluster hosted in your Azure VMware Solution environment using [Azure Arc enabled Kubernetes](../azure-arc/kubernetes/overview.md). -- **Azure Monitor** collects, analyzes, and acts on telemetry from your cloud and on-premises environments. It requires no deployment. You can monitor guest operating system performance to discover and map application dependencies for Azure VMware Solution or on-premises VMs. Your Log Analytics workspace in Azure Monitor enables log collection and performance counter collection using the Log Analytics agent or extensions. +- **Azure Monitor** collects, analyzes, and acts on data from your cloud and on-premises environments. It requires no deployment. You can monitor guest operating system performance to discover and map application dependencies for Azure VMware Solution or on-premises VMs. Your Log Analytics workspace in Azure Monitor enables log collection and performance counter collection using the Log Analytics agent or extensions. With Azure Monitor, you can collect data from different [sources to monitor and analyze](../azure-monitor/data-sources.md) and different types of [data for analysis, visualization, and alerting](../azure-monitor/data-platform.md). You can also create alert rules to identify issues in your environment, like high use of resources, missing patches, low disk space, and heartbeat of your VMs. You can set an automated response to detected events by sending an alert to IT Service Management (ITSM) tools. Alert detection notification can also be sent via email. The Azure native services that you can integrate with Azure VMware Solution incl The diagram shows the integrated monitoring architecture for Azure VMware Solution VMs. The Log Analytics agent enables collection of log data from Azure, Azure VMware Solution, and on-premises VMs. The log data is sent to Azure Monitor Logs and stored in a Log Analytics workspace. You can deploy the Log Analytics agent using Arc enabled servers [VM extensions support](../azure-arc/servers/manage-vm-extensions.md) for new and existing VMs. You can configure the Log Analytics workspace with Microsoft Sentinel for alert ## Before you start -If you are new to Azure or unfamiliar with any of the services previously mentioned, review the following articles: +If you're new to Azure or unfamiliar with any of the services previously mentioned, review the following articles: - [Automation account authentication overview](../automation/automation-security-overview.md) - [Designing your Azure Monitor Logs deployment](../azure-monitor/logs/workspace-design.md) and [Azure Monitor](../azure-monitor/overview.md) If you are new to Azure or unfamiliar with any of the services previously mentio - [What is Azure Arc enabled servers?](../azure-arc/servers/overview.md) and [What is Azure Arc enabled Kubernetes?](../azure-arc/kubernetes/overview.md) - [Update Management overview](../automation/update-management/overview.md) -- ## Enable Azure Update Management [Azure Update Management](../automation/update-management/overview.md) in Azure Automation manages operating system updates for your Windows and Linux machines in a hybrid environment. It monitors patching compliance and forwards patching deviation alerts to Azure Monitor for remediation. Azure Update Management must connect to your Log Analytics workspace to use stored data to assess the status of updates on your VMs. If you are new to Azure or unfamiliar with any of the services previously mentio 1. [Create a Log Analytics workspace in the Azure portal](../azure-monitor/logs/quick-create-workspace.md). If you prefer, you can also create a workspace via [CLI](../azure-monitor/logs/resource-manager-workspace.md), [PowerShell](../azure-monitor/logs/powershell-workspace-configuration.md), or [Azure Resource Manager template](../azure-monitor/logs/resource-manager-workspace.md). 1. [Enable Update Management from an Automation account](../automation/update-management/enable-from-automation-account.md). In the process, you'll link your Log Analytics workspace with your automation account. - -1. Once you've enabled Update Management, you can [deploy updates on VMs and review the results](../automation/update-management/deploy-updates.md). ++1. Once you've enabled Update Management, you can [deploy updates on VMs and review the results](../automation/update-management/deploy-updates.md). ## Enable Microsoft Defender for Cloud For more information, see [Integrate Microsoft Defender for Cloud with Azure VMw Extend Azure management to any infrastructure, including Azure VMware Solution, on-premises, or other cloud platforms. For information on enabling Azure Arc enabled servers for multiple Windows or Linux VMs, see [Connect hybrid machines to Azure at scale](../azure-arc/servers/onboard-service-principal.md). -- ## Onboard hybrid Kubernetes clusters with Azure Arc-enabled Kubernetes Attach a Kubernetes cluster hosted in your Azure VMware Solution environment using Azure Arc enabled Kubernetes. For more information, see [Create an Azure Arc-enabled Kubernetes cluster](../azure-arc/kubernetes/quickstart-connect-cluster.md). - ## Deploy the Log Analytics agent Monitor Azure VMware Solution VMs through the Log Analytics agent. Machines connected to the Log Analytics workspace use the [Log Analytics agent](../azure-monitor/agents/log-analytics-agent.md) to collect data about changes to installed software, Microsoft services, Windows registry and files, and Linux daemons on monitored servers. When data is available, the agent sends it to Azure Monitor Logs for processing. Azure Monitor Logs applies logic to the received data, records it, and makes it available for analysis. Deploy the Log Analytics agent by using [Azure Arc-enabled servers VM extension support](../azure-arc/servers/manage-vm-extensions.md). --- ## Enable Azure Monitor Can collect data from different [sources to monitor and analyze](../azure-monitor/data-sources.md) and different types of [data for analysis, visualization, and alerting](../azure-monitor/data-platform.md). You can also create alert rules to identify issues in your environment, like high use of resources, missing patches, low disk space, and heartbeat of your VMs. You can set an automated response to detected events by sending an alert to IT Service Management (ITSM) tools. Alert detection notification can also be sent via email. -Monitor guest operating system performance to discover and map application dependencies for Azure VMware Solution or on-premises VMs. Your Log Analytics workspace in Azure Monitor enables log collection and performance counter collection using the Log Analytics agent or extensions. -+Monitor guest operating system performance to discover and map application dependencies for Azure VMware Solution or on-premises VMs. Your Log Analytics workspace in Azure Monitor enables log collection and performance counter collection using the Log Analytics agent or extensions. 1. [Design your Azure Monitor Logs deployment](../azure-monitor/logs/workspace-design.md) Monitor guest operating system performance to discover and map application depen - [Connect Azure to ITSM tools using IT Service Management Connector](../azure-monitor/alerts/itsmc-overview.md). - ## Next steps Now that you've covered Azure VMware Solution network and interconnectivity concepts, you may want to learn about [integrating Microsoft Defender for Cloud with Azure VMware Solution](azure-security-integration.md). |
| azure-vmware | Tutorial Access Private Cloud | https://github.com/MicrosoftDocs/azure-docs/commits/main/articles/azure-vmware/tutorial-access-private-cloud.md | Title: Tutorial - Access your private cloud description: Learn how to access an Azure VMware Solution private cloud Previously updated : 08/13/2021 Last updated : 10/27/2022+ # Tutorial: Access an Azure VMware Solution private cloud -Azure VMware Solution doesn't allow you to manage your private cloud with your on-premises vCenter Server. Instead, you'll need to connect to the Azure VMware Solution vCenter Server instance through a jump box. +Azure VMware Solution doesn't allow you to manage your private cloud with your on-premises vCenter Server. Instead, you'll need to connect to the Azure VMware Solution vCenter Server instance through a jump box. -In this tutorial, you'll create a jump box in the resource group you created in the [previous tutorial](tutorial-configure-networking.md) and sign into the Azure VMware Solution vCenter Server. This jump box is a Windows virtual machine (VM) on the same virtual network you created. It provides access to both vCenter Server and the NSX Manager. +In this tutorial, you'll create a jump box in the resource group you created in the [previous tutorial](tutorial-configure-networking.md) and sign into the Azure VMware Solution vCenter Server. This jump box is a Windows virtual machine (VM) on the same virtual network you created. It provides access to both vCenter Server and the NSX Manager. In this tutorial, you learn how to: In this tutorial, you learn how to: 1. In the resource group, select **Add**, search for **Microsoft Windows 10**, and select it. Then select **Create**. - :::image type="content" source="media/tutorial-access-private-cloud/ss8-azure-w10vm-create.png" alt-text="Screenshot of how to add a new Windows 10 VM for a jump box."::: + :::image type="content" source="media/tutorial-access-private-cloud/ss8-azure-w10vm-create.png" alt-text="Screenshot of how to add a new Windows 10 VM for a jump box."lightbox="media/tutorial-access-private-cloud/ss8-azure-w10vm-create.png"::: -1. Enter the required information in the fields, and then select **Review + create**. +1. Enter the required information in the fields, and then select **Review + create**. For more information on the fields, see the following table. In this tutorial, you learn how to: 1. From the jump box, sign in to vSphere Client with VMware vCenter Server SSO using a cloud admin username and verify that the user interface displays successfully. -1. In the Azure portal, select your private cloud, and then **Manage** > **Identity**. +1. In the Azure portal, select your private cloud, and then **Manage** > **Identity**. The URLs and user credentials for private cloud vCenter Server and NSX-T Manager display. - :::image type="content" source="media/tutorial-access-private-cloud/ss4-display-identity.png" alt-text="Screenshot showing the private cloud vCenter Server and NSX Manager URLs and credentials." lightbox="media/tutorial-access-private-cloud/ss4-display-identity.png"::: + :::image type="content" source="media/tutorial-access-private-cloud/ss4-display-identity.png" alt-text="Screenshot showing the private cloud vCenter Server and NSX Manager URLs and credentials."lightbox="media/tutorial-access-private-cloud/ss4-display-identity.png"::: -1. Navigate to the VM you created in the preceding step and connect to the virtual machine. +1. Navigate to the VM you created in the preceding step and connect to the virtual machine. If you need help with connecting to the VM, see [connect to a virtual machine](../virtual-machines/windows/connect-logon.md#connect-to-the-virtual-machine) for details. -1. In the Windows VM, open a browser and navigate to the vCenter Server and NSX-T Manager URLs in two tabs. +1. In the Windows VM, open a browser and navigate to the vCenter Server and NSX-T Manager URLs in two tabs. 1. In the vSphere Client tab, enter the `cloudadmin@vsphere.local` user credentials from the previous step. - :::image type="content" source="media/tutorial-access-private-cloud/ss5-vcenter-login.png" alt-text="Screenshot showing the VMware vSphere sign in page." border="true"::: + :::image type="content" source="media/tutorial-access-private-cloud/ss5-vcenter-login.png" alt-text="Screenshot showing the VMware vSphere sign in page."lightbox="media/tutorial-access-private-cloud/ss5-vcenter-login.png" border="true"::: - :::image type="content" source="media/tutorial-access-private-cloud/ss6-vsphere-client-home.png" alt-text="Screenshot showing a summary of Cluster-1 in the vSphere Client." border="true"::: + :::image type="content" source="media/tutorial-access-private-cloud/ss6-vsphere-client-home.png" alt-text="Screenshot showing a summary of Cluster-1 in the vSphere Client."lightbox="media/tutorial-access-private-cloud/ss6-vsphere-client-home.png" border="true"::: 1. In the second tab of the browser, sign in to NSX-T Manager. - :::image type="content" source="media/tutorial-access-private-cloud/ss10-nsx-manager-home.png" alt-text="Screenshot of the NSX-T Manager Overview." border="true"::: --+ :::image type="content" source="media/tutorial-access-private-cloud/ss10-nsx-manager-home.png" alt-text="Screenshot of the NSX-T Manager Overview."lightbox="media/tutorial-access-private-cloud/ss10-nsx-manager-home.png" border="true"::: ## Next steps Continue to the next tutorial to learn how to create a virtual network to set up > [!div class="nextstepaction"] > [Create a Virtual Network](tutorial-configure-networking.md)- |
| azure-vmware | Tutorial Create Private Cloud | https://github.com/MicrosoftDocs/azure-docs/commits/main/articles/azure-vmware/tutorial-create-private-cloud.md | Title: Tutorial - Deploy an Azure VMware Solution private cloud description: Learn how to create and deploy an Azure VMware Solution private cloud Previously updated : 09/29/2021 Last updated : 10/27/2022+ # Tutorial: Deploy an Azure VMware Solution private cloud You use vCenter Server and NSX-T Manager to manage most other aspects of cluster >[!TIP] >You can always extend the cluster and add more clusters later if you need to go beyond the initial deployment number. -Because Azure VMware Solution doesn't allow you to manage your private cloud with your cloud vCenter Server at launch, you'll need to do additional steps for the configuration. This tutorial covers these steps and related prerequisites. +Because Azure VMware Solution doesn't allow you to manage your private cloud with your cloud vCenter Server at launch, you'll need to do more steps for the configuration. This tutorial covers these steps and related prerequisites. In this tutorial, you'll learn how to: In this tutorial, you've learned how to: Continue to the next tutorial to learn how to create a jump box. You use the jump box to connect to your environment to manage your private cloud locally. - > [!div class="nextstepaction"] > [Access an Azure VMware Solution private cloud](tutorial-access-private-cloud.md) |
| azure-vmware | Tutorial Delete Private Cloud | https://github.com/MicrosoftDocs/azure-docs/commits/main/articles/azure-vmware/tutorial-delete-private-cloud.md | Title: Tutorial - Delete an Azure VMware Solution private cloud description: Learn how to delete an Azure VMware Solution private cloud that you no longer need. Previously updated : 03/13/2021 Last updated : 10/27/2022+ # Tutorial: Delete an Azure VMware Solution private cloud If you have an Azure VMware Solution private cloud that you no longer need, you * Several virtual machines (VMs) -When you delete a private cloud, all VMs, their data, clusters, and network address space provisioned get deleted. The dedicated Azure VMware Solution hosts are securely wiped and returned to the free pool. +When you delete a private cloud, all VMs, their data, clusters, and network address space provisioned get deleted. The dedicated Azure VMware Solution hosts are securely wiped and returned to the free pool. > [!CAUTION] > Deleting the private cloud terminates all running workloads and components and is an irreversible operation. Once you delete the private cloud, you cannot recover the data. When you delete a private cloud, all VMs, their data, clusters, and network addr If you require the VMs and their data later, make sure to backup the data before you delete the private cloud. Unfortunately, there's no way to recover the VMs and their data. - ## Delete the private cloud 1. Access the Azure VMware Solutions console in the [Azure portal](https://portal.azure.com). 2. Select the private cloud you want to delete.- -3. Enter the name of the private cloud and select **Yes**. ++3. Enter the name of the private cloud and select **Yes**. >[!NOTE] >The deletion process takes a few hours to complete. |
| azure-vmware | Tutorial Expressroute Global Reach Private Cloud | https://github.com/MicrosoftDocs/azure-docs/commits/main/articles/azure-vmware/tutorial-expressroute-global-reach-private-cloud.md | Title: Peer on-premises environments to Azure VMware Solution description: Learn how to create ExpressRoute Global Reach peering to a private cloud in Azure VMware Solution. -+ Previously updated : 07/28/2021 Last updated : 10/27/2022 -# Peer on-premises environments to Azure VMware Solution +# Tutorial: Peer on-premises environments to Azure VMware Solution -After you deploy your Azure VMware Solution private cloud, you'll connect it to your on-premises environment. ExpressRoute Global Reach connects your on-premises environment to your Azure VMware Solution private cloud. The ExpressRoute Global Reach connection is established between the private cloud ExpressRoute circuit and an existing ExpressRoute connection to your on-premises environments. +After you deploy your Azure VMware Solution private cloud, you'll connect it to your on-premises environment. ExpressRoute Global Reach connects your on-premises environment to your Azure VMware Solution private cloud. The ExpressRoute Global Reach connection is established between the private cloud ExpressRoute circuit and an existing ExpressRoute connection to your on-premises environments. :::image type="content" source="media/pre-deployment/azure-vmware-solution-on-premises-diagram.png" alt-text="Diagram showing ExpressRoute Global Reach on-premises network connectivity." lightbox="media/pre-deployment/azure-vmware-solution-on-premises-diagram.png" border="false"::: The circuit owner creates an authorization, which creates an authorization key t > [!NOTE] > Each connection requires a separate authorization. -1. From the **ExpressRoute circuits** blade, under Settings, select **Authorizations**. +1. From **ExpressRoute circuits** in the left navigation, under Settings, select **Authorizations**. 1. Enter the name for the authorization key and select **Save**. - :::image type="content" source="media/expressroute-global-reach/start-request-auth-key-on-premises-expressroute.png" alt-text="Select Authorizations and enter the name for the authorization key."::: + :::image type="content" source="media/expressroute-global-reach/start-request-auth-key-on-premises-expressroute.png" alt-text="Select Authorizations and enter the name for the authorization key."lightbox="media/expressroute-global-reach/start-request-auth-key-on-premises-expressroute.png"::: Once created, the new key appears in the list of authorization keys for the circuit. 1. Copy the authorization key and the ExpressRoute ID. You'll use them in the next step to complete the peering. -## Peer private cloud to on-premises +## Peer private cloud to on-premises + Now that you've created an authorization key for the private cloud ExpressRoute circuit, you can peer it with your on-premises ExpressRoute circuit. The peering is done from the on-premises ExpressRoute circuit in the **Azure portal**. You'll use the resource ID (ExpressRoute circuit ID) and authorization key of your private cloud ExpressRoute circuit to finish the peering. 1. From the private cloud, under Manage, select **Connectivity** > **ExpressRoute Global Reach** > **Add**. - :::image type="content" source="./media/expressroute-global-reach/expressroute-global-reach-tab.png" alt-text="Screenshot showing the ExpressRoute Global Reach tab in the Azure VMware Solution private cloud."::: + :::image type="content" source="./media/expressroute-global-reach/expressroute-global-reach-tab.png" alt-text="Screenshot showing the ExpressRoute Global Reach tab in the Azure VMware Solution private cloud." lightbox="./media/expressroute-global-reach/expressroute-global-reach-tab.png"::: 1. Enter the ExpressRoute ID and the authorization key created in the previous section. - :::image type="content" source="./media/expressroute-global-reach/on-premises-cloud-connections.png" alt-text="Screenshot showing the dialog for entering the connection information."::: + :::image type="content" source="./media/expressroute-global-reach/on-premises-cloud-connections.png" alt-text="Screenshot showing the dialog for entering the connection information." lightbox="./media/expressroute-global-reach/on-premises-cloud-connections.png"::: 1. Select **Create**. The new connection shows in the on-premises cloud connections list. >[!TIP] >You can delete or disconnect a connection from the list by selecting **More**. >->:::image type="content" source="./media/expressroute-global-reach/on-premises-connection-disconnect.png" alt-text="Screenshot showing how to disconnect or delete an on-premises connection in Azure VMware Solution."::: -+>:::image type="content" source="./media/expressroute-global-reach/on-premises-connection-disconnect.png" alt-text="Screenshot showing how to disconnect or delete an on-premises connection in Azure VMware Solution." lightbox="./media/expressroute-global-reach/on-premises-connection-disconnect.png"::: ## Verify on-premises network connectivity In your **on-premises edge router**, you should now see where the ExpressRoute c >Everyone has a different environment, and some will need to allow these routes to propagate back into the on-premises network. ## Next steps+ Continue to the next tutorial to install VMware HCX add-on in your Azure VMware Solution private cloud. > [!div class="nextstepaction"] > [Install VMware HCX](install-vmware-hcx.md) - <!-- LINKS - external--> <!-- LINKS - internal --> |
| azure-vmware | Tutorial Scale Private Cloud | https://github.com/MicrosoftDocs/azure-docs/commits/main/articles/azure-vmware/tutorial-scale-private-cloud.md | Title: Tutorial - Scale clusters in a private cloud description: In this tutorial, you use the Azure portal to scale an Azure VMware Solution private cloud. Previously updated : 08/03/2021 Last updated : 10/27/2022+ #Customer intent: As a VMware administrator, I want to learn how to scale an Azure VMware Solution private cloud in the Azure portal. # Tutorial: Scale clusters in a private cloud -To get the most out of your Azure VMware Solution private cloud experience, scale the clusters and hosts to reflect what you need for planned workloads. You can scale the clusters and hosts in a private cloud as required for your application workload. You should address performance and availability limitations for specific services on a case-by-case basis. +To get the most out of your Azure VMware Solution private cloud experience, scale the clusters and hosts to reflect what you need for planned workloads. You can scale the clusters and hosts in a private cloud as required for your application workload. You should address performance and availability limitations for specific services on a case-by-case basis. [!INCLUDE [azure-vmware-solutions-limits](includes/azure-vmware-solutions-limits.md)] In this tutorial, you'll use the Azure portal to: ## Prerequisites -You'll need an existing private cloud to complete this tutorial. If you haven't created a private cloud, follow the [create a private cloud tutorial](tutorial-create-private-cloud.md) to create one. +You'll need an existing private cloud to complete this tutorial. If you haven't created a private cloud, follow the [create a private cloud tutorial](tutorial-create-private-cloud.md) to create one. ## Add a new cluster 1. In your Azure VMware Solution private cloud, under **Manage**, select **Clusters** > **Add a cluster**. - :::image type="content" source="media/tutorial-scale-private-cloud/ss2-select-add-cluster.png" alt-text="Screenshot showing how to add a cluster to an Azure VMware Solution private cloud." border="true"::: + :::image type="content" source="media/tutorial-scale-private-cloud/ss2-select-add-cluster.png" alt-text="Screenshot showing how to add a cluster to an Azure VMware Solution private cloud." lightbox="media/tutorial-scale-private-cloud/ss2-select-add-cluster.png" border="true"::: 1. Use the slider to select the number of hosts and then select **Save**. - :::image type="content" source="media/tutorial-scale-private-cloud/ss3-configure-new-cluster.png" alt-text="Screenshot showing how to configure a new cluster." border="true"::: + :::image type="content" source="media/tutorial-scale-private-cloud/ss3-configure-new-cluster.png" alt-text="Screenshot showing how to configure a new cluster." lightbox="media/tutorial-scale-private-cloud/ss3-configure-new-cluster.png" border="true"::: The deployment of the new cluster begins. -## Scale a cluster +## Scale a cluster 1. In your Azure VMware Solution private cloud, under **Manage**, select **Clusters**. -1. Select the cluster you want to scale, select **More** (...) and then select **Edit**. +1. Select the cluster you want to scale, select **More** (...), then select **Edit**. - :::image type="content" source="media/tutorial-scale-private-cloud/ss4-select-scale-private-cloud-2.png" alt-text="Screenshot showing where to edit an existing cluster." border="true"::: + :::image type="content" source="media/tutorial-scale-private-cloud/ss4-select-scale-private-cloud-2.png" alt-text="Screenshot showing where to edit an existing cluster." lightbox="media/tutorial-scale-private-cloud/ss4-select-scale-private-cloud-2.png" border="true"::: 1. Use the slider to select the number of hosts and then select **Save**. You'll need an existing private cloud to complete this tutorial. If you haven't ## Next steps -If you require another Azure VMware Solution private cloud, [create another private cloud](tutorial-create-private-cloud.md), following the same networking prerequisites, cluster, and host limits. +If you require another Azure VMware Solution private cloud, [create another private cloud](tutorial-create-private-cloud.md) following the same networking prerequisites, cluster, and host limits. <!-- LINKS - external--> |
| backup | Backup Azure Dataprotection Use Rest Api Backup Blobs | https://github.com/MicrosoftDocs/azure-docs/commits/main/articles/backup/backup-azure-dataprotection-use-rest-api-backup-blobs.md | Title: Back up blobs in a storage account using Azure Data Protection REST API. description: In this article, learn how to configure, initiate, and manage backup operations of blobs using REST API. Previously updated : 07/09/2021 Last updated : 10/31/2022 ms.assetid: 7c244b94-d736-40a8-b94d-c72077080bbe++++ # Back up blobs in a storage account using Azure Data Protection via REST API -This article describes how to manage backups for blobs in a storage account via REST API. Backup of blobs is configured at the storage account level. So, all blobs in the storage account are protected with operational backup. +Azure Backup enables you to easily configure operational backup for protecting block blobs in your storage accounts. ++This article describes how to configure backups for blobs in a storage account via REST API. Backup of blobs is configured at the storage account level. So, all blobs in the storage account are protected with operational backup. ++In this article, you'll learn about: ++> [!div class="checklist"] +> - Prerequisites +> - Configure backup For information on the Azure blob region availability, supported scenarios and limitations, see the [support matrix](blob-backup-support-matrix.md). ## Prerequisites - [Create a Backup vault](backup-azure-dataprotection-use-rest-api-create-update-backup-vault.md)- - [Create a blob backup policy](backup-azure-dataprotection-use-rest-api-create-update-blob-policy.md) ## Configure backup -Once the vault and policy are created, there are two critical points that the user needs to consider to protect all Azure blobs within a storage account. +Once you create the vault and policy, you need to consider two critical points to protect all Azure Blobs within a storage account. ++### Key entities -### Key entities involved +#### Storage account that contains the blobs for protection -#### Storage account which contains the blobs to be protected +Fetch the Azure Resource Manager ID of the storage account which contains the blobs to be protected. This serves as the identifier of the storage account. -Fetch the Azure Resource Manager ID of the storage account which contains the blobs to be protected. This will serve as the identifier of the storage account. We will use an example of a storage account named _msblobbackup_, under the resource group _RG-BlobBackup_, in a different subscription and in west US. +For example, we'll use a storage account named *msblobbackup*, under the resource group *RG-BlobBackup*, in a different subscription and in *west US*. ```http "/subscriptions/xxxxxxxx-xxxx-xxxx-xxxx/resourcegroups/RG-BlobBackup/providers/Microsoft.Storage/storageAccounts/msblobbackup" Fetch the Azure Resource Manager ID of the storage account which contains the bl #### Backup vault -The Backup vault requires permissions on the storage account to enable backups on blobs present within the storage account. The system-assigned managed identity of the vault is used for assigning such permissions. We will use an example of a backup vault called "testBkpVault" in "West US" region under "TestBkpVaultRG" resource group. +The Backup vault requires permissions on the storage account to enable backups on blobs present within the storage account. The system-assigned managed identity of the vault is used for assigning the permissions. ++For example, we'll use a backup vault called *testBkpVault* in *West US* region under *TestBkpVaultRG* resource group. ### Assign permissions -You need to assign a few permissions via RBAC to vault (represented by vault MSI) and the relevant storage account. These can be performed via Portal or PowerShell or REST API. Learn more about all [related permissions](blob-backup-configure-manage.md#grant-permissions-to-the-backup-vault-on-storage-accounts). +You need to assign a few permissions via Azure role-based access control (Azure RBAC) to vault (represented by vault Managed Service Identity) and the relevant storage account. You can do these via Azure portal, PowerShell, or REST API. Learn more about all [related permissions](blob-backup-configure-manage.md#grant-permissions-to-the-backup-vault-on-storage-accounts). ### Prepare the request to configure backup -Once the relevant permissions are set to the vault and storage account, and the vault and policy are configured, we can prepare the request to configure backup. The following is the request body to configure backup for all blobs within a storage account. The Azure Resource Manager ID (ARM ID) of the storage account and its details are mentioned in the 'datasourceinfo' section and the policy information is present in the 'policyinfo' section. +Once you set the relevant permissions to the vault and storage account, and configure the vault and policy, prepare the request to configure backup. ++The following is the request body to configure backup for all blobs within a storage account. The Azure Resource Manager ID (ARM ID) of the storage account and its details are mentioned in the *datasourceinfo* section and the policy information is present in the *policyinfo* section. ```json { Once the relevant permissions are set to the vault and storage account, and the ### Validate the request to configure backup -We can validate whether the request to configure backup or not will be successful or not using [the validate for backup API](/rest/api/dataprotection/backup-instances/validate-for-backup). The response can be used by customer to perform all required pre-requisites and then submit the configuration for backup request. +To validate if the request to configure backup will be successful, use [the validate for backup API](/rest/api/dataprotection/backup-instances/validate-for-backup). You can use the response to perform all required prerequisites and then submit the configuration for backup request. -Validate for backup request is a POST operation and the URI has `{subscriptionId}`, `{vaultName}`, `{vaultresourceGroupName}` parameters. +*Validate for backup request* is a *POST operation and the URI has `{subscriptionId}`, `{vaultName}`, `{vaultresourceGroupName}` parameters. ```http POST https://management.azure.com/Subscriptions/{subscriptionId}/resourceGroups/{vaultresourceGroupname}/providers/Microsoft.DataProtection/backupVaults/{backupVaultName}/validateForBackup?api-version=2021-01-01 ``` -For example, this translates to +For example, this translates to: ```http POST https://management.azure.com/subscriptions/xxxxxxxx-xxxx-xxxx-xxxx-xxxxxxxxxxxxx/resourceGroups/TestBkpVaultRG/providers/Microsoft.DataProtection/backupVaults/testBkpVault/validateForBackup?api-version=2021-01-01 ``` -The [request body](#prepare-the-request-to-configure-backup) that we prepared earlier will be used to give the details of the storage account to be protected. +The [request body](#prepare-the-request-to-configure-backup) that you prepared earlier is used to give the details of the storage account to be protected. #### Example request body It returns two responses: 202 (Accepted) when another operation is created and t ###### Error response -In case the given storage account is already protected, the response is HTTP 400 (Bad request) and clearly states that the given storage account is protected to a backup vault along with details. +If the given storage account is already protected, the response is HTTP 400 (Bad request) and clearly states that the given storage account is protected to a backup vault along with details. ```http HTTP/1.1 400 BadRequest X-Powered-By: ASP.NET } ``` -###### Tracking response +###### Track response -If the datasource is unprotected, then the API proceeds for further validations and creates a tracking operation. +If the data source is unprotected, then the API proceeds for further validations and creates a tracking operation. ```http HTTP/1.1 202 Accepted Location: https://management.azure.com/subscriptions/xxxxxxxx-xxxx-xxxx-xxxx-xxx X-Powered-By: ASP.NET ``` -Track the resulting operation using the "Azure-AsyncOperation" header with a simple *GET* command +Track the resulting operation using the *Azure-AsyncOperation* header with a simple *GET* command. ```http GET https://management.azure.com/subscriptions/xxxxxxxx-xxxx-xxxx-xxxx-xxxxxxxxxxxxx/providers/Microsoft.DataProtection/locations/westus/operationStatus/ZmMzNDFmYWMtZWJlMS00NGJhLWE4YTgtMDNjYjI4Y2M5OTExOzM2NDdhZDNjLTFiNGEtNDU4YS05MGJkLTQ4NThiYjRhMWFkYg==?api-version=2021-01-01 GET https://management.azure.com/subscriptions/xxxxxxxx-xxxx-xxxx-xxxx-xxxxxxxxx } ``` -It returns 200(OK) once it completes and the response body lists further requirements to be fulfilled, such as permissions. +It returns 200 (OK) once the validation completes and the response body lists further requirements to be fulfilled, such as permissions. ```http GET https://management.azure.com/subscriptions/xxxxxxxx-xxxx-xxxx-xxxx-xxxxxxxxxxxxx/providers/Microsoft.DataProtection/locations/westus/operationStatus/ZmMzNDFmYWMtZWJlMS00NGJhLWE4YTgtMDNjYjI4Y2M5OTExOzM2NDdhZDNjLTFiNGEtNDU4YS05MGJkLTQ4NThiYjRhMWFkYg==?api-version=2021-01-01 GET https://management.azure.com/subscriptions/xxxxxxxx-xxxx-xxxx-xxxx-xxxxxxxxx } ``` -If all the permissions are granted, then resubmit the validate request, track the resulting operation and it will return 200(OK) as succeeded if all the conditions are met. +If all the permissions are granted, then resubmit the validate request and track the resulting operation. It returns 200 (OK) as succeeded, if all the conditions are met. ```http GET https://management.azure.com/subscriptions/xxxxxxxx-xxxx-xxxx-xxxx-xxxxxxxxxxxxx/providers/Microsoft.DataProtection/locations/westus/operationStatus/ZmMzNDFmYWMtZWJlMS00NGJhLWE4YTgtMDNjYjI4Y2M5OTExOzlhMjk2YWM2LWRjNDMtNGRjZS1iZTU2LTRkZDNiMDhjZDlkOA==?api-version=2021-01-01 GET https://management.azure.com/subscriptions/xxxxxxxx-xxxx-xxxx-xxxx-xxxxxxxxx ### Configure backup request -Once the request is validated, then you can submit the same to the [create backup instance API](/rest/api/dataprotection/backup-instances/create-or-update). A Backup instance represents an item protected with data protection service of Azure Backup within the backup vault. In this case, the storage account is the backup instance and you can use the same request body, which was validated above, with minor additions. +Once the request validation is complete, you can submit the same to the [create backup instance API](/rest/api/dataprotection/backup-instances/create-or-update). A Backup instance represents an item protected with data protection service of Azure Backup within the backup vault. In this case, the storage account is the backup instance and you can use the same request body, which was validated above, with minor additions. -You have to decide a unique name for the backup instance and hence we recommend you use a combination of the resource name and a unique identifier. We will use an example of "msblobbackup-f2df34eb-5628-4570-87b2-0331d797c67d" here and mark it as the backup instance name. +Use a unique name for the backup instance. So, we recommend you use a combination of the resource name and a unique identifier. In this example, use *msblobbackup-f2df34eb-5628-4570-87b2-0331d797c67d* here and mark it as the backup instance name. -To create or update the backup instance, use the following ***PUT*** operation. +To create or update the backup instance, use the following *PUT* operation. ```http PUT https://management.azure.com/subscriptions/{subscriptionId}/resourceGroups/{resourceGroupName}/providers/Microsoft.DataProtection/{BkpvaultName}/backupInstances/{UniqueBackupInstanceName}?api-version=2021-01-01 To create a backup instance, following are the components of the request body ##### Example request for configure backup -We will use the same request body that we used to validate the backup request with a unique name as we mentioned [above](#configure-backup). +Use the same request body that you used to validate the backup request with a unique name as we mentioned [above](#configure-backup). ```json { It returns two responses: 201 (Created) when backup instance is created and the ##### Example responses to configure backup request -Once you submit the *PUT* request to create a backup instance, the initial response is 201 (Created) with an Azure-asyncOperation header. Please note that the request body contains all the backup instance properties. +Once you submit the *PUT* request to create a backup instance, the initial response is 201 (Created) with an Azure-asyncOperation header. ++>[Note] +>The request body contains all the backup instance properties. ```http HTTP/1.1 201 Created X-Powered-By: ASP.NET } ``` -Then track the resulting operation using the Azure-AsyncOperation header with a simple *GET* command. +Then track the resulting operation using the *Azure-AsyncOperation* header with a simple *GET* command. ```http GET https://management.azure.com/subscriptions/xxxxxxxx-xxxx-xxxx-xxxx-xxxxxxxxxxxxx/providers/Microsoft.DataProtection/locations/westus/operationStatus/ZmMzNDFmYWMtZWJlMS00NGJhLWE4YTgtMDNjYjI4Y2M5OTExOzI1NWUwNmFlLTI5MjUtNDBkNy1iMjMxLTM0ZWZlMDA3NjdkYQ==?api-version=2021-01-01 Once the operation completes, it returns 200 (OK) with the success message in th ### Stop protection and delete data -To remove the protection on a storage account and delete the backup data as well, perform a delete operation as detailed [here](/rest/api/dataprotection/backup-instances/delete). +To remove the protection on a storage account and delete the backup data as well, follow [the delete operation process](/rest/api/dataprotection/backup-instances/delete). Stopping protection and deleting data is a *DELETE* operation. |
| backup | Backup Support Matrix Iaas | https://github.com/MicrosoftDocs/azure-docs/commits/main/articles/backup/backup-support-matrix-iaas.md | Title: Support matrix for Azure VM backup description: Provides a summary of support settings and limitations when backing up Azure VMs with the Azure Backup service. Previously updated : 09/07/2022 Last updated : 10/31/2022 Azure VM data disks | Support for backup of Azure VMs with up to 32 disks.<br><b Data disk size | Individual disk size can be up to 32 TB and a maximum of 256 TB combined for all disks in a VM. Storage type | Standard HDD, Standard SSD, Premium SSD. <br><br> Backup and restore of [ZRS disks](../virtual-machines/disks-redundancy.md#zone-redundant-storage-for-managed-disks) is supported. Managed disks | Supported.-Encrypted disks | Supported.<br/><br/> Azure VMs enabled with Azure Disk Encryption can be backed up (with or without the Azure AD app).<br/><br/> Encrypted VMs can't be recovered at the file/folder level. You must recover the entire VM.<br/><br/> You can enable encryption on VMs that are already protected by Azure Backup. +Encrypted disks | Supported.<br/><br/> Azure VMs enabled with Azure Disk Encryption can be backed up (with or without the Azure AD app).<br/><br/> Encrypted VMs can't be recovered at the file/folder level. You must recover the entire VM.<br/><br/> You can enable encryption on VMs that are already protected by Azure Backup. <br><br> You can back up and restore disks encrypted using platform-managed keys (PMKs) or customer-managed keys (CMKs). You can also assign a disk-encryption set while restoring in the same region (that is providing disk-encryption set while performing cross-region restore is currently not supported, however, you can assign the DES to the restored disk after the restore is complete). Disks with Write Accelerator enabled | Azure VM with WA disk backup is available in all Azure public regions starting from May 18, 2020. If WA disk backup is not required as part of VM backup, you can choose to remove with [**Selective disk** feature](selective-disk-backup-restore.md). <br><br>**Important** <br> Virtual machines with WA disks need internet connectivity for a successful backup (even though those disks are excluded from the backup). Disks enabled for access with private EndPoint | Unsupported. Back up & Restore deduplicated VMs/disks | Azure Backup doesn't support deduplication. For more information, see this [article](./backup-support-matrix.md#disk-deduplication-support) <br/> <br/> - Azure Backup doesn't deduplicate across VMs in the Recovery Services vault <br/> <br/> - If there are VMs in deduplication state during restore, the files can't be restored because the vault doesn't understand the format. However, you can successfully perform the full VM restore. |
| backup | Blob Backup Support Matrix | https://github.com/MicrosoftDocs/azure-docs/commits/main/articles/backup/blob-backup-support-matrix.md | Operational backup of blobs uses blob point-in-time restore, blob versioning, so **Other limitations:** -- If you've deleted a container during the retention period, that container won't be restored with the point-in-time restore operation. If you attempt to restore a range of blobs that includes blobs in a deleted container, the point-in-time restore operation will fail. For more information about protecting containers from deletion, see [Soft delete for containers (preview)](../storage/blobs/soft-delete-container-overview.md).+- If you've deleted a container during the retention period, that container won't be restored with the point-in-time restore operation. If you attempt to restore a range of blobs that includes blobs in a deleted container, the point-in-time restore operation will fail. For more information about protecting containers from deletion, see [Soft delete for containers](../storage/blobs/soft-delete-container-overview.md). - If a blob has moved between the hot and cool tiers in the period between the present moment and the restore point, the blob is restored to its previous tier. Restoring block blobs in the archive tier isn't supported. For example, if a blob in the hot tier was moved to the archive tier two days ago, and a restore operation restores to a point three days ago, the blob isn't restored to the hot tier. To restore an archived blob, first move it out of the archive tier. For more information, see [Rehydrate blob data from the archive tier](../storage/blobs/archive-rehydrate-overview.md). - A block that has been uploaded via [Put Block](/rest/api/storageservices/put-block) or [Put Block from URL](/rest/api/storageservices/put-block-from-url), but not committed via [Put Block List](/rest/api/storageservices/put-block-list), isn't part of a blob and so isn't restored as part of a restore operation. - A blob with an active lease can't be restored. If a blob with an active lease is included in the range of blobs to restore, the restore operation will fail automatically. Break any active leases before starting the restore operation. Operational backup of blobs uses blob point-in-time restore, blob versioning, so ## Next steps -[Overview of operational backup for Azure Blobs](blob-backup-overview.md) +[Overview of operational backup for Azure Blobs](blob-backup-overview.md) |
| backup | Tutorial Restore Disk | https://github.com/MicrosoftDocs/azure-docs/commits/main/articles/backup/tutorial-restore-disk.md | If the backed-up VM has managed disks and if the intent is to restore managed di ``` > [!WARNING]- > If **target-resource-group** isn't provided, then the managed disks will be restored as unmanaged disks to the given storage account. This will have significant consequences to the restore time since the time taken to restore the disks entirely depends on the given storage account. You'll get the benefit of instant restore only when the target-resource-group parameter is given. If the intention is to restore managed disks as unmanaged then don't provide the **target-resource-group** parameter and instead provide the parameter **restore-as-unmanaged-disk** parameter as shown below. This parameter is available from az 3.4.0 onwards. + > If **target-resource-group** isn't provided, then the managed disks will be restored as unmanaged disks to the given storage account. This will have significant consequences to the restore time since the time taken to restore the disks entirely depends on the given storage account. You'll get the benefit of instant restore only when the target-resource-group parameter is given. If the intention is to restore managed disks as unmanaged then don't provide the **target-resource-group** parameter and instead provide the **restore-as-unmanaged-disk** parameter as shown below. This parameter is available from Azure CLI 3.4.0 onwards. ```azurecli-interactive az backup restore restore-disks \ |
| blockchain | Architecture | https://github.com/MicrosoftDocs/azure-docs/commits/main/articles/blockchain/workbench/architecture.md | - Title: Azure Blockchain Workbench architecture -description: Overview of Azure Blockchain Workbench Preview architecture and its components. Previously updated : 02/18/2022---#Customer intent: As a developer, I want to understand the architecture and components of Azure Blockchain Workbench. --# Azure Blockchain Workbench architecture ---Azure Blockchain Workbench Preview simplifies blockchain application development by providing a solution using several Azure components. Blockchain Workbench can be deployed using a solution template in the Azure Marketplace. The template allows you to pick modules and components to deploy including blockchain stack, type of client application, and support for IoT integration. Once deployed, Blockchain Workbench provides access to a web app, iOS app, and Android app. -- --## Identity and authentication --Using Blockchain Workbench, a consortium can federate their enterprise identities using Azure Active Directory (Azure AD). Workbench generates new user accounts for on-chain identities with the enterprise identities stored in Azure AD. The identity mapping facilitates authenticated login to client APIs and applications and uses the authentication policies of organizations. Workbench also provides the ability to associate enterprise identities to specific roles within a given smart contract. In addition, Workbench also provides a mechanism to identify the actions those roles can take and at what time. --After Blockchain Workbench is deployed, users interact with Blockchain Workbench either via the client applications, REST-based client API, or Messaging API. In all cases, interactions must be authenticated, either via Azure Active Directory (Azure AD) or device-specific credentials. --Users federate their identities to a consortium Azure AD by sending an email invitation to participants at their email address. When logging in, these users are authenticated using the name, password, and policies. For example, two-factor authentication of their organization. --Azure AD is used to manage all users who have access to Blockchain Workbench. Each device connecting to a smart contract is also associated with Azure AD. --Azure AD is also used to assign users to a special administrator group. Users associated with the administrator group are granted access to -rights and actions within Blockchain Workbench including deploying contracts and giving permissions to a user to access a contract. Users outside this group do not have access to administrator actions. --## Client applications --Workbench provides automatically generated client applications for web and mobile (iOS, Android), which can be used to validate, test, and view blockchain applications. The application interface is dynamically generated based on smart contract metadata and can accommodate any use case. The client applications deliver a user-facing front end to the complete blockchain applications generated by Blockchain Workbench. Client applications authenticate users via Azure Active Directory (Azure AD) and then present a user experience tailored to the business context of the smart contract. The user experience enables the creation of new smart contract instances by authorized individuals and then presents the ability to execute certain types of transactions at appropriate points in the business process the smart contract represents. --In the web application, authorized users can access the Administrator Console. The console is available to users in the Administrator group in Azure AD and provides access to the following functionality: --* Deploy Microsoft provided smart contracts for popular scenarios. For example, an asset transfer scenario. -* Upload and deploy their own smart contracts. -* Assign a user access to the smart contract in the context of a specific role. --For more information, see the [Azure Blockchain Workbench sample client applications on GitHub](https://github.com/Azure-Samples/blockchain-devkit/tree/master/connect/mobile). --## Gateway service API --Blockchain Workbench includes a REST-based gateway service API. When writing to a blockchain, the API generates and delivers messages to an event broker. When data is requested by the API, queries are sent to the off-chain database. The database contains a replica of on-chain data and metadata that provides context and configuration information for supported smart contracts. Queries return the required data from the off-chain replica in a format informed by the metadata for the contract. --Developers can access the gateway service API to build or integrate blockchain solutions without relying on Blockchain Workbench client apps. --> [!NOTE] -> To enable authenticated access to the API, two client applications are registered in Azure Active Directory. Azure Active Directory requires distinct application registrations each application type (native and web). --## Message broker for incoming messages --Developers who want to send messages directly to Blockchain Workbench can send messages directly to Service Bus. For example, messages API could be used for system-to-system integration or IoT devices. --## Message broker for downstream consumers --During the lifecycle of the application, events occur. Events can be triggered by the Gateway API or on the ledger. Event notifications can initiate downstream code based on the event. --Blockchain Workbench automatically deploys two types of event consumers. One consumer is triggered by blockchain events to populate the off-chain SQL store. The other consumer is to capture metadata for events generated by the API related to the upload and storage of documents. --## Message consumers -- Message consumers take messages from Service Bus. The underlying eventing model for message consumers allows for extensions of additional services and systems. For example, you could add support to populate CosmosDB or evaluate messages using Azure Streaming Analytics. The following sections describe the message consumers included in Blockchain Workbench. --### Distributed ledger consumer --Distributed ledger technology (DLT) messages contain the metadata for transactions to be written to the blockchain. The consumer retrieves the messages and pushes the data to a transaction builder, signer, and router. --### Database consumer --The database consumer takes messages from Service Bus and pushes the data to an attached database, such as a database in Azure SQL Database. --### Storage consumer --The storage consumer takes messages from Service Bus and pushes data to an attached storage. For example, storing hashed documents in Azure Storage. --## Transaction builder and signer --If a message on the inbound message broker needs to be written to the blockchain, it will be processed by the DLT consumer. The DLT consumer is a service, which retrieves the message containing metadata for a desired transaction to execute and then sends the information to the *transaction builder and signer*. The *transaction builder and signer* assembles a blockchain transaction based on the data and the desired blockchain destination. Once assembled, the transaction is signed. Private keys are stored in Azure Key Vault. -- Blockchain Workbench retrieves the appropriate private key from Key Vault and signs the transaction outside of Key Vault. Once signed, the transaction is sent to transaction routers and ledgers. --## Transaction routers and ledgers --Transaction routers and ledgers take signed transactions and route them to the appropriate blockchain. Currently, Blockchain Workbench supports Ethereum as its target blockchain. --## DLT watcher --A distributed ledger technology (DLT) watcher monitors events occurring on block chains attached to Blockchain Workbench. -Events reflect information relevant to individuals and systems. For example, the creation of new contract instances, execution of transactions, and changes of state. The events are captured and sent to the outbound message broker, so they can be consumed by downstream consumers. --For example, the SQL consumer monitors events, consumes them, and populates the database with the included values. The copy enables recreation of a replica of on-chain data in an off-chain store. --## Azure SQL Database --The database attached to Blockchain Workbench stores contract definitions, configuration metadata, and a SQL-accessible replica of data stored in the blockchain. This data can easily be queried, visualized, or analyzed by directly accessing the database. Developers and other users can use -the database for reporting, analytics, or other data-centric integrations. For example, users can visualize transaction data using Power BI. --This off-chain storage provides the ability for enterprise organizations to query data in SQL rather than in a blockchain ledger. Also, by standardizing on a standard schema that's agnostic of blockchain technology stacks, the off-chain storage enables the reuse of reports and other artifacts across projects, scenarios, and organizations. --## Azure Storage --Azure Storage is used to store contracts and metadata associated with contracts. --From purchase orders and bills of lading, to images used in the news and medical imagery, to video originating from a continuum including police body cameras and major motion pictures, documents play a role in many blockchain-centric scenarios. Documents are not appropriate to place directly on the blockchain. --Blockchain Workbench supports the ability to add documents or other media content with blockchain business logic. A hash of the document or media content is stored in the blockchain and the actual document or media content is stored in Azure Storage. The associated transaction information is delivered to the inbound message broker, packaged up, signed, and routed to the blockchain. This process triggers events, which are shared via -the outbound message broker. The SQL DB consumes this information and sends it to the DB for later querying. Downstream systems could also consume these events to act as appropriate. --## Monitoring --Workbench provides application logging using Application Insights and Azure Monitor. Application Insights is used to store all logged information from Blockchain Workbench and includes errors, warnings, and successful operations. Application Insights can be used by developers to debug issues with Blockchain Workbench. --Azure Monitor provides information on the health of the blockchain network. --## Next steps --> [!div class="nextstepaction"] -> [Deploy Azure Blockchain Workbench](./deploy.md) |
| blockchain | Configuration | https://github.com/MicrosoftDocs/azure-docs/commits/main/articles/blockchain/workbench/configuration.md | - Title: Azure Blockchain Workbench configuration metadata reference -description: Azure Blockchain Workbench Preview application configuration metadata overview. Previously updated : 02/18/2022---#Customer intent: As a developer, I want to understand application configuration metadata details used by Azure Blockchain Workbench. --# Azure Blockchain Workbench configuration reference ---Azure Blockchain Workbench applications are multi-party workflows defined by configuration metadata and smart contract code. Configuration metadata defines the high-level workflows and interaction model of the blockchain application. Smart contracts define the business logic of the blockchain application. Workbench uses configuration and smart contract code to generate blockchain application user experiences. --Configuration metadata specifies the following information for each blockchain application: --* Name and description of the blockchain application -* Unique roles for users who can act or participate within the blockchain application -* One or more workflows. Each workflow acts as a state machine to control the flow of the business logic. Workflows can be independent or interact with one another. --Each defined workflow specifies the following: --* Name and description of the workflow -* States of the workflow. Each state is a stage in the business logic's control flow. -* Actions to transition to the next state -* User roles permitted to initiate each action -* Smart contracts that represent business logic in code files --## Application --A blockchain application contains configuration metadata, workflows, and user roles who can act or participate within the application. --| Field | Description | Required | -|-|-|:--:| -| ApplicationName | Unique application name. The corresponding smart contract must use the same **ApplicationName** for the applicable contract class. | Yes | -| DisplayName | Friendly display name of the application. | Yes | -| Description | Description of the application. | No | -| ApplicationRoles | Collection of [ApplicationRoles](#application-roles). User roles who can act or participate within the application. | Yes | -| Workflows | Collection of [Workflows](#workflows). Each workflow acts as a state machine to control the flow of the business logic. | Yes | --For an example, see [configuration file example](#configuration-file-example). --## Workflows --An application's business logic may be modeled as a state machine where taking an action causes the flow of the business logic to move from one state to another. A workflow is a collection of such states and actions. Each workflow consists of one or more smart contracts, which represent the business logic in code files. An executable contract is an instance of a workflow. --| Field | Description | Required | Max length | -|-|-|:--:|--:| -| Name | Unique workflow name. The corresponding smart contract must use the same **Name** for the applicable contract class. | Yes | 50 | -| DisplayName | Friendly display name of the workflow. | Yes | 255 | -| Description | Description of the workflow. | No | 255 | -| Initiators | Collection of [ApplicationRoles](#application-roles). Roles that are assigned to users who are authorized to create contracts in the workflow. | Yes | | -| StartState | Name of the initial state of the workflow. | Yes | | -| Properties | Collection of [identifiers](#identifiers). Represents data that can be read off-chain or visualized in a user experience tool. | Yes | | -| Constructor | Defines input parameters for creating an instance of the workflow. | Yes | | -| Functions | A collection of [functions](#functions) that can be executed in the workflow. | Yes | | -| States | A collection of workflow [states](#states). | Yes | | --For an example, see [configuration file example](#configuration-file-example). --## Type --Supported data types. --| Type | Description | -|-|-| -| address | Blockchain address type, such as *contracts* or *users*. | -| array | Single level array of type integer, bool, money, or time. Arrays can be static or dynamic. Use **ElementType** to specify the datatype of the elements within the array. See [example configuration](#example-configuration-of-type-array). | -| bool | Boolean data type. | -| contract | Address of type contract. | -| enum | Enumerated set of named values. When using the enum type, you also specify a list of EnumValues. Each value is limited to 255 characters. Valid value characters include upper and lower case letters (A-Z, a-z) and numbers (0-9). See [example configuration and use in Solidity](#example-configuration-of-type-enum). | -| int | Integer data type. | -| money | Money data type. | -| state | Workflow state. | -| string | String data type. 4000 character maximum. See [example configuration](#example-configuration-of-type-string). | -| user | Address of type user. | -| time | Time data type. | -|`[ Application Role Name ]`| Any name specified in application role. Limits users to be of that role type. | --### Example configuration of type array --```json -{ - "Name": "Quotes", - "Description": "Market quotes", - "DisplayName": "Quotes", - "Type": { - "Name": "array", - "ElementType": { - "Name": "int" - } - } -} -``` --#### Using a property of type array --If you define a property as type array in configuration, you need to include an explicit get function to return the public property of the array type in Solidity. For example: --``` -function GetQuotes() public constant returns (int[]) { - return Quotes; -} -``` --### Example configuration of type string --``` json -{ - "Name": "description", - "Description": "Descriptive text", - "DisplayName": "Description", - "Type": { - "Name": "string" - } -} -``` --### Example configuration of type enum --``` json -{ - "Name": "PropertyType", - "DisplayName": "Property Type", - "Description": "The type of the property", - "Type": { - "Name": "enum", - "EnumValues": ["House", "Townhouse", "Condo", "Land"] - } -} -``` --#### Using enumeration type in Solidity --Once an enum is defined in configuration, you can use enumeration types in Solidity. For example, you can define an enum called PropertyTypeEnum. --``` -enum PropertyTypeEnum {House, Townhouse, Condo, Land} PropertyTypeEnum public PropertyType; -``` --The list of strings needs to match between the configuration and smart contract to be valid and consistent declarations in Blockchain Workbench. --Assignment example: --``` -PropertyType = PropertyTypeEnum.Townhouse; -``` --Function parameter example: --``` -function AssetTransfer(string description, uint256 price, PropertyTypeEnum propertyType) public -{ - InstanceOwner = msg.sender; - AskingPrice = price; - Description = description; - PropertyType = propertyType; - State = StateType.Active; - ContractCreated(); -} --``` --## Constructor --Defines input parameters for an instance of a workflow. --| Field | Description | Required | -|-|-|:--:| -| Parameters | Collection of [identifiers](#identifiers) required to initiate a smart contract. | Yes | --### Constructor example --``` json -{ - "Parameters": [ - { - "Name": "description", - "Description": "The description of this asset", - "DisplayName": "Description", - "Type": { - "Name": "string" - } - }, - { - "Name": "price", - "Description": "The price of this asset", - "DisplayName": "Price", - "Type": { - "Name": "money" - } - } - ] -} -``` --## Functions --Defines functions that can be executed on the workflow. --| Field | Description | Required | Max length | -|-|-|:--:|--:| -| Name | The unique name of the function. The corresponding smart contract must use the same **Name** for the applicable function. | Yes | 50 | -| DisplayName | Friendly display name of the function. | Yes | 255 | -| Description | Description of the function | No | 255 | -| Parameters | Collection of [identifiers](#identifiers) corresponding to the parameters of the function. | Yes | | --### Functions example --``` json -"Functions": [ - { - "Name": "Modify", - "DisplayName": "Modify", - "Description": "Modify the description/price attributes of this asset transfer instance", - "Parameters": [ - { - "Name": "description", - "Description": "The new description of the asset", - "DisplayName": "Description", - "Type": { - "Name": "string" - } - }, - { - "Name": "price", - "Description": "The new price of the asset", - "DisplayName": "Price", - "Type": { - "Name": "money" - } - } - ] - }, - { - "Name": "Terminate", - "DisplayName": "Terminate", - "Description": "Used to cancel this particular instance of asset transfer", - "Parameters": [] - } -] --``` --## States --A collection of unique states within a workflow. Each state captures a step in the business logic's control flow. --| Field | Description | Required | Max length | -|-|-|:--:|--:| -| Name | Unique name of the state. The corresponding smart contract must use the same **Name** for the applicable state. | Yes | 50 | -| DisplayName | Friendly display name of the state. | Yes | 255 | -| Description | Description of the state. | No | 255 | -| PercentComplete | An integer value displayed in the Blockchain Workbench user interface to show the progress within the business logic control flow. | Yes | | -| Style | Visual hint indicating whether the state represents a success or failure state. There are two valid values: `Success` or `Failure`. | Yes | | -| Transitions | Collection of available [transitions](#transitions) from the current state to the next set of states. | No | | --### States example --``` json -"States": [ - { - "Name": "Active", - "DisplayName": "Active", - "Description": "The initial state of the asset transfer workflow", - "PercentComplete": 20, - "Style": "Success", - "Transitions": [ - { - "AllowedRoles": [], - "AllowedInstanceRoles": [ "InstanceOwner" ], - "Description": "Cancels this instance of asset transfer", - "Function": "Terminate", - "NextStates": [ "Terminated" ], - "DisplayName": "Terminate Offer" - }, - { - "AllowedRoles": [ "Buyer" ], - "AllowedInstanceRoles": [], - "Description": "Make an offer for this asset", - "Function": "MakeOffer", - "NextStates": [ "OfferPlaced" ], - "DisplayName": "Make Offer" - }, - { - "AllowedRoles": [], - "AllowedInstanceRoles": [ "InstanceOwner" ], - "Description": "Modify attributes of this asset transfer instance", - "Function": "Modify", - "NextStates": [ "Active" ], - "DisplayName": "Modify" - } - ] - }, - { - "Name": "Accepted", - "DisplayName": "Accepted", - "Description": "Asset transfer process is complete", - "PercentComplete": 100, - "Style": "Success", - "Transitions": [] - }, - { - "Name": "Terminated", - "DisplayName": "Terminated", - "Description": "Asset transfer has been canceled", - "PercentComplete": 100, - "Style": "Failure", - "Transitions": [] - } - ] -``` --## Transitions --Available actions to the next state. One or more user roles may perform an action at each state, where an action may transition a state to another state in the workflow. --| Field | Description | Required | -|-|-|:--:| -| AllowedRoles | List of applications roles allowed to initiate the transition. All users of the specified role may be able to perform the action. | No | -| AllowedInstanceRoles | List of user roles participating or specified in the smart contract allowed to initiate the transition. Instance roles are defined in **Properties** within workflows. AllowedInstanceRoles represent a user participating in an instance of a smart contract. AllowedInstanceRoles give you the ability to restrict taking an action to a user role in a contract instance. For example, you may only want to allow the user who created the contract (InstanceOwner) to be able to terminate rather than all users in role type (Owner) if you specified the role in AllowedRoles. | No | -| DisplayName | Friendly display name of the transition. | Yes | -| Description | Description of the transition. | No | -| Function | The name of the function to initiate the transition. | Yes | -| NextStates | A collection of potential next states after a successful transition. | Yes | --### Transitions example --``` json -"Transitions": [ - { - "AllowedRoles": [], - "AllowedInstanceRoles": [ "InstanceOwner" ], - "Description": "Cancels this instance of asset transfer", - "Function": "Terminate", - "NextStates": [ "Terminated" ], - "DisplayName": "Terminate Offer" - }, - { - "AllowedRoles": [ "Buyer" ], - "AllowedInstanceRoles": [], - "Description": "Make an offer for this asset", - "Function": "MakeOffer", - "NextStates": [ "OfferPlaced" ], - "DisplayName": "Make Offer" - }, - { - "AllowedRoles": [], - "AllowedInstanceRoles": [ "InstanceOwner" ], - "Description": "Modify attributes of this asset transfer instance", - "Function": "Modify", - "NextStates": [ "Active" ], - "DisplayName": "Modify" - } -] --``` --## Application roles --Application roles define a set of roles that can be assigned to users who want to act or participate within the application. Application roles can be used to restrict actions and participation within the blockchain application and corresponding workflows. --| Field | Description | Required | Max length | -|-|-|:--:|--:| -| Name | The unique name of the application role. The corresponding smart contract must use the same **Name** for the applicable role. Base type names are reserved. You cannot name an application role with the same name as [Type](#type)| Yes | 50 | -| Description | Description of the application role. | No | 255 | --### Application roles example --``` json -"ApplicationRoles": [ - { - "Name": "Appraiser", - "Description": "User that signs off on the asset price" - }, - { - "Name": "Buyer", - "Description": "User that places an offer on an asset" - } -] -``` -## Identifiers --Identifiers represent a collection of information used to describe workflow properties, constructor, and function parameters. --| Field | Description | Required | Max length | -|-|-|:--:|--:| -| Name | The unique name of the property or parameter. The corresponding smart contract must use the same **Name** for the applicable property or parameter. | Yes | 50 | -| DisplayName | Friendly display name for the property or parameter. | Yes | 255 | -| Description | Description of the property or parameter. | No | 255 | -| Type | Property [data type](#type). | Yes | --### Identifiers example --``` json -"Properties": [ - { - "Name": "State", - "DisplayName": "State", - "Description": "Holds the state of the contract", - "Type": { - "Name": "state" - } - }, - { - "Name": "Description", - "DisplayName": "Description", - "Description": "Describes the asset being sold", - "Type": { - "Name": "string" - } - } -] -``` --## Configuration file example --Asset transfer is a smart contract scenario for buying and selling high value assets, which require an inspector and appraiser. Sellers can list their assets by instantiating an asset transfer smart contract. Buyers can make offers by taking an action on the smart contract, and other parties can take actions to inspect or appraise the asset. Once the asset is marked both inspected and appraised, the buyer and seller will confirm the sale again before the contract is set to complete. At each point in the process, all participants have visibility into the state of the contract as it is updated.  --For more information including the code files, see -[asset transfer sample for Azure Blockchain Workbench](https://github.com/Azure-Samples/blockchain/tree/master/blockchain-workbench/application-and-smart-contract-samples/asset-transfer) --The following configuration file is for the asset transfer sample: --``` json -{ - "ApplicationName": "AssetTransfer", - "DisplayName": "Asset Transfer", - "Description": "Allows transfer of assets between a buyer and a seller, with appraisal/inspection functionality", - "ApplicationRoles": [ - { - "Name": "Appraiser", - "Description": "User that signs off on the asset price" - }, - { - "Name": "Buyer", - "Description": "User that places an offer on an asset" - }, - { - "Name": "Inspector", - "Description": "User that inspects the asset and signs off on inspection" - }, - { - "Name": "Owner", - "Description": "User that signs off on the asset price" - } - ], - "Workflows": [ - { - "Name": "AssetTransfer", - "DisplayName": "Asset Transfer", - "Description": "Handles the business logic for the asset transfer scenario", - "Initiators": [ "Owner" ], - "StartState": "Active", - "Properties": [ - { - "Name": "State", - "DisplayName": "State", - "Description": "Holds the state of the contract", - "Type": { - "Name": "state" - } - }, - { - "Name": "Description", - "DisplayName": "Description", - "Description": "Describes the asset being sold", - "Type": { - "Name": "string" - } - }, - { - "Name": "AskingPrice", - "DisplayName": "Asking Price", - "Description": "The asking price for the asset", - "Type": { - "Name": "money" - } - }, - { - "Name": "OfferPrice", - "DisplayName": "Offer Price", - "Description": "The price being offered for the asset", - "Type": { - "Name": "money" - } - }, - { - "Name": "InstanceAppraiser", - "DisplayName": "Instance Appraiser", - "Description": "The user that appraises the asset", - "Type": { - "Name": "Appraiser" - } - }, - { - "Name": "InstanceBuyer", - "DisplayName": "Instance Buyer", - "Description": "The user that places an offer for this asset", - "Type": { - "Name": "Buyer" - } - }, - { - "Name": "InstanceInspector", - "DisplayName": "Instance Inspector", - "Description": "The user that inspects this asset", - "Type": { - "Name": "Inspector" - } - }, - { - "Name": "InstanceOwner", - "DisplayName": "Instance Owner", - "Description": "The seller of this particular asset", - "Type": { - "Name": "Owner" - } - } - ], - "Constructor": { - "Parameters": [ - { - "Name": "description", - "Description": "The description of this asset", - "DisplayName": "Description", - "Type": { - "Name": "string" - } - }, - { - "Name": "price", - "Description": "The price of this asset", - "DisplayName": "Price", - "Type": { - "Name": "money" - } - } - ] - }, - "Functions": [ - { - "Name": "Modify", - "DisplayName": "Modify", - "Description": "Modify the description/price attributes of this asset transfer instance", - "Parameters": [ - { - "Name": "description", - "Description": "The new description of the asset", - "DisplayName": "Description", - "Type": { - "Name": "string" - } - }, - { - "Name": "price", - "Description": "The new price of the asset", - "DisplayName": "Price", - "Type": { - "Name": "money" - } - } - ] - }, - { - "Name": "Terminate", - "DisplayName": "Terminate", - "Description": "Used to cancel this particular instance of asset transfer", - "Parameters": [] - }, - { - "Name": "MakeOffer", - "DisplayName": "Make Offer", - "Description": "Place an offer for this asset", - "Parameters": [ - { - "Name": "inspector", - "Description": "Specify a user to inspect this asset", - "DisplayName": "Inspector", - "Type": { - "Name": "Inspector" - } - }, - { - "Name": "appraiser", - "Description": "Specify a user to appraise this asset", - "DisplayName": "Appraiser", - "Type": { - "Name": "Appraiser" - } - }, - { - "Name": "offerPrice", - "Description": "Specify your offer price for this asset", - "DisplayName": "Offer Price", - "Type": { - "Name": "money" - } - } - ] - }, - { - "Name": "Reject", - "DisplayName": "Reject", - "Description": "Reject the user's offer", - "Parameters": [] - }, - { - "Name": "AcceptOffer", - "DisplayName": "Accept Offer", - "Description": "Accept the user's offer", - "Parameters": [] - }, - { - "Name": "RescindOffer", - "DisplayName": "Rescind Offer", - "Description": "Rescind your placed offer", - "Parameters": [] - }, - { - "Name": "ModifyOffer", - "DisplayName": "Modify Offer", - "Description": "Modify the price of your placed offer", - "Parameters": [ - { - "Name": "offerPrice", - "DisplayName": "Price", - "Type": { - "Name": "money" - } - } - ] - }, - { - "Name": "Accept", - "DisplayName": "Accept", - "Description": "Accept the inspection/appraisal results", - "Parameters": [] - }, - { - "Name": "MarkInspected", - "DisplayName": "Mark Inspected", - "Description": "Mark the asset as inspected", - "Parameters": [] - }, - { - "Name": "MarkAppraised", - "DisplayName": "Mark Appraised", - "Description": "Mark the asset as appraised", - "Parameters": [] - } - ], - "States": [ - { - "Name": "Active", - "DisplayName": "Active", - "Description": "The initial state of the asset transfer workflow", - "PercentComplete": 20, - "Style": "Success", - "Transitions": [ - { - "AllowedRoles": [], - "AllowedInstanceRoles": [ "InstanceOwner" ], - "Description": "Cancels this instance of asset transfer", - "Function": "Terminate", - "NextStates": [ "Terminated" ], - "DisplayName": "Terminate Offer" - }, - { - "AllowedRoles": [ "Buyer" ], - "AllowedInstanceRoles": [], - "Description": "Make an offer for this asset", - "Function": "MakeOffer", - "NextStates": [ "OfferPlaced" ], - "DisplayName": "Make Offer" - }, - { - "AllowedRoles": [], - "AllowedInstanceRoles": [ "InstanceOwner" ], - "Description": "Modify attributes of this asset transfer instance", - "Function": "Modify", - "NextStates": [ "Active" ], - "DisplayName": "Modify" - } - ] - }, - { - "Name": "OfferPlaced", - "DisplayName": "Offer Placed", - "Description": "Offer has been placed for the asset", - "PercentComplete": 30, - "Style": "Success", - "Transitions": [ - { - "AllowedRoles": [], - "AllowedInstanceRoles": [ "InstanceOwner" ], - "Description": "Accept the proposed offer for the asset", - "Function": "AcceptOffer", - "NextStates": [ "PendingInspection" ], - "DisplayName": "Accept Offer" - }, - { - "AllowedRoles": [], - "AllowedInstanceRoles": [ "InstanceOwner" ], - "Description": "Reject the proposed offer for the asset", - "Function": "Reject", - "NextStates": [ "Active" ], - "DisplayName": "Reject" - }, - { - "AllowedRoles": [], - "AllowedInstanceRoles": [ "InstanceOwner" ], - "Description": "Cancel this instance of asset transfer", - "Function": "Terminate", - "NextStates": [ "Terminated" ], - "DisplayName": "Terminate" - }, - { - "AllowedRoles": [], - "AllowedInstanceRoles": [ "InstanceBuyer" ], - "Description": "Rescind the offer you previously placed for this asset", - "Function": "RescindOffer", - "NextStates": [ "Active" ], - "DisplayName": "Rescind Offer" - }, - { - "AllowedRoles": [], - "AllowedInstanceRoles": [ "InstanceBuyer" ], - "Description": "Modify the price that you specified for your offer", - "Function": "ModifyOffer", - "NextStates": [ "OfferPlaced" ], - "DisplayName": "Modify Offer" - } - ] - }, - { - "Name": "PendingInspection", - "DisplayName": "Pending Inspection", - "Description": "Asset is pending inspection", - "PercentComplete": 40, - "Style": "Success", - "Transitions": [ - { - "AllowedRoles": [], - "AllowedInstanceRoles": [ "InstanceOwner" ], - "Description": "Reject the offer", - "Function": "Reject", - "NextStates": [ "Active" ], - "DisplayName": "Reject" - }, - { - "AllowedRoles": [], - "AllowedInstanceRoles": [ "InstanceOwner" ], - "Description": "Cancel the offer", - "Function": "Terminate", - "NextStates": [ "Terminated" ], - "DisplayName": "Terminate" - }, - { - "AllowedRoles": [], - "AllowedInstanceRoles": [ "InstanceBuyer" ], - "Description": "Rescind the offer you placed for this asset", - "Function": "RescindOffer", - "NextStates": [ "Active" ], - "DisplayName": "Rescind Offer" - }, - { - "AllowedRoles": [], - "AllowedInstanceRoles": [ "InstanceInspector" ], - "Description": "Mark this asset as inspected", - "Function": "MarkInspected", - "NextStates": [ "Inspected" ], - "DisplayName": "Mark Inspected" - }, - { - "AllowedRoles": [], - "AllowedInstanceRoles": [ "InstanceAppraiser" ], - "Description": "Mark this asset as appraised", - "Function": "MarkAppraised", - "NextStates": [ "Appraised" ], - "DisplayName": "Mark Appraised" - } - ] - }, - { - "Name": "Inspected", - "DisplayName": "Inspected", - "PercentComplete": 45, - "Style": "Success", - "Transitions": [ - { - "AllowedRoles": [], - "AllowedInstanceRoles": [ "InstanceOwner" ], - "Description": "Reject the offer", - "Function": "Reject", - "NextStates": [ "Active" ], - "DisplayName": "Reject" - }, - { - "AllowedRoles": [], - "AllowedInstanceRoles": [ "InstanceOwner" ], - "Description": "Cancel the offer", - "Function": "Terminate", - "NextStates": [ "Terminated" ], - "DisplayName": "Terminate" - }, - { - "AllowedRoles": [], - "AllowedInstanceRoles": [ "InstanceBuyer" ], - "Description": "Rescind the offer you placed for this asset", - "Function": "RescindOffer", - "NextStates": [ "Active" ], - "DisplayName": "Rescind Offer" - }, - { - "AllowedRoles": [], - "AllowedInstanceRoles": [ "InstanceAppraiser" ], - "Description": "Mark this asset as appraised", - "Function": "MarkAppraised", - "NextStates": [ "NotionalAcceptance" ], - "DisplayName": "Mark Appraised" - } - ] - }, - { - "Name": "Appraised", - "DisplayName": "Appraised", - "Description": "Asset has been appraised, now awaiting inspection", - "PercentComplete": 45, - "Style": "Success", - "Transitions": [ - { - "AllowedRoles": [], - "AllowedInstanceRoles": [ "InstanceOwner" ], - "Description": "Reject the offer", - "Function": "Reject", - "NextStates": [ "Active" ], - "DisplayName": "Reject" - }, - { - "AllowedRoles": [], - "AllowedInstanceRoles": [ "InstanceOwner" ], - "Description": "Cancel the offer", - "Function": "Terminate", - "NextStates": [ "Terminated" ], - "DisplayName": "Terminate" - }, - { - "AllowedRoles": [], - "AllowedInstanceRoles": [ "InstanceBuyer" ], - "Description": "Rescind the offer you placed for this asset", - "Function": "RescindOffer", - "NextStates": [ "Active" ], - "DisplayName": "Rescind Offer" - }, - { - "AllowedRoles": [], - "AllowedInstanceRoles": [ "InstanceInspector" ], - "Description": "Mark the asset as inspected", - "Function": "MarkInspected", - "NextStates": [ "NotionalAcceptance" ], - "DisplayName": "Mark Inspected" - } - ] - }, - { - "Name": "NotionalAcceptance", - "DisplayName": "Notional Acceptance", - "Description": "Asset has been inspected and appraised, awaiting final sign-off from buyer and seller", - "PercentComplete": 50, - "Style": "Success", - "Transitions": [ - { - "AllowedRoles": [], - "AllowedInstanceRoles": [ "InstanceOwner" ], - "Description": "Sign-off on inspection and appraisal", - "Function": "Accept", - "NextStates": [ "SellerAccepted" ], - "DisplayName": "SellerAccept" - }, - { - "AllowedRoles": [], - "AllowedInstanceRoles": [ "InstanceOwner" ], - "Description": "Reject the proposed offer for the asset", - "Function": "Reject", - "NextStates": [ "Active" ], - "DisplayName": "Reject" - }, - { - "AllowedRoles": [], - "AllowedInstanceRoles": [ "InstanceOwner" ], - "Description": "Cancel this instance of asset transfer", - "Function": "Terminate", - "NextStates": [ "Terminated" ], - "DisplayName": "Terminate" - }, - { - "AllowedRoles": [], - "AllowedInstanceRoles": [ "InstanceBuyer" ], - "Description": "Sign-off on inspection and appraisal", - "Function": "Accept", - "NextStates": [ "BuyerAccepted" ], - "DisplayName": "BuyerAccept" - }, - { - "AllowedRoles": [], - "AllowedInstanceRoles": [ "InstanceBuyer" ], - "Description": "Rescind the offer you placed for this asset", - "Function": "RescindOffer", - "NextStates": [ "Active" ], - "DisplayName": "Rescind Offer" - } - ] - }, - { - "Name": "BuyerAccepted", - "DisplayName": "Buyer Accepted", - "Description": "Buyer has signed-off on inspection and appraisal", - "PercentComplete": 75, - "Style": "Success", - "Transitions": [ - { - "AllowedRoles": [], - "AllowedInstanceRoles": [ "InstanceOwner" ], - "Description": "Sign-off on inspection and appraisal", - "Function": "Accept", - "NextStates": [ "SellerAccepted" ], - "DisplayName": "Accept" - }, - { - "AllowedRoles": [], - "AllowedInstanceRoles": [ "InstanceOwner" ], - "Description": "Reject the proposed offer for the asset", - "Function": "Reject", - "NextStates": [ "Active" ], - "DisplayName": "Reject" - }, - { - "AllowedRoles": [], - "AllowedInstanceRoles": [ "InstanceOwner" ], - "Description": "Cancel this instance of asset transfer", - "Function": "Terminate", - "NextStates": [ "Terminated" ], - "DisplayName": "Terminate" - } - ] - }, - { - "Name": "SellerAccepted", - "DisplayName": "Seller Accepted", - "Description": "Seller has signed-off on inspection and appraisal", - "PercentComplete": 75, - "Style": "Success", - "Transitions": [ - { - "AllowedRoles": [], - "AllowedInstanceRoles": [ "InstanceBuyer" ], - "Description": "Sign-off on inspection and appraisal", - "Function": "Accept", - "NextStates": [ "Accepted" ], - "DisplayName": "Accept" - }, - { - "AllowedRoles": [], - "AllowedInstanceRoles": [ "InstanceBuyer" ], - "Description": "Rescind the offer you placed for this asset", - "Function": "RescindOffer", - "NextStates": [ "Active" ], - "DisplayName": "Rescind Offer" - } - ] - }, - { - "Name": "Accepted", - "DisplayName": "Accepted", - "Description": "Asset transfer process is complete", - "PercentComplete": 100, - "Style": "Success", - "Transitions": [] - }, - { - "Name": "Terminated", - "DisplayName": "Terminated", - "Description": "Asset transfer has been canceled", - "PercentComplete": 100, - "Style": "Failure", - "Transitions": [] - } - ] - } - ] -} -``` -## Next steps --> [!div class="nextstepaction"] -> [Azure Blockchain Workbench REST API reference](/rest/api/azure-blockchain-workbench) |
| blockchain | Create App | https://github.com/MicrosoftDocs/azure-docs/commits/main/articles/blockchain/workbench/create-app.md | - Title: Create a blockchain application - Azure Blockchain Workbench -description: Tutorial on how to create a blockchain application for Azure Blockchain Workbench Preview. Previously updated : 02/18/2022---#Customer intent: As a developer, I want to use Azure Blockchain Workbench to create a blockchain app. --# Tutorial: Create a blockchain application for Azure Blockchain Workbench ---You can use Azure Blockchain Workbench to create blockchain applications that represent multi-party workflows defined by configuration and smart contract code. --You'll learn how to: --> [!div class="checklist"] -> * Configure a blockchain application -> * Create a smart contract code file -> * Add a blockchain application to Blockchain Workbench -> * Add members to the blockchain application ---## Prerequisites --* A Blockchain Workbench deployment. For more information, see [Azure Blockchain Workbench deployment](deploy.md) for details on deployment. -* Azure Active Directory users in the tenant associated with Blockchain Workbench. For more information, see [add Azure AD users in Azure Blockchain Workbench](manage-users.md#add-azure-ad-users). -* A Blockchain Workbench administrator account. For more information, see add [Blockchain Workbench administrators in Azure Blockchain Workbench](manage-users.md#manage-blockchain-workbench-administrators). --## Hello, Blockchain! --Let's build a basic application in which a requestor sends a request and a responder send a response to the request. -For example, a request can be, "Hello, how are you?", and the response can be, "I'm great!". Both the request and the response are recorded on the underlying blockchain. --Follow the steps to create the application files or you can [download the sample from GitHub](https://github.com/Azure-Samples/blockchain/tree/master/blockchain-workbench/application-and-smart-contract-samples/hello-blockchain). --## Configuration file --Configuration metadata defines the high-level workflows and interaction model of the blockchain application. Configuration metadata represents the workflow stages and interaction model of the blockchain application. For more information about the contents of configuration files, see [Azure Blockchain Workflow configuration reference](configuration.md). --1. In your favorite editor, create a file named `HelloBlockchain.json`. -2. Add the following JSON to define the configuration of the blockchain application. -- ``` json - { - "ApplicationName": "HelloBlockchain", - "DisplayName": "Hello, Blockchain!", - "Description": "A simple application to send request and get response", - "ApplicationRoles": [ - { - "Name": "Requestor", - "Description": "A person sending a request." - }, - { - "Name": "Responder", - "Description": "A person responding to a request" - } - ], - "Workflows": [ - { - "Name": "HelloBlockchain", - "DisplayName": "Request Response", - "Description": "A simple workflow to send a request and receive a response.", - "Initiators": [ "Requestor" ], - "StartState": "Request", - "Properties": [ - { - "Name": "State", - "DisplayName": "State", - "Description": "Holds the state of the contract.", - "Type": { - "Name": "state" - } - }, - { - "Name": "Requestor", - "DisplayName": "Requestor", - "Description": "A person sending a request.", - "Type": { - "Name": "Requestor" - } - }, - { - "Name": "Responder", - "DisplayName": "Responder", - "Description": "A person sending a response.", - "Type": { - "Name": "Responder" - } - }, - { - "Name": "RequestMessage", - "DisplayName": "Request Message", - "Description": "A request message.", - "Type": { - "Name": "string" - } - }, - { - "Name": "ResponseMessage", - "DisplayName": "Response Message", - "Description": "A response message.", - "Type": { - "Name": "string" - } - } - ], - "Constructor": { - "Parameters": [ - { - "Name": "message", - "Description": "...", - "DisplayName": "Request Message", - "Type": { - "Name": "string" - } - } - ] - }, - "Functions": [ - { - "Name": "SendRequest", - "DisplayName": "Request", - "Description": "...", - "Parameters": [ - { - "Name": "requestMessage", - "Description": "...", - "DisplayName": "Request Message", - "Type": { - "Name": "string" - } - } - ] - }, - { - "Name": "SendResponse", - "DisplayName": "Response", - "Description": "...", - "Parameters": [ - { - "Name": "responseMessage", - "Description": "...", - "DisplayName": "Response Message", - "Type": { - "Name": "string" - } - } - ] - } - ], - "States": [ - { - "Name": "Request", - "DisplayName": "Request", - "Description": "...", - "PercentComplete": 50, - "Value": 0, - "Style": "Success", - "Transitions": [ - { - "AllowedRoles": ["Responder"], - "AllowedInstanceRoles": [], - "Description": "...", - "Function": "SendResponse", - "NextStates": [ "Respond" ], - "DisplayName": "Send Response" - } - ] - }, - { - "Name": "Respond", - "DisplayName": "Respond", - "Description": "...", - "PercentComplete": 90, - "Value": 1, - "Style": "Success", - "Transitions": [ - { - "AllowedRoles": [], - "AllowedInstanceRoles": ["Requestor"], - "Description": "...", - "Function": "SendRequest", - "NextStates": [ "Request" ], - "DisplayName": "Send Request" - } - ] - } - ] - } - ] - } - ``` --3. Save the `HelloBlockchain.json` file. --The configuration file has several sections. Details about each section are as follows: --### Application metadata --The beginning of the configuration file contains information about the application including application name and description. --### Application roles --The application roles section defines the user roles who can act or participate within the blockchain application. You define a set of distinct roles based on functionality. In the request-response scenario, there is a distinction between the functionality of a requestor as an entity that produces requests and a responder as an entity that produces responses. --### Workflows --Workflows define one or more stages and actions of the contract. In the request-response scenario, the first stage (state) of the workflow is a requestor (role) takes an action (transition) to send a request (function). The next stage (state) is a responder (role) takes an action (transition) to send a response (function). An application's workflow can involve properties, functions, and states required describe the flow of a contract. --## Smart contract code file --Smart contracts represent the business logic of the blockchain application. Currently, Blockchain Workbench supports Ethereum for the blockchain ledger. Ethereum uses [Solidity](https://solidity.readthedocs.io) as its programming language for writing self-enforcing business logic for smart contracts. --Smart contracts in Solidity are similar to classes in object-oriented languages. Each contract contains state and functions to implement stages and actions of the smart contract. --In your favorite editor, create a file called `HelloBlockchain.sol`. --### Version pragma --As a best practice, indicate the version of Solidity you are targeting. Specifying the version helps avoid incompatibilities with future Solidity versions. --Add the following version pragma at the top of `HelloBlockchain.sol` smart contract code file. --``` solidity -pragma solidity >=0.4.25 <0.6.0; -``` --### Configuration and smart contract code relationship --Blockchain Workbench uses the configuration file and smart contract code file to create a blockchain application. There is a relationship between what is defined in the configuration and the code in the smart contract. Contract details, functions, parameters, and types are required to match to create the application. Blockchain Workbench verifies the files prior to application creation. --### Contract --Add the **contract** header to your `HelloBlockchain.sol` smart contract code file. --``` solidity -contract HelloBlockchain { -``` --### State variables --State variables store values of the state for each contract instance. The state variables in your contract must match the workflow properties defined in the configuration file. --Add the state variables to your contract in your `HelloBlockchain.sol` smart contract code file. --``` solidity - //Set of States - enum StateType { Request, Respond} -- //List of properties - StateType public State; - address public Requestor; - address public Responder; -- string public RequestMessage; - string public ResponseMessage; -``` --### Constructor --The constructor defines input parameters for a new smart contract instance of a workflow. Required parameters for the constructor are defined as constructor parameters in the configuration file. The number, order, and type of parameters must match in both files. --In the constructor function, write any business logic you want to perform prior to creating the contract. For example, initialize the state variables with starting values. --Add the constructor function to your contract in your `HelloBlockchain.sol` smart contract code file. --``` solidity - // constructor function - constructor(string memory message) public - { - Requestor = msg.sender; - RequestMessage = message; - State = StateType.Request; - } -``` --### Functions --Functions are the executable units of business logic within a contract. Required parameters for the function are defined as function parameters in the configuration file. The number, order, and type of parameters must match in both files. Functions are associated to transitions in a Blockchain Workbench workflow in the configuration file. A transition is an action performed to move to the next stage of an application's workflow as determined by the contract. --Write any business logic you want to perform in the function. For example, modifying a state variable's value. --1. Add the following functions to your contract in your `HelloBlockchain.sol` smart contract code file. -- ``` solidity - // call this function to send a request - function SendRequest(string memory requestMessage) public - { - if (Requestor != msg.sender) - { - revert(); - } - - RequestMessage = requestMessage; - State = StateType.Request; - } - - // call this function to send a response - function SendResponse(string memory responseMessage) public - { - Responder = msg.sender; - - ResponseMessage = responseMessage; - State = StateType.Respond; - } - } - ``` --2. Save your `HelloBlockchain.sol` smart contract code file. --## Add blockchain application to Blockchain Workbench --To add a blockchain application to Blockchain Workbench, you upload the configuration and smart contract files to define the application. --1. In a web browser, navigate to the Blockchain Workbench web address. For example, `https://{workbench URL}.azurewebsites.net/` The web application is created when you deploy Blockchain Workbench. For information on how to find your Blockchain Workbench web address, see [Blockchain Workbench Web URL](deploy.md#blockchain-workbench-web-url) -2. Sign in as a [Blockchain Workbench administrator](manage-users.md#manage-blockchain-workbench-administrators). -3. Select **Applications** > **New**. The **New application** pane is displayed. -4. Select **Upload the contract configuration** > **Browse** to locate the **HelloBlockchain.json** configuration file you created. The configuration file is automatically validated. Select the **Show** link to display validation errors. Fix validation errors before you deploy the application. -5. Select **Upload the contract code** > **Browse** to locate the **HelloBlockchain.sol** smart contract code file. The code file is automatically validated. Select the **Show** link to display validation errors. Fix validation errors before you deploy the application. -6. Select **Deploy** to create the blockchain application based on the configuration and smart contract files. --Deployment of the blockchain application takes a few minutes. When deployment is finished, the new application is displayed in **Applications**. --> [!NOTE] -> You can also create blockchain applications by using the [Azure Blockchain Workbench REST API](/rest/api/azure-blockchain-workbench). --## Add blockchain application members --Add application members to your application to initiate and take actions on contracts. To add application members, you need to be a [Blockchain Workbench administrator](manage-users.md#manage-blockchain-workbench-administrators). --1. Select **Applications** > **Hello, Blockchain!**. -2. The number of members associated to the application is displayed in the upper right corner of the page. For a new application, the number of members will be zero. -3. Select the **members** link in the upper right corner of the page. A current list of members for the application is displayed. -4. In the membership list, select **Add members**. -5. Select or enter the member's name you want to add. Only Azure AD users that exist in the Blockchain Workbench tenant are listed. If the user is not found, you need to [add Azure AD users](manage-users.md#add-azure-ad-users). -6. Select the **Role** for the member. For the first member, select **Requestor** as the role. -7. Select **Add** to add the member with the associated role to the application. -8. Add another member to the application with the **Responder** role. --For more information about managing users in Blockchain Workbench, see [managing users in Azure Blockchain Workbench](manage-users.md) --## Next steps --In this how-to article, you've created a basic request and response application. To learn how to use the application, continue to the next how-to article. --> [!div class="nextstepaction"] -> [Using a blockchain application](use.md) |
| blockchain | Data Excel | https://github.com/MicrosoftDocs/azure-docs/commits/main/articles/blockchain/workbench/data-excel.md | - Title: Use Azure Blockchain Workbench data in Microsoft Excel -description: Learn how to load and view Azure Blockchain Workbench Preview SQL DB data in Microsoft Excel. Previously updated : 02/18/2022---#Customer intent: As a developer, I want to view Azure Blockchain Workbench data in Microsoft Excel for analysis. ---# View Azure Blockchain Workbench data with Microsoft Excel ---You can use Microsoft Excel to view data in Azure Blockchain Workbench's SQL DB. This article provides the steps you need to: --* Connect to the Blockchain Workbench database from Microsoft Excel -* Look at Blockchain Workbench database tables and views -* Load Blockchain Workbench view data into Excel --## Connect to the Blockchain Workbench database --To connect to a Blockchain Workbench database: --1. Open Microsoft Excel. -2. On the **Data** tab, choose **Get Data**. -3. Select **From Azure** and then select **From Azure SQL Database**. --  --4. In the **SQL Server database** dialog box: -- * For **Server**, enter the name of the Blockchain Workbench server. - * For **Database (optional)**, enter the name of the database. --  --5. In the **SQL Server database** dialog navigation bar, select **Database**. Enter your **Username** and **Password**, and then select **Connect**. -- > [!NOTE] - > If you're using the credentials created during the Azure Blockchain Workbench deployment process, the **User name** is `dbadmin`. The **Password** is the one you created when you deployed the Blockchain Workbench. - -  --## Look at database tables and views --The Excel Navigator dialog opens after you connect to the database. You can use the Navigator to look at the tables and views in the database. The views are designed for reporting and their names are prefixed with **vw**. --  --## Load view data into an Excel workbook --The next example shows how you can load data from a view into an Excel workbook. --1. In the **Navigator** scroll bar, select the **vwContractAction** view. The **vwContractAction** preview shows all the actions related to a contract in the Blockchain Workbench database. -2. Select **Load** to retrieve all the data in the view and put it in your Excel workbook. --  --Now that you have the data loaded, you can use Excel features to create your own reports using the metadata and transaction data from the Azure Blockchain Workbench database. --## Next steps --> [!div class="nextstepaction"] -> [Database views in Azure Blockchain Workbench](database-views.md) |
| blockchain | Data Powerbi | https://github.com/MicrosoftDocs/azure-docs/commits/main/articles/blockchain/workbench/data-powerbi.md | - Title: Use Azure Blockchain Workbench data in Microsoft Power BI -description: Learn how to load and view Azure Blockchain Workbench SQL DB data in Microsoft Power BI. Previously updated : 02/18/2022---#Customer intent: As a developer, I want to load and view Azure Blockchain Workbench data in Power BI for analysis. --# Using Azure Blockchain Workbench data with Microsoft Power BI ---Microsoft Power BI provides the ability to easily generate powerful reports from SQL DB databases using Power BI Desktop and then publish them to [https://www.powerbi.com](https://www.powerbi.com). --This article contains a step by step walkthrough of how to connect to Azure Blockchain Workbench's SQL Database from within PowerBI desktop, create a report, and deploy the report to powerbi.com. --## Prerequisites --* Download [Power BI Desktop](https://powerbi.microsoft.com/desktop/). --## Connecting Power BI to data in Azure Blockchain Workbench --1. Open Power BI Desktop. -2. Select **Get Data**. --  -3. Select **SQL Server** from the list of data source types. --4. Provide the server and database name in the dialog. Specify if you want to import the data or perform a **DirectQuery**. Select **OK**. --  --5. Provide the database credentials to access Azure Blockchain Workbench. Select **Database** and enter your credentials. -- If you are using the credentials created by the Azure Blockchain Workbench deployment process, the username is **dbadmin** and the password is the one you provided during deployment. --  --6. Once connected to the database, the **Navigator** dialog displays the tables and views available within the database. The views are designed for reporting and are all prefixed **vw**. --  --7. Select the views you wish to include. For demonstration purposes, we include **vwContractAction**, which provides details on the actions that have taken place on a contract. --  --You can now create and publish reports as you normally would with Power BI. --## Next steps --> [!div class="nextstepaction"] -> [Database views in Azure Blockchain Workbench](database-views.md) |
| blockchain | Data Sql Management Studio | https://github.com/MicrosoftDocs/azure-docs/commits/main/articles/blockchain/workbench/data-sql-management-studio.md | - Title: Query Azure Blockchain Workbench data using SQL Server Management Studio -description: Learn how to connect to Azure Blockchain Workbench's SQL Database from within SQL Server Management Studio. Previously updated : 02/18/2022----#Customer intent: As a developer, I want to use SQL Server Management Studio to query Azure Blockchain Workbench data. --# Using Azure Blockchain Workbench data with SQL Server Management Studio ---Microsoft SQL Server Management Studio provides the ability to rapidly -write and test queries against Azure Blockchain Workbench's SQL DB. This section contains a step-by-step walkthrough of how to connect to Azure Blockchain Workbench's SQL Database from within SQL Server Management Studio. --## Prerequisites --* Download [SQL Server Management Studio](/sql/ssms/download-sql-server-management-studio-ssms). --## Connecting SQL Server Management Studio to data in Azure Blockchain Workbench --1. Open the SQL Server Management Studio and select **Connect**. -2. Select **Database Engine**. --  --3. In the **Connect to Server** dialog, enter the server name and your - database credentials. -- If you are using the credentials created by the Azure Blockchain Workbench deployment process, the username is **dbadmin** and the password is the one you provided during deployment. --  -- 1. SQL Server Management Studio displays the list of databases, database views, and stored procedures in the Azure Blockchain Workbench database. --  --5. To view the data associated with any of the database views, you can automatically generate a select statement using the following steps. -6. Right-click any of the database views in the Object Explorer. -7. Select **Script View as**. -8. Choose **SELECT to**. -9. Select **New Query Editor Window**. -10. A new query can be created by selecting **New Query**. --## Next steps --> [!div class="nextstepaction"] -> [Database views in Azure Blockchain Workbench](database-views.md) |
| blockchain | Database Firewall | https://github.com/MicrosoftDocs/azure-docs/commits/main/articles/blockchain/workbench/database-firewall.md | - Title: Configure Azure Blockchain Workbench database firewall -description: Learn how to configure the Azure Blockchain Workbench Preview database firewall to allow external clients and applications to connect. Previously updated : 02/18/2022---#Customer intent: As an administrator, I want to configure Azure Blockchain Workbench's SQL Server firewall to allow external clients to connect. ---# Configure the Azure Blockchain Workbench database firewall ---This article shows how to configure a firewall rule using the Azure portal. Firewall rules let external clients or applications connect to your Azure Blockchain Workbench database. --## Connect to the Blockchain Workbench database --To connect to the database where you want to configure a rule: --1. Sign in to the Azure portal with an account that has **Owner** permissions for the Azure Blockchain Workbench resources. -2. In the left navigation pane, choose **Resource groups**. -3. Choose the name of the resource group for your Blockchain Workbench deployment. -4. Select **Type** to sort the list of resources, and then choose your **SQL server**. -5. The resource list example in the following screen capture shows two databases: *master* and *lsgn-sdk*. You configure the firewall rule on *lsgn-sdk*. -- --## Create a database firewall rule --To create a firewall rule: --1. Choose the link to the "lsgn-sdk" database. -2. On the menu bar, select **Set server firewall**. --  --3. To create a rule for your organization: -- * Enter a **RULE NAME** - * Enter an IP address for the **START IP** of the address range - * Enter an IP address for the **END IP** of the address range --  -- > [!NOTE] - > If you only want to add the IP address of your computer, choose **+ Add client IP**. - -1. To save your firewall configuration, select **Save**. -2. Test the IP address range you configured for the database by connecting from an application or tool. For example, SQL - Server Management Studio. --## Next steps --> [!div class="nextstepaction"] -> [Database views in Azure Blockchain Workbench](database-views.md) |
| blockchain | Database Views | https://github.com/MicrosoftDocs/azure-docs/commits/main/articles/blockchain/workbench/database-views.md | - Title: Azure Blockchain Workbench database views -description: Overview of available Azure Blockchain Workbench Preview SQL DB database views. Previously updated : 02/18/2022---#Customer intent: As a developer, I want to understand the available Azure Blockchain Workbench SQL Server database views for querying off-chain blockchain data. --# Azure Blockchain Workbench database views ---Azure Blockchain Workbench Preview delivers data from distributed ledgers to an *off-chain* SQL DB database. The off-chain database makes it possible to use SQL and existing tools, such as [SQL Server Management Studio](/sql/ssms/download-sql-server-management-studio-ssms), to interact with blockchain data. --Azure Blockchain Workbench provides a set of database views that provide access to data that will be helpful when performing your queries. These views are heavily denormalized to make it easy to quickly get started building reports, analytics, and otherwise consume blockchain data with existing tools and without having to retrain database staff. --This section includes an overview of the database views and the data they contain. --> [!NOTE] -> Any direct usage of database tables found in the database outside of these views, while possible, is not supported. -> --## vwApplication --This view provides details on **Applications** that have been uploaded to Azure Blockchain Workbench. --| Name | Type | Can Be Null | Description | -|-||-|| -| ApplicationId | int | No | A unique identifier for the application | -| ApplicationName | nvarchar(50) | No | The name of the application | -| ApplicationDescription | nvarchar(255) | Yes | A description of the application | -| ApplicationDisplayName | nvarchar(255) | No | The name to be displayed in a user interface | -| ApplicationEnabled | bit | No | Identifies if the application is currently enabled<br /> **Note:** Even though an application can be reflected as disabled in the database, associated contracts remain on the blockchain and data about those contracts remain in the database. | -| UploadedDtTm | datetime2(7) | No | The date and time a contract was uploaded | -| UploadedByUserId | int | No | The ID of the user who uploaded the application | -| UploadedByUserExternalId | nvarchar(255) | No | The external identifier for the user who uploaded the application. By default, this ID is the user from the Azure Active Directory for the consortium. | -| UploadedByUserProvisioningStatus | int | No | Identifies the current status of provisioning process for the user. Possible values are: <br />0 ΓÇô User has been created by the API<br />1 ΓÇô A key has been associated with the user in the database<br />2 ΓÇô The user is fully provisioned | -| UploadedByUserFirstName | nvarchar(50) | Yes | The first name of the user who uploaded the contract | -| UploadedByUserLastName | nvarchar(50) | Yes | The last name of the user who uploaded the contract | -| UploadedByUserEmailAddress | nvarchar(255) | Yes | The email address of the user who uploaded the contract | --## vwApplicationRole --This view provides details on the roles that have been defined in Azure Blockchain Workbench applications. --In an *Asset Transfer* application, for example, roles such as *Buyer* and *Seller* roles may be defined. --| Name | Type | Can Be Null | Description | -|||-|| -| ApplicationId | int | No | A unique identifier for the application | -| ApplicationName | nvarchar(50) | No | The name of the application | -| ApplicationDescription | nvarchar(255) | Yes | A description of the application | -| ApplicationDisplayName | nvarchar(255) | No | The name to be displayed in a user interface | -| RoleId | int | No | A unique identifier for a role in the application | -| RoleName | nvarchar50) | No | The name of the role | -| RoleDescription | description(255) | Yes | A description of the role | --## vwApplicationRoleUser --This view provides details on the roles that have been defined in Azure Blockchain Workbench applications and the users associated with them. --In an *Asset Transfer* application, for example, *John Smith* may be associated with the *Buyer* role. --| Name | Type | Can Be Null | Description | -|-||-|| -| ApplicationId | int | No | A unique identifier for the application | -| ApplicationName | nvarchar(50) | No | The name of the application | -| ApplicationDescription | nvarchar(255) | Yes | A description of the application | -| ApplicationDisplayName | nvarchar(255) | No | The name to be displayed in a user interface | -| ApplicationRoleId | int | No | A unique identifier for a role in the application | -| ApplicationRoleName | nvarchar50) | No | The name of the role | -| ApplicationRoleDescription | nvarchar(255) | Yes | A description of the role | -| UserId | int | No | The ID of the user associated with the role | -| UserExternalId | nvarchar(255) | No | The external identifier for the user who is associated with the role. By default, this ID is the user from the Azure Active Directory for the consortium. | -| UserProvisioningStatus | int | No | Identifies the current status of provisioning process for the user. Possible values are: <br />0 ΓÇô User has been created by the API<br />1 ΓÇô A key has been associated with the user in the database<br />2 ΓÇô The user is fully provisioned | -| UserFirstName | nvarchar(50) | Yes | The first name of the user who is associated with the role | -| UserLastName | nvarchar(255) | Yes | The last name of the user who is associated with the role | -| UserEmailAddress | nvarchar(255) | Yes | The email address of the user who is associated with the role | --## vwConnectionUser --This view provides details on the connections defined in Azure Blockchain Workbench and the users associated with them. For each connection, this view contains the following data: --- Associated ledger details-- Associated user information--| Name | Type | Can Be Null | Description | -|--||-|| -| ConnectionId | int | No | The unique identifier for a connection in Azure Blockchain Workbench | -| ConnectionEndpointUrl | nvarchar(50) | No | The endpoint url for a connection | -| ConnectionFundingAccount | nvarchar(255) | Yes | The funding account associated with a connection, if applicable | -| LedgerId | int | No | The unique identifier for a ledger | -| LedgerName | nvarchar(50) | No | The name of the ledger | -| LedgerDisplayName | nvarchar(255) | No | The name of the ledger to display in the UI | -| UserId | int | No | The ID of the user associated with the connection | -| UserExternalId | nvarchar(255) | No | The external identifier for the user who is associated with the connection. By default, this ID is the user from the Azure Active Directory for the consortium. | -| UserProvisioningStatus | int | No |Identifies the current status of provisioning process for the user. Possible values are: <br />0 ΓÇô User has been created by the API<br />1 ΓÇô A key has been associated with the user in the database<br />2 ΓÇô The user is fully provisioned | -| UserFirstName | nvarchar(50) | Yes | The first name of the user who is associated with the connection | -| UserLastName | nvarchar(255) | Yes | The last name of the user who is associated with the connection | -| UserEmailAddress | nvarchar(255) | Yes | The email address of the user who is associated with the connection | --## vwContract --This view provides details about deployed contracts. For each contract, this view contains the following data: --- Associated application definition-- Associated workflow definition-- Associated ledger implementation for the function-- Details for the user who initiated the action-- Details related to the blockchain block and transaction--| Name | Type | Can Be Null | Description | -||-|-|| -| ConnectionId | int | No | The unique identifier for a connection in Azure Blockchain Workbench. | -| ConnectionEndpointUrl | nvarchar(50) | No | The endpoint url for a connection | -| ConnectionFundingAccount | nvarchar(255) | Yes | The funding account associated with a connection, if applicable | -| LedgerId | int | No | The unique identifier for a ledger | -| LedgerName | nvarchar(50) | No | The name of the ledger | -| LedgerDisplayName | nvarchar(255) | No | The name of the ledger to display in the UI | -| ApplicationId | int | No | A unique identifier for the application | -| ApplicationName | nvarchar (50) | No | The name of the application | -| ApplicationDisplayName | nvarchar (255) | No | The name to be displayed in a user interface | -| ApplicationEnabled | bit | No | Identifies if the application is currently enabled.<br /> **Note:** Even though an application can be reflected as disabled in the database, associated contracts remain on the blockchain and data about those contracts remain in the database. | -| WorkflowId | int | No | A unique identifier for the workflow associated with a contract | -| WorkflowName | nvarchar(50) | No | The name of the workflow associated with a contract | -| WorkflowDisplayName | nvarchar(255) | No | The name of the workflow associated with the contract displayed in the user interface | -| WorkflowDescription | nvarchar(255) | Yes | The description of the workflow associated with a contract | -| ContractCodeId | int | No | A unique identifier for the contract code associated with the contract | -| ContractFileName | int | No | The name of the file containing the smart contract code for this workflow. | -| ContractUploadedDtTm | int | No | The date and time the contract code was uploaded | -| ContractId | int | No | The unique identifier for the contract | -| ContractProvisioningStatus | int | No | Identifies the current status of the provisioning process for the contract. Possible values are: <br />0 ΓÇô The contract has been created by the API in the database<br />1 ΓÇô The contract has been sent to the ledger<br />2 ΓÇô The contract has been successfully deployed to the ledger<br />3 or 4 - The contract failed to be deployed to the ledger<br />5 - The contract was successfully deployed to the ledger <br /><br />Beginning with version 1.5, values 0 through 5 are supported. For backwards compatibility in the current release, view **vwContractV0** is available that only supports values 0 through 2. | -| ContractLedgerIdentifier | nvarchar (255) | | The email address of the user who deployed the contract | -| ContractDeployedByUserId | int | No | An external identifier for the user who deployed the contract. By default, this ID is the guid representing the Azure Active Directory ID for the user. | -| ContractDeployedByUserExternalId | nvarchar(255) | No | An external identifier for the user that deployed the contract. By default, this ID is the guid representing the Azure Active Directory ID for the user. | -| ContractDeployedByUserProvisioningStatus | int | No | Identifies the current status of the provisioning process for the user. Possible values are: <br />0 ΓÇô user has been created by the API<br />1 ΓÇô A key has been associated with the user in the database <br />2 ΓÇô The user is fully provisioned | -| ContractDeployedByUserFirstName | nvarchar(50) | Yes | The first name of the user who deployed the contract | -| ContractDeployedByUserLastName | nvarchar(255) | Yes | The last name of the user who deployed the contract | -| ContractDeployedByUserEmailAddress | nvarchar(255) | Yes | The email address of the user who deployed the contract | --## vwContractAction --This view represents the majority of information related to actions taken on contracts and is designed to readily facilitate common reporting scenarios. For each action taken, this view contains the following data: --- Associated application definition-- Associated workflow definition-- Associated smart contract function and parameter definition-- Associated ledger implementation for the function-- Specific instance values provided for parameters-- Details for the user who initiated the action-- Details related to the blockchain block and transaction--| Name | Type | Can Be Null | Description | -|||-|-| -| ApplicationId | int | No | A unique identifier for the application | -| ApplicationName | nvarchar(50) | No | The name of the application | -| ApplicationDisplayName | nvarchar(255) | No | The name to be displayed in a user interface | -| ApplicationEnabled | bit | No | This field identifies if the application is currently enabled. Note ΓÇô Even though an application can be reflected as disabled in the database, associated contracts remain on the blockchain and data about those contracts remain in the database. | -| WorkflowId | int | No | A unique identifier for a workflow | -| WorkflowName | nvarchar(50) | No | The name of the workflow | -| WorkflowDisplayName | nvarchar(255) | No | The name of the workflow to display in a user interface | -| WorkflowDescription | nvarchar(255) | Yes | The description of the workflow | -| ContractId | int | No | A unique identifier for the contract | -| ContractProvisioningStatus | int | No | Identifies the current status of the provisioning process for the contract. Possible values are: <br />0 ΓÇô The contract has been created by the API in the database<br />1 ΓÇô The contract has been sent to the ledger<br />2 ΓÇô The contract has been successfully deployed to the ledger<br />3 or 4 - The contract failed to be deployed to the ledger<br />5 - The contract was successfully deployed to the ledger <br /><br />Beginning with version 1.5, values 0 through 5 are supported. For backwards compatibility in the current release, view **vwContractActionV0** is available that only supports values 0 through 2. | -| ContractCodeId | int | No | A unique identifier for the code implementation of the contract | -| ContractLedgerIdentifier | nvarchar(255) | Yes | A unique identifier associated with the deployed version of a smart contract for a specific distributed ledger. For example, Ethereum. | -| ContractDeployedByUserId | int | No | The unique identifier of the user that deployed the contract | -| ContractDeployedByUserFirstName | nvarchar(50) | Yes | First name of the user who deployed the contract | -| ContractDeployedByUserLastName | nvarchar(255) | Yes | Last name of the user who deployed the contract | -| ContractDeployedByUserExternalId | nvarchar(255) | No | External identifier of the user who deployed the contract. By default, this ID is the guid that represents their identity in the consortium Azure Active Directory. | -| ContractDeployedByUserEmailAddress | nvarchar(255) | Yes | The email address of the user who deployed the contract | -| WorkflowFunctionId | int | No | A unique identifier for a workflow function | -| WorkflowFunctionName | nvarchar(50) | No | The name of the function | -| WorkflowFunctionDisplayName | nvarchar(255) | No | The name of a function to be displayed in the user interface | -| WorkflowFunctionDescription | nvarchar(255) | No | The description of the function | -| ContractActionId | int | No | The unique identifier for a contract action | -| ContractActionProvisioningStatus | int | No | Identifies the current status of the provisioning process for the contract action. Possible values are: <br />0 ΓÇô The contract action has been created by the API in the database<br />1 ΓÇô The contract action has been sent to the ledger<br />2 ΓÇô The contract action has been successfully deployed to the ledger<br />3 or 4 - The contract failed to be deployed to the ledger<br />5 - The contract was successfully deployed to the ledger <br /><br />Beginning with version 1.5, values 0 through 5 are supported. For backwards compatibility in the current release, view **vwContractActionV0** is available that only supports values 0 through 2. | -| ContractActionTimestamp | datetime(2,7) | No | The timestamp of the contract action | -| ContractActionExecutedByUserId | int | No | Unique identifier of the user that executed the contract action | -| ContractActionExecutedByUserFirstName | int | Yes | First name of the user who executed the contract action | -| ContractActionExecutedByUserLastName | nvarchar(50) | Yes | Last name of the user who executed the contract action | -| ContractActionExecutedByUserExternalId | nvarchar(255) | Yes | External identifier of the user who executed the contract action. By default, this ID is the guid that represents their identity in the consortium Azure Active Directory. | -| ContractActionExecutedByUserEmailAddress | nvarchar(255) | Yes | The email address of the user who executed the contract action | -| WorkflowFunctionParameterId | int | No | A unique identifier for a parameter of the function | -| WorkflowFunctionParameterName | nvarchar(50) | No | The name of a parameter of the function | -| WorkflowFunctionParameterDisplayName | nvarchar(255) | No | The name of a function parameter to be displayed in the user interface | -| WorkflowFunctionParameterDataTypeId | int | No | The unique identifier for the data type associated with a workflow function parameter | -| WorkflowParameterDataTypeName | nvarchar(50) | No | The name of a data type associated with a workflow function parameter | -| ContractActionParameterValue | nvarchar(255) | No | The value for the parameter stored in the smart contract | -| BlockHash | nvarchar(255) | Yes | The hash of the block | -| BlockNumber | int | Yes | The number of the block on the ledger | -| BlockTimestamp | datetime(2,7) | Yes | The time stamp of the block | -| TransactionId | int | No | A unique identifier for the transaction | -| TransactionFrom | nvarchar(255) | Yes | The party that originated the transaction | -| TransactionTo | nvarchar(255) | Yes | The party that was transacted with | -| TransactionHash | nvarchar(255) | Yes | The hash of a transaction | -| TransactionIsWorkbenchTransaction | bit | Yes | A bit that identifies if the transaction is an Azure Blockchain Workbench transaction | -| TransactionProvisioningStatus | int | Yes | Identifies the current status of the provisioning process for the transaction. Possible values are: <br />0 ΓÇô The transaction has been created by the API in the database<br />1 ΓÇô The transaction has been sent to the ledger<br />2 ΓÇô The transaction has been successfully deployed to the ledger | -| TransactionValue | decimal(32,2) | Yes | The value of the transaction | --## vwContractProperty --This view represents the majority of information related to properties associated with a contract and is designed to readily facilitate common reporting scenarios. For each property taken, this view contains the following data: --- Associated application definition-- Associated workflow definition-- Details for the user who deployed the workflow-- Associated smart contract property definition-- Specific instance values for properties-- Details for the state property of the contract--| Name | Type | Can Be Null | Description | -|||-|| -| ApplicationId | int | No | A unique identifier for the application | -| ApplicationName | nvarchar(50) | No | The name of the application | -| ApplicationDisplayName | nvarchar(255) | No | The name to be displayed in a user interface | -| ApplicationEnabled | bit | No | Identifies if the application is currently enabled.<br />**Note:** Even though an application can be reflected as disabled in the database, associated contracts remain on the blockchain and data about those contracts remain in the database. | -| WorkflowId | int | No | The unique identifier for the workflow | -| WorkflowName | nvarchar(50) | No | The name of the workflow | -| WorkflowDisplayName | nvarchar(255) | No | The name of the workflow displayed in the user interface | -| WorkflowDescription | nvarchar(255) | Yes | The description of the workflow | -| ContractId | int | No | The unique identifier for the contract | -| ContractProvisioningStatus | int | No | Identifies the current status of the provisioning process for the contract. Possible values are: <br />0 ΓÇô The contract has been created by the API in the database<br />1 ΓÇô The contract has been sent to the ledger<br />2 ΓÇô The contract has been successfully deployed to the ledger<br />3 or 4 - The contract failed to be deployed to the ledger<br />5 - The contract was successfully deployed to the ledger <br /><br />Beginning with version 1.5, values 0 through 5 are supported. For backwards compatibility in the current release, view **vwContractPropertyV0** is available that only supports values 0 through 2. | -| ContractCodeId | int | No | A unique identifier for the code implementation of the contract | -| ContractLedgerIdentifier | nvarchar(255) | Yes | A unique identifier associated with the deployed version of a smart contract for a specific distributed ledger. For example, Ethereum. | -| ContractDeployedByUserId | int | No | The unique identifier of the user that deployed the contract | -| ContractDeployedByUserFirstName | nvarchar(50) | Yes | First name of the user who deployed the contract | -| ContractDeployedByUserLastName | nvarchar(255) | Yes | Last name of the user who deployed the contract | -| ContractDeployedByUserExternalId | nvarchar(255) | No | External identifier of the user who deployed the contract. By default, this ID is the guid that represents their identity in the consortium Azure Active Directory | -| ContractDeployedByUserEmailAddress | nvarchar(255) | Yes | The email address of the user who deployed the contract | -| WorkflowPropertyId | int | | A unique identifier for a property of a workflow | -| WorkflowPropertyDataTypeId | int | No | The ID of the data type of the property | -| WorkflowPropertyDataTypeName | nvarchar(50) | No | The name of the data type of the property | -| WorkflowPropertyName | nvarchar(50) | No | The name of the workflow property | -| WorkflowPropertyDisplayName | nvarchar(255) | No | The display name of the workflow property | -| WorkflowPropertyDescription | nvarchar(255) | Yes | A description of the property | -| ContractPropertyValue | nvarchar(255) | No | The value for a property on the contract | -| StateName | nvarchar(50) | Yes | If this property contains the state of the contract, it is the display name for the state. If it is not associated with the state, the value will be null. | -| StateDisplayName | nvarchar(255) | No | If this property contains the state, it is the display name for the state. If it is not associated with the state, the value will be null. | -| StateValue | nvarchar(255) | Yes | If this property contains the state, it is the state value. If it is not associated with the state, the value will be null. | --## vwContractState --This view represents the majority of information related to the state of a specific contract and is designed to readily facilitate common reporting scenarios. Each record in this view contains the following data: --- Associated application definition-- Associated workflow definition-- Details for the user who deployed the workflow-- Associated smart contract property definition-- Details for the state property of the contract--| Name | Type | Can Be Null | Description | -|||-|| -| ApplicationId | int | No | A unique identifier for the application | -| ApplicationName | nvarchar(50) | No | The name of the application | -| ApplicationDisplayName | nvarchar(255) | No | The name to be displayed in a user interface | -| ApplicationEnabled | bit | No | Identifies if the application is currently enabled.<br />**Note:** Even though an application can be reflected as disabled in the database, associated contracts remain on the blockchain and data about those contracts remain in the database. | -| WorkflowId | int | No | A unique identifier for the workflow | -| WorkflowName | nvarchar(50) | No | The name of the workflow | -| WorkflowDisplayName | nvarchar(255) | No | The name displayed in the user interface | -| WorkflowDescription | nvarchar(255) | Yes | The description of the workflow | -| ContractLedgerImplementationId | nvarchar(255) | Yes | A unique identifier associated with the deployed version of a smart contract for a specific distributed ledger. For example, Ethereum. | -| ContractId | int | No | A unique identifier for the contract | -| ContractProvisioningStatus | int | No |Identifies the current status of the provisioning process for the contract. Possible values are: <br />0 ΓÇô The contract has been created by the API in the database<br />1 ΓÇô The contract has been sent to the ledger<br />2 ΓÇô The contract has been successfully deployed to the ledger<br />3 or 4 - The contract failed to be deployed to the ledger<br />5 - The contract was successfully deployed to the ledger <br /><br />Beginning with version 1.5, values 0 through 5 are supported. For backwards compatibility in the current release, view **vwContractStateV0** is available that only supports values 0 through 2. | -| ConnectionId | int | No | A unique identifier for the blockchain instance the workflow is deployed to | -| ContractCodeId | int | No | A unique identifier for the code implementation of the contract | -| ContractDeployedByUserId | int | No | Unique identifier of the user that deployed the contract | -| ContractDeployedByUserExternalId | nvarchar(255) | No | External identifier of the user who deployed the contract. By default, this ID is the guid that represents their identity in the consortium Azure Active Directory. | -| ContractDeployedByUserFirstName | nvarchar(50) | Yes | First name of the user who deployed the contract | -| ContractDeployedByUserLastName | nvarchar(255) | Yes | Last name of the user who deployed the contract | -| ContractDeployedByUserEmailAddress | nvarchar(255) | Yes | The email address of the user who deployed the contract | -| WorkflowPropertyId | int | No | A unique identifier for a workflow property | -| WorkflowPropertyDataTypeId | int | No | The ID of the data type of the workflow property | -| WorkflowPropertyDataTypeName | nvarchar(50) | No | The name of the data type of the workflow property | -| WorkflowPropertyName | nvarchar(50) | No | The name of the workflow property | -| WorkflowPropertyDisplayName | nvarchar(255) | No | The display name of the property to show in a UI | -| WorkflowPropertyDescription | nvarchar(255) | Yes | The description of the property | -| ContractPropertyValue | nvarchar(255) | No | The value for a property stored in the contract | -| StateName | nvarchar(50) | Yes | If this property contains the state, it the display name for the state. If it is not associated with the state, the value will be null. | -| StateDisplayName | nvarchar(255) | No | If this property contains the state, it is the display name for the state. If it is not associated with the state, the value will be null. | -| StateValue | nvarchar(255) | Yes | If this property contains the state, it is the state value. If it is not associated with the state, the value will be null. | --## vwUser --This view provides details on the consortium members that are provisioned to use Azure Blockchain Workbench. By default, data is populated through the initial provisioning of the user. --| Name | Type | Can Be Null | Description | -|--||-|-| -| ID | int | No | A unique identifier for a user | -| ExternalID | nvarchar(255) | No | An external identifier for a user. By default, this ID is the guid representing the Azure Active Directory ID for the user. | -| ProvisioningStatus | int | No |Identifies the current status of provisioning process for the user. Possible values are: <br />0 ΓÇô User has been created by the API<br />1 ΓÇô A key has been associated with the user in the database<br />2 ΓÇô The user is fully provisioned | -| FirstName | nvarchar(50) | Yes | The first name of the user | -| LastName | nvarchar(50) | Yes | The last name of the user | -| EmailAddress | nvarchar(255) | Yes | The email address of the user | --## vwWorkflow --This view represents the details core workflow metadata as well as the workflow's functions and parameters. Designed for reporting, it also contains metadata about the application associated with the workflow. This view contains data from multiple underlying tables to facilitate reporting on workflows. For each workflow, this view contains the following data: --- Associated application definition-- Associated workflow definition-- Associated workflow start state information--| Name | Type | Can Be Null | Description | -|--||-|--| -| ApplicationId | int | No | A unique identifier for the application | -| ApplicationName | nvarchar(50) | No | The name of the application | -| ApplicationDisplayName | nvarchar(255) | No | The name to be displayed in a user interface | -| ApplicationEnabled | bit | No | Identifies if the application is enabled | -| WorkflowId | int | Yes | A unique identifier for a workflow | -| WorkflowName | nvarchar(50) | No | The name of the workflow | -| WorkflowDisplayName | nvarchar(255) | No | The name displayed in the user interface | -| WorkflowDescription | nvarchar(255) | Yes | The description of the workflow. | -| WorkflowConstructorFunctionId | int | No | The identifier of the workflow function that serves as the constructor for the workflow | -| WorkflowStartStateId | int | No | A unique identifier for the state | -| WorkflowStartStateName | nvarchar(50) | No | The name of the state | -| WorkflowStartStateDisplayName | nvarchar(255) | No | The name to be displayed in the user interface for the state | -| WorkflowStartStateDescription | nvarchar(255) | Yes | A description of the workflow state | -| WorkflowStartStateStyle | nvarchar(50) | Yes | This value identifies the percentage complete that the workflow is when in this state | -| WorkflowStartStateValue | int | No | The value of the state | -| WorkflowStartStatePercentComplete | int | No | A text description that provides a hint to clients on how to render this state in the UI. Supported states include *Success* and *Failure* | --## vwWorkflowFunction --This view represents the details core workflow metadata as well as the workflow's functions and parameters. Designed for reporting, it also contains metadata about the application associated with the workflow. This view contains data from multiple underlying tables to facilitate reporting on workflows. For each workflow function, this view contains the following data: --- Associated application definition-- Associated workflow definition-- Workflow function details--| Name | Type | Can Be Null | Description | -|--||-|--| -| ApplicationId | int | No | A unique identifier for the application | -| ApplicationName | nvarchar(50) | No | The name of the application | -| ApplicationDisplayName | nvarchar(255) | No | The name to be displayed in a user interface | -| ApplicationEnabled | bit | No | Identifies if the application is enabled | -| WorkflowId | int | No | A unique identifier for a workflow | -| WorkflowName | nvarchar(50) | No | The name of the workflow | -| WorkflowDisplayName | nvarchar(255) | No | The name of the workflow displayed in the user interface | -| WorkflowDescription | nvarchar(255) | Yes | The description of the workflow | -| WorkflowFunctionId | int | No | A unique identifier for a function | -| WorkflowFunctionName | nvarchar(50) | Yes | The name of the function | -| WorkflowFunctionDisplayName | nvarchar(255) | No | The name of a function to be displayed in the user interface | -| WorkflowFunctionDescription | nvarchar(255) | Yes | The description of the workflow function | -| WorkflowFunctionIsConstructor | bit | No | Identifies if the workflow function is the constructor for the workflow | -| WorkflowFunctionParameterId | int | No | A unique identifier for a parameter of a function | -| WorkflowFunctionParameterName | nvarchar(50) | No | The name of a parameter of the function | -| WorkflowFunctionParameterDisplayName | nvarchar(255) | No | The name of a function parameter to be displayed in the user interface | -| WorkflowFunctionParameterDataTypeId | int | No | A unique identifier for the data type associated with a workflow function parameter | -| WorkflowParameterDataTypeName | nvarchar(50) | No | The name of a data type associated with a workflow function parameter | --## vwWorkflowProperty --This view represents the properties defined for a workflow. For each property, this view contains the following data: --- Associated application definition-- Associated workflow definition-- Workflow property details--| Name | Type | Can Be Null | Description | -|||-|| -| ApplicationId | int | No | A unique identifier for the application | -| ApplicationName | nvarchar(50) | No | The name of the application | -| ApplicationDisplayName | nvarchar(255) | No | The name to be displayed in a user interface | -| ApplicationEnabled | bit | No | Identifies if the application is currently enabled.<br />**Note:** Even though an application can be reflected as disabled in the database, associated contracts remain on the blockchain and data about those contracts remain in the database. | -| WorkflowId | int | No | A unique identifier for the workflow | -| WorkflowName | nvarchar(50) | No | The name of the workflow | -| WorkflowDisplayName | nvarchar(255) | No | The name to be displayed for the workflow in a user interface | -| WorkflowDescription | nvarchar(255) | Yes | A description of the workflow | -| WorkflowPropertyID | int | No | A unique identifier for a property of a workflow | -| WorkflowPropertyName | nvarchar(50) | No | The name of the property | -| WorkflowPropertyDescription | nvarchar(255) | Yes | A description of the property | -| WorkflowPropertyDisplayName | nvarchar(255) | No | The name to be displayed in a user interface | -| WorkflowPropertyWorkflowId | int | No | The ID of the workflow to which this property is associated | -| WorkflowPropertyDataTypeId | int | No | The ID of the data type defined for the property | -| WorkflowPropertyDataTypeName | nvarchar(50) | No | The name of the data type defined for the property | -| WorkflowPropertyIsState | bit | No | This field identifies if this workflow property contains the state of the workflow | --## vwWorkflowState --This view represents the properties associated with a workflow. For each contract, this view contains the following data: --- Associated application definition-- Associated workflow definition-- Workflow state information--| Name | Type | Can Be Null | Description | -|||-|| -| ApplicationId | int | No | A unique identifier for the application | -| ApplicationName | nvarchar(50) | No | The name of the application | -| ApplicationDisplayName | nvarchar(255) | No | A description of the application | -| ApplicationEnabled | bit | No | Identifies if the application is currently enabled.<br />**Note:** Even though an application can be reflected as disabled in the database, associated contracts remain on the blockchain and data about those contracts remain in the database. | -| WorkflowId | int | No | The unique identifier for the workflow | -| WorkflowName | nvarchar(50) | No | The name of the workflow | -| WorkflowDisplayName | nvarchar(255) | No | The name displayed in the user interface for the workflow | -| WorkflowDescription | nvarchar(255) | Yes | The description of the workflow | -| WorkflowStateID | int | No | The unique identifier for the state | -| WorkflowStateName | nvarchar(50) | No | The name of the state | -| WorkflowStateDisplayName | nvarchar(255) | No | The name to be displayed in the user interface for the state | -| WorkflowStateDescription | nvarchar(255) | Yes | A description of the workflow state | -| WorkflowStatePercentComplete | int | No | This value identifies the percentage complete that the workflow is when in this state | -| WorkflowStateValue | nvarchar(50) | No | Value of the state | -| WorkflowStateStyle | nvarchar(50) | No | A text description that provides a hint to clients on how to render this state in the UI. Supported states include *Success* and *Failure* | |
| blockchain | Deploy | https://github.com/MicrosoftDocs/azure-docs/commits/main/articles/blockchain/workbench/deploy.md | - Title: Deploy Azure Blockchain Workbench Preview -description: How to deploy Azure Blockchain Workbench Preview Previously updated : 02/18/2022----#Customer intent: As a developer, I want to deploy Azure Blockchain Workbench so that I can create a blockchain apps. --# Deploy Azure Blockchain Workbench Preview ---Azure Blockchain Workbench Preview is deployed using a solution template in the Azure Marketplace. The template simplifies the deployment of components needed to create blockchain applications. Once deployed, Blockchain Workbench provides access to client apps to create and manage users and blockchain applications. --For more information about the components of Blockchain Workbench, see [Azure Blockchain Workbench architecture](architecture.md). ---## Prepare for deployment --Blockchain Workbench allows you to deploy a blockchain ledger along with a set of relevant Azure services most often used to build a blockchain-based application. Deploying Blockchain Workbench results in the following Azure services being provisioned within a resource group in your Azure subscription. --* App Service Plan (Standard) -* Application Insights -* Event Grid -* Azure Key Vault -* Service Bus -* SQL Database (Standard S0) -* Azure Storage account (Standard LRS) -* Virtual machine scale set with capacity of 1 -* Virtual Network resource group (with Load Balancer, Network Security Group, Public IP Address, Virtual Network) -* Azure Blockchain Service. If you are using a previous Blockchain Workbench deployment, consider redeploying Azure Blockchain Workbench to use Azure Blockchain Service. --The following is an example deployment created in **myblockchain** resource group. -- --The cost of Blockchain Workbench is an aggregate of the cost of the underlying Azure services. Pricing information for Azure services can be calculated using the [pricing calculator](https://azure.microsoft.com/pricing/calculator/). --## Prerequisites --Azure Blockchain Workbench requires Azure AD configuration and application registrations. You can choose to do the Azure AD [configurations manually](#azure-ad-configuration) before deployment or run a script post deployment. If you are redeploying Blockchain Workbench, see [Azure AD configuration](#azure-ad-configuration) to verify your Azure AD configuration. --> [!IMPORTANT] -> Workbench does not have to be deployed in the same tenant as the one you are using to register an Azure AD application. Workbench must be deployed in a tenant where you have sufficient permissions to deploy resources. For more information on Azure AD tenants, see [How to get an Active Directory tenant](../../active-directory/develop/quickstart-create-new-tenant.md) and [Integrating applications with Azure Active Directory](../../active-directory/develop/quickstart-register-app.md). --## Deploy Blockchain Workbench --Once the prerequisite steps have been completed, you are ready to deploy the Blockchain Workbench. The following sections outline how to deploy the framework. --1. Sign in to the [Azure portal](https://portal.azure.com). -1. Select your account in the top-right corner, and switch to the desired Azure AD tenant where you want to deploy Azure Blockchain Workbench. -1. Select **Create a resource** in the upper left-hand corner of the Azure portal. -1. Select **Blockchain** > **Azure Blockchain Workbench (preview)**. --  -- | Setting | Description | - ||--| - | Resource prefix | Short unique identifier for your deployment. This value is used as a base for naming resources. | - | VM user name | The user name is used as administrator for all virtual machines (VM). | - | Authentication type | Select if you want to use a password or key for connecting to VMs. | - | Password | The password is used for connecting to VMs. | - | SSH | Use an RSA public key in the single-line format beginning with **ssh-rsa** or use the multi-line PEM format. You can generate SSH keys using `ssh-keygen` on Linux and OS X, or by using PuTTYGen on Windows. More information on SSH keys, see [How to use SSH keys with Windows on Azure](../../virtual-machines/linux/ssh-from-windows.md). | - | Database and Blockchain password | Specify the password to use for access to the database created as part of the deployment. The password must meet three of the following four requirements: length needs to be between 12 & 72 characters, 1 lower case character, 1 upper case character, 1 number, and 1 special character that is not number sign(#), percent(%), comma(,), star(*), back quote(\`), double quote("), single quote('), dash(-) and semicolumn(;) | - | Deployment region | Specify where to deploy Blockchain Workbench resources. For best availability, this should match the **Region** location setting. Not all regions are available during preview. Features may not be available in some regions. Azure Blockchain Data Manager is available in the following Azure regions: East US and West Europe.| - | Subscription | Specify the Azure Subscription you wish to use for your deployment. | - | Resource groups | Create a new Resource group by selecting **Create new** and specify a unique resource group name. | - | Location | Specify the region you wish to deploy the framework. | --1. Select **OK** to finish the basic setting configuration section. --1. In **Advanced Settings**, choose the existing Ethereum proof-of-authority blockchain network, Active Directory settings, and preferred VM size for Blockchain Workbench components. -- The Ethereum RPC endpoint has the following requirements: -- * The endpoint must be an Ethereum Proof-of-Authority (PoA) blockchain network. - * The endpoint must be publicly accessible over the network. - * The PoA blockchain network should be configured to have gas price set to zero. - * The endpoint starts with `https://` or `http://` and ends with a port number. For example, `http<s>://<network-url>:<port>` -- > [!NOTE] - > Blockchain Workbench accounts are not funded. If funds are required, the transactions fail. --  -- | Setting | Description | - ||--| - | Ethereum RPC Endpoint | Provide the RPC endpoint of an existing PoA blockchain network. | - | Azure Active Directory settings | Choose **Add Later**.</br>Note: If you chose to [pre-configure Azure AD](#azure-ad-configuration) or are redeploying, choose to *Add Now*. | - | VM selection | Select preferred storage performance and VM size for your blockchain network. Choose a smaller VM size such as *Standard DS1 v2* if you are on a subscription with low service limits like Azure free tier. | --1. Select **Review + create** to finish Advanced Settings. --1. Review the summary to verify your parameters are accurate. --  --1. Select **Create** to agree to the terms and deploy your Azure Blockchain Workbench. --The deployment can take up to 90 minutes. You can use the Azure portal to monitor progress. In the newly created resource group, select **Deployments > Overview** to see the status of the deployed artifacts. --> [!IMPORTANT] -> Post deployment, you need to complete Active Directory settings. If you chose **Add Later**, you need to run the [Azure AD configuration script](#azure-ad-configuration-script). If you chose **Add now**, you need to [configure the Reply URL](#configuring-the-reply-url). --## Blockchain Workbench web URL --Once the deployment of the Blockchain Workbench has completed, a new resource group contains your Blockchain Workbench resources. Blockchain Workbench services are accessed through a web URL. The following steps show you how to retrieve the web URL of the deployed framework. --1. Sign in to the [Azure portal](https://portal.azure.com). -1. In the left-hand navigation pane, select **Resource groups**. -1. Choose the resource group name you specified when deploying Blockchain Workbench. -1. Select the **TYPE** column heading to sort the list alphabetically by type. -1. There are two resources with type **App Service**. Select the resource of type **App Service** *without* the "-api" suffix. --  --1. In the App Service **Overview**, copy the **URL** value, which represents the web URL to your deployed Blockchain Workbench. --  --To associate a custom domain name with Blockchain Workbench, see [configuring a custom domain name for a web app in Azure App Service using Traffic Manager](../../app-service/configure-domain-traffic-manager.md). --## Azure AD configuration script --Azure AD must be configured to complete your Blockchain Workbench deployment. You'll use a PowerShell script to do the configuration. --1. In a browser, navigate to the [Blockchain Workbench Web URL](#blockchain-workbench-web-url). -1. You'll see instructions to set up Azure AD using Cloud Shell. Copy the command and launch Cloud Shell. --  --1. Choose the Azure AD tenant where you deployed Blockchain Workbench. -1. In Cloud Shell PowerShell environment, paste and run the command. -1. When prompted, enter the Azure AD tenant you want to use for Blockchain Workbench. This will be the tenant containing the users for Blockchain Workbench. -- > [!IMPORTANT] - > The authenticated user requires permissions to create Azure AD application registrations and grant delegated application permissions in the tenant. You may need to ask an administrator of the tenant to run the Azure AD configuration script or create a new tenant. --  --1. You'll be prompted to authenticate to the Azure AD tenant using a browser. Open the web URL in a browser, enter the code, and authenticate. --  --1. The script outputs several status messages. You get a **SUCCESS** status message if the tenant was successfully provisioned. -1. Navigate to the Blockchain Workbench URL. You are asked to consent to grant read permissions to the directory. This allows the Blockchain Workbench web app access to the users in the tenant. If you are the tenant administrator, you can choose to consent for the entire organization. This option accepts consent for all users in the tenant. Otherwise, each user is prompted for consent on first use of the Blockchain Workbench web application. -1. Select **Accept** to consent. --  --1. After consent, the Blockchain Workbench web app can be used. --You have completed your Azure Blockchain Workbench deployment. See [Next steps](#next-steps) for suggestions to get started using your deployment. --## Azure AD configuration --If you choose to manually configure or verify Azure AD settings prior to deployment, complete all steps in this section. If you prefer to automatically configure Azure AD settings, use [Azure AD configuration script](#azure-ad-configuration-script) after you deploy Blockchain Workbench. --### Blockchain Workbench API app registration --Blockchain Workbench deployment requires registration of an Azure AD application. You need an Azure Active Directory (Azure AD) tenant to register the app. You can use an existing tenant or create a new tenant. If you are using an existing Azure AD tenant, you need sufficient permissions to register applications, grant Graph API permissions, and allow guest access within an Azure AD tenant. If you do not have sufficient permissions in an existing Azure AD tenant, create a new tenant. --1. Sign in to the [Azure portal](https://portal.azure.com). -1. Select your account in the top-right corner, and switch to the desired Azure AD tenant. The tenant should be the subscription admin's tenant of the subscription where Azure Blockchain Workbench is deployed and you have sufficient permissions to register applications. -1. In the left-hand navigation pane, select the **Azure Active Directory** service. Select **App registrations** > **New registration**. --  --1. Provide a display **Name** and choose **Accounts in this organizational directory only**. --  --1. Select **Register** to register the Azure AD application. --### Modify manifest --Next, you need to modify the manifest to use application roles within Azure AD to specify Blockchain Workbench administrators. For more information about application manifests, see [Azure Active Directory application manifest](../../active-directory/develop/reference-app-manifest.md). --1. A GUID is required for the manifest. You can generate a GUID using the PowerShell command `[guid]::NewGuid()` or `New-GUID` cmdlet. Another option is to use a GUID generator website. -1. For the application you registered, select **Manifest** in the **Manage** section. -1. Next, update the **appRoles** section of the manifest. Replace `"appRoles": []` with the provided JSON. Be sure to replace the value for the `id` field with the GUID you generated. -  -- ``` json - "appRoles": [ - { - "allowedMemberTypes": [ - "User", - "Application" - ], - "displayName": "Administrator", - "id": "<A unique GUID>", - "isEnabled": true, - "description": "Blockchain Workbench administrator role allows creation of applications, user to role assignments, etc.", - "value": "Administrator" - } - ], - ``` -- > [!IMPORTANT] - > The value **Administrator** is needed to identify Blockchain Workbench administrators. --1. In the manifest, also change the **Oauth2AllowImplicitFlow** value to **true**. -- ``` json - "oauth2AllowImplicitFlow": true, - ``` --1. Select **Save** to save the manifest changes. --### Add Graph API required permissions --The API application needs to request permission from the user to access the directory. Set the following required permission for the API application: --1. In the *Blockchain API* app registration, select **API permissions**. By default, the Graph API **User.Read** permission is added. -1. The Workbench application requires read access to users' basic profile information. In *Configured permissions*, select **Add a permission**. In **Microsoft APIs**, select **Microsoft Graph**. -1. Since the Workbench application uses the authenticated user credentials, select **Delegated permissions**. -1. In the *User* category, choose **User.ReadBasic.All** permission. --  -- Select **Add permissions**. --1. In *Configured permissions*, select **Grant admin consent** for the domain then select **Yes** for the verification prompt. --  -- Granting permission allows Blockchain Workbench to access users in the directory. The read permission is required to search and add members to Blockchain Workbench. --### Get application ID --The application ID and tenant information are required for deployment. Collect and store the information for use during deployment. --1. For the application you registered, select **Overview**. -1. Copy and store the **Application ID** value for later use during deployment. --  -- | Setting to store | Use in deployment | - ||-| - | Application (client) ID | Azure Active Directory setup > Application ID | --### Get tenant domain name --Collect and store the Active Directory tenant domain name where the applications are registered. --In the left-hand navigation pane, select the **Azure Active Directory** service. Select **Custom domain names**. Copy and store the domain name. -- --### Guest user settings --If you have guest users in your Azure AD tenant, follow the additional steps to ensure Blockchain Workbench user assignment and management works properly. --1. Switch you your Azure AD tenant and select **Azure Active Directory > User settings > Manage external collaboration settings**. -1. Set **Guest user permissions are limited** to **No**. -  --## Configuring the reply URL --Once the Azure Blockchain Workbench has been deployed, you have to configure the Azure Active Directory (Azure AD) client application **Reply URL** of the deployed Blockchain Workbench web URL. --1. Sign in to the [Azure portal](https://portal.azure.com). -1. Verify you are in the tenant where you registered the Azure AD client application. -1. In the left-hand navigation pane, select the **Azure Active Directory** service. Select **App registrations**. -1. Select the Azure AD client application you registered in the prerequisite section. -1. Select **Authentication**. -1. Specify the main web URL of the Azure Blockchain Workbench deployment you retrieved in the [Blockchain Workbench web URL](#blockchain-workbench-web-url) section. The Reply URL is prefixed with `https://`. For example, `https://myblockchain2-7v75.azurewebsites.net` --  --1. In the **Advanced setting** section, check **Access tokens** and **ID tokens**. --  --1. Select **Save** to update the client registration. --## Remove a deployment --When a deployment is no longer needed, you can remove a deployment by deleting the Blockchain Workbench resource group. --1. In the Azure portal, navigate to **Resource group** in the left navigation pane and select the resource group you want to delete. -1. Select **Delete resource group**. Verify deletion by entering the resource group name and select **Delete**. --  --## Next steps --In this how-to article, you deployed Azure Blockchain Workbench. To learn how to create a blockchain application, continue to the next how-to article. --> [!div class="nextstepaction"] -> [Create a blockchain application in Azure Blockchain Workbench](create-app.md) |
| blockchain | Getdb Details | https://github.com/MicrosoftDocs/azure-docs/commits/main/articles/blockchain/workbench/getdb-details.md | - Title: Get Azure Blockchain Workbench database details -description: Learn how to get Azure Blockchain Workbench Preview database and database server information. Previously updated : 02/18/2022---#Customer intent: As a developer, I want to get Azure Blockchain database details to connect and view off-chain blockchain data. ---# Get information about your Azure Blockchain Workbench database --This article shows how to get detailed information about your Azure Blockchain Workbench Preview database. --## Overview --Information about applications, workflows, and smart contract execution is provided using database views in the Blockchain Workbench SQL DB. Developers can use this information when using tools such as Microsoft Excel, Power BI, Visual Studio, and SQL Server Management Studio. --Before a developer can connect to the database, they need: --* External client access allowed in the database firewall. This article about configuring a database firewall article explains how to allow access. -* The database server name and database name. --## Connect to the Blockchain Workbench database --To connect to the database: --1. Sign in to the Azure portal with an account that has **Owner** permissions for the Azure Blockchain Workbench resources. -2. In the left navigation pane, choose **Resource groups**. -3. Choose the name of the resource group for your Blockchain Workbench deployment. -4. Select **Type** to sort the resource list, and then choose your **SQL server**. The sorted list in the next screen capture shows two databases, "master" and one that uses "lhgn" as the **Resource prefix**. --  --5. To see detailed information about the Blockchain Workbench database, select the link for the database with the **Resource prefix** you provided for deploying Blockchain Workbench. --  --The database server name and database name let you connect to the Blockchain Workbench database using your development or reporting tool. --## Next steps --> [!div class="nextstepaction"] -> [Database views in Azure Blockchain Workbench](database-views.md) |
| blockchain | Integration Patterns | https://github.com/MicrosoftDocs/azure-docs/commits/main/articles/blockchain/workbench/integration-patterns.md | - Title: Smart contract integration patterns - Azure Blockchain Workbench -description: Overview of smart contract integration patterns in Azure Blockchain Workbench Preview. Previously updated : 02/18/2022---#Customer intent: As a developer, I want to understand recommended integration pattern using Azure Blockchain Workbench so that I can integrate with external systems. --# Smart contract integration patterns ---Smart contracts often represent a business workflow that needs to integrate with external systems and devices. --The requirements of these workflows include a need to initiate transactions on a distributed ledger that include data from an external system, service, or device. They also need to have external systems react to events originating from smart contracts on a distributed ledger. --The REST API and messaging integration sends transactions from external systems to smart contracts included in an Azure Blockchain Workbench application. It also sends event notifications to external systems based on changes that take place within an application. --For data integration scenarios, Azure Blockchain Workbench includes a set of database views that merge a combination of transactional data from the blockchain and meta-data about applications and smart contracts. --In addition, some scenarios, such as those related to supply chain or media, may also require the integration of documents. While Azure Blockchain Workbench does not provide API calls for handling documents directly, documents can be incorporated into a blockchain -application. This section also includes that pattern. --This section includes the patterns identified for implementing each of these types of integrations in your end to end solutions. --## REST API-based integration --Capabilities within the Azure Blockchain Workbench generated web application are exposed via the REST API. Capabilities include Azure Blockchain Workbench uploading, configuration and administration of applications, sending transactions to a distributed ledger, and the querying of application metadata and ledger data. --The REST API is primarily used for interactive clients such as web, mobile, and bot applications. --This section looks at patterns focused on the aspects of the REST API that send transactions to a distributed ledger and patterns that query data about transactions from Azure Blockchain Workbench's *off chain* database. --### Sending transactions to a distributed ledger from an external system --The Azure Blockchain Workbench REST API sends authenticated requests to execute transactions on a distributed ledger. -- --Executing transactions occurs using the process depicted previously, where: --- The external application authenticates to the Azure Active Directory provisioned as part of the Azure Blockchain Workbench deployment.-- Authorized users receive a bearer token that can be sent with requests to the API.-- External applications make calls to the REST API using the bearer token.-- The REST API packages the request as a message and sends it to the Service Bus. From here it is retrieved, signed, and sent to the appropriate distributed ledger.-- The REST API makes a request to the Azure Blockchain Workbench SQL DB to record the request and establish the current provisioning status.-- The SQL DB returns the provisioning status and the API call returns the ID to the external application that called it.--### Querying Blockchain Workbench metadata and distributed ledger transactions --The Azure Blockchain Workbench REST API sends authenticated requests to query details related to smart contract execution on a distributed ledger. -- --Querying occurs using the process depicted previously, where: --1. The external application authenticates to the Azure Active Directory provisioned as part of the Azure Blockchain Workbench deployment. -2. Authorized users receive a bearer token that can be sent with requests to the API. -3. External applications make calls to the REST API using the bearer token. -4. The REST API queries the data for the request from the SQL DB and returns it to the client. --## Messaging integration --Messaging integration facilitates interaction with systems, services, and devices where an interactive sign-in is not possible or desirable. Messaging integration focuses on two types of messages: messages requesting transactions be executed on a distributed ledger, and events exposed by that ledger when transactions have taken place. --Messaging integration focuses on the execution and monitoring of transactions related to user creation, contract creation, and execution of transactions on contracts and is primarily used by *headless* back-end systems. --This section looks at patterns focused on the aspects of the message-based API that send transactions to a distributed ledger and patterns that represent event messages exposed by the underlying distributed ledger. --### One-way event delivery from a smart contract to an event consumer --In this scenario, an event occurs within a smart contract, for example, a state change or the execution of a specific type of transaction. This event is broadcast via an Event Grid to downstream consumers, and those consumers then take appropriate actions. --An example of this scenario is that when a transaction occurs, a consumer would be alerted and could take action, such as recording the information in a SQL DB or the Common Data Service. This scenario is the same pattern that Workbench follows to populate its *off chain* SQL DB. --Another would be if a smart contract transitions to a particular state, for example when a contract goes into an *OutOfCompliance*. When this state change happens, it could trigger an alert to be sent to an administrator's mobile phone. -- --This scenario occurs using the process depicted previously, where: --- The smart contract transitions to a new state and sends an event to the ledger.-- The ledger receives and delivers the event to Azure Blockchain Workbench.-- Azure Blockchain Workbench is subscribed to events from the ledger and receives the event.-- Azure Blockchain Workbench publishes the event to subscribers on the Event Grid.-- External systems are subscribed to the Event Grid, consume the message, and take the appropriate actions.--## One-way event delivery of a message from an external system to a smart contract --There is also a scenario that flows from the opposite direction. In this case, an event is generated by a sensor or an external system and the data from that event should be sent to a smart contract. --A common example is the delivery of data from financial markets, for example, prices of commodities, stock, or bonds, to a smart contract. --### Direct delivery of an Azure Blockchain Workbench in the expected format --Some applications are built to integrate with Azure Blockchain Workbench and directly generates and send messages in the expected formats. -- --This delivery occurs using the process depicted previously, where: --- An event occurs in an external system that triggers the creation of a message for Azure Blockchain Workbench.-- The external system has code written to create this message in a known format and sends it directly to the Service Bus.-- Azure Blockchain Workbench is subscribed to events from the Service Bus and retrieves the message.-- Azure Blockchain Workbench initiates a call to the ledger, sending data from the external system to a specific contract.-- Upon receipt of the message, the contract transitions to a new state.--### Delivery of a message in a format unknown to Azure Blockchain Workbench --Some systems cannot be modified to deliver messages in the standard formats used by Azure Blockchain Workbench. In these cases, existing mechanisms and message formats from these systems can often be used. Specifically, the native message types of these systems can be -transformed using Logic Apps, Azure Functions, or other custom code to map to one of the standard messaging formats expected. -- --This occurs using the process depicted previously, where: --- An event occurs in an external system that triggers the creation of a message.-- A Logic App or custom code is used to receive that message and transform it to a standard Azure Blockchain Workbench formatted message.-- The Logic App sends the transformed message directly to the Service Bus.-- Azure Blockchain Workbench is subscribed to events from the Service- Bus and retrieves the message. -- Azure Blockchain Workbench initiates a call to the ledger, sending data from the external system to a specific function on the contract.-- The function executes and typically modifies the state. The change of state moves forward the business workflow reflected in the smart contract, enabling other functions to now be executed as appropriate.--### Transitioning control to an external process and await completion --There are scenarios where a smart contract must stop internal execution and hand off to an external process. That external process would then complete, send a message to the smart contract, and execution would then continue within the smart contract. --#### Transition to the external process --This pattern is typically implemented using the following approach: --- The smart contract transitions to a specific state. In this state, either no or a limited number of functions can be executed until an external system takes a desired action.-- The change of state is surfaced as an event to a downstream consumer.-- The downstream consumer receives the event and triggers external code execution.-- --#### Return of control from the smart contract --Depending on the ability to customize the external system, it may or may not be able to deliver messages in one of the standard formats that Azure Blockchain Workbench expects. Based on the external systems ability to generate one of these messages determine which of the following two return paths is taken. --##### Direct delivery of an Azure Blockchain Workbench in the expected format -- --In this model, the communication to the contract and subsequent state -change occurs following the previous process where - --- Upon reaching the completion or a specific milestone in the external- code execution, an event is sent to the Service Bus connected to - Azure Blockchain Workbench. --- For systems that can't be directly adapted to write a message that- conforms to the expectations of the API, it is transformed. --- The content of the message is packaged up and sent to a specific- function on the smart contract. This delivery is done on behalf of the user - associated with the external system. --- The function executes and typically modifies the state. The- change of state moves forward the business workflow reflected in the - smart contract, enabling other functions to now be executed as - appropriate. --### Delivery of a message in a format unknown to Azure Blockchain Workbench -- --In this model where a message in a standard format cannot be sent directly, the communication to the contract and subsequent state change occurs following the previous process where: --1. Upon reaching the completion or a specific milestone in the external code execution, an event is sent to the Service Bus connected to Azure Blockchain Workbench. -2. A Logic App or custom code is used to receive that message and transform it to a standard Azure Blockchain Workbench formatted message. -3. The Logic App sends the transformed message directly to the Service Bus. -4. Azure Blockchain Workbench is subscribed to events from the Service Bus and retrieves the message. -5. Azure Blockchain Workbench initiates a call to the ledger, sending data from the external system to a specific contract. -6. The content of the message is packaged up and sent to a specific function on the smart contract. This delivery is done on behalf of the user associated with the external system. -7. The function executes and typically modifies the state. The change of state moves forward the business workflow reflected in the smart contract, enabling other functions to now be executed as appropriate. --## IoT integration --A common integration scenario is the inclusion of telemetry data retrieved from sensors in a smart contract. Based on data delivered by sensors, smart contracts could take informed actions and alter the state of the contract. --For example, if a truck delivering medicine had its temperature soar to 110 degrees, it may impact the effectiveness of the medicine and may cause a public safety issue if not detected and removed from the supply chain. If a driver accelerated their car to 100 miles per hour, the resulting sensor information could trigger a cancellation of insurance by -their insurance provider. If the car was a rental car, GPS data could indicate when the driver went outside a geography covered by their rental agreement and charge a penalty. --The challenge is that these sensors can be delivering data on a constant basis and it is not appropriate to send all of this data to a smart contract. A typical approach is to limit the number of messages sent to the blockchain while delivering all messages to a secondary store. For example, deliver messages received at only fixed interval, for example, once per hour, and when a contained value falls outside of an agreed upon range for a smart contract. Checking values that fall outside of tolerances, ensures that the data relevant to the contracts business logic is received and executed. Checking the value at the interval confirms that the sensor is still reporting. All data is sent to a secondary reporting store to enable broader reporting, analytics, and machine learning. For example, while getting sensor readings for GPS may not be required every minute for a smart contract, they could provide interesting data to be used in reports or mapping routes. --On the Azure platform, integration with devices is typically done with IoT Hub. IoT Hub provides routing of messages based on content, and enables the type of functionality described previously. -- --The process depicts a pattern: --- A device communicates directly or via a field gateway to IoT Hub.-- IoT Hub receives the messages and evaluates the messages against routes established that check the content of the message, for example. *Does the sensor report a temperature greater than 50 degrees?*-- The IoT Hub sends messages that meet the criteria to a defined Service Bus for the route.-- A Logic App or other code listens to the Service Bus that IoT Hub has established for the route.-- The Logic App or other code retrieves and transform the message to a known format.-- The transformed message, now in a standard format, is sent to the Service Bus for Azure Blockchain Workbench.-- Azure Blockchain Workbench is subscribed to events from the Service Bus and retrieves the message.-- Azure Blockchain Workbench initiates a call to the ledger, sending data from the external system to a specific contract.-- Upon receipt of the message, the contract evaluates the data and may change the state based on the outcome of that evaluation, for example, for a high temperature, change the state to *Out of Compliance*.--## Data integration --In addition to REST and message-based API, Azure Blockchain Workbench also provides access to a SQL DB populated with application and contract meta-data as well as transactional data from distributed ledgers. -- --The data integration is well known: --- Azure Blockchain Workbench stores metadata about applications, workflows, contracts, and transactions as part of its normal operating behavior.-- External systems or tools provide one or more dialogs to facilitate the collection of information about the database, such as database server name, database name, type of authentication, login credentials, and which database views to utilize.-- Queries are written against database views to facilitate downstream consumption by external systems, services, reporting, developer tools, and enterprise productivity tools.--## Storage integration --Many scenarios may require the need to incorporate attestable files. For multiple reasons, it is inappropriate to put files on a blockchain. Instead, a common approach is to perform a cryptographic hash (for example, SHA-256) against a file and share that hash on a distributed ledger. Performing the hash again at any future time should return the same result. If the file is -modified, even if just one pixel is modified in an image, the hash returns a different value. -- --The pattern can be implemented where: --- An external system persists a file in a storage mechanism, such as Azure Storage.-- A hash is generated with the file or the file and associated metadata such as an identifier for the owner, the URL where the file is located, etc.-- The hash and any metadata is sent to a function on a smart contract, such as *FileAdded*-- In future, the file and meta-data can be hashed again and compared against the values stored on the ledger.--## Prerequisites for implementing integration patterns using the REST and message APIs --To facilitate the ability for an external system or device to interact with the smart contract using either the REST or message API, the following must occur - --1. In the Azure Active Directory for the consortium, an account is created that represents the external system or device. -2. One or more appropriate smart contracts for your Azure Blockchain Workbench application have functions defined to accept the events from your external system or device. -3. The application configuration file for your smart contract contains the role, which the system or device is assigned. -4. The application configuration file for your smart contract identifies in which states this function is called by the defined role. -5. The Application configuration file and its smart contracts are uploaded to Azure Blockchain Workbench. --Once the application is uploaded, the Azure Active Directory account for the external system is assigned to the contract and the associated role. --## Testing External System Integration Flows Prior to Writing Integration Code --Integrating with external systems is a key requirement of many scenarios. It is desirable to be able to validate smart contract design prior or in parallel to the development of code to integrate with external systems. --The use of Azure Active Directory (Azure AD) can greatly accelerate developer productivity and time to value. Specifically, the code integration with an external system may take a non-trivial amount of time. By using Azure AD and the auto-generation of UX by Azure Blockchain Workbench, you can allow developers to sign in to Blockchain Workbench as the external system and populate values from the external system via the UX. You can rapidly develop and validate ideas in a proof of concept environment before integration code is written for the external systems. |
| blockchain | Manage Users | https://github.com/MicrosoftDocs/azure-docs/commits/main/articles/blockchain/workbench/manage-users.md | - Title: Manage users in Azure Blockchain Workbench -description: How to manage users in Azure Blockchain Workbench. Previously updated : 02/18/2022---#Customer intent: As an administrator of Blockchain Workbench, I want to manage users for blockchain apps in Azure Blockchain Workbench. --# Manage Users in Azure Blockchain Workbench ---Azure Blockchain Workbench includes user management for people and organizations that are part of your consortium. --## Prerequisites --A Blockchain Workbench deployment is required. See [Azure Blockchain Workbench deployment](deploy.md) for details on deployment. --## Add Azure AD users --The Azure Blockchain Workbench uses Azure Active Directory (Azure AD) for authentication, access control, and roles. Users in the Blockchain Workbench Azure AD tenant can authenticate and use Blockchain Workbench. Add users to the Administrator application role to interact and perform actions. --Blockchain Workbench users need to exist in the Azure AD tenant before you can assign them to applications and roles. To add users to Azure AD, use the following steps: --1. Sign in to the [Azure portal](https://portal.azure.com). -1. Select your account in the top right corner, and switch to the Azure AD tenant associated to Blockchain Workbench. -1. Select **Azure Active Directory > Users**. You see a list of users in your directory. -1. To add users to the directory, select **New user**. For external users, select **New guest user**. -1. Complete the required fields for the new user. Select **Create**. --Visit [Azure AD](../../active-directory/fundamentals/add-users-azure-active-directory.md) documentation for more details on how to manage users within Azure AD. --## Manage Blockchain Workbench administrators --Once users have been added to the directory, the next step is to choose which users are Blockchain Workbench administrators. Users in the **Administrator** group are associated with the **Administrator application role** in Blockchain Workbench. Administrators can add or remove users, assign users to specific scenarios, and create new applications. --To add users to the **Administrator** group in the Azure AD directory: --1. Sign in to the [Azure portal](https://portal.azure.com). -1. Verify you are in the Azure AD tenant associated to Blockchain Workbench by selecting your account in the top-right corner. -1. Select **Azure Active Directory > Enterprise applications**. -1. Change **Application type** drop-down filter to **All Applications** and select **Apply**. -1. Select the Azure AD client application for Azure Blockchain Workbench --  --1. Select **Users and groups > Add user**. -1. In **Add Assignment**, select **Users**. Choose or search for the user you want to add as an administrator. Click **Select** when finished choosing. --  --1. Verify **Role** is set to **Administrator** -1. Select **Assign**. The added users are displayed in the list with the administrator role assigned. --  --## Managing Blockchain Workbench members --Use the Blockchain Workbench application to manage users and organizations that are part of your consortium. You can add or remove users to applications and roles. --1. [Open the Blockchain Workbench](deploy.md#blockchain-workbench-web-url) in your browser and sign in as an administrator. --  -- Members are added to each application. Members can have one or more application roles to initiate contracts or take actions. --1. To manage members for an application, select an application tile in the **Applications** pane. -- The number of members associated to the selected application is reflected in the members tile. --  ---#### Add member to application --1. Select the member tile to display a list of the current members. -1. Select **Add members**. --  --1. Search for the user's name. Only Azure AD users that exist in the Blockchain Workbench tenant are listed. If the user is not found, you need to [Add Azure AD users](#add-azure-ad-users). --  --1. Select a **Role** from the drop-down. --  --1. Select **Add** to add the member with the associated role to the application. --#### Remove member from application --1. Select the member tile to display a list of the current members. -1. For the user you want to remove, choose **Remove** from the role drop-down. --  --#### Change or add role --1. Select the member tile to display a list of the current members. -1. For the user you want to change, click the drop-down and select the new role. --  --## Next steps --In this how-to article, you have learned how to manage users for Azure Blockchain Workbench. To learn how to create a blockchain application, continue to the next how-to article. --> [!div class="nextstepaction"] -> [Create a blockchain application in Azure Blockchain Workbench](create-app.md) |
| blockchain | Messages Overview | https://github.com/MicrosoftDocs/azure-docs/commits/main/articles/blockchain/workbench/messages-overview.md | - Title: Use messages to integrate with Azure Blockchain Workbench-description: Overview of using messages to integrate Azure Blockchain Workbench Preview with other systems. Previously updated : 02/18/2022---#Customer intent: As an developer, I want to use messages to integrate external systems with Azure Blockchain Workbench. ---# Azure Blockchain Workbench messaging integration ---In addition to providing a REST API, Azure Blockchain Workbench also provides messaging-based integration. Workbench publishes ledger-centric events via Azure Event Grid, enabling downstream consumers to ingest data or take action based on these events. For those clients that require reliable messaging, Azure Blockchain Workbench delivers messages to an Azure Service Bus endpoint as well. --## Input APIs --If you want to initiate transactions from external systems to create users, create contracts, and update contracts, you can use messaging input APIs to perform transactions on a ledger. See [messaging integration samples](https://aka.ms/blockchain-workbench-integration-sample) for a sample that demonstrates input APIs. --The following are the currently available input APIs. --### Create user --Creates a new user. --The request requires the following fields: --| **Name** | **Description** | -|-|| -| requestId | Client supplied GUID | -| firstName | First name of the user | -| lastName | Last name of the user | -| emailAddress | Email address of the user | -| externalId | Azure AD object ID of the user | -| connectionId | Unique identifier for the blockchain connection | -| messageSchemaVersion | Messaging schema version | -| messageName | **CreateUserRequest** | --Example: --``` json -{ - "requestId": "e2264523-6147-41fc-bbbb-edba8e44562d", - "firstName": "Ali", - "lastName": "Alio", - "emailAddress": "aa@contoso.com", - "externalId": "6a9b7f65-ffff-442f-b3b8-58a35abd1bcd", - "connectionId": 1, - "messageSchemaVersion": "1.0.0", - "messageName": "CreateUserRequest" -} -``` --Blockchain Workbench returns a response with the following fields: --| **Name** | **Description** | -|--|--| -| requestId | Client supplied GUID | -| userId | ID of the user that was created | -| userChainIdentifier | Address of the user that was created on the blockchain network. In Ethereum, the address is the user's **on-chain** address. | -| connectionId | Unique identifier for the blockchain connection| -| messageSchemaVersion | Messaging schema version | -| messageName | **CreateUserUpdate** | -| status | Status of the user creation request. If successful, value is **Success**. On failure, value is **Failure**. | -| additionalInformation | Additional information provided based on the status | --Example successful **create user** response from Blockchain Workbench: --``` json -{ - "requestId": "e2264523-6147-41fc-bb59-edba8e44562d", - "userId": 15, - "userChainIdentifier": "0x9a8DDaCa9B7488683A4d62d0817E965E8f248398", - "connectionId": 1, - "messageSchemaVersion": "1.0.0", - "messageName": "CreateUserUpdate", - "status": "Success", - "additionalInformation": { } -} -``` --If the request was unsuccessful, details about the failure are included in additional information. --``` json -{ - "requestId": "e2264523-6147-41fc-bb59-edba8e44562d", - "userId": 15, - "userChainIdentifier": null, - "connectionId": 1, - "messageSchemaVersion": "1.0.0", - "messageName": "CreateUserUpdate", - "status": "Failure", - "additionalInformation": { - "errorCode": 4000, - "errorMessage": "User cannot be provisioned on connection." - } -} -``` --### Create contract --Creates a new contract. --The request requires the following fields: --| **Name** | **Description** | -|-|| -| requestId | Client supplied GUID | -| userChainIdentifier | Address of the user that was created on the blockchain network. In Ethereum, this address is the user's **on chain** address. | -| applicationName | Name of the application | -| version | Version of the application. Required if you have multiple versions of the application enabled. Otherwise, version is optional. For more information on application versioning, see [Azure Blockchain Workbench application versioning](version-app.md). | -| workflowName | Name of the workflow | -| parameters | Parameters input for contract creation | -| connectionId | Unique identifier for the blockchain connection | -| messageSchemaVersion | Messaging schema version | -| messageName | **CreateContractRequest** | --Example: --``` json -{ - "requestId": "ce3c429b-a091-4baa-b29b-5b576162b211", - "userChainIdentifier": "0x9a8DDaCa9B7488683A4d62d0817E965E8f248398", - "applicationName": "AssetTransfer", - "version": "1.0", - "workflowName": "AssetTransfer", - "parameters": [ - { - "name": "description", - "value": "a 1969 dodge charger" - }, - { - "name": "price", - "value": "12345" - } - ], - "connectionId": 1, - "messageSchemaVersion": "1.0.0", - "messageName": "CreateContractRequest" -} -``` --Blockchain Workbench returns a response with the following fields: --| **Name** | **Description** | -|--|--| -| requestId | Client supplied GUID | -| contractId | Unique identifier for the contract inside Azure Blockchain Workbench | -| contractLedgerIdentifier | Address of the contract on the ledger | -| connectionId | Unique identifier for the blockchain connection | -| messageSchemaVersion | Messaging schema version | -| messageName | **CreateContractUpdate** | -| status | Status of the contract creation request. Possible values: **Submitted**, **Committed**, **Failure**. | -| additionalInformation | Additional information provided based on the status | --Example of a submitted **create contract** response from Blockchain Workbench: --``` json -{ - "requestId": "ce3c429b-a091-4baa-b29b-5b576162b211", - "contractId": 55, - "contractLedgerIdentifier": "0xde0B295669a9FD93d5F28D9Ec85E40f4cb697BAe", - "connectionId": 1, - "messageSchemaVersion": "1.0.0", - "messageName": "CreateContractUpdate", - "status": "Submitted", - "additionalInformation": { } -} -``` --Example of a committed **create contract** response from Blockchain Workbench: --``` json -{ - "requestId": "ce3c429b-a091-4baa-b29b-5b576162b211", - "contractId": 55, - "contractLedgerIdentifier": "0xde0B295669a9FD93d5F28D9Ec85E40f4cb697BAe", - "connectionId": 1, - "messageSchemaVersion": "1.0.0", - "messageName": "CreateContractUpdate", - "status": "Committed", - "additionalInformation": { } -} -``` --If the request was unsuccessful, details about the failure are included in additional information. --``` json -{ - "requestId": "ce3c429b-a091-4baa-b29b-5b576162b211", - "contractId": 55, - "contractLedgerIdentifier": null, - "connectionId": 1, - "messageSchemaVersion": "1.0.0", - "messageName": "CreateContractUpdate", - "status": "Failure", - "additionalInformation": { - "errorCode": 4000, - "errorMessage": "Contract cannot be provisioned on connection." - } -} -``` --### Create contract action --Creates a new contract action. --The request requires the following fields: --| **Name** | **Description** | -|--|| -| requestId | Client supplied GUID | -| userChainIdentifier | Address of the user that was created on the blockchain network. In Ethereum, this address is the user's **on chain** address. | -| contractLedgerIdentifier | Address of the contract on the ledger | -| version | Version of the application. Required if you have multiple versions of the application enabled. Otherwise, version is optional. For more information on application versioning, see [Azure Blockchain Workbench application versioning](version-app.md). | -| workflowFunctionName | Name of the workflow function | -| parameters | Parameters input for contract creation | -| connectionId | Unique identifier for the blockchain connection | -| messageSchemaVersion | Messaging schema version | -| messageName | **CreateContractActionRequest** | --Example: --``` json -{ - "requestId": "a5530932-9d6b-4eed-8623-441a647741d3", - "userChainIdentifier": "0x9a8DDaCa9B7488683A4d62d0817E965E8f248398", - "contractLedgerIdentifier": "0xde0B295669a9FD93d5F28D9Ec85E40f4cb697BAe", - "version": "1.0", - "workflowFunctionName": "modify", - "parameters": [ - { - "name": "description", - "value": "a 1969 dodge charger" - }, - { - "name": "price", - "value": "12345" - } - ], - "connectionId": 1, - "messageSchemaVersion": "1.0.0", - "messageName": "CreateContractActionRequest" -} -``` --Blockchain Workbench returns a response with the following fields: --| **Name** | **Description** | -|--|--| -| requestId | Client supplied GUID| -| contractId | Unique identifier for the contract inside Azure Blockchain Workbench | -| connectionId | Unique identifier for the blockchain connection | -| messageSchemaVersion | Messaging schema version | -| messageName | **CreateContractActionUpdate** | -| status | Status of the contract action request. Possible values: **Submitted**, **Committed**, **Failure**. | -| additionalInformation | Additional information provided based on the status | --Example of a submitted **create contract action** response from Blockchain Workbench: --``` json -{ - "requestId": "a5530932-9d6b-4eed-8623-441a647741d3", - "contractId": 105, - "connectionId": 1, - "messageSchemaVersion": "1.0.0", - "messageName": "CreateContractActionUpdate", - "status": "Submitted", - "additionalInformation": { } -} -``` --Example of a committed **create contract action** response from Blockchain Workbench: --``` json -{ - "requestId": "a5530932-9d6b-4eed-8623-441a647741d3", - "contractId": 105, - "connectionId": 1, - "messageSchemaVersion": "1.0.0", - "messageName": "CreateContractActionUpdate", - "status": "Committed", - "additionalInformation": { } -} -``` --If the request was unsuccessful, details about the failure are included in additional information. --``` json -{ - "requestId": "a5530932-9d6b-4eed-8623-441a647741d3", - "contractId": 105, - "connectionId": 1, - "messageSchemaVersion": "1.0.0", - "messageName": "CreateContractActionUpdate", - "status": "Failure", - "additionalInformation": { - "errorCode": 4000, - "errorMessage": "Contract action cannot be provisioned on connection." - } -} -``` --### Input API error codes and messages --**Error code 4000: Bad request error** -- Invalid connectionId-- CreateUserRequest deserialization failed-- CreateContractRequest deserialization failed-- CreateContractActionRequest deserialization failed-- Application {identified by application name} does not exist-- Application {identified by application name} does not have workflow-- UserChainIdentifier does not exist-- Contract {identified by ledger identifier} does not exist-- Contract {identified by ledger identifier} does not have function {workflow function name}-- UserChainIdentifier does not exist--**Error code 4090: Conflict error** -- User already exists-- Contract already exists-- Contract action already exists--**Error code 5000: Internal server error** -- Exception messages--## Event notifications --Event notifications can be used to notify users and downstream systems of events that happen in Blockchain Workbench and the blockchain network it is connected to. Event notifications can be consumed directly in code or used with tools such as Logic Apps and Flow to trigger flow of data to downstream systems. --See [Notification message reference](#notification-message-reference) -for details of various messages that can be received. --### Consuming Event Grid events with Azure Functions --If a user wants to use Event Grid to be notified about events that happen in Blockchain Workbench, you can consume events from Event Grid by using Azure Functions. --1. Create an **Azure Function App** in the Azure portal. -2. Create a new function. -3. Locate the template for Event Grid. Basic template code for reading the message is shown. Modify the code as needed. -4. Save the Function. -5. Select the Event Grid from Blockchain Workbench's resource group. --### Consuming Event Grid events with Logic Apps --1. Create a new **Azure Logic App** in the Azure portal. -2. When opening the Azure Logic App in the portal, you will be prompted to select a trigger. Select **Azure Event Grid -- When a resource event occurs**. -3. When the workflow designer is displayed, you will be prompted to sign in. -4. Select the Subscription. Resource as **Microsoft.EventGrid.Topics**. Select the **Resource Name** from the name of the resource from the Azure Blockchain Workbench resource group. -5. Select the Event Grid from Blockchain Workbench's resource group. --## Using Service Bus Topics for notifications --Service Bus Topics can be used to notify users about events that happen in Blockchain Workbench. --1. Browse to the Service Bus within the Workbench's resource group. -2. Select **Topics**. -3. Select **egress-topic**. -4. Create a new subscription to this topic. Obtain a key for it. -5. Create a program, which subscribes to events from this subscription. --### Consuming Service Bus Messages with Logic Apps --1. Create a new **Azure Logic App** in the Azure portal. -2. When opening the Azure Logic App in the portal, you will be prompted to select a trigger. Type **Service Bus** into the search box and select the trigger appropriate for the type of interaction you want to have with the Service Bus. For example, **Service Bus -- When a message is received in a topic subscription (auto-complete)**. -3. When the workflow designer is displayed, specify the connection information for the Service Bus. -4. Select your subscription and specify the topic of **workbench-external**. -5. Develop the logic for your application that utilizes the message from -this trigger. --## Notification message reference --Depending on the **messageName**, the notification messages have one of the following message types. --### Block message --Contains information about individual blocks. The *BlockMessage* includes a section with block level information and a section with transaction information. --| Name | Description | -||-| -| block | Contains [block information](#block-information) | -| transactions | Contains a collection [transaction information](#transaction-information) for the block | -| connectionId | Unique identifier for the connection | -| messageSchemaVersion | Messaging schema version | -| messageName | **BlockMessage** | -| additionalInformation | Additional information provided | --#### Block information --| Name | Description | -|-|-| -| blockId | Unique identifier for the block inside Azure Blockchain Workbench | -| blockNumber | Unique identifier for a block on the ledger | -| blockHash | The hash of the block | -| previousBlockHash | The hash of the previous block | -| blockTimestamp | The timestamp of the block | --#### Transaction information --| Name | Description | -|--|-| -| transactionId | Unique identifier for the transaction inside Azure Blockchain Workbench | -| transactionHash | The hash of the transaction on the ledger | -| from | Unique identifier on the ledger for the transaction origin | -| to | Unique identifier on the ledger for the transaction destination | -| provisioningStatus | Identifies the current status of the provisioning process for the transaction. Possible values are: </br>0 – The transaction has been created by the API in the database</br>1 – The transaction has been sent to the ledger</br>2 – The transaction has been successfully committed to the ledger</br>3 or 4 - The transaction failed to be committed to the ledger</br>5 - The transaction was successfully committed to the ledger | --Example of a *BlockMessage* from Blockchain Workbench: --``` json -{ - "block": { - "blockId": 123, - "blockNumber": 1738312, - "blockHash": "0x03a39411e25e25b47d0ec6433b73b488554a4a5f6b1a253e0ac8a200d13fffff", - "previousBlockHash": null, - "blockTimestamp": "2018-10-09T23:35:58Z", - }, - "transactions": [ - { - "transactionId": 234, - "transactionHash": "0xa4d9c95b581f299e41b8cc193dd742ef5a1d3a4ddf97bd11b80d123fec27ffff", - "from": "0xd85e7262dd96f3b8a48a8aaf3dcdda90f60dffff", - "to": null, - "provisioningStatus": 1 - }, - { - "transactionId": 235, - "transactionHash": "0x5c1fddea83bf19d719e52a935ec8620437a0a6bdaa00ecb7c3d852cf92e1ffff", - "from": "0xadd97e1e595916e29ea94fda894941574000ffff", - "to": "0x9a8DDaCa9B7488683A4d62d0817E965E8f24ffff", - "provisioningStatus": 2 - } - ], - "connectionId": 1, - "messageSchemaVersion": "1.0.0", - "messageName": "BlockMessage", - "additionalInformation": {} -} -``` --### Contract message --Contains information about a contract. The message includes a section with contract properties and a section with transaction information. All -transactions that have modified the contract for the particular block are included in the transaction section. --| Name | Description | -||-| -| blockId | Unique identifier for the block inside Azure Blockchain Workbench | -| blockHash | Hash of the block | -| modifyingTransactions | [Transactions that modified](#modifying-transaction-information) the contract | -| contractId | Unique identifier for the contract inside Azure Blockchain Workbench | -| contractLedgerIdentifier | Unique identifier for the contract on the ledger | -| contractProperties | [Properties of the contract](#contract-properties) | -| isNewContract | Indicates whether or not this contract was newly created. Possible values are: true: this contract was a new contract created. false: this contract is a contract update. | -| connectionId | Unique identifier for the connection | -| messageSchemaVersion | Messaging schema version | -| messageName | **ContractMessage** | -| additionalInformation | Additional information provided | --#### Modifying transaction information --| Name | Description | -|--|-| -| transactionId | Unique identifier for the transaction inside Azure Blockchain Workbench | -| transactionHash | The hash of the transaction on the ledger | -| from | Unique identifier on the ledger for the transaction origin | -| to | Unique identifier on the ledger for the transaction destination | --#### Contract properties --| Name | Description | -|--|-| -| workflowPropertyId | Unique identifier for the workflow property inside Azure Blockchain Workbench | -| name | Name of the workflow property | -| value | Value of the workflow property | --Example of a *ContractMessage* from Blockchain Workbench: --``` json -{ - "blockId": 123, - "blockhash": "0x03a39411e25e25b47d0ec6433b73b488554a4a5f6b1a253e0ac8a200d13fffff", - "modifyingTransactions": [ - { - "transactionId": 234, - "transactionHash": "0x5c1fddea83bf19d719e52a935ec8620437a0a6bdaa00ecb7c3d852cf92e1ffff", - "from": "0xd85e7262dd96f3b8a48a8aaf3dcdda90f60dffff", - "to": "0xf8559473b3c7197d59212b401f5a9f07ffff" - }, - { - "transactionId": 235, - "transactionHash": "0xa4d9c95b581f299e41b8cc193dd742ef5a1d3a4ddf97bd11b80d123fec27ffff", - "from": "0xd85e7262dd96f3b8a48a8aaf3dcdda90f60dffff", - "to": "0xf8559473b3c7197d59212b401f5a9f07b429ffff" - } - ], - "contractId": 111, - "contractLedgerIdentifier": "0xf8559473b3c7197d59212b401f5a9f07b429ffff", - "contractProperties": [ - { - "workflowPropertyId": 1, - "name": "State", - "value": "0" - }, - { - "workflowPropertyId": 2, - "name": "Description", - "value": "1969 Dodge Charger" - }, - { - "workflowPropertyId": 3, - "name": "AskingPrice", - "value": "30000" - }, - { - "workflowPropertyId": 4, - "name": "OfferPrice", - "value": "0" - }, - { - "workflowPropertyId": 5, - "name": "InstanceAppraiser", - "value": "0x0000000000000000000000000000000000000000" - }, - { - "workflowPropertyId": 6, - "name": "InstanceBuyer", - "value": "0x0000000000000000000000000000000000000000" - }, - { - "workflowPropertyId": 7, - "name": "InstanceInspector", - "value": "0x0000000000000000000000000000000000000000" - }, - { - "workflowPropertyId": 8, - "name": "InstanceOwner", - "value": "0x9a8DDaCa9B7488683A4d62d0817E965E8f24ffff" - }, - { - "workflowPropertyId": 9, - "name": "ClosingDayOptions", - "value": "[21,48,69]" - } - ], - "isNewContract": false, - "connectionId": 1, - "messageSchemaVersion": "1.0.0", - "messageName": "ContractMessage", - "additionalInformation": {} -} -``` --### Event message: Contract function invocation --Contains information when a contract function is invoked, such as the function name, parameters input, and the caller of the function. --| Name | Description | -||-| -| eventName | **ContractFunctionInvocation** | -| caller | [Caller information](#caller-information) | -| contractId | Unique identifier for the contract inside Azure Blockchain Workbench | -| contractLedgerIdentifier | Unique identifier for the contract on the ledger | -| functionName | Name of the function | -| parameters | [Parameter information](#parameter-information) | -| transaction | Transaction information | -| inTransactionSequenceNumber | The sequence number of the transaction in the block | -| connectionId | Unique identifier for the connection | -| messageSchemaVersion | Messaging schema version | -| messageName | **EventMessage** | -| additionalInformation | Additional information provided | --#### Caller information --| Name | Description | -||-| -| type | Type of the caller, like a user or a contract | -| id | Unique identifier for the caller inside Azure Blockchain Workbench | -| ledgerIdentifier | Unique identifier for the caller on the ledger | --#### Parameter information --| Name | Description | -||-| -| name | Parameter name | -| value | Parameter value | --#### Event message transaction information --| Name | Description | -|--|-| -| transactionId | Unique identifier for the transaction inside Azure Blockchain Workbench | -| transactionHash | The hash of the transaction on the ledger | -| from | Unique identifier on the ledger for the transaction origin | -| to | Unique identifier on the ledger for the transaction destination | --Example of an *EventMessage ContractFunctionInvocation* from Blockchain Workbench: --``` json -{ - "eventName": "ContractFunctionInvocation", - "caller": { - "type": "User", - "id": 21, - "ledgerIdentifier": "0xd85e7262dd96f3b8a48a8aaf3dcdda90f60ffff" - }, - "contractId": 34, - "contractLedgerIdentifier": "0xf8559473b3c7197d59212b401f5a9f07b429ffff", - "functionName": "Modify", - "parameters": [ - { - "name": "description", - "value": "a new description" - }, - { - "name": "price", - "value": "4567" - } - ], - "transaction": { - "transactionId": 234, - "transactionHash": "0x5c1fddea83bf19d719e52a935ec8620437a0a6bdaa00ecb7c3d852cf92e1ffff", - "from": "0xd85e7262dd96f3b8a48a8aaf3dcdda90f60dffff", - "to": "0xf8559473b3c7197d59212b401f5a9f07b429ffff" - }, - "inTransactionSequenceNumber": 1, - "connectionId": 1, - "messageSchemaVersion": "1.0.0", - "messageName": "EventMessage", - "additionalInformation": { } -} -``` --### Event message: Application ingestion --Contains information when an application is uploaded to Workbench, such as the name and version of the application uploaded. --| Name | Description | -||-| -| eventName | **ApplicationIngestion** | -| applicationId | Unique identifier for the application inside Azure Blockchain Workbench | -| applicationName | Application name | -| applicationDisplayName | Application display name | -| applicationVersion | Application version | -| applicationDefinitionLocation | URL where the application configuration file is located | -| contractCodes | Collection of [contract codes](#contract-code-information) for the application | -| applicationRoles | Collection of [application roles](#application-role-information) for the application | -| applicationWorkflows | Collection of [application workflows](#application-workflow-information) for the application | -| connectionId | Unique identifier for the connection | -| messageSchemaVersion | Messaging schema version | -| messageName | **EventMessage** | -| additionalInformation | Additional information provided here includes the application workflow states and transition information. | --#### Contract code information --| Name | Description | -||-| -| id | Unique identifier for the contract code file inside Azure Blockchain Workbench | -| ledgerId | Unique identifier for the ledger inside Azure Blockchain Workbench | -| location | URL where the contract code file is located | --#### Application role information --| Name | Description | -||-| -| id | Unique identifier for the application role inside Azure Blockchain Workbench | -| name | Name of the application role | --#### Application workflow information --| Name | Description | -||-| -| id | Unique identifier for the application workflow inside Azure Blockchain Workbench | -| name | Application workflow name | -| displayName | Application workflow display name | -| functions | Collection of [functions for the application workflow](#workflow-function-information)| -| states | Collection of [states for the application workflow](#workflow-state-information) | -| properties | Application [workflow properties information](#workflow-property-information) | --##### Workflow function information --| Name | Description | -||-| -| id | Unique identifier for the application workflow function inside Azure Blockchain Workbench | -| name | Function name | -| parameters | Parameters for the function | --##### Workflow state information --| Name | Description | -||-| -| name | State name | -| displayName | State display name | -| style | State style (success or failure) | --##### Workflow property information --| Name | Description | -||-| -| id | Unique identifier for the application workflow property inside Azure Blockchain Workbench | -| name | Property name | -| type | Property type | --Example of an *EventMessage ApplicationIngestion* from Blockchain Workbench: --``` json -{ - "eventName": "ApplicationIngestion", - "applicationId": 31, - "applicationName": "AssetTransfer", - "applicationDisplayName": "Asset Transfer", - "applicationVersion": "1.0", - "applicationDefinitionLocation": "http://url", - "contractCodes": [ - { - "id": 23, - "ledgerId": 1, - "location": "http://url" - } - ], - "applicationRoles": [ - { - "id": 134, - "name": "Buyer" - }, - { - "id": 135, - "name": "Seller" - } - ], - "applicationWorkflows": [ - { - "id": 89, - "name": "AssetTransfer", - "displayName": "Asset Transfer", - "functions": [ - { - "id": 912, - "name": "", - "parameters": [ - { - "name": "description", - "type": { - "name": "string" - } - }, - { - "name": "price", - "type": { - "name": "int" - } - } - ] - }, - { - "id": 913, - "name": "modify", - "parameters": [ - { - "name": "description", - "type": { - "name": "string" - } - }, - { - "name": "price", - "type": { - "name": "int" - } - } - ] - } - ], - "states": [ - { - "name": "Created", - "displayName": "Created", - "style" : "Success" - }, - { - "name": "Terminated", - "displayName": "Terminated", - "style" : "Failure" - } - ], - "properties": [ - { - "id": 879, - "name": "Description", - "type": { - "name": "string" - } - }, - { - "id": 880, - "name": "Price", - "type": { - "name": "int" - } - } - ] - } - ], - "connectionId": [ ], - "messageSchemaVersion": "1.0.0", - "messageName": "EventMessage", - "additionalInformation": - { - "states" : - [ - { - "Name": "BuyerAccepted", - "Transitions": [ - { - "DisplayName": "Accept", - "AllowedRoles": [ ], - "AllowedInstanceRoles": [ "InstanceOwner" ], - "Function": "Accept", - "NextStates": [ "SellerAccepted" ] - } - ] - } - ] - } -} -``` --### Event message: Role assignment --Contains information when a user is assigned a role in Workbench, such as who performed the role assignment and the name of the role and corresponding application. --| Name | Description | -||-| -| eventName | **RoleAssignment** | -| applicationId | Unique identifier for the application inside Azure Blockchain Workbench | -| applicationName | Application name | -| applicationDisplayName | Application display name | -| applicationVersion | Application version | -| applicationRole | Information about the [application role](#roleassignment-application-role) | -| assigner | Information about the [assigner](#roleassignment-assigner) | -| assignee | Information about the [assignee](#roleassignment-assignee) | -| connectionId | Unique identifier for the connection | -| messageSchemaVersion | Messaging schema version | -| messageName | **EventMessage** | -| additionalInformation | Additional information provided | --#### RoleAssignment application role --| Name | Description | -||-| -| id | Unique identifier for the application role inside Azure Blockchain Workbench | -| name | Name of the application role | --#### RoleAssignment assigner --| Name | Description | -||-| -| id | Unique identifier of the user inside Azure Blockchain Workbench | -| type | Type of the assigner | -| chainIdentifier | Unique identifier of the user on the ledger | --#### RoleAssignment assignee --| Name | Description | -||-| -| id | Unique identifier of the user inside Azure Blockchain Workbench | -| type | Type of the assignee | -| chainIdentifier | Unique identifier of the user on the ledger | --Example of an *EventMessage RoleAssignment* from Blockchain Workbench: --``` json -{ - "eventName": "RoleAssignment", - "applicationId": 31, - "applicationName": "AssetTransfer", - "applicationDisplayName": "Asset Transfer", - "applicationVersion": "1.0", - "applicationRole": { - "id": 134, - "name": "Buyer" - }, - "assigner": { - "id": 1, - "type": null, - "chainIdentifier": "0xeFFC7766d38aC862d79706c3C5CEEf089564ffff" - }, - "assignee": { - "id": 3, - "type": null, - "chainIdentifier": "0x9a8DDaCa9B7488683A4d62d0817E965E8f24ffff" - }, - "connectionId": [ ], - "messageSchemaVersion": "1.0.0", - "messageName": "EventMessage", - "additionalInformation": { } -} -``` --## Next steps --- [Smart contract integration patterns](integration-patterns.md) |
| blockchain | Overview | https://github.com/MicrosoftDocs/azure-docs/commits/main/articles/blockchain/workbench/overview.md | - Title: Azure Blockchain Workbench Preview overview -description: Overview of Azure Blockchain Workbench Preview and its capabilities. Previously updated : 02/18/2022---#Customer intent: As an developer or administrator, I want to understand what Azure Blockchain Workbench is and its capabilities. --# What is Azure Blockchain Workbench? ---Azure Blockchain Workbench Preview is a collection of Azure services and capabilities designed to help you create and deploy blockchain applications to share business processes and data with other organizations. Azure Blockchain Workbench provides the infrastructure scaffolding for building blockchain applications enabling developers to focus on creating business logic and smart contracts. It also makes it easier to create blockchain applications by integrating several Azure services and capabilities to help automate common development tasks. ---## Create blockchain applications --With Blockchain Workbench, you can define blockchain applications using configuration and writing smart contract code. You can jumpstart blockchain application development and focus on defining your contract and writing business logic instead of building scaffolding and setting up supporting services. --## Manage applications and users --Azure Blockchain Workbench provides a web application and REST APIs for managing blockchain applications and users. Blockchain Workbench administrators can manage application access and assign your users to application roles. Azure AD users are automatically mapped to members in the application. --## Integrate blockchain with applications --You can use the Blockchain Workbench REST APIs and message-based APIs to integrate with existing systems. The APIs provide an interface to allow for replacing or using multiple distributed ledger technologies, storage, and database offerings. --Blockchain Workbench can transform messages sent to its message-based API to build transactions in a format expected by that blockchain's native API. Workbench can sign and route transactions to the appropriate blockchain. --Workbench automatically delivers events to Service Bus and Event Grid to send messages to downstream consumers. Developers can integrate with either of these messaging systems to drive transactions and to look at results. --## Deploy a blockchain network --Azure Blockchain Workbench simplifies consortium blockchain network setup as a preconfigured solution with an Azure Resource Manager solution template. The template provides simplified deployment that deploys all components needed to run a consortium. Today, Blockchain Workbench currently supports Ethereum. --## Use Active Directory --With existing blockchain protocols, blockchain identities are represented as an address on the network. Azure Blockchain Workbench abstracts away the blockchain identity by associating it with an Active Directory identity, making it simpler to build enterprise applications with Active Directory identities. --## Synchronize on-chain data with off-chain storage --Azure Blockchain Workbench makes it easier to analyze blockchain events and data by automatically synchronizing data on the blockchain to off-chain storage. Instead of extracting data directly from the blockchain, you can query off-chain database systems such as SQL Server. Blockchain expertise is not required for end users who are doing data analysis tasks. --## Support and feedback --For Azure Blockchain news, visit the [Azure Blockchain blog](https://azure.microsoft.com/blog/topics/blockchain/) to stay up to date on blockchain service offerings and information from the Azure Blockchain engineering team. --To provide product feedback or to request new features, post or vote for an idea via the [Azure feedback forum for blockchain](https://aka.ms/blockchainuservoice). --### Community support --Engage with Microsoft engineers and Azure Blockchain community experts. --* [Microsoft Q&A question page for Azure Blockchain Workbench](/answers/topics/azure-blockchain-workbench.html) -* [Microsoft Tech Community](https://techcommunity.microsoft.com/t5/Blockchain/bd-p/AzureBlockchain) -* [Stack Overflow](https://stackoverflow.com/questions/tagged/azure-blockchain-workbench) --## Next steps --> [!div class="nextstepaction"] -> [Azure Blockchain Workbench architecture](architecture.md) |
| blockchain | Troubleshooting | https://github.com/MicrosoftDocs/azure-docs/commits/main/articles/blockchain/workbench/troubleshooting.md | - Title: Azure Blockchain Workbench troubleshooting -description: How to troubleshoot an Azure Blockchain Workbench Preview application. Previously updated : 02/18/2022---#Customer intent: As an developer, I want to know how I can troubleshoot a blockchain application in Azure Blockchain Workbench. ---# Azure Blockchain Workbench Preview troubleshooting ---A PowerShell script is available to assist with developer debugging or support. The script generates a summary and collects detailed logs for troubleshooting. Collected logs include: --* Blockchain network, such as Ethereum -* Blockchain Workbench microservices -* Application Insights -* Azure Monitoring (Azure Monitor logs) --You can use the information to determine next steps and determine root cause of issues. ---## Troubleshooting script --The PowerShell troubleshooting script is available on GitHub. [Download a zip file](https://github.com/Azure-Samples/blockchain/archive/master.zip) or clone the sample from GitHub. --``` -git clone https://github.com/Azure-Samples/blockchain.git -``` --## Run the script --Run the `collectBlockchainWorkbenchTroubleshooting.ps1` script to collect logs and create a ZIP file containing a folder of troubleshooting information. For example: --``` powershell -collectBlockchainWorkbenchTroubleshooting.ps1 -SubscriptionID "<subscription_id>" -ResourceGroupName "workbench-resource-group-name" -``` -The script accepts the following parameters: --| Parameter | Description | Required | -|||-| -| SubscriptionID | SubscriptionID to create or locate all resources. | Yes | -| ResourceGroupName | Name of the Azure Resource Group where Blockchain Workbench has been deployed. | Yes | -| OutputDirectory | Path to create the output .ZIP file. If not specified, defaults to the current directory. | No | -| LookbackHours | Number of hours to use when pulling telemetry. Default value is 24 hours. Maximum value is 90 hours | No | -| OmsSubscriptionId | The subscription ID where Azure Monitor logs is deployed. Only pass this parameter if the Azure Monitor logs for the blockchain network is deployed outside of Blockchain Workbench's resource group.| No | -| OmsResourceGroup |The resource group where Azure Monitor logs is deployed. Only pass this parameter if the Azure Monitor logs for the blockchain network is deployed outside of Blockchain Workbench's resource group.| No | -| OmsWorkspaceName | The Log Analytics workspace name. Only pass this parameter if the Azure Monitor logs for the blockchain network is deployed outside of Blockchain Workbench's resource group | No | --## What is collected? --The output ZIP file contains the following folder structure: --| Folder or File | Description | -||| -| \Summary.txt | Summary of the system | -| \Metrics\blockchain | Metrics about the blockchain | -| \Metrics\Workbench | Metrics about the workbench | -| \Details\Blockchain | Detailed logs about the blockchain | -| \Details\Workbench | Detailed logs about the workbench | --The summary file gives you a snapshot of the overall state of the application and health of the application. The summary provides recommended actions, highlights top errors, and metadata about running services. --The **Metrics** folder contains metrics of various system components over time. For example, the output file `\Details\Workbench\apiMetrics.txt` contains a summary of different response codes, and response times throughout the collection period. -The **Details** folder contains detailed logs for troubleshooting specific issues with Workbench or the underlying blockchain network. For example, `\Details\Workbench\Exceptions.csv` contains a list of the most recent exceptions that have occurred in the system, which is useful for troubleshooting errors with smart contracts or interactions with the blockchain. --## Next steps --> [!div class="nextstepaction"] -> [Azure Blockchain Workbench Application Insights troubleshooting guide](https://aka.ms/workbenchtroubleshooting) |
| blockchain | Use Api | https://github.com/MicrosoftDocs/azure-docs/commits/main/articles/blockchain/workbench/use-api.md | - Title: Using Azure Blockchain Workbench REST APIs -description: Scenarios for how to use the Azure Blockchain Workbench Preview REST API Previously updated : 02/18/2022---#Customer intent: As a developer, I want to understand the Azure Blockchain Workbench REST API to so that I can integrate apps with Blockchain Workbench. --# Using the Azure Blockchain Workbench Preview REST API ---Azure Blockchain Workbench Preview REST API provides developers and information workers a way to build rich integrations to blockchain applications. This article highlights several scenarios of how to use the Workbench REST API. For example, suppose you want to create a custom blockchain client that allows signed in users to view and interact with their assigned blockchain applications. The client can use the Blockchain Workbench API to view contract instances and take actions on smart contracts. --## Blockchain Workbench API endpoint --Blockchain Workbench APIs are accessed through an endpoint for your deployment. To get the API endpoint URL for your deployment: --1. Sign in to the [Azure portal](https://portal.azure.com). -1. In the left-hand navigation pane, select **Resource groups**. -1. Choose the resource group name your deployed Blockchain Workbench. -1. Select the **TYPE** column heading to sort the list alphabetically by type. -1. There are two resources with type **App Service**. Select the resource of type **App Service** *with* the "-api" suffix. -1. In the App Service **Overview**, copy the **URL** value, which represents the API endpoint URL to your deployed Blockchain Workbench. --  --## Authentication --Requests to the Blockchain Workbench REST API are protected with Azure Active Directory (Azure AD). --To make an authenticated request to the REST APIs, client code requires authentication with valid credentials before you can call the API. Authentication is coordinated between the various actors by Azure AD, and provides your client with an [access token](../../active-directory/develop/developer-glossary.md#access-token) as proof of the authentication. The token is then sent in the HTTP Authorization header of REST API requests. To learn more about Azure AD authentication, see [Azure Active Directory for developers](../../active-directory/develop/index.yml). --See [REST API samples](https://github.com/Azure-Samples/blockchain/tree/master/blockchain-workbench/rest-api-samples) for examples of how to authenticate. --## Using Postman --If you want to test or experiment with Workbench APIs, you can use [Postman](https://www.postman.com) to make API calls to your deployment. [Download a sample Postman collection of Workbench API requests](https://github.com/Azure-Samples/blockchain/tree/master/blockchain-workbench/rest-api-samples/postman) from GitHub. See the README file for details on authenticating and using the example API requests. --## Create an application --You use two API calls to create a Blockchain Workbench application. This method can only be performed by users who are Workbench administrators. --Use the [Applications POST API](/rest/api/azure-blockchain-workbench/applications/applicationspost) to upload the application's JSON file and get an application ID. --### Applications POST request --Use the **appFile** parameter to send the configuration file as part of the request body. --``` http -POST /api/v1/applications -Content-Type: multipart/form-data; -Authorization : Bearer {access token} -Content-Disposition: form-data; name="appFile"; filename="/C:/smart-contract-samples/HelloWorld.json" -Content-Type: application/json -``` --### Applications POST response --The created application ID is returned in the response. You need the application ID to associate the configuration file with the code file when you call the next API. --``` http -HTTP/1.1 200 OK -Content-Type: "application/json" -1 -``` --### Contract code POST request --Use the [Applications contract code POST API](/rest/api/azure-blockchain-workbench/applications/contractcodepost) by passing the application ID to upload the application's Solidity code file. The payload can be a single Solidity file or a zipped file containing Solidity files. --Replace the following values: --| Parameter | Value | -|--|-| -| {applicationId} | Return value from the applications POST API. | -| {ledgerId} | Index of the ledger. The value is usually 1. You can also check the [Ledger table](data-sql-management-studio.md) for the value. | --``` http -POST /api/v1/applications/{applicationId}/contractCode?ledgerId={ledgerId} -Content-Type: multipart/form-data; -Authorization : Bearer {access token} -Content-Disposition: form-data; name="contractFile"; filename="/C:/smart-contract-samples/HelloWorld.sol" -``` --### Contract code POST response --If successful, the response includes the created contract code ID from the [ContractCode table](data-sql-management-studio.md). --``` http -HTTP/1.1 200 OK -Content-Type: "application/json" -2 -``` --## Assign roles to users --Use the [Applications role assignments POST API](/rest/api/azure-blockchain-workbench/applications/roleassignmentspost) by passing the application ID, user ID, and application role ID to create a user-to-role mapping in the specified blockchain application. This method can only be performed by users who are Workbench administrators. --### Role assignments POST request --Replace the following values: --| Parameter | Value | -|--|-| -| {applicationId} | Return value from the Applications POST API. | -| {userId} | User ID value from the [User table](data-sql-management-studio.md). | -| {applicationRoleId} | Application role ID value associated to the application ID from the [ApplicationRole table](data-sql-management-studio.md). | --``` http -POST /api/v1/applications/{applicationId}/roleAssignments -Content-Type: application/json; -Authorization : Bearer {access token} --{ - "userId": {userId}, - "applicationRoleId": {applicationRoleId} -} -``` --### Role assignments POST response --If successful, the response includes the created role assignment ID from the [RoleAssignment table](data-sql-management-studio.md). --``` http -HTTP/1.1 200 -1 -``` --## List applications --Use the [Applications GET API](/rest/api/azure-blockchain-workbench/applications/applicationsget) to retrieve all Blockchain Workbench applications for the user. In this example, the signed-in user has access to two applications: --- [Asset transfer](https://github.com/Azure-Samples/blockchain/blob/master/blockchain-workbench/application-and-smart-contract-samples/asset-transfer/readme.md)-- [Refrigerated transportation](https://github.com/Azure-Samples/blockchain/blob/master/blockchain-workbench/application-and-smart-contract-samples/refrigerated-transportation/readme.md)--### Applications GET request --``` http -GET /api/v1/applications -Authorization : Bearer {access token} -``` --### Applications GET response --The response lists all blockchain applications to which a user has access in Blockchain Workbench. Blockchain Workbench administrators get every blockchain application. Non-Workbench administrators get all blockchain applications for which they have at least one associated application role or an associated smart contract instance role. --``` http -HTTP/1.1 200 OK -Content-type: application/json -{ - "nextLink": "/api/v1/applications?skip=2", - "applications": [ - { - "id": 1, - "name": "AssetTransfer", - "description": "Allows transfer of assets between a buyer and a seller, with appraisal/inspection functionality", - "displayName": "Asset Transfer", - "createdByUserId": 1, - "createdDtTm": "2018-04-28T05:59:14.4733333", - "enabled": true, - "applicationRoles": null - }, - { - "id": 2, - "name": "RefrigeratedTransportation", - "description": "Application to track end-to-end transportation of perishable goods.", - "displayName": "Refrigerated Transportation", - "createdByUserId": 7, - "createdDtTm": "2018-04-28T18:25:38.71", - "enabled": true, - "applicationRoles": null - } - ] -} -``` --## List workflows for an application --Use [Applications Workflows GET API](/rest/api/azure-blockchain-workbench/applications/workflowsget) to list all workflows of a specified blockchain application to which a user has access in Blockchain Workbench. Each blockchain application has one or more workflows and each workflow has zero or smart contract instances. For a blockchain client application that has only one workflow, we recommend skipping the user experience flow that allows users to select the appropriate workflow. --### Application workflows request --``` http -GET /api/v1/applications/{applicationId}/workflows -Authorization: Bearer {access token} -``` --### Application workflows response --Blockchain Workbench administrators get every blockchain workflow. Non-Workbench administrators get all workflows for which they have at least one associated application role or is associated with a smart contract instance role. --``` http -HTTP/1.1 200 OK -Content-type: application/json -{ - "nextLink": "/api/v1/applications/1/workflows?skip=1", - "workflows": [ - { - "id": 1, - "name": "AssetTransfer", - "description": "Handles the business logic for the asset transfer scenario", - "displayName": "Asset Transfer", - "applicationId": 1, - "constructorId": 1, - "startStateId": 1 - } - ] -} -``` --## Create a contract instance --Use [Contracts V2 POST API](/rest/api/azure-blockchain-workbench/contractsv2/contractpost) to create a new smart contract instance for a workflow. Users are only able to create a new smart contract instance if the user is associated with an application role, which can initiate a smart contract instance for the workflow. --> [!NOTE] -> In this example, version 2 of the API is used. Version 2 contract APIs provide more granularity for the associated ProvisioningStatus fields. --### Contracts POST request --Replace the following values: --| Parameter | Value | -|--|-| -| {workflowId} | Workflow ID value is the contract's ConstructorID from the [Workflow table](data-sql-management-studio.md). | -| {contractCodeId} | Contract code ID value from the [ContractCode table](data-sql-management-studio.md). Correlate the application ID and ledger ID for the contract instance you want to create. | -| {connectionId} | Connection ID value from the [Connection table](data-sql-management-studio.md). | --For the request body, set values using the following information: --| Parameter | Value | -|--|-| -| workflowFunctionID | ID from the [WorkflowFunction table](data-sql-management-studio.md). | -| workflowActionParameters | Name value pairs of parameters passed to the constructor. For each parameter, use the workflowFunctionParameterID value from the [WorkflowFunctionParameter](data-sql-management-studio.md) table. | --``` http -POST /api/v2/contracts?workflowId={workflowId}&contractCodeId={contractCodeId}&connectionId={connectionId} -Content-Type: application/json; -Authorization : Bearer {access token} --{ - "workflowFunctionID": 2, - "workflowActionParameters": [ - { - "name": "message", - "value": "Hello, world!", - "workflowFunctionParameterId": 3 - } - ] -} -``` --### Contracts POST response --If successful, role assignments API returns the ContractActionID from the [ContractActionParameter table](data-sql-management-studio.md). --``` http -HTTP/1.1 200 OK -4 -``` --## List smart contract instances for a workflow --Use [Contracts GET API](/rest/api/azure-blockchain-workbench/contractsv2/contractsget) to show all smart contract instances for a workflow. Or you can allow users to deep dive into any of the shown smart contract instances. --### Contracts request --In this example, consider a user would like to interact with one of the smart contract instances to take action. --``` http -GET api/v1/contracts?workflowId={workflowId} -Authorization: Bearer {access token} -``` --### Contracts response --The response lists all smart contract instances of the specified workflow. Workbench administrators get all smart contract instances. Non-Workbench administrators get every smart contract instance for which they have at least one associated application role or is associated with a smart contract instance role. --``` http -HTTP/1.1 200 OK -Content-type: application/json -{ - "nextLink": "/api/v1/contracts?skip=3&workflowId=1", - "contracts": [ - { - "id": 1, - "provisioningStatus": 2, - "connectionID": 1, - "ledgerIdentifier": "0xbcb6127be062acd37818af290c0e43479a153a1c", - "deployedByUserId": 1, - "workflowId": 1, - "contractCodeId": 1, - "contractProperties": [ - { - "workflowPropertyId": 1, - "value": "0" - }, - { - "workflowPropertyId": 2, - "value": "My first car" - }, - { - "workflowPropertyId": 3, - "value": "54321" - }, - { - "workflowPropertyId": 4, - "value": "0" - }, - { - "workflowPropertyId": 5, - "value": "0x0000000000000000000000000000000000000000" - }, - { - "workflowPropertyId": 6, - "value": "0x0000000000000000000000000000000000000000" - }, - { - "workflowPropertyId": 7, - "value": "0x0000000000000000000000000000000000000000" - }, - { - "workflowPropertyId": 8, - "value": "0xd882530eb3d6395e697508287900c7679dbe02d7" - } - ], - "transactions": [ - { - "id": 1, - "connectionId": 1, - "transactionHash": "0xf3abb829884dc396e03ae9e115a770b230fcf41bb03d39457201449e077080f4", - "blockID": 241, - "from": "0xd882530eb3d6395e697508287900c7679dbe02d7", - "to": null, - "value": 0, - "isAppBuilderTx": true - } - ], - "contractActions": [ - { - "id": 1, - "userId": 1, - "provisioningStatus": 2, - "timestamp": "2018-04-29T23:41:14.9333333", - "parameters": [ - { - "name": "Description", - "value": "My first car" - }, - { - "name": "Price", - "value": "54321" - } - ], - "workflowFunctionId": 1, - "transactionId": 1, - "workflowStateId": 1 - } - ] - } - ] -} -``` --## List available actions for a contract --Use [Contract Action GET API](/rest/api/azure-blockchain-workbench/contractsv2/contractactionget) to show the available user actions given the state of the contract. --### Contract action request --In this example, the user is looking at all available actions for a new smart contract they created. --``` http -GET /api/v1/contracts/{contractId}/actions -Authorization: Bearer {access token} -``` --### Contract action response --Response lists all actions to which a user can take given the current state of the specified smart contract instance. --* Modify: Allows the user to modify the description and price of an asset. -* Terminate: Allows the user to end the contract of the asset. --Users get all applicable actions if the user has an associated application role or is associated with a smart contract instance role for the current state of the specified smart contract instance. --``` http -HTTP/1.1 200 OK -Content-type: application/json -{ - "nextLink": "/api/v1/contracts/1/actions?skip=2", - "workflowFunctions": [ - { - "id": 2, - "name": "Modify", - "description": "Modify the description/price attributes of this asset transfer instance", - "displayName": "Modify", - "parameters": [ - { - "id": 1, - "name": "description", - "description": "The new description of the asset", - "displayName": "Description", - "type": { - "id": 2, - "name": "string", - "elementType": null, - "elementTypeId": 0 - } - }, - { - "id": 2, - "name": "price", - "description": "The new price of the asset", - "displayName": "Price", - "type": { - "id": 3, - "name": "money", - "elementType": null, - "elementTypeId": 0 - } - } - ], - "workflowId": 1 - }, - { - "id": 3, - "name": "Terminate", - "description": "Used to cancel this particular instance of asset transfer", - "displayName": "Terminate", - "parameters": [], - "workflowId": 1 - } - ] -} -``` --## Execute an action for a contract --Use [Contract Action POST API](/rest/api/azure-blockchain-workbench/contractsv2/contractactionpost) to take action for the specified smart contract instance. --### Contract action POST request --In this case, consider the scenario where a user would like to modify the description and price of an asset. --``` http -POST /api/v1/contracts/{contractId}/actions -Authorization: Bearer {access token} -actionInformation: { - "workflowFunctionId": 2, - "workflowActionParameters": [ - { - "name": "description", - "value": "My updated car" - }, - { - "name": "price", - "value": "54321" - } - ] -} -``` --Users are only able to execute the action given the current state of the specified smart contract instance and the user's associated application role or smart contract instance role. --### Contract action POST response --If the post is successful, an HTTP 200 OK response is returned with no response body. --``` http -HTTP/1.1 200 OK -Content-type: application/json -``` --## Next steps --For reference information on Blockchain Workbench APIs, see the [Azure Blockchain Workbench REST API reference](/rest/api/azure-blockchain-workbench). |
| blockchain | Use | https://github.com/MicrosoftDocs/azure-docs/commits/main/articles/blockchain/workbench/use.md | - Title: Using applications in Azure Blockchain Workbench -description: Tutorial on how to use application contracts in Azure Blockchain Workbench Preview. Previously updated : 02/18/2022---#Customer intent: As a developer, I want to use a blockchain application I created in Azure Blockchain Workbench. ---# Tutorial: Using applications in Azure Blockchain Workbench ---You can use Blockchain Workbench to create and take actions on contracts. You can also view contract details such as status and transaction history. --You'll learn how to: --> [!div class="checklist"] -> * Create a new contract -> * Take an action on a contract ---## Prerequisites --* A Blockchain Workbench deployment. For more information, see [Azure Blockchain Workbench deployment](deploy.md) for details on deployment -* A deployed blockchain application in Blockchain Workbench. See [Create a blockchain application in Azure Blockchain Workbench](create-app.md) --[Open the Blockchain Workbench](deploy.md#blockchain-workbench-web-url) in your browser. -- --You need to sign in as a member of the Blockchain Workbench. If there are no applications listed, you are a member of Blockchain Workbench but not a member of any applications. The Blockchain Workbench administrator can assign members to applications. --## Create new contract --To create a new contract, you need to be a member specified as a contract **initiator**. For information defining application roles and initiators for the contract, see [workflows in the configuration overview](configuration.md#workflows). For information on assigning members to application roles, see [add a member to application](manage-users.md#add-member-to-application). --1. In Blockchain Workbench application section, select the application tile that contains the contract you want to create. A list of active contracts is displayed. --2. To create a new contract, select **New contract**. --  --3. The **New contract** pane is displayed. Specify the initial parameters values. Select **Create**. --  -- The newly created contract is displayed in the list with the other active contracts. --  --## Take action on contract --Depending on the state the contract is in, members can take actions to transition to the next state of the contract. Actions are defined as [transitions](configuration.md#transitions) within a [state](configuration.md#states). Members belonging to an allowed application or instance role for the transition can take the action. --1. In Blockchain Workbench application section, select the application tile that contains the contract to take the action. -2. Select the contract in the list. Details about the contract are displayed in different sections. --  -- | Section | Description | - ||| - | Status | Lists the current progress within the contract stages | - | Details | The current values of the contract | - | Action | Details about the last action | - | Activity | Transaction history of the contract | - -3. In the **Action** section, select **Take action**. --4. The details about the current state of the contract are displayed in a pane. Choose the action you want to take in the drop-down. --  --5. Select **Take action** to initiate the action. -6. If parameters are required for the action, specify the values for the action. --  --7. Select **Take action** to execute the action. --## Next steps --> [!div class="nextstepaction"] -> [Azure Blockchain Workbench application versioning](version-app.md) |
| blockchain | Version App | https://github.com/MicrosoftDocs/azure-docs/commits/main/articles/blockchain/workbench/version-app.md | - Title: Blockchain app versioning - Azure Blockchain Workbench -description: How to use application versions in Azure Blockchain Workbench Preview. Previously updated : 02/18/2022---#Customer intent: As a developer, I want to create and use multiple versions of an Azure Blockchain Workbench app. --# Azure Blockchain Workbench Preview application versioning ---You can create and use multiple versions of an Azure Blockchain Workbench Preview app. If multiple versions of the same application are uploaded, a version history is available and users can choose which version they want to use. ---## Prerequisites --* A Blockchain Workbench deployment. For more information, see [Azure Blockchain Workbench deployment](deploy.md) for details on deployment -* A deployed blockchain application in Blockchain Workbench. See [Create a blockchain application in Azure Blockchain Workbench](create-app.md) --## Add an app version --To add a new version, upload the new configuration and smart contract files to Blockchain Workbench. --1. In a web browser, navigate to the Blockchain Workbench web address. For example, `https://{workbench URL}.azurewebsites.net/` For information on how to find your Blockchain Workbench web address, see [Blockchain Workbench Web URL](deploy.md#blockchain-workbench-web-url) -2. Sign in as a [Blockchain Workbench administrator](manage-users.md#manage-blockchain-workbench-administrators). -3. Select the blockchain application you want to update with another version. -4. Select **Add version**. The **Add version** pane is displayed. -5. Choose the new version contract configuration and contract code files to upload. The configuration file is automatically validated. Fix any validation errors before you deploy the application. -6. Select **Add version** to add the new blockchain application version. --  --Deployment of the blockchain application can take a few minutes. When deployment is finished, refresh the application page. Choosing the application and selecting the **Version history** button, displays the version history of the application. --> [!IMPORTANT] -> Previous versions of the application are disabled. You can individually re-enable past versions. -> -> You may need to re-add members to application roles if changes were made to the application roles in the new version. --## Using app versions --By default, the latest enabled version of the application is used in Blockchain Workbench. If you want to use a previous version of an application, you need to choose the version from the application page first. --1. In Blockchain Workbench application section, select the application checkbox that contains the contract you want to use. If previous versions are enabled, the version history button is available. -2. Select the **Version history** button. -3. In the version history pane, choose the version of the application by selecting the link in the *Date modified* column. --  -- You can create new contracts or take actions on previous version contracts. The version of the application is displayed following the application name and a warning is displayed about the older version. --## Next steps --* [Azure Blockchain Workbench troubleshooting](troubleshooting.md) |
| chaos-studio | Chaos Studio Permissions Security | https://github.com/MicrosoftDocs/azure-docs/commits/main/articles/chaos-studio/chaos-studio-permissions-security.md | All user interactions with Chaos Studio happen through Azure Resource Manager. I Azure Chaos Studio doesn't support Private Link for agent-based scenarios. ## Service tags -A service tag is a group of IP address prefixes that can be assigned to in-bound and out-bound NSG rules. It handles updates to the group of IP address prefixes without any intervention. This benefits you because you can use service tags to explicitly allow in-bound traffic from Chaos Studio, without needing to know the IP addresses of the platform. Currently service tags can be enabled via PowerShell. -* Limitation of service tags is that they can only be used with resources that have a public IP address. If a resource only has a private IP address, then service tags will not be able to allow traffic to route to it. +A [service tags](../virtual-network/service-tags-overview.md) is a group of IP address prefixes that can be assigned to in-bound and out-bound NSG rules. It automatically handles updates to the group of IP address prefixes without any intervention. This benefits you because you can use service tags to explicitly allow in-bound traffic from Chaos Studio without needing to know the IP addresses of the platform. Currently service tags can be enabled via PowerShell and support will soon be added to the Chaos Studio user interface. +* Limitation of service tags is that they can only be used with applications that have a public IP address. If a resource only has a private IP address, then service tags will not be able to allow traffic to route to it. ## Data encryption |
| cognitive-services | Batch Inference | https://github.com/MicrosoftDocs/azure-docs/commits/main/articles/cognitive-services/Anomaly-Detector/How-to/batch-inference.md | + + Title: Trigger batch inference with trained model ++description: Trigger batch inference with trained model ++++++ Last updated : 11/01/2022++++# Trigger batch inference with trained model ++You could choose the batch inference API, or the streaming inference API for detection. ++| Batch inference API | Streaming inference API | +| - | - | +| More suitable for batch use cases when customers donΓÇÖt need to get inference results immediately and want to detect anomalies and get results over a longer time period.| When customers want to get inference immediately and want to detect multivariate anomalies in real-time, this API is recommended. Also suitable for customers having difficulties conducting the previous compressing and uploading process for inference. | ++|API Name| Method | Path | Description | +| | - | -- | | +|**Batch Inference**| POST | `{endpoint}`/anomalydetector/v1.1/multivariate/models/`{modelId}`: detect-batch | Trigger an asynchronous inference with `modelId`, which works in a batch scenario | +|**Get Batch Inference Results**| GET | `{endpoint}`/anomalydetector/v1.1/multivariate/detect-batch/`{resultId}` | Get batch inference results with `resultId` | +|**Streaming Inference**| POST | `{endpoint}`/anomalydetector/v1.1/multivariate/models/`{modelId}`: detect-last | Trigger a synchronous inference with `modelId`, which works in a streaming scenario | ++## Trigger a batch inference ++To perform batch inference, provide the blob URL containing the inference data, the start time, and end time. For inference data volume, at least `1 sliding window` length and at most **20000** timestamps. ++This inference is asynchronous, so the results aren't returned immediately. Notice that you need to save in a variable the link of the results in the **response header** which contains the `resultId`, so that you may know where to get the results afterwards. ++Failures are usually caused by model issues or data issues. You can't perform inference if the model isn't ready or the data link is invalid. Make sure that the training data and inference data are consistent, meaning they should be **exactly** the same variables but with different timestamps. More variables, fewer variables, or inference with a different set of variables won't pass the data verification phase and errors will occur. Data verification is deferred so that you'll get error messages only when you query the results. ++### Request ++A sample request: ++```json +{ + "dataSource": "{{dataSource}}", + "topContributorCount": 3, + "startTime": "2021-01-02T12:00:00Z", + "endTime": "2021-01-03T00:00:00Z" +} +``` +#### Required parameters ++* **dataSource**: This is the Blob URL that linked to your folder or CSV file located in Azure Blob Storage. The schema should be the same as your training data, either OneTable or MultiTable, and the variable number and name should be exactly the same as well. +* **startTime**: The start time of data used for inference. If it's earlier than the actual earliest timestamp in the data, the actual earliest timestamp will be used as the starting point. +* **endTime**: The end time of data used for inference, which must be later than or equal to `startTime`. If `endTime` is later than the actual latest timestamp in the data, the actual latest timestamp will be used as the ending point. ++#### Optional parameters ++* **topContributorCount**: This is a number that you could specify N from **1 to 30**, which will give you the details of top N contributed variables in the anomaly results. For example, if you have 100 variables in the model, but you only care the top five contributed variables in detection results, then you should fill this field with 5. The default number is **10**. ++### Response ++A sample response: ++```json +{ + "resultId": "aaaaaaaa-5555-1111-85bb-36f8cdfb3365", + "summary": { + "status": "CREATED", + "errors": [], + "variableStates": [], + "setupInfo": { + "dataSource": "https://mvaddataset.blob.core.windows.net/sample-onetable/sample_data_5_3000.csv", + "topContributorCount": 3, + "startTime": "2021-01-02T12:00:00Z", + "endTime": "2021-01-03T00:00:00Z" + } + }, + "results": [] +} +``` +* **resultId**: This is the information that you'll need to trigger **Get Batch Inference Results API**. +* **status**: This indicates whether you trigger a batch inference task successfully. If you see **CREATED**, then you don't need to trigger this API again, you should use the **Get Batch Inference Results API** to get the detection status and anomaly results. ++## Get batch detection results ++There's no content in the request body, what's required only is to put the resultId in the API path, which will be in a format of: +**{{endpoint}}anomalydetector/v1.1/multivariate/detect-batch/{{resultId}}** ++### Response ++A sample response: ++```json +{ + "resultId": "aaaaaaaa-5555-1111-85bb-36f8cdfb3365", + "summary": { + "status": "READY", + "errors": [], + "variableStates": [ + { + "variable": "series_0", + "filledNARatio": 0.0, + "effectiveCount": 721, + "firstTimestamp": "2021-01-02T12:00:00Z", + "lastTimestamp": "2021-01-03T00:00:00Z" + }, + { + "variable": "series_1", + "filledNARatio": 0.0, + "effectiveCount": 721, + "firstTimestamp": "2021-01-02T12:00:00Z", + "lastTimestamp": "2021-01-03T00:00:00Z" + }, + { + "variable": "series_2", + "filledNARatio": 0.0, + "effectiveCount": 721, + "firstTimestamp": "2021-01-02T12:00:00Z", + "lastTimestamp": "2021-01-03T00:00:00Z" + }, + { + "variable": "series_3", + "filledNARatio": 0.0, + "effectiveCount": 721, + "firstTimestamp": "2021-01-02T12:00:00Z", + "lastTimestamp": "2021-01-03T00:00:00Z" + }, + { + "variable": "series_4", + "filledNARatio": 0.0, + "effectiveCount": 721, + "firstTimestamp": "2021-01-02T12:00:00Z", + "lastTimestamp": "2021-01-03T00:00:00Z" + } + ], + "setupInfo": { + "dataSource": "https://mvaddataset.blob.core.windows.net/sample-onetable/sample_data_5_3000.csv", + "topContributorCount": 3, + "startTime": "2021-01-02T12:00:00Z", + "endTime": "2021-01-03T00:00:00Z" + } + }, + "results": [ + { + "timestamp": "2021-01-02T12:00:00Z", + "value": { + "isAnomaly": false, + "severity": 0.0, + "score": 0.3377174139022827, + "interpretation": [] + }, + "errors": [] + }, + { + "timestamp": "2021-01-02T12:01:00Z", + "value": { + "isAnomaly": false, + "severity": 0.0, + "score": 0.24631972312927247, + "interpretation": [] + }, + "errors": [] + }, + { + "timestamp": "2021-01-02T12:02:00Z", + "value": { + "isAnomaly": false, + "severity": 0.0, + "score": 0.16678125858306886, + "interpretation": [] + }, + "errors": [] + }, + { + "timestamp": "2021-01-02T12:03:00Z", + "value": { + "isAnomaly": false, + "severity": 0.0, + "score": 0.23783254623413086, + "interpretation": [] + }, + "errors": [] + }, + { + "timestamp": "2021-01-02T12:04:00Z", + "value": { + "isAnomaly": false, + "severity": 0.0, + "score": 0.24804904460906982, + "interpretation": [] + }, + "errors": [] + }, + { + "timestamp": "2021-01-02T12:05:00Z", + "value": { + "isAnomaly": false, + "severity": 0.0, + "score": 0.11487171649932862, + "interpretation": [] + }, + "errors": [] + }, + { + "timestamp": "2021-01-02T12:06:00Z", + "value": { + "isAnomaly": true, + "severity": 0.32980116622958083, + "score": 0.5666913509368896, + "interpretation": [ + { + "variable": "series_2", + "contributionScore": 0.4130149677604554, + "correlationChanges": { + "changedVariables": [ + "series_0", + "series_4", + "series_3" + ] + } + }, + { + "variable": "series_3", + "contributionScore": 0.2993065960239115, + "correlationChanges": { + "changedVariables": [ + "series_0", + "series_4", + "series_3" + ] + } + }, + { + "variable": "series_1", + "contributionScore": 0.287678436215633, + "correlationChanges": { + "changedVariables": [ + "series_0", + "series_4", + "series_3" + ] + } + } + ] + }, + "errors": [] + } + ] +} +``` ++The response contains the result status, variable information, inference parameters, and inference results. ++* **variableStates**: This lists the information of each variable in the inference request. +* **setupInfo**: This is the request body submitted for this inference. +* **results**: This contains the detection results. There are three typical types of detection results. ++* Error code `InsufficientHistoricalData`. This usually happens only with the first few timestamps because the model inferences data in a window-based manner and it needs historical data to make a decision. For the first few timestamps, there's insufficient historical data, so inference can't be performed on them. In this case, the error message can be ignored. ++* **isAnomaly**: `false` indicates the current timestamp isn't an anomaly.`true` indicates an anomaly at the current timestamp. + * `severity` indicates the relative severity of the anomaly and for abnormal data it's always greater than 0. + * `score` is the raw output of the model on which the model makes a decision. `severity` is a derived value from `score`. Every data point has a `score`. ++* **interpretation**: This field only appears when a timestamp is detected as anomalous, which contains `variables`, `contributionScore`, `correlationChanges`. ++* **contributors**: This is a list containing the contribution score of each variable. Higher contribution scores indicate higher possibility of the root cause. This list is often used for interpreting anomalies and diagnosing the root causes. ++* **correlationChanges**: This field only appears when a timestamp is detected as anomalous, which included in interpretation. It contains `changedVariables` and `changedValues` that interpret which correlations between variables changed. ++* **changedVariables**: This field will show which variables that have significant change in correlation with `variable`. The variables in this list are ranked by the extent of correlation changes. ++> [!NOTE] +> A common pitfall is taking all data points with `isAnomaly`=`true` as anomalies. That may end up with too many false positives. +> You should use both `isAnomaly` and `severity` (or `score`) to sift out anomalies that are not severe and (optionally) use grouping to check the duration of the anomalies to suppress random noise. +> Please refer to the [FAQ](../concepts/best-practices-multivariate.md#faq) in the best practices document for the difference between `severity` and `score`. ++## Next steps ++* [Best practices of multivariate anomaly detection](../concepts/best-practices-multivariate.md) |
| cognitive-services | Streaming Inference | https://github.com/MicrosoftDocs/azure-docs/commits/main/articles/cognitive-services/Anomaly-Detector/How-to/streaming-inference.md | + + Title: Streaming inference with trained model ++description: Streaming inference with trained model ++++++ Last updated : 11/01/2022++++# Streaming inference with trained model ++You could choose the batch inference API, or the streaming inference API for detection. ++| Batch inference API | Streaming inference API | +| - | - | +| More suitable for batch use cases when customers donΓÇÖt need to get inference results immediately and want to detect anomalies and get results over a longer time period.| When customers want to get inference immediately and want to detect multivariate anomalies in real-time, this API is recommended. Also suitable for customers having difficulties conducting the previous compressing and uploading process for inference. | ++|API Name| Method | Path | Description | +| | - | -- | | +|**Batch Inference**| POST | `{endpoint}`/anomalydetector/v1.1/multivariate/models/`{modelId}`: detect-batch | Trigger an asynchronous inference with `modelId` which works in a batch scenario | +|**Get Batch Inference Results**| GET | `{endpoint}`/anomalydetector/v1.1/multivariate/detect-batch/`{resultId}` | Get batch inference results with `resultId` | +|**Streaming Inference**| POST | `{endpoint}`/anomalydetector/v1.1/multivariate/models/`{modelId}`: detect-last | Trigger a synchronous inference with `modelId`, which works in a streaming scenario | ++## Trigger a streaming inference API ++### Request ++With the synchronous API, you can get inference results point by point in real time, and no need for compressing and uploading task like for training and asynchronous inference. Here are some requirements for the synchronous API: +* You need to put data in **JSON format** into the API request body. +* Due to payload limitation, the size of inference data in the request body is limited, which support at most `2880` timestamps * `300` variables, and at least `1 sliding window length`. ++You can submit a bunch of timestamps of multiple variables in JSON format in the request body, with an API call like this: ++**{{endpoint}}/anomalydetector/v1.1/multivariate/models/{modelId}:detect-last** ++A sample request: ++```json +{ + "variables": [ + { + "variableName": "Variable_1", + "timestamps": [ + "2021-01-01T00:00:00Z", + "2021-01-01T00:01:00Z", + "2021-01-01T00:02:00Z" + //more timestamps + ], + "values": [ + 0.4551378545933972, + 0.7388603950488748, + 0.201088255984052 + //more values + ] + }, + { + "variableName": "Variable_2", + "timestamps": [ + "2021-01-01T00:00:00Z", + "2021-01-01T00:01:00Z", + "2021-01-01T00:02:00Z" + //more timestamps + ], + "values": [ + 0.9617871613964145, + 0.24903311574778408, + 0.4920561254118613 + //more values + ] + }, + { + "variableName": "Variable_3", + "timestamps": [ + "2021-01-01T00:00:00Z", + "2021-01-01T00:01:00Z", + "2021-01-01T00:02:00Z" + //more timestamps + ], + "values": [ + 0.4030756879437628, + 0.15526889968448554, + 0.36352226408981103 + //more values + ] + } + ], + "topContributorCount": 2 +} +``` ++#### Required parameters ++* **variableName**: This name should be exactly the same as in your training data. +* **timestamps**: The length of the timestamps should be equal to **1 sliding window**, since every streaming inference call will use 1 sliding window to detect the last point in the sliding window. +* **values**: The values of each variable in every timestamp that was inputted above. ++#### Optional parameters ++* **topContributorCount**: This is a number that you could specify N from **1 to 30**, which will give you the details of top N contributed variables in the anomaly results. For example, if you have 100 variables in the model, but you only care the top five contributed variables in detection results, then you should fill this field with 5. The default number is **10**. ++### Response ++A sample response: ++```json +{ + "variableStates": [ + { + "variable": "series_0", + "filledNARatio": 0.0, + "effectiveCount": 1, + "firstTimestamp": "2021-01-03T01:59:00Z", + "lastTimestamp": "2021-01-03T01:59:00Z" + }, + { + "variable": "series_1", + "filledNARatio": 0.0, + "effectiveCount": 1, + "firstTimestamp": "2021-01-03T01:59:00Z", + "lastTimestamp": "2021-01-03T01:59:00Z" + }, + { + "variable": "series_2", + "filledNARatio": 0.0, + "effectiveCount": 1, + "firstTimestamp": "2021-01-03T01:59:00Z", + "lastTimestamp": "2021-01-03T01:59:00Z" + }, + { + "variable": "series_3", + "filledNARatio": 0.0, + "effectiveCount": 1, + "firstTimestamp": "2021-01-03T01:59:00Z", + "lastTimestamp": "2021-01-03T01:59:00Z" + }, + { + "variable": "series_4", + "filledNARatio": 0.0, + "effectiveCount": 1, + "firstTimestamp": "2021-01-03T01:59:00Z", + "lastTimestamp": "2021-01-03T01:59:00Z" + } + ], + "results": [ + { + "timestamp": "2021-01-03T01:59:00Z", + "value": { + "isAnomaly": false, + "severity": 0.0, + "score": 0.2675322890281677, + "interpretation": [] + }, + "errors": [] + } + ] +} +``` ++The response contains the result status, variable information, inference parameters, and inference results. ++* **variableStates**: This lists the information of each variable in the inference request. +* **setupInfo**: This is the request body submitted for this inference. +* **results**: This contains the detection results. There are three typical types of detection results. ++* **isAnomaly**: `false` indicates the current timestamp isn't an anomaly.`true` indicates an anomaly at the current timestamp. + * `severity` indicates the relative severity of the anomaly and for abnormal data it's always greater than 0. + * `score` is the raw output of the model on which the model makes a decision. `severity` is a derived value from `score`. Every data point has a `score`. ++* **interpretation**: This field only appears when a timestamp is detected as anomalous, which contains `variables`, `contributionScore`, `correlationChanges`. ++* **contributors**: This is a list containing the contribution score of each variable. Higher contribution scores indicate higher possibility of the root cause. This list is often used for interpreting anomalies and diagnosing the root causes. ++* **correlationChanges**: This field only appears when a timestamp is detected as anomalous, which is included in interpretation. It contains `changedVariables` and `changedValues` that interpret which correlations between variables changed. ++* **changedVariables**: This field will show which variables that have significant change in correlation with `variable`. The variables in this list are ranked by the extent of correlation changes. ++> [!NOTE] +> A common pitfall is taking all data points with `isAnomaly`=`true` as anomalies. That may end up with too many false positives. +> You should use both `isAnomaly` and `severity` (or `score`) to sift out anomalies that are not severe and (optionally) use grouping to check the duration of the anomalies to suppress random noise. +> Please refer to the [FAQ](../concepts/best-practices-multivariate.md#faq) in the best practices document for the difference between `severity` and `score`. ++## Next steps ++* [Multivariate Anomaly Detection reference architecture](../concepts/multivariate-architecture.md) +* [Best practices of multivariate anomaly detection](../concepts/best-practices-multivariate.md) |
| cognitive-services | Train Model | https://github.com/MicrosoftDocs/azure-docs/commits/main/articles/cognitive-services/Anomaly-Detector/How-to/train-model.md | + + Title: Train a Multivariate Anomaly Detection model ++description: Train a Multivariate Anomaly Detection model ++++++ Last updated : 11/01/2022++++# Train a Multivariate Anomaly Detection model ++To test out Multivariate Anomaly Detection quickly, try the [Code Sample](https://github.com/Azure-Samples/AnomalyDetector)! For more instructions on how to run a jupyter notebook, please refer to [Install and Run a Jupyter Notebook](https://jupyter-notebook-beginner-guide.readthedocs.io/en/latest/install.html#). ++## API Overview ++There are 7 APIs provided in Multivariate Anomaly Detection: +* **Training**: Use `Train Model API` to create and train a model, then use `Get Model Status API` to get the status and model metadata. +* **Inference**: + * Use `Async Inference API` to trigger an asynchronous inference process and use `Get Inference results API` to get detection results on a batch of data. + * You could also use `Sync Inference API` to trigger a detection on one timestamp every time. +* **Other operations**: `List Model API` and `Delete Model API` are supported in Multivariate Anomaly Detection model for model management. ++ ++|API Name| Method | Path | Description | +| | - | -- | | +|**Train Model**| POST | `{endpoint}`/anomalydetector/v1.1/multivariate/models | Create and train a model | +|**Get Model Status**| GET | `{endpoint}`anomalydetector/v1.1/multivariate/models/`{modelId}` | Get model status and model metadata with `modelId` | +|**Batch Inference**| POST | `{endpoint}`/anomalydetector/v1.1/multivariate/models/`{modelId}`: detect-batch | Trigger an asynchronous inference with `modelId` which works in a batch scenario | +|**Get Batch Inference Results**| GET | `{endpoint}`/anomalydetector/v1.1/multivariate/detect-batch/`{resultId}` | Get batch inference results with `resultId` | +|**Streaming Inference**| POST | `{endpoint}`/anomalydetector/v1.1/multivariate/models/`{modelId}`: detect-last | Trigger a synchronous inference with `modelId` which works in a streaming scenario | +|**List Model**| GET | `{endpoint}`/anomalydetector/v1.1/multivariate/models | List all models | +|**Delete Model**| DELET | `{endpoint}`/anomalydetector/v1.1/multivariate/models/`{modelId}` | Delete model with `modelId` | ++## Train a model ++In this process, you'll use the following information that you created previously: ++* **Key** of Anomaly Detector resource +* **Endpoint** of Anomaly Detector resource +* **Blob URL** of your data in Storage Account ++For training data size, the maximum number of timestamps is **1000000**, and a recommended minimum number is **5000** timestamps. ++### Request ++Here's a sample request body to train a Multivariate Anomaly Detection model. ++```json +{ + "slidingWindow": 200, + "alignPolicy": { + "alignMode": "Outer", + "fillNAMethod": "Linear", + "paddingValue": 0 + }, + "dataSource": "{{dataSource}}", //Example: https://mvaddataset.blob.core.windows.net/sample-onetable/sample_data_5_3000.csv + "dataSchema": "OneTable", + "startTime": "2021-01-01T00:00:00Z", + "endTime": "2021-01-02T09:19:00Z", + "displayName": "SampleRequest" +} +``` ++#### Required parameters ++These three parameters are required in training and inference API requests: ++* **dataSource**: This is the Blob URL that linked to your folder or CSV file located in the Azure Blob Storage. +* **dataSchema**: This indicates the schema that you're using: `OneTable` or `MultiTable`. +* **startTime**: The start time of data used for training or inference. If it's earlier than the actual earliest timestamp in the data, the actual earliest timestamp will be used as the starting point. +* **endTime**: The end time of data used for training or inference, which must be later than or equal to `startTime`. If `endTime` is later than the actual latest timestamp in the data, the actual latest timestamp will be used as the ending point. If `endTime` equals to `startTime`, it means inference of one single data point, which is often used in streaming scenarios. ++#### Optional parameters ++Other parameters for training API are optional: ++* **slidingWindow**: How many data points are used to determine anomalies. An integer between 28 and 2,880. The default value is 300. If `slidingWindow` is `k` for model training, then at least `k` points should be accessible from the source file during inference to get valid results. ++ Multivariate Anomaly Detection takes a segment of data points to decide if the next data point is an anomaly. The length of the segment is the `slidingWindow`. + Please keep two things in mind when choosing a `slidingWindow` value: + 1. The properties of your data: whether it's periodic and the sampling rate. When your data is periodic, you could set the length of 1 - 3 cycles as the `slidingWindow`. When your data is at a high frequency (small granularity) like minute-level or second-level, you could set a relatively higher value of `slidingWindow`. + 1. The trade-off between training/inference time and potential performance impact. A larger `slidingWindow` may cause longer training/inference time. There's **no guarantee** that larger `slidingWindow`s will lead to accuracy gains. A small `slidingWindow` may make it difficult for the model to converge on an optimal solution. For example, it's hard to detect anomalies when `slidingWindow` has only two points. ++* **alignMode**: How to align multiple variables (time series) on timestamps. There are two options for this parameter, `Inner` and `Outer`, and the default value is `Outer`. ++ This parameter is critical when there's misalignment between timestamp sequences of the variables. The model needs to align the variables onto the same timestamp sequence before further processing. ++ `Inner` means the model will report detection results only on timestamps on which **every variable** has a value, that is, the intersection of all variables. `Outer` means the model will report detection results on timestamps on which **any variable** has a value, that is, the union of all variables. ++ Here's an example to explain different `alignModel` values. ++ *Variable-1* ++ |timestamp | value| + -| --| + |2020-11-01| 1 + |2020-11-02| 2 + |2020-11-04| 4 + |2020-11-05| 5 ++ *Variable-2* ++ timestamp | value + | - + 2020-11-01| 1 + 2020-11-02| 2 + 2020-11-03| 3 + 2020-11-04| 4 ++ *`Inner` join two variables* ++ timestamp | Variable-1 | Variable-2 + -| - | - + 2020-11-01| 1 | 1 + 2020-11-02| 2 | 2 + 2020-11-04| 4 | 4 ++ *`Outer` join two variables* ++ timestamp | Variable-1 | Variable-2 + | - | - + 2020-11-01| 1 | 1 + 2020-11-02| 2 | 2 + 2020-11-03| `nan` | 3 + 2020-11-04| 4 | 4 + 2020-11-05| 5 | `nan` ++* **fillNAMethod**: How to fill `nan` in the merged table. There might be missing values in the merged table and they should be properly handled. We provide several methods to fill them up. The options are `Linear`, `Previous`, `Subsequent`, `Zero`, and `Fixed` and the default value is `Linear`. ++ | Option | Method | + | - | -| + | `Linear` | Fill `nan` values by linear interpolation | + | `Previous` | Propagate last valid value to fill gaps. Example: `[1, 2, nan, 3, nan, 4]` -> `[1, 2, 2, 3, 3, 4]` | + | `Subsequent` | Use next valid value to fill gaps. Example: `[1, 2, nan, 3, nan, 4]` -> `[1, 2, 3, 3, 4, 4]` | + | `Zero` | Fill `nan` values with 0. | + | `Fixed` | Fill `nan` values with a specified valid value that should be provided in `paddingValue`. | ++* **paddingValue**: Padding value is used to fill `nan` when `fillNAMethod` is `Fixed` and must be provided in that case. In other cases it's optional. ++* **displayName**: This is an optional parameter, which is used to identify models. For example, you can use it to mark parameters, data sources, and any other metadata about the model and its input data. The default value is an empty string. ++### Response ++Within the response, the most important thing is the `modelId`, which you'll use to trigger the Get Model Status API. ++A response sample: ++```json +{ + "modelId": "09c01f3e-5558-11ed-bd35-36f8cdfb3365", + "createdTime": "2022-11-01T00:00:00Z", + "lastUpdatedTime": "2022-11-01T00:00:00Z", + "modelInfo": { + "dataSource": "https://mvaddataset.blob.core.windows.net/sample-onetable/sample_data_5_3000.csv", + "dataSchema": "OneTable", + "startTime": "2021-01-01T00:00:00Z", + "endTime": "2021-01-02T09:19:00Z", + "displayName": "SampleRequest", + "slidingWindow": 200, + "alignPolicy": { + "alignMode": "Outer", + "fillNAMethod": "Linear", + "paddingValue": 0.0 + }, + "status": "CREATED", + "errors": [], + "diagnosticsInfo": { + "modelState": { + "epochIds": [], + "trainLosses": [], + "validationLosses": [], + "latenciesInSeconds": [] + }, + "variableStates": [] + } + } +} +``` ++## Get model status ++You could use the above API to trigger a training and use **Get model status API** to know whether the model is trained successfully or not. ++### Request ++There's no content in the request body, what's required only is to put the modelId in the API path, which will be in a format of: +**{{endpoint}}anomalydetector/v1.1/multivariate/models/{{modelId}}** ++### Response ++* **status**: The `status` in the response body indicates the model status with this category: *CREATED, RUNNING, READY, FAILED.* +* **trainLosses & validationLosses**: These are two machine learning concepts indicating the model performance. If the numbers are decreasing and finally to a relatively small number like 0.2, 0.3, then it means the model performance is good to some extent. However, the model performance still needs to be validated through inference and the comparison with labels if any. +* **epochIds**: indicates how many epochs the model has been trained out of a total of 100 epochs. For example, if the model is still in training status, `epochId` might be `[10, 20, 30, 40, 50]` , which means that it has completed its 50th training epoch, and therefore is halfway complete. +* **latenciesInSeconds**: contains the time cost for each epoch and is recorded every 10 epochs. In this example, the 10th epoch takes approximately 0.34 second. This would be helpful to estimate the completion time of training. +* **variableStates**: summarizes information about each variable. It's a list ranked by `filledNARatio` in descending order. It tells how many data points are used for each variable and `filledNARatio` tells how many points are missing. Usually we need to reduce `filledNARatio` as much as possible. +Too many missing data points will deteriorate model accuracy. +* **errors**: Errors during data processing will be included in the `errors` field. ++A response sample: ++```json +{ + "modelId": "09c01f3e-5558-11ed-bd35-36f8cdfb3365", + "createdTime": "2022-11-01T00:00:12Z", + "lastUpdatedTime": "2022-11-01T00:00:12Z", + "modelInfo": { + "dataSource": "https://mvaddataset.blob.core.windows.net/sample-onetable/sample_data_5_3000.csv", + "dataSchema": "OneTable", + "startTime": "2021-01-01T00:00:00Z", + "endTime": "2021-01-02T09:19:00Z", + "displayName": "SampleRequest", + "slidingWindow": 200, + "alignPolicy": { + "alignMode": "Outer", + "fillNAMethod": "Linear", + "paddingValue": 0.0 + }, + "status": "READY", + "errors": [], + "diagnosticsInfo": { + "modelState": { + "epochIds": [ + 10, + 20, + 30, + 40, + 50, + 60, + 70, + 80, + 90, + 100 + ], + "trainLosses": [ + 0.30325182933699, + 0.24335388161919333, + 0.22876543213020673, + 0.2439815090461211, + 0.22489577260884372, + 0.22305156764659015, + 0.22466289590705524, + 0.22133831883018668, + 0.2214335961775346, + 0.22268397090109912 + ], + "validationLosses": [ + 0.29047123109451445, + 0.263965221366497, + 0.2510373182971068, + 0.27116744686858824, + 0.2518718700216274, + 0.24802495975687047, + 0.24790137705176768, + 0.24640804830223623, + 0.2463938973166726, + 0.24831805566344597 + ], + "latenciesInSeconds": [ + 2.1662967205047607, + 2.0658926963806152, + 2.112030029296875, + 2.130472183227539, + 2.183091640472412, + 2.1442034244537354, + 2.117824077606201, + 2.1345198154449463, + 2.0993552207946777, + 2.1198465824127197 + ] + }, + "variableStates": [ + { + "variable": "series_0", + "filledNARatio": 0.0004999999999999449, + "effectiveCount": 1999, + "firstTimestamp": "2021-01-01T00:01:00Z", + "lastTimestamp": "2021-01-02T09:19:00Z" + }, + { + "variable": "series_1", + "filledNARatio": 0.0004999999999999449, + "effectiveCount": 1999, + "firstTimestamp": "2021-01-01T00:01:00Z", + "lastTimestamp": "2021-01-02T09:19:00Z" + }, + { + "variable": "series_2", + "filledNARatio": 0.0004999999999999449, + "effectiveCount": 1999, + "firstTimestamp": "2021-01-01T00:01:00Z", + "lastTimestamp": "2021-01-02T09:19:00Z" + }, + { + "variable": "series_3", + "filledNARatio": 0.0004999999999999449, + "effectiveCount": 1999, + "firstTimestamp": "2021-01-01T00:01:00Z", + "lastTimestamp": "2021-01-02T09:19:00Z" + }, + { + "variable": "series_4", + "filledNARatio": 0.0004999999999999449, + "effectiveCount": 1999, + "firstTimestamp": "2021-01-01T00:01:00Z", + "lastTimestamp": "2021-01-02T09:19:00Z" + } + ] + } + } +} +``` ++## List models ++You may refer to [this page](https://westus2.dev.cognitive.microsoft.com/docs/services/AnomalyDetector-v1-1/operations/ListMultivariateModel) for information about the request URL and request headers. Notice that we only return 10 models ordered by update time, but you can visit other models by setting the `$skip` and the `$top` parameters in the request URL. For example, if your request URL is `https://{endpoint}/anomalydetector/v1.1/multivariate/models?$skip=10&$top=20`, then we'll skip the latest 10 models and return the next 20 models. ++A sample response is ++```json +{ + "models": [ + { + "modelId": "09c01f3e-5558-11ed-bd35-36f8cdfb3365", + "createdTime": "2022-10-26T18:00:12Z", + "lastUpdatedTime": "2022-10-26T18:03:53Z", + "modelInfo": { + "dataSource": "https://mvaddataset.blob.core.windows.net/sample-onetable/sample_data_5_3000.csv", + "dataSchema": "OneTable", + "startTime": "2021-01-01T00:00:00Z", + "endTime": "2021-01-02T09:19:00Z", + "displayName": "SampleRequest", + "slidingWindow": 200, + "alignPolicy": { + "alignMode": "Outer", + "fillNAMethod": "Linear", + "paddingValue": 0.0 + }, + "status": "READY", + "errors": [], + "diagnosticsInfo": { + "modelState": { + "epochIds": [ + 10, + 20, + 30, + 40, + 50, + 60, + 70, + 80, + 90, + 100 + ], + "trainLosses": [ + 0.30325182933699, + 0.24335388161919333, + 0.22876543213020673, + 0.2439815090461211, + 0.22489577260884372, + 0.22305156764659015, + 0.22466289590705524, + 0.22133831883018668, + 0.2214335961775346, + 0.22268397090109912 + ], + "validationLosses": [ + 0.29047123109451445, + 0.263965221366497, + 0.2510373182971068, + 0.27116744686858824, + 0.2518718700216274, + 0.24802495975687047, + 0.24790137705176768, + 0.24640804830223623, + 0.2463938973166726, + 0.24831805566344597 + ], + "latenciesInSeconds": [ + 2.1662967205047607, + 2.0658926963806152, + 2.112030029296875, + 2.130472183227539, + 2.183091640472412, + 2.1442034244537354, + 2.117824077606201, + 2.1345198154449463, + 2.0993552207946777, + 2.1198465824127197 + ] + }, + "variableStates": [ + { + "variable": "series_0", + "filledNARatio": 0.0004999999999999449, + "effectiveCount": 1999, + "firstTimestamp": "2021-01-01T00:01:00Z", + "lastTimestamp": "2021-01-02T09:19:00Z" + }, + { + "variable": "series_1", + "filledNARatio": 0.0004999999999999449, + "effectiveCount": 1999, + "firstTimestamp": "2021-01-01T00:01:00Z", + "lastTimestamp": "2021-01-02T09:19:00Z" + }, + { + "variable": "series_2", + "filledNARatio": 0.0004999999999999449, + "effectiveCount": 1999, + "firstTimestamp": "2021-01-01T00:01:00Z", + "lastTimestamp": "2021-01-02T09:19:00Z" + }, + { + "variable": "series_3", + "filledNARatio": 0.0004999999999999449, + "effectiveCount": 1999, + "firstTimestamp": "2021-01-01T00:01:00Z", + "lastTimestamp": "2021-01-02T09:19:00Z" + }, + { + "variable": "series_4", + "filledNARatio": 0.0004999999999999449, + "effectiveCount": 1999, + "firstTimestamp": "2021-01-01T00:01:00Z", + "lastTimestamp": "2021-01-02T09:19:00Z" + } + ] + } + } + } + ], + "currentCount": 42, + "maxCount": 1000, + "nextLink": "" +} +``` ++The response contains four fields, `models`, `currentCount`, `maxCount`, and `nextLink`. ++* **models**: This contains the created time, last updated time, model ID, display name, variable counts, and the status of each model. +* **currentCount**: This contains the number of trained multivariate models in your Anomaly Detector resource. +* **maxCount**: The maximum number of models supported by your Anomaly Detector resource, which will be differentiated by the pricing tier that you choose. +* **nextLink**: This could be used to fetch more models since maximum models that will be listed in this API response is **10**. ++## Next steps ++* [Best practices of multivariate anomaly detection](../concepts/best-practices-multivariate.md) |
| cognitive-services | Whats New | https://github.com/MicrosoftDocs/azure-docs/commits/main/articles/cognitive-services/Anomaly-Detector/whats-new.md | description: This article is regularly updated with news about the Azure Cogniti Previously updated : 06/03/2022 Last updated : 11/01/2022 # What's new in Anomaly Detector We've also added links to some user-generated content. Those items will be marke ## Release notes +### Nov 2022 ++* Multivariate Anomaly Detection is now a generally available feature in Anomaly Detector service, with a better user experience and better model performance. Learn more about [how to use latest Multivariate Anomaly Detection](quickstarts/client-libraries-multivariate.md). ++### June 2022 ++* New blog released: [4 sets of best practices to use Multivariate Anomaly Detector when monitoring your equipment](https://techcommunity.microsoft.com/t5/ai-cognitive-services-blog/4-sets-of-best-practices-to-use-multivariate-anomaly-detector/ba-p/3490848#footerContent). + ### May 2022 * New blog released: [Detect anomalies in equipment with Multivariate Anomaly Detector in Azure Databricks](https://techcommunity.microsoft.com/t5/ai-cognitive-services-blog/detect-anomalies-in-equipment-with-anomaly-detector-in-azure/ba-p/3390688). |
| cognitive-services | Overview Ocr | https://github.com/MicrosoftDocs/azure-docs/commits/main/articles/cognitive-services/Computer-vision/overview-ocr.md | Title: What is Optical Character Recognition (OCR)? + Title: OCR - Optical Character Recognition -description: The optical character recognition (OCR) service extracts print and handwritten text from images. +description: Learn how the optical character recognition (OCR) services extract print and handwritten text from images and documents in global languages. -# What is Optical Character Recognition (OCR) +# OCR - Optical Character Recognition OCR or Optical Character Recognition is also referred to as text recognition or text extraction. Machine-learning based OCR techniques allow you to extract printed or handwritten text from images, such as posters, street signs and product labels, as well as from documents like articles, reports, forms, and invoices. The text is typically extracted as words, text lines, and paragraphs or text blocks, enabling access to digital version of the scanned text. This eliminates or significantly reduces the need for manual data entry. OCR or Optical Character Recognition is also referred to as text recognition or Intelligent Document Processing (IDP) uses OCR as its foundational technology to additionally extract structure, relationships, key-values, entities, and other document-centric insights with an advanced machine-learning based AI service like [Form Recognizer](../../applied-ai-services/form-recognizer/overview.md). Form Recognizer includes a document-optimized version of **Read** as its OCR engine while delegating to other models for higher-end insights. If you are extracting text from scanned and digital documents, use [Form Recognizer Read OCR](../../applied-ai-services/form-recognizer/concept-read.md). -## Read OCR engine +## OCR engine Microsoft's **Read** OCR engine is composed of multiple advanced machine-learning based models supporting [global languages](./language-support.md). This allows them to extract printed and handwritten text including mixed languages and writing styles. **Read** is available as cloud service and on-premises container for deployment flexibility. With the latest preview, it's also available as a synchronous API for single, non-document, image-only scenarios with performance enhancements that make it easier to implement OCR-assisted user experiences. +> [!WARNING] +> The Computer Vision legacy [ocr](https://westus.dev.cognitive.microsoft.com/docs/services/computer-vision-v3-2/operations/56f91f2e778daf14a499f20d) and [RecognizeText](https://westus.dev.cognitive.microsoft.com/docs/services/5cd27ec07268f6c679a3e641/operations/587f2c6a1540550560080311) operations are no longer supported and should not be used. + [!INCLUDE [read-editions](includes/read-editions.md)] ## How to use OCR Try out OCR by using Vision Studio. Then follow one of the links to the Read edi :::image type="content" source="Images/vision-studio-ocr-demo.png" alt-text="Screenshot: Read OCR demo in Vision Studio."::: -## Supported languages +## OCR supported languages Both **Read** versions available today in Computer Vision support several languages for printed and handwritten text. OCR for printed text includes support for English, French, German, Italian, Portuguese, Spanish, Chinese, Japanese, Korean, Russian, Arabic, Hindi, and other international languages that use Latin, Cyrillic, Arabic, and Devanagari scripts. OCR for handwritten text includes support for English, Chinese Simplified, French, German, Italian, Japanese, Korean, Portuguese, and Spanish languages. Refer to the full list of [OCR-supported languages](./language-support.md#optical-character-recognition-ocr). -## Read OCR common features +## OCR common features The Read OCR model is available in Computer Vision and Form Recognizer with common baseline capabilities while optimizing for respective scenarios. The following list summarizes the common features: The Read OCR model is available in Computer Vision and Form Recognizer with comm * Support for mixed languages, mixed mode (print and handwritten) * Available as Distroless Docker container for on-premises deployment -## Use the cloud APIs or deploy on-premises +## Use the OCR cloud APIs or deploy on-premises The cloud APIs are the preferred option for most customers because of their ease of integration and fast productivity out of the box. Azure and the Computer Vision service handle scale, performance, data security, and compliance needs while you focus on meeting your customers' needs. For on-premises deployment, the [Read Docker container (preview)](./computer-vision-how-to-install-containers.md) enables you to deploy the Computer Vision v3.2 generally available OCR capabilities in your own local environment. Containers are great for specific security and data governance requirements. -> [!WARNING] -> The Computer Vision [ocr](https://westus.dev.cognitive.microsoft.com/docs/services/computer-vision-v3-2/operations/56f91f2e778daf14a499f20d) and [RecognizeText](https://westus.dev.cognitive.microsoft.com/docs/services/5cd27ec07268f6c679a3e641/operations/587f2c6a1540550560080311) operations are no longer supported and should not be used. --## Data privacy and security +## OCR data privacy and security As with all of the Cognitive Services, developers using the Computer Vision service should be aware of Microsoft's policies on customer data. See the [Cognitive Services page](https://www.microsoft.com/trustcenter/cloudservices/cognitiveservices) on the Microsoft Trust Center to learn more. ## Next steps -- For general (non-document) images, try the [Computer Vision 4.0 preview Image Analysis REST API quickstart](./concept-ocr.md).-- For PDF, Office and HTML documents and document images, start with [Form Recognizer Read](../../applied-ai-services/form-recognizer/concept-read.md).+- OCR for general (non-document) images - try the [Computer Vision 4.0 preview Image Analysis REST API quickstart](./concept-ocr.md). +- OCR for PDF, Office and HTML documents and document images, start with [Form Recognizer Read](../../applied-ai-services/form-recognizer/concept-read.md). - Looking for the previous GA version? Refer to the [Computer Vision 3.2 GA SDK or REST API quickstarts](./quickstarts-sdk/client-library.md). |
| cognitive-services | Developer Guide | https://github.com/MicrosoftDocs/azure-docs/commits/main/articles/cognitive-services/language-service/concepts/developer-guide.md | The conversation analysis authoring API enables you to author custom models and * [Conversational language understanding](../conversational-language-understanding/quickstart.md?pivots=rest-api) * [Orchestration workflow](../orchestration-workflow/quickstart.md?pivots=rest-api) -As you use this API in your application, see the [reference documentation](/rest/api/language/conversational-analysis-authoring) for additional information. +As you use this API in your application, see the [reference documentation](/rest/api/language/2022-05-01/conversational-analysis-authoring) for additional information. ### Conversation analysis runtime API It additionally enables you to use the following features, without creating any * [Conversation summarization](../summarization/quickstart.md?pivots=rest-api&tabs=conversation-summarization) * [Personally Identifiable Information (PII) detection for conversations](../personally-identifiable-information/how-to-call-for-conversations.md?tabs=rest-api#examples) -As you use this API in your application, see the [reference documentation](/rest/api/language/conversation-analysis-runtime) for additional information. +As you use this API in your application, see the [reference documentation](/rest/api/language/2022-05-01/conversation-analysis-runtime) for additional information. ### Text analysis authoring API The text analysis authoring API enables you to author custom models and create/m * [Custom named entity recognition](../custom-named-entity-recognition/quickstart.md?pivots=rest-api) * [Custom text classification](../custom-text-classification/quickstart.md?pivots=rest-api) -As you use this API in your application, see the [reference documentation](/rest/api/language/text-analysis-authoring) for additional information. +As you use this API in your application, see the [reference documentation](/rest/api/language/2022-05-01/text-analysis-authoring) for additional information. ### Text analysis runtime API It additionally enables you to use the following features, without creating any * [Sentiment analysis and opinion mining](../sentiment-opinion-mining/quickstart.md?pivots=rest-api) * [Text analytics for health](../text-analytics-for-health/quickstart.md?pivots=rest-api) -As you use this API in your application, see the [reference documentation](/rest/api/language/text-analysis-runtime) for additional information. +As you use this API in your application, see the [reference documentation](/rest/api/language/2022-05-01/text-analysis-runtime/analyze-text) for additional information. ### Question answering APIs |
| cognitive-services | Role Based Access Control | https://github.com/MicrosoftDocs/azure-docs/commits/main/articles/cognitive-services/language-service/concepts/role-based-access-control.md | A user that should only be validating and reviewing the Language apps, typically :::column-end::: :::column span=""::: All GET APIs under: - * [Language authoring conversational language understanding APIs](/rest/api/language/conversational-analysis-authoring) - * [Language authoring text analysis APIs](/rest/api/language/text-analysis-authoring) + * [Language authoring conversational language understanding APIs](/rest/api/language/2022-05-01/conversational-analysis-authoring) + * [Language authoring text analysis APIs](/rest/api/language/2022-05-01/text-analysis-authoring) * [Question answering projects](/rest/api/cognitiveservices/questionanswering/question-answering-projects) Only `TriggerExportProjectJob` POST operation under: - * [Language authoring conversational language understanding export API](/rest/api/language/conversational-analysis-authoring/export?tabs=HTTP) - * [Language authoring text analysis export API](/rest/api/language/text-analysis-authoring/export?tabs=HTTP) + * [Language authoring conversational language understanding export API](/rest/api/language/2022-05-01/text-analysis-authoring/export) + * [Language authoring text analysis export API](/rest/api/language/2022-05-01/text-analysis-authoring/export) Only Export POST operation under: * [Question Answering Projects](/rest/api/cognitiveservices/questionanswering/question-answering-projects/export) All the Batch Testing Web APIs- *[Language Runtime CLU APIs](/rest/api/language/conversation-analysis-runtime) - *[Language Runtime Text Analysis APIs](/rest/api/language/text-analysis-runtime) + *[Language Runtime CLU APIs](/rest/api/language/2022-05-01/conversation-analysis-runtime) + *[Language Runtime Text Analysis APIs](/rest/api/language/2022-05-01/text-analysis-runtime/analyze-text) :::column-end::: :::row-end::: A user that is responsible for building and modifying an application, as a colla :::column span=""::: * All APIs under Language reader * All POST, PUT and PATCH APIs under:- * [Language conversational language understanding APIs](/rest/api/language/conversational-analysis-authoring) - * [Language text analysis APIs](/rest/api/language/text-analysis-authoring) + * [Language conversational language understanding APIs](/rest/api/language/2022-05-01/conversational-analysis-authoring) + * [Language text analysis APIs](/rest/api/language/2022-05-01/text-analysis-authoring) * [question answering projects](/rest/api/cognitiveservices/questionanswering/question-answering-projects) Except for * Delete deployment These users are the gatekeepers for the Language applications in production envi :::column-end::: :::column span=""::: All APIs available under:- * [Language authoring conversational language understanding APIs](/rest/api/language/conversational-analysis-authoring) - * [Language authoring text analysis APIs](/rest/api/language/text-analysis-authoring) + * [Language authoring conversational language understanding APIs](/rest/api/language/2022-05-01/conversational-analysis-authoring) + * [Language authoring text analysis APIs](/rest/api/language/2022-05-01/text-analysis-authoring) * [question answering projects](/rest/api/cognitiveservices/questionanswering/question-answering-projects) :::column-end::: |
| cognitive-services | Use Asynchronously | https://github.com/MicrosoftDocs/azure-docs/commits/main/articles/cognitive-services/language-service/concepts/use-asynchronously.md | When you send asynchronous requests, you will incur charges based on number of t ## Submit an asynchronous job using the REST API -To submit an asynchronous job, review the [reference documentation](/rest/api/language/text-analysis-runtime/submit-job) for the JSON body you'll send in your request. +To submit an asynchronous job, review the [reference documentation](/rest/api/language/2022-05-01/text-analysis-runtime/submit-job) for the JSON body you'll send in your request. 1. Add your documents to the `analysisInput` object. 1. In the `tasks` object, include the operations you want performed on your data. For example, if you wanted to perform sentiment analysis, you would include the `SentimentAnalysisLROTask` object. 1. You can optionally: 1. Choose a specific [version of the model](model-lifecycle.md) used on your data.- 1. Include additional Language ervice features in the `tasks` object, to be performed on your data at the same time. + 1. Include additional Language service features in the `tasks` object, to be performed on your data at the same time. Once you've created the JSON body for your request, add your key to the `Ocp-Apim-Subscription-Key` header. Then send your API request to job creation endpoint. For example: A successful call will return a 202 response code. The `operation-location` in t GET {Endpoint}/language/analyze-text/jobs/12345678-1234-1234-1234-12345678?api-version=2022-05-01 ``` -To [get the status and retrieve the results](/rest/api/language/text-analysis-runtime/job-status) of the request, send a GET request to the URL you received in the `operation-location` header from the previous API response. Remember to include your key in the `Ocp-Apim-Subscription-Key`. The response will include the results of your API call. +To [get the status and retrieve the results](/rest/api/language/2022-05-01/text-analysis-runtime/job-status) of the request, send a GET request to the URL you received in the `operation-location` header from the previous API response. Remember to include your key in the `Ocp-Apim-Subscription-Key`. The response will include the results of your API call. ## Send asynchronous API requests using the client library |
| cognitive-services | Migrate From Luis | https://github.com/MicrosoftDocs/azure-docs/commits/main/articles/cognitive-services/language-service/conversational-language-understanding/how-to/migrate-from-luis.md | The following table presents a side-by-side comparison between the features of L |Role-Based Access Control (RBAC) for LUIS resources |Role-Based Access Control (RBAC) available for Language resources |Language resource RBAC must be [manually added after migration](../../concepts/role-based-access-control.md). | |Single training mode| Standard and advanced [training modes](#how-are-the-training-times-different-in-clu-how-is-standard-training-different-from-advanced-training) | Training will be required after application migration. | |Two publishing slots and version publishing |Ten deployment slots with custom naming | Deployment will be required after the applicationΓÇÖs migration and training. |-|LUIS authoring APIs and SDK support in .NET, Python, Java, and Node.js |[CLU Authoring REST APIs](/rest/api/language/conversational-analysis-authoring). | For more information, see the [quickstart article](../quickstart.md?pivots=rest-api) for information on the CLU authoring APIs. [Refactoring](#do-i-have-to-refactor-my-code-if-i-migrate-my-applications-from-luis-to-clu) will be necessary to use the CLU authoring APIs. | -|LUIS Runtime APIs and SDK support in .NET, Python, Java, and Node.js |[CLU Runtime APIs](/rest/api/language/conversation-analysis-runtime). CLU Runtime SDK support for [.NET](/dotnet/api/overview/azure/ai.language.conversations-readme) and [Python](/python/api/overview/azure/ai-language-conversations-readme?view=azure-python-preview&preserve-view=true). | See [how to call the API](../how-to/call-api.md#use-the-client-libraries-azure-sdk) for more information. [Refactoring](#do-i-have-to-refactor-my-code-if-i-migrate-my-applications-from-luis-to-clu) will be necessary to use the CLU runtime API response. | +|LUIS authoring APIs and SDK support in .NET, Python, Java, and Node.js |[CLU Authoring REST APIs](/rest/api/language/2022-05-01/conversational-analysis-authoring). | For more information, see the [quickstart article](../quickstart.md?pivots=rest-api) for information on the CLU authoring APIs. [Refactoring](#do-i-have-to-refactor-my-code-if-i-migrate-my-applications-from-luis-to-clu) will be necessary to use the CLU authoring APIs. | +|LUIS Runtime APIs and SDK support in .NET, Python, Java, and Node.js |[CLU Runtime APIs](/rest/api/language/2022-05-01/conversation-analysis-runtime). CLU Runtime SDK support for [.NET](/dotnet/api/overview/azure/ai.language.conversations-readme) and [Python](/python/api/overview/azure/ai-language-conversations-readme?view=azure-python-preview&preserve-view=true). | See [how to call the API](../how-to/call-api.md#use-the-client-libraries-azure-sdk) for more information. [Refactoring](#do-i-have-to-refactor-my-code-if-i-migrate-my-applications-from-luis-to-clu) will be necessary to use the CLU runtime API response. | ## Migrate your LUIS applications The API objects of CLU applications are different from LUIS and therefore code r If you are using the LUIS [programmatic](https://westus.dev.cognitive.microsoft.com/docs/services/luis-programmatic-apis-v3-0-preview/operations/5890b47c39e2bb052c5b9c40) and [runtime](https://westus.dev.cognitive.microsoft.com/docs/services/luis-endpoint-api-v3-0/operations/5cb0a9459a1fe8fa44c28dd8) APIs, you can replace them with their equivalent APIs. -[CLU authoring APIs](/rest/api/language/conversational-analysis-authoring): Instead of LUIS's specific CRUD APIs for individual actions such as _add utterance_, _delete entity_, and _rename intent_, CLU offers an [import API](/rest/api/language/conversational-analysis-authoring/import) that replaces the full content of a project using the same name. If your service used LUIS programmatic APIs to provide a platform for other customers, you must consider this new design paradigm. All other APIs such as: _listing projects_, _training_, _deploying_, and _deleting_ are available. APIs for actions such as _importing_ and _deploying_ are asynchronous operations instead of synchronous as they were in LUIS. +[CLU authoring APIs](/rest/api/language/2022-05-01/conversational-analysis-authoring): Instead of LUIS's specific CRUD APIs for individual actions such as _add utterance_, _delete entity_, and _rename intent_, CLU offers an [import API](/rest/api/language/2022-05-01/conversational-analysis-authoring/import) that replaces the full content of a project using the same name. If your service used LUIS programmatic APIs to provide a platform for other customers, you must consider this new design paradigm. All other APIs such as: _listing projects_, _training_, _deploying_, and _deleting_ are available. APIs for actions such as _importing_ and _deploying_ are asynchronous operations instead of synchronous as they were in LUIS. -[CLU runtime APIs](/rest/api/language/conversation-analysis-runtime/analyze-conversation): The new API request and response includes many of the same parameters such as: _query_, _prediction_, _top intent_, _intents_, _entities_, and their values. The CLU response object offers a more straightforward approach. Entity predictions are provided as they are within the utterance text, and any additional information such as resolution or list keys are provided in extra parameters called `extraInformation` and `resolution`. See the [reference documentation](/rest/api/language/conversation-analysis-runtime/analyze-conversation) for more information on the API response structure. +[CLU runtime APIs](/rest/api/language/2022-05-01/conversation-analysis-runtime): The new API request and response includes many of the same parameters such as: _query_, _prediction_, _top intent_, _intents_, _entities_, and their values. The CLU response object offers a more straightforward approach. Entity predictions are provided as they are within the utterance text, and any additional information such as resolution or list keys are provided in extra parameters called `extraInformation` and `resolution`. See the [reference documentation](/rest/api/language/2022-05-01/conversation-analysis-runtime) for more information on the API response structure. You can use the [.NET](https://github.com/Azure/azure-sdk-for-net/tree/Azure.AI.Language.Conversations_1.0.0-beta.3/sdk/cognitivelanguage/Azure.AI.Language.Conversations/samples/) or [Python](https://github.com/Azure/azure-sdk-for-python/blob/azure-ai-language-conversations_1.1.0b1/sdk/cognitivelanguage/azure-ai-language-conversations/samples/README.md) CLU runtime SDK to replace the LUIS runtime SDK. There is currently no authoring SDK available for CLU. |
| cognitive-services | Entity Resolutions | https://github.com/MicrosoftDocs/azure-docs/commits/main/articles/cognitive-services/language-service/named-entity-recognition/concepts/entity-resolutions.md | Title: Entity resolutions provided by Named Entity Recognition description: Learn about entity resolutions in the NER feature. -+ Last updated 10/12/2022-+ |
| cognitive-services | Named Entity Categories | https://github.com/MicrosoftDocs/azure-docs/commits/main/articles/cognitive-services/language-service/named-entity-recognition/concepts/named-entity-categories.md | Title: Entity categories recognized by Named Entity Recognition in Azure Cogniti description: Learn about the entities the NER feature can recognize from unstructured text. -+ Last updated 11/02/2021-+ |
| cognitive-services | How To Call | https://github.com/MicrosoftDocs/azure-docs/commits/main/articles/cognitive-services/language-service/named-entity-recognition/how-to-call.md | Title: How to perform Named Entity Recognition (NER) description: This article will show you how to extract named entities from text. -+ Last updated 03/01/2022-+ |
| cognitive-services | Language Support | https://github.com/MicrosoftDocs/azure-docs/commits/main/articles/cognitive-services/language-service/named-entity-recognition/language-support.md | Title: Named Entity Recognition (NER) language support description: This article explains which natural languages are supported by the NER feature of Azure Cognitive Service for Language. -+ Last updated 06/27/2022-+ |
| cognitive-services | Overview | https://github.com/MicrosoftDocs/azure-docs/commits/main/articles/cognitive-services/language-service/named-entity-recognition/overview.md | Title: What is the Named Entity Recognition (NER) feature in Azure Cognitive Ser description: An overview of the Named Entity Recognition feature in Azure Cognitive Services, which helps you extract categories of entities in text. -+ Last updated 06/15/2022-+ |
| cognitive-services | Quickstart | https://github.com/MicrosoftDocs/azure-docs/commits/main/articles/cognitive-services/language-service/named-entity-recognition/quickstart.md | Title: "Quickstart: Use the NER client library" description: Use this quickstart to start using the Named Entity Recognition (NER) API. -+ Last updated 08/15/2022-+ ms.devlang: csharp, java, javascript, python keywords: text mining, key phrase |
| cognitive-services | Extract Excel Information | https://github.com/MicrosoftDocs/azure-docs/commits/main/articles/cognitive-services/language-service/named-entity-recognition/tutorials/extract-excel-information.md | Title: Extract information in Excel using Power Automate description: Learn how to Extract Excel text without having to write code, using Named Entity Recognition and Power Automate. -+ Last updated 07/27/2022-+ |
| cognitive-services | Conversations Entity Categories | https://github.com/MicrosoftDocs/azure-docs/commits/main/articles/cognitive-services/language-service/personally-identifiable-information/concepts/conversations-entity-categories.md | Title: Entity categories recognized by Conversational Personally Identifiable In description: Learn about the entities the Conversational PII feature (preview) can recognize from conversation inputs. -+ Last updated 05/15/2022-+ |
| cognitive-services | Entity Categories | https://github.com/MicrosoftDocs/azure-docs/commits/main/articles/cognitive-services/language-service/personally-identifiable-information/concepts/entity-categories.md | Title: Entity categories recognized by Personally Identifiable Information (dete description: Learn about the entities the PII feature can recognize from unstructured text. -+ Last updated 11/15/2021-+ |
| cognitive-services | How To Call For Conversations | https://github.com/MicrosoftDocs/azure-docs/commits/main/articles/cognitive-services/language-service/personally-identifiable-information/how-to-call-for-conversations.md | Title: How to detect Personally Identifiable Information (PII) in conversations. description: This article will show you how to extract PII from chat and spoken transcripts and redact identifiable information. -+ Last updated 05/10/2022-+ |
| cognitive-services | How To Call | https://github.com/MicrosoftDocs/azure-docs/commits/main/articles/cognitive-services/language-service/personally-identifiable-information/how-to-call.md | Title: How to detect Personally Identifiable Information (PII) description: This article will show you how to extract PII and health information (PHI) from text and detect identifiable information. -+ Last updated 07/27/2022-+ |
| cognitive-services | Language Support | https://github.com/MicrosoftDocs/azure-docs/commits/main/articles/cognitive-services/language-service/personally-identifiable-information/language-support.md | Title: Personally Identifiable Information (PII) detection language support description: This article explains which natural languages are supported by the PII detection feature of Azure Cognitive Service for Language. -+ Last updated 08/02/2022-+ |
| cognitive-services | Overview | https://github.com/MicrosoftDocs/azure-docs/commits/main/articles/cognitive-services/language-service/personally-identifiable-information/overview.md | Title: What is the Personally Identifying Information (PII) detection feature in description: An overview of the PII detection feature in Azure Cognitive Services, which helps you extract entities and sensitive information (PII) in text. -+ Last updated 08/02/2022-+ |
| cognitive-services | Quickstart | https://github.com/MicrosoftDocs/azure-docs/commits/main/articles/cognitive-services/language-service/personally-identifiable-information/quickstart.md | Title: "Quickstart: Detect Personally Identifying Information (PII) in text" description: Use this quickstart to start using the PII detection API. -+ Last updated 08/15/2022-+ ms.devlang: csharp, java, javascript, python zone_pivot_groups: programming-languages-text-analytics |
| cognitive-services | Assertion Detection | https://github.com/MicrosoftDocs/azure-docs/commits/main/articles/cognitive-services/language-service/text-analytics-for-health/concepts/assertion-detection.md | Title: Assertion detection in Text Analytics for health description: Learn about assertion detection. -+ Last updated 11/02/2021-+ |
| cognitive-services | Health Entity Categories | https://github.com/MicrosoftDocs/azure-docs/commits/main/articles/cognitive-services/language-service/text-analytics-for-health/concepts/health-entity-categories.md | Title: Entity categories recognized by Text Analytics for health description: Learn about categories recognized by Text Analytics for health -+ Last updated 11/02/2021-+ |
| cognitive-services | Relation Extraction | https://github.com/MicrosoftDocs/azure-docs/commits/main/articles/cognitive-services/language-service/text-analytics-for-health/concepts/relation-extraction.md | Title: Relation extraction in Text Analytics for health description: Learn about relation extraction -+ Last updated 11/02/2021-+ |
| cognitive-services | Call Api | https://github.com/MicrosoftDocs/azure-docs/commits/main/articles/cognitive-services/language-service/text-analytics-for-health/how-to/call-api.md | Title: How to call Text Analytics for health description: Learn how to extract and label medical information from unstructured clinical text with Text Analytics for health. -+ Last updated 09/05/2022-+ |
| cognitive-services | Configure Containers | https://github.com/MicrosoftDocs/azure-docs/commits/main/articles/cognitive-services/language-service/text-analytics-for-health/how-to/configure-containers.md | Title: Configure Text Analytics for health containers description: Text Analytics for health containers uses a common configuration framework, so that you can easily configure and manage storage, logging and telemetry, and security settings for your containers. -+ Last updated 11/02/2021-+ |
| cognitive-services | Use Containers | https://github.com/MicrosoftDocs/azure-docs/commits/main/articles/cognitive-services/language-service/text-analytics-for-health/how-to/use-containers.md | Title: How to use Text Analytics for health containers description: Learn how to extract and label medical information on premises using Text Analytics for health Docker container. -+ Last updated 09/05/2022-+ ms.devlang: azurecli |
| cognitive-services | Language Support | https://github.com/MicrosoftDocs/azure-docs/commits/main/articles/cognitive-services/language-service/text-analytics-for-health/language-support.md | Title: Text Analytics for health language support description: "This article explains which natural languages are supported by the Text Analytics for health." -+ Last updated 9/5/2022-+ |
| cognitive-services | Overview | https://github.com/MicrosoftDocs/azure-docs/commits/main/articles/cognitive-services/language-service/text-analytics-for-health/overview.md | Title: What is the Text Analytics for health in Azure Cognitive Service for Lang description: An overview of Text Analytics for health in Azure Cognitive Services, which helps you extract medical information from unstructured text, like clinical documents. -+ Last updated 06/15/2022-+ |
| cognitive-services | Quickstart | https://github.com/MicrosoftDocs/azure-docs/commits/main/articles/cognitive-services/language-service/text-analytics-for-health/quickstart.md | Title: "Quickstart: Use the Text Analytics for health REST API and client librar description: Use this quickstart to start using Text Analytics for health. -+ Last updated 08/15/2022-+ ms.devlang: csharp, java, javascript, python keywords: text mining, health, text analytics for health |
| connectors | Connectors Create Api Sqlazure | https://github.com/MicrosoftDocs/azure-docs/commits/main/articles/connectors/connectors-create-api-sqlazure.md | +## As a developer, I want to access my SQL database from my logic app workflow. # Connect to an SQL database from workflows in Azure Logic Apps The SQL Server connector has different versions, based on [logic app type and ho | Logic app | Environment | Connector version | |--|-|-|-| **Consumption** | Multi-tenant Azure Logic Apps | Managed connector (Standard class). For more information, review the following documentation: <br><br>- [SQL Server managed connector reference](/connectors/sql) <br>- [Managed connectors in Azure Logic Apps](managed.md) | -| **Consumption** | Integration service environment (ISE) | Managed connector (Standard class) and ISE version, which has different message limits than the Standard class. For more information, review the following documentation: <br><br>- [SQL Server managed connector reference](/connectors/sql) <br>- [ISE message limits](../logic-apps/logic-apps-limits-and-config.md#message-size-limits) <br>- [Managed connectors in Azure Logic Apps](managed.md) | -| **Standard** | Single-tenant Azure Logic Apps and App Service Environment v3 (Windows plans only) | Managed connector (Azure-hosted) and built-in connector, which is [service provider based](../logic-apps/custom-connector-overview.md#service-provider-interface-implementation). The built-in version differs in the following ways: <br><br>- The built-in version doesn't have triggers. You can use the SQL managed connector trigger or a different trigger. <br><br>- The built-in version can connect directly to an SQL database and access Azure virtual networks. You don't need an on-premises data gateway.<br><br>For more information, review the following documentation: <br><br>- [SQL Server managed connector reference](/connectors/sql/) <br>- [SQL Server built-in connector reference](#built-in-connector-operations) section later in this article <br>- [Built-in connectors in Azure Logic Apps](built-in.md) | +| **Consumption** | Multi-tenant Azure Logic Apps | Managed connector, which appears in the designer under the **Standard** label. For more information, review the following documentation: <br><br>- [SQL Server managed connector reference](/connectors/sql) <br>- [Managed connectors in Azure Logic Apps](managed.md) | +| **Consumption** | Integration service environment (ISE) | Managed connector, which appears in the designer under the **Standard** label, and the ISE version, which has different message limits than the Standard class. For more information, review the following documentation: <br><br>- [SQL Server managed connector reference](/connectors/sql) <br>- [ISE message limits](../logic-apps/logic-apps-limits-and-config.md#message-size-limits) <br>- [Managed connectors in Azure Logic Apps](managed.md) | +| **Standard** | Single-tenant Azure Logic Apps and App Service Environment v3 (Windows plans only) | Managed connector, which appears in the designer under the **Azure** label, and built-in connector, which appears in the designer under the **Built-in** label and is [service provider based](../logic-apps/custom-connector-overview.md#service-provider-interface-implementation). The built-in version differs in the following ways: <br><br>- The built-in version doesn't have triggers. You can use the SQL managed connector trigger or a different trigger. <br><br>- The built-in version can connect directly to an SQL database and access Azure virtual networks. You don't need an on-premises data gateway. <br><br>For more information, review the following documentation: <br><br>- [SQL Server managed connector reference](/connectors/sql/) <br>- [SQL Server built-in connector reference](/azure/logic-apps/connectors/built-in/reference/sql/) <br>- [Built-in connectors in Azure Logic Apps](built-in.md) | -## Limitations +### Limitations -For more information, review the [SQL Server managed connector reference](/connectors/sql/) or the [SQL Server built-in connector reference](#built-in-connector-operations). +For more information, review the [SQL Server managed connector reference](/connectors/sql/) or the [SQL Server built-in connector reference](/azure/logic-apps/connectors/built-in/reference/sql/). ## Prerequisites For more information, review the [SQL Server managed connector reference](/conne You can use the SQL Server built-in connector or managed connector. - * To use the built-in connector, you can authenticate your connection with either a managed identity, Active Directory OAuth, or a connection string. You can adjust connection pooling by specifying parameters in the connection string. For more information, review [Connection Pooling](/dotnet/framework/data/adonet/connection-pooling). + * To use Azure Active Directory authentication or managed identity authentication with your logic app, you have to set up your SQL Server to work with these authentication types. For more information, see [Authentication - SQL Server managed connector reference](/connectors/sql/#authentication). ++ * To use the built-in connector, you can authenticate your connection with either a managed identity, Azure Active Directory, or a connection string. You can adjust connection pooling by specifying parameters in the connection string. For more information, review [Connection Pooling](/dotnet/framework/data/adonet/connection-pooling). * To use the SQL Server managed connector, follow the same requirements as a Consumption logic app workflow in multi-tenant Azure Logic Apps. For other connector requirements, review the [SQL Server managed connector reference](/connectors/sql/). In Standard logic app workflows, only the SQL Server managed connector has trigg When you save your workflow, this step automatically publishes your updates to your deployed logic app, which is live in Azure. With only a trigger, your workflow just checks the SQL database based on your specified schedule. You have to [add an action](#add-sql-action) that responds to the trigger. -<a name="trigger-recurrence-shift-drift"></a> --## Trigger recurrence shift and drift (daylight saving time) --Recurring connection-based triggers where you need to create a connection first, such as the SQL Server managed connector trigger, differ from built-in triggers that run natively in Azure Logic Apps, such as the [Recurrence trigger](../connectors/connectors-native-recurrence.md). For recurring connection-based triggers, the recurrence schedule isn't the only driver that controls execution, and the time zone only determines the initial start time. Subsequent runs depend on the recurrence schedule, the last trigger execution, *and* other factors that might cause run times to drift or produce unexpected behavior. For example, unexpected behavior can include failure to maintain the specified schedule when daylight saving time (DST) starts and ends. --To make sure that the recurrence time doesn't shift when DST takes effect, manually adjust the recurrence. That way, your workflow continues to run at the expected or specified start time. Otherwise, the start time shifts one hour forward when DST starts and one hour backward when DST ends. For more information, see [Recurrence for connection-based triggers](../logic-apps/concepts-schedule-automated-recurring-tasks-workflows.md#recurrence-for-connection-based-triggers). - <a name="add-sql-action"></a> ## Add a SQL Server action In this example, the logic app workflow starts with the [Recurrence trigger](../ 1. Under the **Choose an operation** search box, select either of the following options: - * **Built-in** when you want to use SQL Server [built-in actions](#built-in-connector-operations) such as **Execute query** + * **Built-in** when you want to use SQL Server [built-in actions](/azure/logic-apps/connectors/built-in/reference/sql/) such as **Execute query**  In this example, the logic app workflow starts with the [Recurrence trigger](../ 1. From the actions list, select the SQL Server action that you want. - * [Built-in actions](#built-in-connector-operations) + * [Built-in actions](/azure/logic-apps/connectors/built-in/reference/sql/) This example selects the built-in action named **Execute query**. When you call a stored procedure by using the SQL Server connector, the returned 1. To reference the JSON content properties, click inside the edit boxes where you want to reference those properties so that the dynamic content list appears. In the list, under the [**Parse JSON**](../logic-apps/logic-apps-perform-data-operations.md#parse-json-action) heading, select the data tokens for the JSON content properties that you want. -<a name="built-in-connector-app-settings"></a> --## Built-in connector app settings --In a Standard logic app resource, the SQL Server built-in connector includes app settings that control various thresholds for performance, throughput, capacity, and so on. For example, you can change the query timeout value from 30 seconds. For more information, review [Reference for app settings - local.settings.json](../logic-apps/edit-app-settings-host-settings.md#reference-local-settings-json). --<a name="built-in-connector-operations"></a> --## SQL built-in connector operations --The SQL Server built-in connector is available only for Standard logic app workflows and provides the following actions, but no triggers: --| Action | Description | -|--|-| -| [**Delete rows**](#delete-rows) | Deletes and returns the table rows that match the specified **Where condition** value. | -| [**Execute query**](#execute-query) | Runs a query on an SQL database. | -| [**Execute stored procedure**](#execute-stored-procedure) | Runs a stored procedure on an SQL database. | -| [**Get rows**](#get-rows) | Gets the table rows that match the specified **Where condition** value. | -| [**Get tables**](#get-tables) | Gets all the tables from the database. | -| [**Insert row**](#insert-row) | Inserts a single row in the specified table. | -| [**Update rows**](#update-rows) | Updates the specified columns in all the table rows that match the specified **Where condition** value using the **Set columns** column names and values. | --<a name="delete-rows"></a> --### Delete rows --Operation ID: `deleteRows` --Deletes and returns the table rows that match the specified **Where condition** value. --#### Parameters --| Name | Key | Required | Type | Description | -||--|-||-| -| **Table name** | `tableName` | True | String | The name for the table | -| **Where condition** | `columnValuesForWhereCondition` | True | Object | This object contains the column names and corresponding values used for selecting the rows to delete. To provide this information, follow the *key-value* pair format, for example, *columnName* and *columnValue*, which also lets you specify single or specific rows to delete. | --#### Returns --| Name | Type | -||| -| **Result** | An array object that returns all the deleted rows. Each row contains the column name and the corresponding deleted value. | -| **Result Item** | An array object that returns one deleted row at a time. A **For each** loop is automatically added to your workflow to iterate through the array. Each row contains the column name and the corresponding deleted value. | --*Example* --The following example shows sample parameter values for the **Delete rows** action: --**Sample values** --| Parameter | JSON name | Sample value | -|--|--|--| -| **Table name** | `tableName` | tableName1 | -| **Where condition** | `columnValuesForWhereCondition` | Key-value pairs: <br><br>- <*columnName1*>, <*columnValue1*> <br><br>- <*columnName2*>, <*columnValue2*> | --**Parameters in the action's underlying JSON definition** --```json -"parameters": { - "tableName": "tableName1", - "columnValuesForWhereCondition": { - "columnName1": "columnValue1", - "columnName2": "columnValue2" - } -}, -``` --<a name="execute-query"></a> --### Execute query --Operation ID: `executeQuery` --Runs a query on an SQL database. --#### Parameters --| Name | Key | Required | Type | Description | -||--|-||-| -| **Query** | `query` | True | Dynamic | The body for your SQL query | -| **Query parameters** | `queryParameters` | False | Objects | The parameters for your query. <br><br>**Note**: If the query requires input parameters, you must provide these parameters. | --#### Returns --| Name | Type | -||| -| **Result** | An array object that returns all the query results. Each row contains the column name and the corresponding value. | -| **Result Item** | An array object that returns one query result at a time. A **For each** loop is automatically added to your workflow to iterate through the array. Each row contains the column name and the corresponding value. | --<a name="execute-stored-procedure"></a> --### Execute stored procedure --Operation ID: `executeStoredProcedure` --Runs a stored procedure on an SQL database. --#### Parameters --| Name | Key | Required | Type | Description | -||--|-||-| -| **Procedure name** | `storedProcedureName` | True | String | The name for your stored procedure | -| **Parameters** | `storedProcedureParameters` | False | Dynamic | The parameters for your stored procedure. <br><br>**Note**: If the stored procedure requires input parameters, you must provide these parameters. | --#### Returns --| Name | Type | -||| -| **Result** | An object that contains the result sets array, return code, and output parameters | -| **Result Result Sets** | An object array that contains all the result sets from the stored procedure, which might return zero, one, or multiple result sets. | -| **Result Return Code** | An integer that represents the status code from the stored procedure | -| **Result Stored Procedure Parameters** | An object that contains the final values of the stored procedure's output and input-output parameters | -| **Status Code** | The status code from the **Execute stored procedure** operation | --<a name="get-rows"></a> --### Get rows --Operation ID: `getRows` --Gets the table rows that match the specified **Where condition** value. --#### Parameters --| Name | Key | Required | Type | Description | -||--|-||-| -| **Table name** | `tableName` | True | String | The name for the table | -| **Where condition** | `columnValuesForWhereCondition` | False | Dynamic | This object contains the column names and corresponding values used for selecting the rows to get. To provide this information, follow the *key-value* pair format, for example, *columnName* and *columnValue*, which also lets you specify single or specific rows to get. | --#### Returns --| Name | Type | -||| -| **Result** | An array object that returns all the row results. | -| **Result Item** | An array object that returns one row result at a time. A **For each** loop is automatically added to your workflow to iterate through the array. | --*Example* --The following example shows sample parameter values for the **Get rows** action: --**Sample values** --| Parameter | JSON name | Sample value | -|--|--|--| -| **Table name** | `tableName` | tableName1 | -| **Where condition** | `columnValuesForWhereCondition` | Key-value pairs: <br><br>- <*columnName1*>, <*columnValue1*> <br><br>- <*columnName2*>, <*columnValue2*> | --**Parameters in the action's underlying JSON definition** --```json -"parameters": { - "tableName": "tableName1", - "columnValuesForWhereCondition": { - "columnName1": "columnValue1", - "columnName2": "columnValue2" - } -}, -``` --<a name="get-tables"></a> --### Get tables --Operation ID: `getTables` --Gets a list of all the tables in the database. --#### Parameters --None. --#### Returns --| Name | Type | -||| -| **Result** | An array object that contains the full names and display names for all tables in the database. | -| **Result Display Name** | An array object that contains the display name for each table in the database. A **For each** loop is automatically added to your workflow to iterate through the array. | -| **Result Full Name** | An array object that contains the full name for each table in the database. A **For each** loop is automatically added to your workflow to iterate through the array. | -| **Result Item** | An array object that returns the full name and display name one at time for each table. A **For each** loop is automatically added to your workflow to iterate through the array. | --<a name="insert-row"></a> --### Insert row --Operation ID: `insertRow` --Inserts a single row in the specified table. --| Name | Key | Required | Type | Description | -||--|-||-| -| **Table name** | `tableName` | True | String | The name for the table | -| **Set columns** | `setColumns` | False | Dynamic | This object contains the column names and corresponding values to insert. To provide this information, follow the *key-value* pair format, for example, *columnName* and *columnValue*. If the table has columns with default or autogenerated values, you can leave this field empty. | --#### Returns --| Name | Type | -||| -| **Result** | The inserted row, including the names and values of any autogenerated, default, and null value columns. | --<a name="update-rows"></a> --### Update rows --Operation ID: `updateRows` --Updates the specified columns in all the table rows that match the specified **Where condition** value using the **Set columns** column names and values. --| Name | Key | Required | Type | Description | -||--|-||-| -| **Table name** | `tableName` | True | String | The name for the table | -| **Where condition** | `columnValuesForWhereCondition` | True | Dynamic | This object contains the column names and corresponding values for selecting the rows to update. To provide this information, follow the *key-value* pair format, for example, *columnName* and *columnValue*, which also lets you specify single or specific rows to update. | -| **Set columns** | `setColumns` | True | Dynamic | This object contains the column names and the corresponding values to use for the update. To provide this information, follow the *key-value* pair format, for example, *columnName* and *columnValue*. | --#### Returns --| Name | Type | -||| -| **Result** | An array object that returns all the columns for the updated rows. | -| **Result Item** | An array object that returns one column at a time from the updated rows. A **For each** loop is automatically added to your workflow to iterate through the array. | --*Example* --The following example shows sample parameter values for the **Update rows** action: --**Sample values** --| Parameter | JSON name | Sample value | -|--|--|--| -| **Table name** | `tableName` | tableName1 | -| **Where condition** | `columnValuesForWhereCondition` | Key-value pairs: <br><br>- <*columnName1*>, <*columnValue1*> <br><br>- <*columnName2*>, <*columnValue2*> | --**Parameters in the action's underlying JSON definition** --```json -"parameters": { - "tableName": "tableName1", - "columnValuesForWhereCondition": { - "columnName1": "columnValue1", - "columnName2": "columnValue2" - } -}, -``` --## Troubleshoot problems --<a name="connection-problems"></a> --### Connection problems --Connection problems can commonly happen, so to troubleshoot and resolve these kinds of issues, review [Solving connectivity errors to SQL Server](https://support.microsoft.com/help/4009936/solving-connectivity-errors-to-sql-server). The following list provides some examples: --* **A network-related or instance-specific error occurred while establishing a connection to SQL Server. The server was not found or was not accessible. Verify that the instance name is correct and that SQL Server is configured to allow remote connections.** --* **(provider: Named Pipes Provider, error: 40 - Could not open a connection to SQL Server) (Microsoft SQL Server, Error: 53)** --* **(provider: TCP Provider, error: 0 - No such host is known.) (Microsoft SQL Server, Error: 11001)** - ## Next steps * [Managed connectors for Azure Logic Apps](/connectors/connector-reference/connector-reference-logicapps-connectors)-* [Built-in connectors for Azure Logic Apps](built-in.md) +* [Built-in connectors for Azure Logic Apps](built-in.md) |
| container-instances | Container Instances Github Action | https://github.com/MicrosoftDocs/azure-docs/commits/main/articles/container-instances/container-instances-github-action.md | az role assignment create \ ### Save credentials to GitHub repo -1. In the GitHub UI, navigate to your forked repository and select **Settings** > **Secrets** > **Actions**. +1. In the GitHub UI, navigate to your forked repository and select **Security > Secrets and variables > Actions**. 1. Select **New repository secret** to add the following secrets: |
| container-registry | Container Registry Delete | https://github.com/MicrosoftDocs/azure-docs/commits/main/articles/container-registry/container-registry-delete.md | To maintain the size of a repository or registry, you might need to periodically The following Azure CLI command lists all manifest digests in a repository older than a specified timestamp, in ascending order. Replace `<acrName>` and `<repositoryName>` with values appropriate for your environment. The timestamp could be a full date-time expression or a date, as in this example. ```azurecli-az acr manifest list-metadata --name <repositoryName> --registry <acrName> <repositoryName> \ +az acr manifest list-metadata --name <repositoryName> --registry <acrName> \ --orderby time_asc -o tsv --query "[?lastUpdateTime < '2019-04-05'].[digest, lastUpdateTime]" ``` |
| container-registry | Container Registry Geo Replication | https://github.com/MicrosoftDocs/azure-docs/commits/main/articles/container-registry/container-registry-geo-replication.md | A geo-replicated registry provides the following benefits: > * If you need to maintain copies of container images in more than one Azure container registry, Azure Container Registry also supports [image import](container-registry-import-images.md). For example, in a DevOps workflow, you can import an image from a development registry to a production registry, without needing to use Docker commands. > * If you want to move a registry to a different Azure region, instead of geo-replicating the registry, see [Manually move a container registry to another region](manual-regional-move.md). +## Prerequisites ++* The user will require following permissions (at registry level) to create/delete replications: ++ | Permission | Description | + ||| + | Microsoft.ContainerRegistry/registries/write | Create a replication | + | Microsoft.ContainerRegistry/registries/replications/write | Delete a replication | + ## Example use case Contoso runs a public presence website located across the US, Canada, and Europe. To serve these markets with local and network-close content, Contoso runs [Azure Kubernetes Service](../aks/index.yml) (AKS) clusters in West US, East US, Canada Central, and West Europe. The website application, deployed as a Docker image, utilizes the same code and image across all regions. Content, local to that region, is retrieved from a database, which is provisioned uniquely in each region. Each regional deployment has its unique configuration for resources like the local database. |
| container-registry | Container Registry Helm Repos | https://github.com/MicrosoftDocs/azure-docs/commits/main/articles/container-registry/container-registry-helm-repos.md | Run `helm registry login` to authenticate with the registry. You may pass [regi ``` - Authenticate with a [repository scoped token](container-registry-repository-scoped-permissions.md) (Preview). ```azurecli- USER_NAME="helm-token" + USER_NAME="helmtoken" PASSWORD=$(az acr token create -n $USER_NAME \ -r $ACR_NAME \ --scope-map _repositories_admin \ |
| container-registry | Container Registry Import Images | https://github.com/MicrosoftDocs/azure-docs/commits/main/articles/container-registry/container-registry-import-images.md | In the following example, *mysourceregistry* is in a different subscription from ```azurecli az acr import \ --name myregistry \- --source samples/aci-helloworld:latest \ + --source aci-helloworld:latest \ --image aci-hello-world:latest \ --registry /subscriptions/00000000-0000-0000-0000-000000000000/resourceGroups/sourceResourceGroup/providers/Microsoft.ContainerRegistry/registries/mysourceregistry ``` |
| container-registry | Container Registry Transfer Troubleshooting | https://github.com/MicrosoftDocs/azure-docs/commits/main/articles/container-registry/container-registry-transfer-troubleshooting.md | +* **Problems accessing Key Vault**<a name="problems-accessing-key-vault"></a> + * If your pipelineRun deployment fails with a `403 Forbidden` error when accessing Azure Key Vault, verify that your pipeline managed identity has adequate permissions. + * A pipelineRun uses the exportPipeline or importPipeline managed identity to fetch the SAS token secret from your Key Vault. ExportPipelines and importPipelines are provisioned with either a system-assigned or user-assigned managed identity. This managed identity is required to have `secret get` permissions on the Key Vault in order to read the SAS token secret. Ensure that an access policy for the managed identity was added to the Key Vault. For more information, reference [Give the ExportPipeline identity keyvault policy access](./container-registry-transfer-cli.md#give-the-exportpipeline-identity-keyvault-policy-access) and [Give the ImportPipeline identity keyvault policy access](./container-registry-transfer-cli.md#give-the-importpipeline-identity-keyvault-policy-access). * **Problems accessing storage**<a name="problems-accessing-storage"></a> * If you see a `403 Forbidden` error from storage, you likely have a problem with your SAS token. * The SAS token might not currently be valid. The SAS token might be expired or the storage account keys might have changed since the SAS token was created. Verify that the SAS token is valid by attempting to use the SAS token to authenticate for access to the storage account container. For example, put an existing blob endpoint followed by the SAS token in the address bar of a new Microsoft Edge InPrivate window or upload a blob to the container with the SAS token by using `az storage blob upload`.-[az-resource-delete]: /cli/azure/resource#az_resource_delete +[az-resource-delete]: /cli/azure/resource#az_resource_delete |
| container-registry | Github Action Scan | https://github.com/MicrosoftDocs/azure-docs/commits/main/articles/container-registry/github-action-scan.md | In this example, you'll create a three secrets that you can use to authenticate :::image type="content" source="media/github-action-scan/github-repo-settings.png" alt-text="Select Settings in the navigation."::: -1. Select **Secrets** and then **New Secret**. +1. Select **Security > Secrets and variables > Actions**. - :::image type="content" source="media/github-action-scan/azure-secret-add.png" alt-text="Choose to add a secret."::: +1. Select **New repository secret**. 1. Paste the following values for each secret created with the following values from the Azure portal by navigating to the **Access Keys** in the Container Registry. |
| container-registry | Scan Images Defender | https://github.com/MicrosoftDocs/azure-docs/commits/main/articles/container-registry/scan-images-defender.md | Last updated 10/11/2022 To scan images in your Azure container registries for vulnerabilities, you can integrate one of the available Azure Marketplace solutions or, if you want to use Microsoft Defender for Cloud, optionally enable **Microsoft Defender for container registries** at the subscription level. -* Learn more about [Microsoft Defender for container registries](../security-center/defender-for-container-registries-introduction.md) -* Learn more about [container security in Microsoft Defender for Cloud](../security-center/container-security.md) +* Learn more about [Microsoft Defender for container registries](https://learn.microsoft.com/en-us/azure/defender-for-cloud/defender-for-containers-va-acr) +* Learn more about [container security in Microsoft Defender for Cloud](https://learn.microsoft.com/en-us/azure/defender-for-cloud/defender-for-containers-introduction) ## Registry operations by Microsoft Defender for Cloud -Microsoft Defender for Cloud scans images that are pushed to a registry, imported into a registry, or any images pulled within the last 30 days. If vulnerabilities are detected, [recommended remediations](../security-center/defender-for-container-registries-usage.md#view-and-remediate-findings) appear in Microsoft Defender for Cloud. +Microsoft Defender for Cloud scans images that are pushed to a registry, imported into a registry, or any images pulled within the last 30 days. If vulnerabilities are detected, [recommended remediations](https://learn.microsoft.com/en-us/azure/defender-for-cloud/defender-for-containers-va-acr#view-and-remediate-findings) appear in Microsoft Defender for Cloud. After you've taken the recommended steps to remediate the security issue, replace the image in your registry. Microsoft Defender for Cloud rescans the image to confirm that the vulnerabilities are remediated. -For details, see [Use Microsoft Defender for container registries](../security-center/defender-for-container-registries-usage.md). +For details, see [Use Microsoft Defender for container registries](https://learn.microsoft.com/en-us/azure/defender-for-cloud/defender-for-containers-va-acr). > [!TIP] > Microsoft Defender for Cloud authenticates with the registry to pull images for vulnerability scanning. If [resource logs](monitor-service-reference.md#resource-logs) are collected for your registry, you'll see registry login events and image pull events generated by Microsoft Defender for Cloud. These events are associated with an alphanumeric ID such as `b21cb118-5a59-4628-bab0-3c3f0e434cg6`. |
| cosmos-db | How To Setup Rbac | https://github.com/MicrosoftDocs/azure-docs/commits/main/articles/cosmos-db/how-to-setup-rbac.md | The Azure Cosmos DB data plane RBAC is built on concepts that are commonly found > - [Azure PowerShell scripts](./sql/manage-with-powershell.md) > - [Azure CLI scripts](./sql/manage-with-cli.md) > - Azure management libraries available in:-> - [.NET](https://www.nuget.org/packages/Microsoft.Azure.Management.CosmosDB/) +> - [.NET](https://www.nuget.org/packages/Azure.ResourceManager.CosmosDB/) > - [Java](https://search.maven.org/artifact/com.azure.resourcemanager/azure-resourcemanager-cosmos) > - [Python](https://pypi.org/project/azure-mgmt-cosmosdb/) > |
| cosmos-db | Indexing | https://github.com/MicrosoftDocs/azure-docs/commits/main/articles/cosmos-db/mongodb/indexing.md | Regardless of the value specified for the **Background** index property, index u There is no impact to read availability when adding a new index. Queries will only utilize new indexes once the index transformation is complete. During the index transformation, the query engine will continue to use existing indexes, so you'll observe similar read performance during the indexing transformation to what you had observed before initiating the indexing change. When adding new indexes, there is also no risk of incomplete or inconsistent query results. -When removing indexes and immediately running queries the have filters on the dropped indexes, results might be inconsistent and incomplete until the index transformation finishes. If you remove indexes, the query engine does not provide consistent or complete results when queries filter on these newly removed indexes. Most developers do not drop indexes and then immediately try to query them so, in practice, this situation is unlikely. +When removing indexes and immediately running queries that have filters on the dropped indexes, results might be inconsistent and incomplete until the index transformation finishes. If you remove indexes, the query engine does not provide consistent or complete results when queries filter on these newly removed indexes. Most developers do not drop indexes and then immediately try to query them so, in practice, this situation is unlikely. > [!NOTE] > You can [track index progress](#track-index-progress). |
| cosmos-db | Quickstart Dotnet | https://github.com/MicrosoftDocs/azure-docs/commits/main/articles/cosmos-db/mongodb/quickstart-dotnet.md | Title: Quickstart - Azure Cosmos DB for MongoDB for .NET with MongoDB drier + Title: Quickstart - Azure Cosmos DB for MongoDB for .NET with MongoDB driver description: Learn how to build a .NET app to manage Azure Cosmos DB for MongoDB account resources in this quickstart. |
| data-share | How To Add Recipients | https://github.com/MicrosoftDocs/azure-docs/commits/main/articles/data-share/how-to-add-recipients.md | Title: Add recipients in Azure Data Share description: Learn how to add recipients to an existing data share in Azure Data Share.--++ Previously updated : 02/07/2022 Last updated : 10/27/2022 # How to add a recipient to your share |
| data-share | How To Delete Invitation | https://github.com/MicrosoftDocs/azure-docs/commits/main/articles/data-share/how-to-delete-invitation.md | Title: Delete an invitation in Azure Data Share description: Learn how to delete an invitation to a data share recipient in Azure Data Share.--++ Previously updated : 01/03/2022 Last updated : 10/27/2022 # How to delete an invitation to a recipient in Azure Data Share |
| data-share | How To Revoke Share Subscription | https://github.com/MicrosoftDocs/azure-docs/commits/main/articles/data-share/how-to-revoke-share-subscription.md | Title: Revoke a share subscription in Azure Data Share description: Learn how to revoke a share subscription from a recipient using Azure Data Share.--++ Previously updated : 01/03/2022 Last updated : 10/31/2022 # How to revoke a consumer's share subscription in Azure Data Share |
| data-share | Move To New Region | https://github.com/MicrosoftDocs/azure-docs/commits/main/articles/data-share/move-to-new-region.md | Title: Move Azure Data Share Accounts to another Azure region using the Azure po description: Use Azure Resource Manager template to move Azure Data Share account from one Azure region to another using the Azure portal. Previously updated : 03/17/2022 Last updated : 10/27/2022 |
| data-share | Accept Share Invitations Powershell | https://github.com/MicrosoftDocs/azure-docs/commits/main/articles/data-share/scripts/powershell/accept-share-invitations-powershell.md | Title: "PowerShell script: Accept invitation from an Azure Data Share" description: This PowerShell script accepts invitations from an existing data share. --++ Previously updated : 01/03/2022 Last updated : 10/31/2022 |
| data-share | Add Datasets Powershell | https://github.com/MicrosoftDocs/azure-docs/commits/main/articles/data-share/scripts/powershell/add-datasets-powershell.md | Title: "PowerShell script: Add a blob dataset to an Azure Data Share" description: This PowerShell script adds a blob dataset to an existing share. --++ Previously updated : 01/03/2022 Last updated : 10/31/2022 |
| data-share | Create New Share Account Powershell | https://github.com/MicrosoftDocs/azure-docs/commits/main/articles/data-share/scripts/powershell/create-new-share-account-powershell.md | Title: "PowerShell script: Create new Azure Data Share account" description: This PowerShell script creates a new Data Share account.-+ Previously updated : 01/03/2022- Last updated : 10/31/2022+ |
| data-share | Create View Trigger Powershell | https://github.com/MicrosoftDocs/azure-docs/commits/main/articles/data-share/scripts/powershell/create-view-trigger-powershell.md | Title: "PowerShell script: Create and view an Azure Data Share snapshot triggers" description: This PowerShell script creates and gets share snapshot triggers.--++ Previously updated : 01/03/2022 Last updated : 10/31/2022 |
| data-share | Monitor Usage Powershell | https://github.com/MicrosoftDocs/azure-docs/commits/main/articles/data-share/scripts/powershell/monitor-usage-powershell.md | Title: "PowerShell script: Monitor usage of an Azure Data Share" description: This PowerShell script retrieves usage metrics of a sent data share.-+ Previously updated : 01/03/2022- Last updated : 10/31/2022+ |
| data-share | Set View Synchronizations Powershell | https://github.com/MicrosoftDocs/azure-docs/commits/main/articles/data-share/scripts/powershell/set-view-synchronizations-powershell.md | Title: "PowerShell script: Set and view Azure Data Share synchronization settings" description: This PowerShell script sets and gets share synchronization settings.-+ Previously updated : 01/03/2022- Last updated : 10/31/2022+ |
| data-share | View Sent Invitations Powershell | https://github.com/MicrosoftDocs/azure-docs/commits/main/articles/data-share/scripts/powershell/view-sent-invitations-powershell.md | Title: "PowerShell script: List Azure Data Share invitations sent to a consumer" description: Learn how this PowerShell script gets invitations sent to a consumer and see an example of the script that you can use.--++ Previously updated : 01/03/2022 Last updated : 10/31/2022 |
| data-share | View Share Details Powershell | https://github.com/MicrosoftDocs/azure-docs/commits/main/articles/data-share/scripts/powershell/view-share-details-powershell.md | Title: "PowerShell script: List existing shares in Azure Data Share" description: This PowerShell script lists and displays details of shares. --++ Previously updated : 01/03/2022 Last updated : 10/31/2022 |
| defender-for-cloud | Auto Deploy Vulnerability Assessment | https://github.com/MicrosoftDocs/azure-docs/commits/main/articles/defender-for-cloud/auto-deploy-vulnerability-assessment.md | To assess your machines for vulnerabilities, you can use one of the following so Defender for Cloud also offers vulnerability assessment for your: - SQL databases - [Explore vulnerability assessment reports in the vulnerability assessment dashboard](defender-for-sql-on-machines-vulnerability-assessment.md#explore-vulnerability-assessment-reports)-- Azure Container Registry images - [Use Microsoft Defender for container registries to scan your images for vulnerabilities](defender-for-containers-va-acr.md)-- Amazon AWS Elastic Container Registry images - [Use Microsoft Defender for container registries to scan your images for vulnerabilities](defender-for-containers-va-ecr.md)+- Azure Container Registry images - [Use Microsoft Defender for container registries to scan your images for vulnerabilities](defender-for-containers-vulnerability-assessment-azure.md) +- Amazon AWS Elastic Container Registry images - [Use Microsoft Defender for container registries to scan your images for vulnerabilities](defender-for-containers-vulnerability-assessment-elastic.md) |
| defender-for-cloud | Custom Dashboards Azure Workbooks | https://github.com/MicrosoftDocs/azure-docs/commits/main/articles/defender-for-cloud/custom-dashboards-azure-workbooks.md | Learn more about using these scanners: - [Find vulnerabilities with Microsoft threat and vulnerability management](deploy-vulnerability-assessment-tvm.md) - [Find vulnerabilities with the integrated Qualys scanner](deploy-vulnerability-assessment-vm.md)-- [Scan your ACR images for vulnerabilities](defender-for-containers-va-acr.md)-- [Scan your ECR images for vulnerabilities](defender-for-containers-va-ecr.md)+- [Scan your ACR images for vulnerabilities](defender-for-containers-vulnerability-assessment-azure.md) +- [Scan your ECR images for vulnerabilities](defender-for-containers-vulnerability-assessment-elastic.md) - [Scan your SQL resources for vulnerabilities](defender-for-sql-on-machines-vulnerability-assessment.md) Findings for each resource type are reported in separate recommendations: |
| defender-for-cloud | Defender For Cloud Glossary | https://github.com/MicrosoftDocs/azure-docs/commits/main/articles/defender-for-cloud/defender-for-cloud-glossary.md | + + Title: Defender for Cloud glossary for device builder +description: The glossary provides a brief description of important Defender for Cloud platform terms and concepts. Last updated : 10/30/2022++++# Defender for Cloud glossary for device builder ++This glossary provides a brief description of important terms and concepts for the Microsoft Defender for Cloud platform. Select the **Learn more** links to go to related terms in the glossary. This will help you to learn and use the product tools quickly and effectively. ++<a name="glossary-a"></a> +## A +| Term | Description | Learn more | +|--|--|--| +|**AAC**|Adaptive application controls are an intelligent and automated solution for defining allowlists of known-safe applications for your machines. |[Adaptive Application Controls](adaptive-application-controls.md) +| **ACR Tasks** | A suite of features within Azure container registry | [Frequently asked questions - Azure Container Registry](../container-registry/container-registry-faq.yml) | +|**ADO**|Azure DevOps provides developer services for allowing teams to plan work, collaborate on code development, and build and deploy applications.|[What is Azure DevOps?](/azure/devops/user-guide/what-is-azure-devops) | +|**AKS**| Azure Kubernetes Service, Microsoft's managed service for developing, deploying, and managing containerized applications.| [Kubernetes Concepts](/azure-stack/aks-hci/kubernetes-concepts)| +|**Alerts**| Alerts defend your workloads in real-time so you can react immediately and prevent security events from developing.|[Security alerts and incidents](alerts-overview.md)| +|**ANH** | Adaptive network hardening| [Improve your network security posture with adaptive network hardening](adaptive-network-hardening.md) +|**APT** | Advanced Persistent Threats | [Video: Understanding APTs](/events/teched-2012/sia303)| +| **Arc-enabled Kubernetes**| Azure Arc-enabled Kubernetes allows you to attach and configure Kubernetes clusters running anywhere. You can connect your clusters running on other public cloud providers or clusters running on your on-premises data center.|[What is Azure Arc-enabled Logic Apps? (Preview)](../logic-apps/azure-arc-enabled-logic-apps-overview.md) +|**ARM**| Azure Resource Manager-the deployment and management service for Azure.| [Azure Resource Manager Overview](/azure/azure-resource-manager/management/overview)| +|**ASB**| Azure Security Benchmark provides recommendations on how you can secure your cloud solutions on Azure.| [Azure Security Benchmark](/azure/baselines/security-center-security-baseline) | +|**Auto-provisioning**| To make sure that your server resources are secure, Microsoft Defender for Cloud uses agents installed on your servers to send information about your servers to Microsoft Defender for Cloud for analysis. You can use auto provisioning to quietly deploy the Azure Monitor Agent on your servers.| [Configure auto provision](../iot-dps/quick-setup-auto-provision.md)| ++## B +| Term | Description | Learn more | +|--|--|--| +|**Blob storage**| Azure Blob Storage is the high scale object storage service for Azure and a key building block for data storage in Azure.| [what is Azure blob storage?](/azure/storage/blobs/storage-blobs-introduction)| ++## C +| Term | Description | Learn more | +|--|--|--| +|**Cacls** | Change access control list, Microsoft Windows native command-line utility often used for modifying the security permission on folders and files.| [access-control-lists](/windows/win32/secauthz/access-control-lists) | +|**CIS Benchmark** | (Kubernetes) Center for Internet Security benchmark| [CIS](/azure/aks/cis-kubernetes)| +|**CORS**| Cross origin resource sharing, an HTTP feature that enables a web application running under one domain to access resources in another domain.| [CORS](/rest/api/storageservices/cross-origin-resource-sharing--cors--support-for-the-azure-storage-services)| +|**CNCF**|Cloud Native Computing Foundation|[Build CNCF projects by using Azure Kubernetes service](/azure/architecture/example-scenario/apps/build-cncf-incubated-graduated-projects-aks)| +|**CSPM**|Cloud Security Posture Management| [Cloud Security Posture Management (CSPM)](concept-cloud-security-posture-management.md)| +|**CWPP** | Cloud Workload Protection Platform | [CWPP](/azure/defender-for-cloud/overview-page)| ++## D +| Term | Description | Learn more | +|--|--|--| +| **DDOS Attack** | Distributed denial-of-service, a type of attack where an attacker sends more requests to an application than the application is capable of handling.| [DDOS FAQs](/azure/ddos-protection/ddos-faq)| ++## E +| Term | Description | Learn more | +|--|--|--| +|**EDR**| Endpoint Detection and Response|[Microsoft Defender for Endpoint]([Protect your endpoints with Defender for Cloud's integrated EDR solution: Microsoft Defender for Endpoint](integration-defender-for-endpoint.md)| +|**EKS**| Amazon Elastic Kubernetes Service, Amazon's managed service for running Kubernetes on AWS without needing to install, operate, and maintain your own Kubernetes control plane or nodes.|[EKS](https://aws.amazon.com/eks/)| +|**eBPF**|Extended Berkley Packet Filter |[What is eBPF?](https://ebpf.io/)| ++## F +| Term | Description | Learn more | +|--|--|--| +|**FIM**| File Integrity Monitoring | ([File Integrity Monitoring in Microsoft Defender for Cloud](file-integrity-monitoring-overview.md)| +**FTP** | File Transfer Protocol | [Deploy content using FTP](/azure/app-service/deploy-ftp?tabs=portal)| ++## G +| Term | Description | Learn more | +|--|--|--| +|**GCP**| Google Cloud Platform | [Onboard a GPC Project](/azure/active-directory/cloud-infrastructure-entitlement-management/onboard-gcp)| +|**GKE**| Google Kubernetes Engine, Google’s managed environment for deploying, managing, and scaling applications using GCP infrastructure.|[Deploy a Kubernetes workload using GPU sharing on your Azure Stack Edge Pro](../databox-online/azure-stack-edge-gpu-deploy-kubernetes-gpu-sharing.md)| ++## J +| Term | Description | Learn more | +|--|--|--| +| **JIT** | Just-in-Time VM access |[Understanding just-in-time (JIT) VM access](just-in-time-access-overview.md)| ++## K +| Term | Description | Learn more | +|--|--|--| +|**KQL**|Kusto Query Language-a tool to explore your data and discover patterns, identify anomalies and outliers, create statistical modeling, and more.| [KQL Overview](/azure/data-explorer/kusto/query/)| ++## L +| Term | Description | Learn more | +|--|--|--| +|**LSA**| Local Security Authority| [Secure and use policies on virtual machines in Azure](../virtual-machines/security-policy.md)| ++## M +| Term | Description | Learn more | +|--|--|--| +|**MDC**| Microsoft Defender for Cloud is a Cloud Security Posture Management (CSPM) and Cloud Workload Protection Platform (CWPP) for all of your Azure, on-premises, and multicloud (Amazon AWS and Google GCP) resources. | [What is Microsoft Defender for Cloud?](defender-for-cloud-introduction.md)| +|**MDE**| Microsoft Defender for Endpoint is an enterprise endpoint security platform designed to help enterprise networks prevent, detect, investigate, and respond to advanced threats.|[Protect your endpoints with Defender for Cloud's integrated EDR solution: Microsoft Defender for Endpoint](integration-defender-for-endpoint.md)| +|**MFA**|multi factor authentication, a process in which users are prompted during the sign-in process for an additional form of identification, such as a code on their cellphone or a fingerprint scan.|[How it works: Azure Multi Factor Authentication](/azure/active-directory/authentication/concept-mfa-howitworks)| +|**MITRE ATT&CK**| a globally-accessible knowledge base of adversary tactics and techniques based on real-world observations.|[MITRE ATT&CK](https://attack.mitre.org/)| +|**MMA**| Microsoft Monitoring Agent, also known as Log Analytics Agent|[Log Analytics Agent Overview](/azure/azure-monitor/agents/log-analytics-agent)| ++## N +| Term | Description | Learn more | +|--|--|--| +|**NGAV**| Next Generation Anti-Virus | +**NIST** | National Institute of Standards and Technology|[National Institute of Standards and Technology](https://www.nist.gov/) ++## R +| Term | Description | Learn more | +|--|--|--| +|**RaMP**| Rapid Modernization Plan, guidance based on initiatives, giving you a set of deployment paths to more quickly implement key layers of protection.|[Zero Trust Rapid Modernization Plan](../security/fundamentals/zero-trust.md)| +|**RBAC**| Azure role-based access control (Azure RBAC) helps you manage who has access to Azure resources, what they can do with those resources, and what areas they have access to. | [RBAC Overview](/azure/role-based-access-control/overview)| +|**RDP** | Remote Desktop Protocol (RDP) is a sophisticated technology that uses various techniques to perfect the server's remote graphics' delivery to the client device.| [RDP Bandwidth Requirements](/azure/virtual-desktop/rdp-bandwidth)| +|**Recommendations**|Recommendations secure your workloads with step-by-step actions that protect your workloads from known security risks.| [What are security policies, initiatives, and recommendations?](security-policy-concept.md)| +**Regulatory Compliance** | Regulatory compliance refers to the discipline and process of ensuring that a company follows the laws enforced by governing bodies in their geography or rules required | [Regulatory Compliance Overview](/azure/cloud-adoption-framework/govern/policy-compliance/regulatory-compliance) | +++## S +| Term | Description | Learn more | +|--|--|--| +|**Secure Score**|Defender for Cloud continually assesses your cross-cloud resources for security issues. It then aggregates all the findings into a single score that represents your current security situation: the higher the score, the lower the identified risk level.|[Security posture for Microsoft Defender for Cloud](secure-score-security-controls.md)| +|**Security Initiative** | A collection of Azure Policy Definitions, or rules, that are grouped together towards a specific goal or purpose. | [What are security policies, initiatives, and recommendations?](security-policy-concept.md) +|**Security Policy**| An Azure rule about specific security conditions that you want controlled.|[Understanding Security Policies](security-policy-concept.md)| +|**SOAR**| Security Orchestration Automated Response, a collection of software tools designed to collect data about security threats from multiple sources and respond to low-level security events without human assistance.| [SOAR](/azure/sentinel/automation)| ++## T +| Term | Description | Learn more | +|--|--|--| +|**TVM**|Threat and Vulnerability Management, a built-in module in Microsoft Defender for Endpoint that can discover vulnerabilities and misconfigurations in near real time and prioritize vulnerabilities based on the threat landscape and detections in your organization.|[Investigate weaknesses with Microsoft Defender for Endpoint's threat and vulnerability management](deploy-vulnerability-assessment-tvm.md) ++## Z +| Term | Description | Learn more | +|--|--|--| +|**Zero-Trust**|A new security model that assumes breach and verifies each request as though it originated from an uncontrolled network.|[Zero-Trust Security](/azure/security/fundamentals/zero-trust)| ++ ## Next Steps +[Microsoft Defender for Cloud-overview](overview-page.md) + |
| defender-for-cloud | Defender For Cloud Introduction | https://github.com/MicrosoftDocs/azure-docs/commits/main/articles/defender-for-cloud/defender-for-cloud-introduction.md | Review the findings from these vulnerability scanners and respond to them all fr Learn more on the following pages: - [Defender for Cloud's integrated Qualys scanner for Azure and hybrid machines](deploy-vulnerability-assessment-vm.md)-- [Identify vulnerabilities in images in Azure container registries](defender-for-containers-va-acr.md)-- [Identify vulnerabilities in images in AWS Elastic Container Registry](defender-for-containers-va-ecr.md)+- [Identify vulnerabilities in images in Azure container registries](defender-for-containers-vulnerability-assessment-azure.md) +- [Identify vulnerabilities in images in AWS Elastic Container Registry](defender-for-containers-vulnerability-assessment-elastic.md) ## Enforce your security policy from the top down |
| defender-for-cloud | Defender For Container Registries Introduction | https://github.com/MicrosoftDocs/azure-docs/commits/main/articles/defender-for-cloud/defender-for-container-registries-introduction.md | If you connect unsupported registries to your Azure subscription, Defender for C ### Can I customize the findings from the vulnerability scanner? Yes. If you have an organizational need to ignore a finding, rather than remediate it, you can optionally disable it. Disabled findings don't impact your secure score or generate unwanted noise. -[Learn about creating rules to disable findings from the integrated vulnerability assessment tool](defender-for-containers-va-acr.md#disable-specific-findings). +[Learn about creating rules to disable findings from the integrated vulnerability assessment tool](defender-for-containers-vulnerability-assessment-azure.md#disable-specific-findings). ### Why is Defender for Cloud alerting me to vulnerabilities about an image that isnΓÇÖt in my registry? Defender for Cloud provides vulnerability assessments for every image pushed or pulled in a registry. Some images may reuse tags from an image that was already scanned. For example, you may reassign the tag ΓÇ£LatestΓÇ¥ every time you add an image to a digest. In such cases, the ΓÇÿoldΓÇÖ image does still exist in the registry and may still be pulled by its digest. If the image has security findings and is pulled, it'll expose security vulnerabilities. Defender for Cloud provides vulnerability assessments for every image pushed or ## Next steps > [!div class="nextstepaction"]-> [Scan your images for vulnerabilities](defender-for-containers-va-acr.md) +> [Scan your images for vulnerabilities](defender-for-containers-vulnerability-assessment-azure.md) |
| defender-for-cloud | Defender For Containers Enable | https://github.com/MicrosoftDocs/azure-docs/commits/main/articles/defender-for-cloud/defender-for-containers-enable.md | Learn about this plan in [Overview of Microsoft Defender for Containers](defende You can learn more by watching these videos from the Defender for Cloud in the Field video series: -- [Microsoft Defender for Containers in a multi-cloud environment](episode-nine.md)+- [Microsoft Defender for Containers in a multicloud environment](episode-nine.md) - [Protect Containers in GCP with Defender for Containers](episode-ten.md) ::: zone pivot="defender-for-container-arc,defender-for-container-eks,defender-for-container-gke" You can check out the following blogs: Now that you enabled Defender for Containers, you can: -- [Scan your ACR images for vulnerabilities](defender-for-containers-va-acr.md)-- [Scan your Amazon AWS ECR images for vulnerabilities](defender-for-containers-va-ecr.md)+- [Scan your ACR images for vulnerabilities](defender-for-containers-vulnerability-assessment-azure.md) +- [Scan your Amazon AWS ECR images for vulnerabilities](defender-for-containers-vulnerability-assessment-elastic.md) |
| defender-for-cloud | Defender For Containers Introduction | https://github.com/MicrosoftDocs/azure-docs/commits/main/articles/defender-for-cloud/defender-for-containers-introduction.md | When you push an image to a container registry and while the image is stored in When the scan completes, Defender for Containers provides details for each vulnerability detected, a security classification for each vulnerability detected, and guidance on how to remediate issues and protect vulnerable attack surfaces. Learn more about:-- [Vulnerability assessment for Azure Container Registry (ACR)](defender-for-containers-va-acr.md)-- [Vulnerability assessment for Amazon AWS Elastic Container Registry (ECR)](defender-for-containers-va-ecr.md)+- [Vulnerability assessment for Azure Container Registry (ACR)](defender-for-containers-vulnerability-assessment-azure.md) +- [Vulnerability assessment for Amazon AWS Elastic Container Registry (ECR)](defender-for-containers-vulnerability-assessment-elastic.md) ### View vulnerabilities for running images in Azure Container Registry (ACR) To provide findings for the recommendation, Defender for Cloud collects the inve :::image type="content" source="media/defender-for-containers/running-image-vulnerabilities-recommendation.png" alt-text="Screenshot showing where the recommendation is viewable." lightbox="media/defender-for-containers/running-image-vulnerabilities-recommendation-expanded.png"::: -Learn more about [viewing vulnerabilities for running images in (ACR)](defender-for-containers-va-acr.md). +Learn more about [viewing vulnerabilities for running images in (ACR)](defender-for-containers-vulnerability-assessment-azure.md). ## Run-time protection for Kubernetes nodes and clusters Yes. ### Does Microsoft Defender for Containers support AKS without scale set (default)? -No. Only Azure Kubernetes Service (AKS) clusters that use virtual machine scale sets for the nodes is supported. +No. Only Azure Kubernetes Service (AKS) clusters that use Virtual Machine Scale Sets for the nodes is supported. ### Do I need to install the Log Analytics VM extension on my AKS nodes for security protection? |
| defender-for-cloud | Defender For Containers Vulnerability Assessment Azure | https://github.com/MicrosoftDocs/azure-docs/commits/main/articles/defender-for-cloud/defender-for-containers-vulnerability-assessment-azure.md | + + Title: Identify vulnerabilities in Azure Container Registry with Microsoft Defender for Cloud +description: Learn how to use Defender for Containers to scan images in your Azure Container Registry to find vulnerabilities. ++ Last updated : 10/24/2022+++++# Use Defender for Containers to scan your Azure Container Registry images for vulnerabilities ++This article explains how to use Defender for Containers to scan the container images stored in your Azure Resource Manager-based Azure Container Registry, as part of the protections provided within Microsoft Defender for Cloud. ++To enable scanning of vulnerabilities in containers, you have to [enable Defender for Containers](defender-for-containers-enable.md). When the scanner, powered by Qualys, reports vulnerabilities, Defender for Cloud presents the findings and related information as recommendations. In addition, the findings include related information such as remediation steps, relevant CVEs, CVSS scores, and more. You can view the identified vulnerabilities for one or more subscriptions, or for a specific registry. ++Defender for Cloud filters and classifies findings from the scanner. Images without vulnerabilities are marked as healthy and Defender for Cloud doesn't send notifications about healthy images to keep you from getting unwanted informational alerts. ++The triggers for an image scan are: ++- **On push** - Whenever an image is pushed to your registry, Defender for Containers automatically scans that image. To trigger the scan of an image, push it to your repository. ++- **Recently pulled** - Since new vulnerabilities are discovered every day, **Microsoft Defender for Containers** also scans, on a weekly basis, any image that has been pulled within the last 30 days. There's no extra charge for these rescans; as mentioned above, you're billed once per image. ++- **On import** - Azure Container Registry has import tools to bring images to your registry from Docker Hub, Microsoft Container Registry, or another Azure container registry. **Microsoft Defender for Containers** scans any supported images you import. Learn more in [Import container images to a container registry](../container-registry/container-registry-import-images.md). ++- **Continuous scan**- This trigger has two modes: ++ - A continuous scan based on an image pull. This scan is performed every seven days after an image was pulled, and only for 30 days after the image was pulled. This mode doesn't require the security profile, or extension. ++ - (Preview) Continuous scan for running images. This scan is performed every seven days for as long as the image runs. This mode runs instead of the above mode when the Defender profile, or extension is running on the cluster. + +When a scan is triggered, findings are available as Defender for Cloud recommendations from 2 minutes up to 15 minutes after the scan is complete. ++Also, check out the ability scan container images for vulnerabilities as the images are built in your CI/CD GitHub workflows. Learn more in [Defender for DevOps](defender-for-devops-introduction.md). ++## Prerequisites ++Before you can scan your ACR images: ++- [Enable Defender for Containers](defender-for-containers-enable.md) for your subscription. Defender for Containers is now ready to scan images in your registries. ++ >[!NOTE] + > This feature is charged per image. ++- If you want to find vulnerabilities in images stored in other container registries, you can import the images into ACR and scan them. ++ Use the ACR tools to bring images to your registry from Docker Hub or Microsoft Container Registry. When the import completes, the imported images are scanned by the built-in vulnerability assessment solution. ++ Learn more in [Import container images to a container registry](../container-registry/container-registry-import-images.md) ++ You can also [scan images in Amazon AWS Elastic Container Registry](defender-for-containers-vulnerability-assessment-elastic.md) directly from the Azure portal. ++For a list of the types of images and container registries supported by Microsoft Defender for Containers, see [Availability](supported-machines-endpoint-solutions-clouds-containers.md?tabs=azure-aks#registries-and-images). ++## View and remediate findings ++1. To view the findings, open the **Recommendations** page. If issues were found, you'll see the recommendation [Container registry images should have vulnerability findings resolved](https://portal.azure.com/#blade/Microsoft_Azure_Security/RecommendationsBlade/assessmentKey/dbd0cb49-b563-45e7-9724-889e799fa648). ++  ++1. Select the recommendation. ++ The recommendation details page opens with additional information. This information includes the list of registries with vulnerable images ("Affected resources") and the remediation steps. ++1. Select a specific registry to see the repositories within it that have vulnerable repositories. ++  ++ The registry details page opens with the list of affected repositories. ++1. Select a specific repository to see the repositories within it that have vulnerable images. ++  ++ The repository details page opens. It lists the vulnerable images together with an assessment of the severity of the findings. ++1. Select a specific image to see the vulnerabilities. ++  ++ The list of findings for the selected image opens. ++  ++1. To learn more about a finding, select the finding. ++ The findings details pane opens. ++ [](media/monitor-container-security/acr-finding-details-pane.png#lightbox) ++ This pane includes a detailed description of the issue and links to external resources to help mitigate the threats. ++1. Follow the steps in the remediation section of this pane. ++1. When you've taken the steps required to remediate the security issue, replace the image in your registry: ++ 1. Push the updated image to trigger a scan. ++ 1. Check the recommendations page for the recommendation [Container registry images should have vulnerability findings resolved](https://portal.azure.com/#blade/Microsoft_Azure_Security/RecommendationsBlade/assessmentKey/dbd0cb49-b563-45e7-9724-889e799fa648). ++ If the recommendation still appears and the image you've handled still appears in the list of vulnerable images, check the remediation steps again. ++ 1. When you're sure the updated image has been pushed, scanned, and is no longer appearing in the recommendation, delete the ΓÇ£oldΓÇ¥ vulnerable image from your registry. ++## Disable specific findings ++> [!NOTE] +> [!INCLUDE [Legalese](../../includes/defender-for-cloud-preview-legal-text.md)] ++If you have an organizational need to ignore a finding, rather than remediate it, you can optionally disable it. Disabled findings don't affect your secure score or generate unwanted noise. ++When a finding matches the criteria you've defined in your disable rules, it won't appear in the list of findings. Typical scenarios include: ++- Disable findings with severity below medium +- Disable findings that are non-patchable +- Disable findings with CVSS score below 6.5 +- Disable findings with specific text in the security check or category (for example, ΓÇ£RedHatΓÇ¥, ΓÇ£CentOS Security Update for sudoΓÇ¥) ++> [!IMPORTANT] +> To create a rule, you need permissions to edit a policy in Azure Policy. +> +> Learn more in [Azure RBAC permissions in Azure Policy](../governance/policy/overview.md#azure-rbac-permissions-in-azure-policy). ++You can use any of the following criteria: ++- Finding ID +- Category +- Security check +- CVSS v3 scores +- Severity +- Patchable status ++To create a rule: ++1. From the recommendations detail page for [Container registry images should have vulnerability findings resolved](https://portal.azure.com/#blade/Microsoft_Azure_Security/RecommendationsBlade/assessmentKey/dbd0cb49-b563-45e7-9724-889e799fa648), select **Disable rule**. +1. Select the relevant scope. +1. Define your criteria. +1. Select **Apply rule**. ++ :::image type="content" source="./media/defender-for-containers-vulnerability-assessment-azure/new-disable-rule-for-registry-finding.png" alt-text="Create a disable rule for VA findings on registry."::: ++1. To view, override, or delete a rule: + 1. Select **Disable rule**. + 1. From the scope list, subscriptions with active rules show as **Rule applied**. + :::image type="content" source="./media/remediate-vulnerability-findings-vm/modify-rule.png" alt-text="Modify or delete an existing rule."::: + 1. To view or delete the rule, select the ellipsis menu ("..."). ++## FAQ ++### How does Defender for Containers scan an image? ++Defender for Containers pulls the image from the registry and runs it in an isolated sandbox with the Qualys scanner. The scanner extracts a list of known vulnerabilities. ++Defender for Cloud filters and classifies findings from the scanner. When an image is healthy, Defender for Cloud marks it as such. Defender for Cloud generates security recommendations only for images that have issues to be resolved. By only notifying you when there are problems, Defender for Cloud reduces the potential for unwanted informational alerts. ++### Can I get the scan results via REST API? ++Yes. The results are under [Sub-Assessments REST API](/rest/api/defenderforcloud/sub-assessments/list). Also, you can use Azure Resource Graph (ARG), the Kusto-like API for all of your resources: a query can fetch a specific scan. ++### Why is Defender for Cloud alerting me to vulnerabilities about an image that isnΓÇÖt in my registry? ++Some images may reuse tags from an image that was already scanned. For example, you may reassign the tag ΓÇ£LatestΓÇ¥ every time you add an image to a digest. In such cases, the ΓÇÿoldΓÇÖ image does still exist in the registry and may still be pulled by its digest. If the image has security findings and is pulled, it will expose security vulnerabilities. ++## Next steps ++Learn more about the [advanced protection plans of Microsoft Defender for Cloud](enhanced-security-features-overview.md). |
| defender-for-cloud | Defender For Containers Vulnerability Assessment Elastic | https://github.com/MicrosoftDocs/azure-docs/commits/main/articles/defender-for-cloud/defender-for-containers-vulnerability-assessment-elastic.md | + + Title: Identify vulnerabilities in Amazon AWS Elastic Container Registry with Microsoft Defender for Cloud +description: Learn how to use Defender for Containers to scan images in your Amazon AWS Elastic Container Registry (ECR) to find vulnerabilities. ++ Last updated : 09/11/2022+++++# Use Defender for Containers to scan your Amazon AWS Elastic Container Registry images for vulnerabilities (Preview) ++Defender for Containers lets you scan the container images stored in your Amazon AWS Elastic Container Registry (ECR) as part of the protections provided within Microsoft Defender for Cloud. ++To enable scanning of vulnerabilities in containers, you have to [connect your AWS account to Defender for Cloud](quickstart-onboard-aws.md) and [enable Defender for Containers](defender-for-containers-enable.md). The agentless scanner, powered by the open-source scanner Trivy, scans your ECR repositories and reports vulnerabilities. ++Defender for Containers creates resources in your AWS account to build an inventory of the software in your images. The scan then sends only the software inventory to Defender for Cloud. This architecture protects your information privacy and intellectual property, and also keeps the outbound network traffic to a minimum. Defender for Containers creates an ECS cluster in a dedicated VPC, an internet gateway, and an S3 bucket in the us-east-1 and eu-central-1 regions to build the software inventory. ++Defender for Cloud filters and classifies findings from the software inventory that the scanner creates. Images without vulnerabilities are marked as healthy and Defender for Cloud doesn't send notifications about healthy images to keep you from getting unwanted informational alerts. ++The triggers for an image scan are: ++- **On push** - Whenever an image is pushed to your registry, Defender for Containers automatically scans that image within 2 hours. ++- **Continuous scan** - Defender for Containers reassesses the images based on the latest database of vulnerabilities of Trivy. This reassessment is performed weekly. ++## Prerequisites ++Before you can scan your ECR images: ++- [Connect your AWS account to Defender for Cloud and enable Defender for Containers](quickstart-onboard-aws.md) +- You must have at least one free VPC in the `us-east-1` and `eu-central-1` regions to host the AWS resources that build the software inventory. ++For a list of the types of images not supported by Microsoft Defender for Containers, see [Availability](supported-machines-endpoint-solutions-clouds-containers.md?tabs=aws-eks#images). ++## Enable vulnerability assessment ++To enable vulnerability assessment: ++1. From Defender for Cloud's menu, open **Environment settings**. +1. Select the AWS connector that connects to your AWS account. ++ :::image type="content" source="media/defender-for-kubernetes-intro/select-aws-connector.png" alt-text="Screenshot of Defender for Cloud's environment settings page showing an AWS connector."::: ++1. In the Monitoring Coverage section of the Containers plan, select **Settings**. ++ :::image type="content" source="media/defender-for-containers-vulnerability-assessment-elastic/aws-containers-settings.png" alt-text="Screenshot of Containers settings for the AWS connector." lightbox="media/defender-for-containers-vulnerability-assessment-elastic/aws-containers-settings.png"::: ++1. Turn on **Vulnerability assessment**. ++ :::image type="content" source="media/defender-for-containers-vulnerability-assessment-elastic/aws-containers-enable-va.png" alt-text="Screenshot of the toggle to turn on vulnerability assessment for ECR images."::: ++1. Select **Save** > **Next: Configure access**. ++1. Download the CloudFormation template. + +1. Using the downloaded CloudFormation template, create the stack in AWS as instructed on screen. If you're onboarding a management account, you'll need to run the CloudFormation template both as Stack and as StackSet. It takes up to 30 minutes for the AWS resources to be created. The resources have the prefix `defender-for-containers-va`. ++1. Select **Next: Review and generate**. + +1. Select **Update**. ++Findings are available as Defender for Cloud recommendations from 2 hours after vulnerability assessment is turned on. The recommendation also shows any reason that a repository is identified as not scannable ("Not applicable"), such as images pushed more than 3 months before you enabled vulnerability assessment. ++## View and remediate findings ++Vulnerability assessment lists the repositories with vulnerable images as the results of the [Elastic container registry images should have vulnerability findings resolved](https://portal.azure.com/#blade/Microsoft_Azure_Security/RecommendationsBlade/assessmentKey/03587042-5d4b-44ff-af42-ae99e3c71c87) recommendation. From the recommendation, you can identify vulnerable images and get details about the vulnerabilities. ++Vulnerability findings for an image are still shown in the recommendation for 48 hours after an image is deleted. ++1. To view the findings, open the **Recommendations** page. If the scan found issues, you'll see the recommendation [Elastic container registry images should have vulnerability findings resolved](https://portal.azure.com/#blade/Microsoft_Azure_Security/RecommendationsBlade/assessmentKey/03587042-5d4b-44ff-af42-ae99e3c71c87). ++ :::image type="content" source="media/defender-for-containers-vulnerability-assessment-elastic/elastic-container-registry-recommendation.png" alt-text="Screenshot of the Recommendation to remediate findings in ECR images."::: ++1. Select the recommendation. ++ The recommendation details page opens with additional information. This information includes the list of repositories with vulnerable images ("Affected resources") and the remediation steps. ++1. Select specific repositories to the vulnerabilities found in images in those repositories. ++ :::image type="content" source="media/defender-for-containers-vulnerability-assessment-elastic/elastic-container-registry-unhealthy-repositories.png" alt-text="Screenshot of ECR repositories that have vulnerabilities." lightbox="media/defender-for-containers-vulnerability-assessment-elastic/elastic-container-registry-unhealthy-repositories.png"::: ++ The vulnerabilities section shows the identified vulnerabilities. ++1. To learn more about a vulnerability, select the vulnerability. ++ The vulnerability details pane opens. ++ :::image type="content" source="media/defender-for-containers-vulnerability-assessment-elastic/elastic-container-registry-vulnerability.png" alt-text="Screenshot of vulnerability details in ECR repositories." lightbox="media/defender-for-containers-vulnerability-assessment-elastic/elastic-container-registry-vulnerability.png"::: ++ This pane includes a detailed description of the issue and links to external resources to help mitigate the threats. ++1. Follow the steps in the remediation section of the recommendation. ++1. When you've taken the steps required to remediate the security issue, replace the image in your registry: ++ 1. Push the updated image to trigger a scan. ++ 1. Check the recommendations page for the recommendation [Container registry images should have vulnerability findings resolved](https://portal.azure.com/#blade/Microsoft_Azure_Security/RecommendationsBlade/assessmentKey/dbd0cb49-b563-45e7-9724-889e799fa648). ++ If the recommendation still appears and the image you've handled still appears in the list of vulnerable images, check the remediation steps again. ++ 1. When you're sure the updated image has been pushed, scanned, and is no longer appearing in the recommendation, delete the ΓÇ£oldΓÇ¥ vulnerable image from your registry. ++<!-- +## Disable specific findings ++> [!NOTE] +> [!INCLUDE [Legalese](../../includes/defender-for-cloud-preview-legal-text.md)] ++If you have an organizational need to ignore a finding, rather than remediate it, you can optionally disable it. Disabled findings don't affect your secure score or generate unwanted noise. ++When a finding matches the criteria you've defined in your disable rules, it won't appear in the list of findings. Typical scenarios include: ++- Disable findings with severity below medium +- Disable findings that are non-patchable +- Disable findings with CVSS score below 6.5 +- Disable findings with specific text in the security check or category (for example, ΓÇ£RedHatΓÇ¥, ΓÇ£CentOS Security Update for sudoΓÇ¥) ++> [!IMPORTANT] +> To create a rule, you need permissions to edit a policy in Azure Policy. +> +> Learn more in [Azure RBAC permissions in Azure Policy](../governance/policy/overview.md#azure-rbac-permissions-in-azure-policy). ++You can use any of the following criteria: ++- Finding ID +- Category +- Security check +- CVSS v3 scores +- Severity +- Patchable status ++To create a rule: ++1. From the recommendations detail page for [Container registry images should have vulnerability findings resolved](https://portal.azure.com/#blade/Microsoft_Azure_Security/RecommendationsBlade/assessmentKey/dbd0cb49-b563-45e7-9724-889e799fa648), select **Disable rule**. +1. Select the relevant scope. +1. Define your criteria. +1. Select **Apply rule**. ++ :::image type="content" source="media/defender-for-containers-vulnerability-assessment-azure/new-disable-rule-for-registry-finding.png" alt-text="Screenshot of how to create a disable rule for VA findings on registry."::: ++1. To view, override, or delete a rule: + 1. Select **Disable rule**. + 1. From the scope list, subscriptions with active rules show as **Rule applied**. + :::image type="content" source="./media/remediate-vulnerability-findings-vm/modify-rule.png" alt-text="Screenshot of how to modify or delete an existing rule."::: + 1. To view or delete the rule, select the ellipsis menu ("..."). --> ++## FAQs ++### Can I get the scan results via REST API? ++Yes. The results are under [Sub-Assessments REST API](/rest/api/defenderforcloud/sub-assessments/list). Also, you can use Azure Resource Graph (ARG), the Kusto-like API for all of your resources: a query can fetch a specific scan. ++## Next steps ++Learn more about: ++- [Advanced protection plans of Microsoft Defender for Cloud](enhanced-security-features-overview.md) +- [Multicloud protections](multicloud.yml) for your AWS account |
| defender-for-cloud | Defender For Storage Exclude | https://github.com/MicrosoftDocs/azure-docs/commits/main/articles/defender-for-cloud/defender-for-storage-exclude.md | -# Exclude a storage account from Microsoft Defender for Storage protections +# Exclude a storage account from a protected subscription in the per-transaction plan -When you [enable Microsoft Defender for Storage](../storage/common/azure-defender-storage-configure.md#set-up-microsoft-defender-for-cloud) on a subscription, all current and future Azure Storage accounts in that subscription are protected. If you have specific accounts that you want to exclude from the Defender for Storage protections, you can exclude them using the Azure portal, PowerShell, or the Azure CLI. +When you [enable Microsoft Defender for Storage](../storage/common/azure-defender-storage-configure.md) on a subscription for the per-transaction pricing, all current and future Azure Storage accounts in that subscription are protected. You can exclude specific storage accounts from the Defender for Storage protections using the Azure portal, PowerShell, or the Azure CLI. We don't recommend that you exclude storage accounts from Defender for Storage because attackers can use any opening in order to compromise your environment. If you want to optimize your Azure costs and remove storage accounts that you feel are low risk from Defender for Storage, you can use the [Price Estimation Workbook](https://ms.portal.azure.com/#view/Microsoft_Azure_Security/SecurityMenuBlade/~/28) in the Azure portal to evaluate the cost savings. -## Exclude an Azure Storage account +## Exclude an Azure Storage account protection on a subscription with per-transaction pricing To exclude an Azure Storage account from Microsoft Defender for Storage: To exclude an Azure Storage account from Microsoft Defender for Storage: > [!TIP] > Learn more about tags in [az tag](/cli/azure/tag). -1. Disable Microsoft Defender for Storage for the desired account on the relevant subscription with the ``security atp storage`` command (using the same resource ID): +1. Disable Microsoft Defender for Storage for the desired account on the relevant subscription with the `security atp storage` command (using the same resource ID): ```azurecli az security atp storage update --resource-group MyResourceGroup --storage-account MyStorageAccount --is-enabled false The Microsoft Defender for Storage account will inherit the tag of the Databrick ## Next steps -- Explore the [Microsoft Defender for Storage ΓÇô Price Estimation Dashboard](https://techcommunity.microsoft.com/t5/microsoft-defender-for-cloud/microsoft-defender-for-storage-price-estimation-dashboard/ba-p/2429724)+- Explore the [Microsoft Defender for Storage ΓÇô Price Estimation Dashboard](https://techcommunity.microsoft.com/t5/microsoft-defender-for-cloud/microsoft-defender-for-storage-price-estimation-dashboard/ba-p/2429724) |
| defender-for-cloud | Defender For Storage Introduction | https://github.com/MicrosoftDocs/azure-docs/commits/main/articles/defender-for-cloud/defender-for-storage-introduction.md | -You can [enable Microsoft Defender for Storage](../storage/common/azure-defender-storage-configure.md#set-up-microsoft-defender-for-cloud) at either the subscription level (recommended) or the resource level. +You can [enable Microsoft Defender for Storage](../storage/common/azure-defender-storage-configure.md) at either the subscription level (recommended) or the resource level. Defender for Storage continually analyzes the telemetry stream generated by the [Azure Blob Storage](https://azure.microsoft.com/services/storage/blobs/) and Azure Files services. When potentially malicious activities are detected, security alerts are generated. These alerts are displayed in Microsoft Defender for Cloud, together with the details of the suspicious activity along with the relevant investigation steps, remediation actions, and security recommendations. Alerts include details of the incident that triggered them, and recommendations > [!TIP] > For a comprehensive list of all Defender for Storage alerts, see the [alerts reference page](alerts-reference.md#alerts-azurestorage). This is useful for workload owners who want to know what threats can be detected and help SOC teams gain familiarity with detections before investigating them. Learn more about what's in a Defender for Cloud security alert, and how to manage your alerts in [Manage and respond to security alerts in Microsoft Defender for Cloud](managing-and-responding-alerts.md). +## Explore security anomalies -### Limitations of hash reputation analysis +When storage activity anomalies occur, you receive an email notification with information about the suspicious security event. Details of the event include: ++- The nature of the anomaly +- The storage account name +- The event time +- The storage type +- The potential causes +- The investigation steps +- The remediation steps ++The email also includes details on possible causes and recommended actions to investigate and mitigate the potential threat. +++You can review and manage your current security alerts from Microsoft Defender for Cloud's [Security alerts tile](managing-and-responding-alerts.md). Select an alert for details and actions for investigating the current threat and addressing future threats. +++## Limitations of hash reputation analysis - **Hash reputation isn't deep file inspection** - Microsoft Defender for Storage uses hash reputation analysis supported by [Microsoft Threat Intelligence](https://go.microsoft.com/fwlink/?linkid=2128684) to determine whether an uploaded file is suspicious. The threat protection tools donΓÇÖt scan the uploaded files; rather they analyze the telemetry generated from the Blobs Storage and Files services. Defender for Storage then compares the hashes of newly uploaded files with hashes of known viruses, trojans, spyware, and ransomware. |
| defender-for-cloud | Defender For Storage Test | https://github.com/MicrosoftDocs/azure-docs/commits/main/articles/defender-for-cloud/defender-for-storage-test.md | -After you enable Defender for Storage, you can create a test alert to demonstrate how Defender for Storage recognizes and alerts on security risks. +After you enable Defender for Storage, you can create a test alert to demonstrate how Defender for Storage recognizes and triggers alerts on security risks. ## Demonstrate Defender for Storage alerts To test the security alerts from Microsoft Defender for Storage in your environment, generate the alert "Access from a Tor exit node to a storage account" with the following steps: -1. Open a storage account with [Microsoft Defender for Storage enabled](../storage/common/azure-defender-storage-configure.md#set-up-microsoft-defender-for-cloud). +1. Open a storage account with [Microsoft Defender for Storage enabled](../storage/common/azure-defender-storage-configure.md). 1. From the sidebar, select ΓÇ£ContainersΓÇ¥ and open an existing container or create a new one. :::image type="content" source="media/defender-for-storage-introduction/opening-storage-container.png" alt-text="Opening a blob container from an Azure Storage account." lightbox="media/defender-for-storage-introduction/opening-storage-container.png"::: |
| defender-for-cloud | Deploy Vulnerability Assessment Byol Vm | https://github.com/MicrosoftDocs/azure-docs/commits/main/articles/defender-for-cloud/deploy-vulnerability-assessment-byol-vm.md | When you set up your solution, you must choose a resource group to attach it to. Defender for Cloud also offers vulnerability analysis for your: - SQL databases - [Explore vulnerability assessment reports in the vulnerability assessment dashboard](defender-for-sql-on-machines-vulnerability-assessment.md#explore-vulnerability-assessment-reports)-- Azure Container Registry images - [Use Microsoft Defender for container registries to scan your images for vulnerabilities](defender-for-containers-va-acr.md)-- Amazon AWS Elastic Container Registry images - [Use Microsoft Defender for container registries to scan your images for vulnerabilities](defender-for-containers-va-ecr.md)+- Azure Container Registry images - [Use Microsoft Defender for container registries to scan your images for vulnerabilities](defender-for-containers-vulnerability-assessment-azure.md) +- Amazon AWS Elastic Container Registry images - [Use Microsoft Defender for container registries to scan your images for vulnerabilities](defender-for-containers-vulnerability-assessment-elastic.md) |
| defender-for-cloud | Deploy Vulnerability Assessment Tvm | https://github.com/MicrosoftDocs/azure-docs/commits/main/articles/defender-for-cloud/deploy-vulnerability-assessment-tvm.md | You can check out the following blogs: Defender for Cloud also offers vulnerability analysis for your: - SQL databases - [Explore vulnerability assessment reports in the vulnerability assessment dashboard](defender-for-sql-on-machines-vulnerability-assessment.md#explore-vulnerability-assessment-reports)-- Azure Container Registry images - [Use Microsoft Defender for container registries to scan your images for vulnerabilities](defender-for-containers-va-acr.md)-- Amazon AWS Elastic Container Registry images - [Use Microsoft Defender for container registries to scan your images for vulnerabilities](defender-for-containers-va-ecr.md)+- Azure Container Registry images - [Use Microsoft Defender for container registries to scan your images for vulnerabilities](defender-for-containers-vulnerability-assessment-azure.md) +- Amazon AWS Elastic Container Registry images - [Use Microsoft Defender for container registries to scan your images for vulnerabilities](defender-for-containers-vulnerability-assessment-elastic.md) |
| defender-for-cloud | Deploy Vulnerability Assessment Vm | https://github.com/MicrosoftDocs/azure-docs/commits/main/articles/defender-for-cloud/deploy-vulnerability-assessment-vm.md | Within 48 hrs of the disclosure of a critical vulnerability, Qualys incorporates Defender for Cloud also offers vulnerability analysis for your: - SQL databases - [Explore vulnerability assessment reports in the vulnerability assessment dashboard](defender-for-sql-on-machines-vulnerability-assessment.md#explore-vulnerability-assessment-reports)-- Azure Container Registry images - [Use Defender for Containers to scan your ACR images for vulnerabilities](defender-for-containers-va-acr.md)+- Azure Container Registry images - [Use Defender for Containers to scan your ACR images for vulnerabilities](defender-for-containers-vulnerability-assessment-azure.md) |
| defender-for-cloud | Enhanced Security Features Overview | https://github.com/MicrosoftDocs/azure-docs/commits/main/articles/defender-for-cloud/enhanced-security-features-overview.md | If you enable the Servers plan on cross-subscription workspaces, connected VMs f ### Will I be charged for machines without the Log Analytics agent installed? -Yes. When you enable [Microsoft Defender for Servers](defender-for-servers-introduction.md) on an Azure subscription or a connected AWS account, you'll be charged for all machines that are connected to your Azure subscription or AWS account. The term machines include Azure virtual machines, Azure virtual machine scale sets instances, and Azure Arc-enabled servers. Machines that don't have Log Analytics installed are covered by protections that don't depend on the Log Analytics agent. +Yes. When you enable [Microsoft Defender for Servers](defender-for-servers-introduction.md) on an Azure subscription or a connected AWS account, you'll be charged for all machines that are connected to your Azure subscription or AWS account. The term machines include Azure virtual machines, Azure Virtual Machine Scale Sets instances, and Azure Arc-enabled servers. Machines that don't have Log Analytics installed are covered by protections that don't depend on the Log Analytics agent. ### If a Log Analytics agent reports to multiple workspaces, will I be charged twice? |
| defender-for-cloud | Github Action | https://github.com/MicrosoftDocs/azure-docs/commits/main/articles/defender-for-cloud/github-action.md | Security DevOps uses the following Open Source tools: # macos-latest supporting coming soon runs-on: windows-latest - steps: - - uses: actions/checkout@v2 + steps: + - uses: actions/checkout@v2 - - uses: actions/setup-dotnet@v1 - with: - dotnet-version: | - 5.0.x - 6.0.x + - uses: actions/setup-dotnet@v1 + with: + dotnet-version: | + 5.0.x + 6.0.x # Run analyzers - name: Run Microsoft Security DevOps Analysis uses: microsoft/security-devops-action@preview id: msdo - # Upload alerts to the Security tab - - name: Upload alerts to Security tab - uses: github/codeql-action/upload-sarif@v1 - with: - sarif_file: ${{ steps.msdo.outputs.sarifFile }} + # Upload alerts to the Security tab + - name: Upload alerts to Security tab + uses: github/codeql-action/upload-sarif@v1 + with: + sarif_file: ${{ steps.msdo.outputs.sarifFile }} ``` For details on various input options, see [action.yml](https://github.com/microsoft/security-devops-action/blob/main/action.yml) |
| defender-for-cloud | Monitoring Components | https://github.com/MicrosoftDocs/azure-docs/commits/main/articles/defender-for-cloud/monitoring-components.md | Last updated 09/12/2022 # How does Defender for Cloud collect data? -Defender for Cloud collects data from your Azure virtual machines (VMs), virtual machine scale sets, IaaS containers, and non-Azure (including on-premises) machines to monitor for security vulnerabilities and threats. Some Defender plans require monitoring components to collect data from your workloads. +Defender for Cloud collects data from your Azure virtual machines (VMs), Virtual Machine Scale Sets, IaaS containers, and non-Azure (including on-premises) machines to monitor for security vulnerabilities and threats. Some Defender plans require monitoring components to collect data from your workloads. -Data collection is required to provide visibility into missing updates, misconfigured OS security settings, endpoint protection status, and health and threat protection. Data collection is only needed for compute resources such as VMs, virtual machine scale sets, IaaS containers, and non-Azure computers. +Data collection is required to provide visibility into missing updates, misconfigured OS security settings, endpoint protection status, and health and threat protection. Data collection is only needed for compute resources such as VMs, Virtual Machine Scale Sets, IaaS containers, and non-Azure computers. You can benefit from Microsoft Defender for Cloud even if you donΓÇÖt provision agents. However, you'll have limited security and the capabilities listed above aren't supported. |
| defender-for-cloud | Partner Integration | https://github.com/MicrosoftDocs/azure-docs/commits/main/articles/defender-for-cloud/partner-integration.md | Learn more about the integration of [vulnerability scanning tools from Qualys](d Defender for Cloud also offers vulnerability analysis for your: - SQL databases - [Explore vulnerability assessment reports in the vulnerability assessment dashboard](defender-for-sql-on-machines-vulnerability-assessment.md#explore-vulnerability-assessment-reports)-- Azure Container Registry images - [Use Microsoft Defender for container registries to scan your images for vulnerabilities](defender-for-containers-va-acr.md)-- Amazon AWS Elastic Container Registry images - [Use Microsoft Defender for container registries to scan your images for vulnerabilities](defender-for-containers-va-ecr.md)+- Azure Container Registry images - [Use Microsoft Defender for container registries to scan your images for vulnerabilities](defender-for-containers-vulnerability-assessment-azure.md) +- Amazon AWS Elastic Container Registry images - [Use Microsoft Defender for container registries to scan your images for vulnerabilities](defender-for-containers-vulnerability-assessment-elastic.md) ## How security solutions are integrated Azure security solutions that are deployed from Defender for Cloud are automatically connected. You can also connect other security data sources, including computers running on-premises or in other clouds. |
| defender-for-cloud | Quickstart Onboard Gcp | https://github.com/MicrosoftDocs/azure-docs/commits/main/articles/defender-for-cloud/quickstart-onboard-gcp.md | Follow the steps below to create your GCP cloud connector. |--|--| | CSPM service account reader role <br> Microsoft Defender for Cloud identity federation <br> CSPM identity pool <br>*Microsoft Defender for Servers* service account (when the servers plan is enabled) <br>*Azure-Arc for servers onboarding* service account (when the Arc for servers auto-provisioning is enabled) | Microsoft Defender ContainersΓÇÖ service account role <br> Microsoft Defender Data Collector service account role <br> Microsoft Defender for cloud identity pool | -(**Servers/SQL only**) When Arc auto-provisioning is enabled, copy the unique numeric ID presented at the end of the Cloud Shell script. ---To locate the unique numeric ID in the GCP portal, navigate to **IAM & Admin** > **Service Accounts**, locate `Azure-Arc for servers onboarding` in the Name column, and copy the unique numeric ID number (OAuth 2 Client ID). --1. Navigate back to the Microsoft Defender for Cloud portal. --1. (Optional) If you changed any of the names of any of the resources, update the names in the appropriate fields. --1. Select the **Next: Review and generate >**. --1. Ensure the information presented is correct. --1. Select the **Create**. - After creating a connector, a scan will start on your GCP environment. New recommendations will appear in Defender for Cloud after up to 6 hours. If you enabled auto-provisioning, Azure Arc and any enabled extensions will install automatically for each new resource detected. ## (Optional) Configure selected plans Connecting your GCP project is part of the multicloud experience available in Mi - [Connect your AWS accounts to Microsoft Defender for Cloud](quickstart-onboard-aws.md) - [Google Cloud resource hierarchy](https://cloud.google.com/resource-manager/docs/cloud-platform-resource-hierarchy) - Learn about the Google Cloud resource hierarchy in Google's online docs-- [Troubleshoot your multicloud connectors](troubleshooting-guide.md#troubleshooting-the-native-multicloud-connector)+- [Troubleshoot your multicloud connectors](troubleshooting-guide.md#troubleshooting-the-native-multicloud-connector) |
| defender-for-cloud | Release Notes Archive | https://github.com/MicrosoftDocs/azure-docs/commits/main/articles/defender-for-cloud/release-notes-archive.md | Changes in our roadmap and priorities have removed the need for the network traf Defender for Container's image scan now supports Windows images that are hosted in Azure Container Registry. This feature is free while in preview, and will incur a cost when it becomes generally available. -Learn more in [Use Microsoft Defender for Container to scan your images for vulnerabilities](defender-for-containers-va-acr.md). +Learn more in [Use Microsoft Defender for Container to scan your images for vulnerabilities](defender-for-containers-vulnerability-assessment-azure.md). ### New alert for Microsoft Defender for Storage (preview) It's likely that this change will impact your secure scores. For most subscripti ### Azure Defender for container registries now scans for vulnerabilities in registries protected with Azure Private Link -Azure Defender for container registries includes a vulnerability scanner to scan images in your Azure Container Registry registries. Learn how to scan your registries and remediate findings in [Use Azure Defender for container registries to scan your images for vulnerabilities](defender-for-containers-va-acr.md). +Azure Defender for container registries includes a vulnerability scanner to scan images in your Azure Container Registry registries. Learn how to scan your registries and remediate findings in [Use Azure Defender for container registries to scan your images for vulnerabilities](defender-for-containers-vulnerability-assessment-azure.md). To limit access to a registry hosted in Azure Container Registry, assign virtual network private IP addresses to the registry endpoints and use Azure Private Link as explained in [Connect privately to an Azure container registry using Azure Private Link](../container-registry/container-registry-private-link.md). Learn more about Security Center's vulnerability scanners: - [Azure Defender's integrated Qualys vulnerability scanner for Azure and hybrid machines](deploy-vulnerability-assessment-vm.md) - [Azure Defender's integrated vulnerability assessment scanner for SQL servers](defender-for-sql-on-machines-vulnerability-assessment.md)-- [Azure Defender's integrated vulnerability assessment scanner for container registries](defender-for-containers-va-acr.md)+- [Azure Defender's integrated vulnerability assessment scanner for container registries](defender-for-containers-vulnerability-assessment-azure.md) ### SQL data classification recommendation severity changed With the vTPM enabled, the **Guest Attestation extension** can remotely validate - **Secure Boot should be enabled on supported Windows virtual machines** - **Guest Attestation extension should be installed on supported Windows virtual machines**-- **Guest Attestation extension should be installed on supported Windows virtual machine scale sets**+- **Guest Attestation extension should be installed on supported Windows Virtual Machine Scale Sets** - **Guest Attestation extension should be installed on supported Linux virtual machines**-- **Guest Attestation extension should be installed on supported Linux virtual machine scale sets**+- **Guest Attestation extension should be installed on supported Linux Virtual Machine Scale Sets** Learn more in [Trusted launch for Azure virtual machines](../virtual-machines/trusted-launch.md). New vulnerabilities are discovered every day. With this update, container images Scanning is charged on a per image basis, so there's no additional charge for these rescans. -Learn more about this scanner in [Use Azure Defender for container registries to scan your images for vulnerabilities](defender-for-containers-va-acr.md). +Learn more about this scanner in [Use Azure Defender for container registries to scan your images for vulnerabilities](defender-for-containers-vulnerability-assessment-azure.md). ### Use Azure Defender for Kubernetes to protect hybrid and multicloud Kubernetes deployments (in preview) This option is available from the recommendations details pages for: - **Vulnerabilities in Azure Container Registry images should be remediated** - **Vulnerabilities in your virtual machines should be remediated** -Learn more in [Disable specific findings for your container images](defender-for-containers-va-acr.md#disable-specific-findings) and [Disable specific findings for your virtual machines](remediate-vulnerability-findings-vm.md#disable-specific-findings). +Learn more in [Disable specific findings for your container images](defender-for-containers-vulnerability-assessment-azure.md#disable-specific-findings) and [Disable specific findings for your virtual machines](remediate-vulnerability-findings-vm.md#disable-specific-findings). ### Exempt a resource from a recommendation The security findings are now available for export through continuous export whe Related pages: - [Security Center's integrated Qualys vulnerability assessment solution for Azure virtual machines](deploy-vulnerability-assessment-vm.md)-- [Security Center's integrated vulnerability assessment solution for Azure Container Registry images](defender-for-containers-va-acr.md)+- [Security Center's integrated vulnerability assessment solution for Azure Container Registry images](defender-for-containers-vulnerability-assessment-azure.md) - [Continuous export](continuous-export.md) ### Prevent security misconfigurations by enforcing recommendations when creating new resources Updates in November include: - [Support for custom policies (preview)](#support-for-custom-policies-preview) - [Extending Azure Security Center coverage with platform for community and partners](#extending-azure-security-center-coverage-with-platform-for-community-and-partners) - [Advanced integrations with export of recommendations and alerts (preview)](#advanced-integrations-with-export-of-recommendations-and-alerts-preview)-- [Onboard on-prem servers to Security Center from Windows Admin Center (preview)](#onboard-on-prem-servers-to-security-center-from-windows-admin-center-preview)+- [Onboard on-premises servers to Security Center from Windows Admin Center (preview)](#onboard-on-premises-servers-to-security-center-from-windows-admin-center-preview) ### Threat Protection for Azure Key Vault in North America Regions (preview) In order to enable enterprise level scenarios on top of Security Center, it's no - With export to Log Analytics workspace, you can create custom dashboards with Power BI. - With export to Event Hubs, you'll be able to export Security Center alerts and recommendations to your third-party SIEMs, to a third-party solution, or Azure Data Explorer. -### Onboard on-prem servers to Security Center from Windows Admin Center (preview) +### Onboard on-premises servers to Security Center from Windows Admin Center (preview) Windows Admin Center is a management portal for Windows Servers who are not deployed in Azure offering them several Azure management capabilities such as backup and system updates. We have recently added an ability to onboard these non-Azure servers to be protected by ASC directly from the Windows Admin Center experience. |
| defender-for-cloud | Release Notes | https://github.com/MicrosoftDocs/azure-docs/commits/main/articles/defender-for-cloud/release-notes.md | Agentless vulnerability scanning is available in both Defender Cloud Security Po ### Defender for DevOps (Preview) -Microsoft Defender for Cloud enables comprehensive visibility, posture management, and threat protection across multicloud environments including Azure, AWS, Google, and on-premises resources. +Microsoft Defender for Cloud enables comprehensive visibility, posture management, and threat protection across hybrid and multicloud environments including Azure, AWS, Google, and on-premises resources. Now, the new Defender for DevOps service integrates source code management systems, like GitHub and Azure DevOps, into Defender for Cloud. With this new integration we are empowering security teams to protect their resources from code to cloud. -Defender for DevOps allows you to gain visibility into and manage your connected developer environments and code resources. Currently, you can connect [Azure DevOps](quickstart-onboard-devops.md) and [GitHub](quickstart-onboard-github.md) systems to Defender for Cloud and onboard DevOps repositories to Inventory and the new DevOps Security page. It provides security teams with a high level overview of the discovered security issues that exist within them in a unified DevOps Security page. +Defender for DevOps allows you to gain visibility into and manage your connected developer environments and code resources. Currently, you can connect [Azure DevOps](quickstart-onboard-devops.md) and [GitHub](quickstart-onboard-github.md) systems to Defender for Cloud and onboard DevOps repositories to Inventory and the new DevOps Security page. It provides security teams with a high-level overview of the discovered security issues that exist within them in a unified DevOps Security page. Security teams can configure pull request annotations to help developers address secret scanning findings in Azure DevOps directly on their pull requests. We are announcing the addition of the new Defender Cloud Security Posture Manage - Attack path analysis - Agentless scanning for machines -You can learn more about the [Defender Cloud Security Posture Management (CSPM) plan](concept-cloud-security-posture-management.md). +Larn more about the [Defender Cloud Security Posture Management (CSPM) plan](concept-cloud-security-posture-management.md). ### MITRE ATT&CK framework mapping is now available also for AWS and GCP security recommendations Microsoft Defender for Containers now provides agentless vulnerability assessmen Agentless vulnerability assessment scanning for images in ECR repositories helps reduce the attack surface of your containerized estate by continuously scanning images to identify and manage container vulnerabilities. With this new release, Defender for Cloud scans container images after they are pushed to the repository and continually reassess the ECR container images in the registry. The findings are available in Microsoft Defender for Cloud as recommendations, and you can use Defender for Cloud's built-in automated workflows to take action on the findings, such as opening a ticket for fixing a high severity vulnerability in an image. -Learn more about [vulnerability assessment for Amazon ECR images](defender-for-containers-va-ecr.md). +Learn more about [vulnerability assessment for Amazon ECR images](defender-for-containers-vulnerability-assessment-elastic.md). ## September 2022 The new release contains the following capabilities: > [!TIP] > When you exempt an account, it won't be shown as unhealthy and also won't cause a subscription to appear unhealthy. - |Recommendation| Assessment key| + | Recommendation | Assessment key | |--|--| |Accounts with owner permissions on Azure resources should be MFA enabled|6240402e-f77c-46fa-9060-a7ce53997754| |Accounts with write permissions on Azure resources should be MFA enabled|c0cb17b2-0607-48a7-b0e0-903ed22de39b| Note, if you're using the preview version, the `AKS-AzureDefender` feature flag Defender for Container's vulnerability assessment (VA) is able to detect vulnerabilities in OS packages deployed via the OS package manager. We have now extended VA's abilities to detect vulnerabilities included in language specific packages. -This feature is in `preview` and is only available for Linux images. +This feature is in preview and is only available for Linux images. To see all of the included language specific packages that have been added, check out Defender for Container's full list of [features and their availability](supported-machines-endpoint-solutions-clouds-containers.md#registries-and-images). There are now connector-level settings for Defender for Servers in multicloud. The new connector-level settings provide granularity for pricing and auto-provisioning configuration per connector, independently of the subscription. -All auto-provisioning components available in the connector level (Azure Arc, MDE, and vulnerability assessments) are enabled by default, and the new configuration supports both [Plan 1 and Plan 2 pricing tiers](defender-for-servers-introduction.md#defender-for-servers-plans). +All auto-provisioning components available in the connector-level (Azure Arc, MDE, and vulnerability assessments) are enabled by default, and the new configuration supports both [Plan 1 and Plan 2 pricing tiers](defender-for-servers-introduction.md#defender-for-servers-plans). Updates in the UI include a reflection of the selected pricing tier and the required components configured. |
| dns | Private Resolver Endpoints Rulesets | https://github.com/MicrosoftDocs/azure-docs/commits/main/articles/dns/private-resolver-endpoints-rulesets.md | DNS forwarding rulesets enable you to specify one or more custom DNS servers to Rulesets have the following associations: - A single ruleset can be associated with multiple outbound endpoints. -- A ruleset can have up to 1000 DNS forwarding rules. -- A ruleset can be linked to up to 500 virtual networks in the same region+- A ruleset can have up to 25 DNS forwarding rules. +- A ruleset can be linked to up to 10 virtual networks in the same region A ruleset can't be linked to a virtual network in another region. For more information about ruleset and other private resolver limits, see [What are the usage limits for Azure DNS?](dns-faq.yml#what-are-the-usage-limits-for-azure-dns-). |
| expressroute | Cross Connections Api Development | https://github.com/MicrosoftDocs/azure-docs/commits/main/articles/expressroute/cross-connections-api-development.md | To develop against the Partner API, ExpressRoute partners leverage a test custom ### 1. Enlist subscriptions To request the test partner and test customer setup, enlist two Pay-As-You-Go Azure subscriptions to your ExpressRoute engineering contact:+* **ExpressRoute_API_Provider_Sub:** This subscription will be used to manage production ExpressRoute circuits created in peering locations. + * **ExpressRoute_API_Dev_Provider_Sub:** This subscription will be used to manage ExpressRoute circuits created in test peering locations on dummy devices and ports. * **ExpressRoute_API_Dev_Customer_Sub:** This subscription will be used to create ExpressRoute circuits in test peering locations that map to dummy devices and ports. |
| firewall | Deploy Multi Public Ip Powershell | https://github.com/MicrosoftDocs/azure-docs/commits/main/articles/firewall/deploy-multi-public-ip-powershell.md | $azFw | Set-AzFirewall ## Next steps -* [Quickstart: Create an Azure Firewall with multiple public IP addresses - Resource Manager template](quick-create-multiple-ip-template.md) +* [Quickstart: Create an Azure Firewall with multiple public IP addresses - Resource Manager template](quick-create-multiple-ip-template.md) |
| firewall | Integrate Lb | https://github.com/MicrosoftDocs/azure-docs/commits/main/articles/firewall/integrate-lb.md | When you deploy an Azure Firewall into a subnet, one step is to create a default When you introduce the firewall into your load balancer scenario, you want your Internet traffic to come in through your firewall's public IP address. From there, the firewall applies its firewall rules and NATs the packets to your load balancer's public IP address. This is where the problem occurs. Packets arrive on the firewall's public IP address, but return to the firewall via the private IP address (using the default route). To avoid this problem, create an additional host route for the firewall's public IP address. Packets going to the firewall's public IP address are routed via the Internet. This avoids taking the default route to the firewall's private IP address. - - ### Route table example For example, the following routes are for a firewall at public IP address 20.185.97.136, and private IP address 10.0.1.4. -> [!div class="mx-imgBorder"] ->  - ### NAT rule example In the following example, a NAT rule translates RDP traffic to the firewall at 20.185.97.136 over to the load balancer at 20.42.98.220: -> [!div class="mx-imgBorder"] ->  - ### Health probes Remember, you need to have a web service running on the hosts in the load balancer pool if you use TCP health probes to port 80, or HTTP/HTTPS probes. To further enhance the security of your load-balanced scenario, you can use netw For example, you can create an NSG on the backend subnet where the load-balanced virtual machines are located. Allow incoming traffic originating from the firewall IP address/port. - For more information about NSGs, see [Security groups](../virtual-network/network-security-groups-overview.md). |
| firewall | Logs And Metrics | https://github.com/MicrosoftDocs/azure-docs/commits/main/articles/firewall/logs-and-metrics.md | |
| firewall | Policy Rule Sets | https://github.com/MicrosoftDocs/azure-docs/commits/main/articles/firewall/policy-rule-sets.md | There are three types of rule collections: - Network - Application -Rule collection types must match their parent rule collection group category. For example, a DNAT rule collection can only be part of a DNAT rule collection group. +Rule types must match their parent rule collection category. For example, a DNAT rule can only be part of a DNAT rule collection. ## Rules |
| firewall | Snat Private Range | https://github.com/MicrosoftDocs/azure-docs/commits/main/articles/firewall/snat-private-range.md | Azure Firewalls associated with a firewall policy have supported SNAT private ra                     "tier": "Standard"                 },                 "snat": { -                    "privateRanges": [255.255.255.255/32] +                    "privateRanges": "[255.255.255.255/32]"                 }             } ``` You can use the Azure portal to specify private IP address ranges for the firewa The **Edit Private IP Prefixes** page opens: - :::image type="content" source="media/snat-private-range/private-ip.png" alt-text="Edit private IP prefixes"::: + :::image type="content" source="media/snat-private-range/private-ip.png" alt-text="Screenshot of edit private IP prefixes."::: 1. By default, **IANAPrivateRanges** is configured. 2. Edit the private IP address ranges for your environment and then select **Save**. You can use the Azure portal to specify private IP address ranges for the firewa 1. Select your resource group, and then select your firewall policy. 2. Select **Private IP ranges (SNAT)** in the **Settings** column.-- By default, **Use the default Azure Firewall Policy SNAT behavior** is selected. -3. To customize the SNAT configuration, clear the check box, and under **Perform SNAT** select the conditions to perform SNAT for your environment. - :::image type="content" source="media/snat-private-range/private-ip-ranges-snat.png" alt-text="Private IP ranges (SNAT)"::: +3. Select the conditions to perform SNAT for your environment under **Perform SNAT** to customize the SNAT configuration. + :::image type="content" source="media/snat-private-range/private-ip-ranges-snat.png" alt-text="Screenshot of Private IP ranges (SNAT)." lightbox="media/snat-private-range/private-ip-ranges-snat.png"::: 4. Select **Apply**. |
| firewall | Tutorial Hybrid Ps | https://github.com/MicrosoftDocs/azure-docs/commits/main/articles/firewall/tutorial-hybrid-ps.md | |
| frontdoor | How To Create Origin | https://github.com/MicrosoftDocs/azure-docs/commits/main/articles/frontdoor/standard-premium/how-to-create-origin.md | Title: Set up an Azure Front Door Standard/Premium (Preview) Origin + Title: Set up an Azure Front Door Standard/Premium Origin description: This article shows how to configure an origin with Endpoint Manager. Last updated 02/18/2021 -# Set up an Azure Front Door Standard/Premium (Preview) Origin +# Set up an Azure Front Door Standard/Premium Origin > [!Note]-> This documentation is for Azure Front Door Standard/Premium (Preview). Looking for information on Azure Front Door? View [here](../front-door-overview.md). +> This documentation is for Azure Front Door Standard/Premium. Looking for information on Azure Front Door? View [here](../front-door-overview.md). This article will show you how to create an Azure Front Door Standard/Premium origin in an existing origin group. -> [!IMPORTANT] -> Azure Front Door Standard/Premium (Preview) is currently in public preview. -> This preview version is provided without a service level agreement, and it's not recommended for production workloads. Certain features might not be supported or might have constrained capabilities. -> For more information, see [Supplemental Terms of Use for Microsoft Azure Previews](https://azure.microsoft.com/support/legal/preview-supplemental-terms/). - ## Prerequisites Before you can create an Azure Front Door Standard/Premium origin, you must have created at least one origin group. |
| hdinsight | Hdinsight 40 Component Versioning | https://github.com/MicrosoftDocs/azure-docs/commits/main/articles/hdinsight/hdinsight-40-component-versioning.md | The Open-source component versions associated with HDInsight 4.0 are listed in t | Apache Oozie | 4.3.1 | | Apache Zookeeper | 3.4.6 | | Apache Phoenix | 5 |-| Apache Spark | 2.4.4, 3.1 | +| Apache Spark | 2.4.4 | | Apache Livy | 0.5 | | Apache Kafka | 2.1.1, 2.4.1 | | Apache Ambari | 2.7.0 | |
| hdinsight | Apache Spark Improve Performance Iocache | https://github.com/MicrosoftDocs/azure-docs/commits/main/articles/hdinsight/spark/apache-spark-improve-performance-iocache.md | Title: Apache Spark performance - Azure HDInsight IO Cache (Preview) description: Learn about Azure HDInsight IO Cache and how to use it to improve Apache Spark performance. Previously updated : 05/26/2022 Last updated : 10/31/2022 # Improve performance of Apache Spark workloads using Azure HDInsight IO Cache +> [!NOTE] +> Spark 3.1.2 (HDI 5.0) doesnΓÇÖt support IO Cache. + IO Cache is a data caching service for Azure HDInsight that improves the performance of Apache Spark jobs. IO Cache also works with [Apache TEZ](https://tez.apache.org/) and [Apache Hive](https://hive.apache.org/) workloads, which can be run on [Apache Spark](https://spark.apache.org/) clusters. IO Cache uses an open-source caching component called RubiX. RubiX is a local disk cache for use with big data analytics engines that access data from cloud storage systems. RubiX is unique among caching systems, because it uses Solid-State Drives (SSDs) rather than reserve operating memory for caching purposes. The IO Cache service launches and manages RubiX Metadata Servers on each worker node of the cluster. It also configures all services of the cluster for transparent use of RubiX cache. Most SSDs provide more than 1 GByte per second of bandwidth. This bandwidth, complemented by the operating system in-memory file cache, provides enough bandwidth to load big data compute processing engines, such as Apache Spark. The operating memory is left available for Apache Spark to process heavily memory-dependent tasks, such as shuffles. Having exclusive use of operating memory allows Apache Spark to achieve optimal resource usage. |
| iot-central | Howto Connect Eflow | https://github.com/MicrosoftDocs/azure-docs/commits/main/articles/iot-central/core/howto-connect-eflow.md | Title: Azure IoT Edge for Linux on Windows (EFLOW) with IoT Central | Microsoft Docs description: Learn how to connect Azure IoT Edge for Linux on Windows (EFLOW) with IoT Central --++ Last updated 06/16/2022 |
| iot-central | Howto Export To Azure Data Explorer | https://github.com/MicrosoftDocs/azure-docs/commits/main/articles/iot-central/core/howto-export-to-azure-data-explorer.md | Title: Export data to Azure Data Explorer IoT Central | Microsoft Docs description: How to use the new data export to export your IoT data to Azure Data Explorer --++ Last updated 04/28/2022 |
| iot-central | Howto Export To Blob Storage | https://github.com/MicrosoftDocs/azure-docs/commits/main/articles/iot-central/core/howto-export-to-blob-storage.md | Title: Export data to Blob Storage IoT Central | Microsoft Docs description: How to use the new data export to export your IoT data to Blob Storage --++ Last updated 04/28/2022 |
| iot-central | Howto Export To Event Hubs | https://github.com/MicrosoftDocs/azure-docs/commits/main/articles/iot-central/core/howto-export-to-event-hubs.md | Title: Export data to Event Hubs IoT Central | Microsoft Docs description: How to use the new data export to export your IoT data to Event Hubs --++ Last updated 04/28/2022 |
| iot-central | Howto Export To Service Bus | https://github.com/MicrosoftDocs/azure-docs/commits/main/articles/iot-central/core/howto-export-to-service-bus.md | Title: Export data to Service Bus IoT Central | Microsoft Docs description: How to use the new data export to export your IoT data to Service Bus --++ Last updated 04/28/2022 |
| iot-central | Howto Export To Webhook | https://github.com/MicrosoftDocs/azure-docs/commits/main/articles/iot-central/core/howto-export-to-webhook.md | Title: Export data to Webhook IoT Central | Microsoft Docs description: How to use the new data export to export your IoT data to Webhook --++ Last updated 04/28/2022 |
| iot-central | Howto Manage Dashboards With Rest Api | https://github.com/MicrosoftDocs/azure-docs/commits/main/articles/iot-central/core/howto-manage-dashboards-with-rest-api.md | Title: Use the REST API to manage dashboards in Azure IoT Central description: How to use the IoT Central REST API to manage dashboards in an application--++ Last updated 10/06/2022 |
| iot-central | Howto Manage Data Export With Rest Api | https://github.com/MicrosoftDocs/azure-docs/commits/main/articles/iot-central/core/howto-manage-data-export-with-rest-api.md | Title: Use the REST API to manage data export in Azure IoT Central description: How to use the IoT Central REST API to manage data export in an application--++ Last updated 06/15/2022 |
| iot-central | Howto Manage Device Templates With Rest Api | https://github.com/MicrosoftDocs/azure-docs/commits/main/articles/iot-central/core/howto-manage-device-templates-with-rest-api.md | Title: Use the REST API to add device templates in Azure IoT Central description: How to use the IoT Central REST API to add device templates in an application--++ Last updated 06/17/2022 |
| iot-central | Howto Manage Devices With Rest Api | https://github.com/MicrosoftDocs/azure-docs/commits/main/articles/iot-central/core/howto-manage-devices-with-rest-api.md | Title: How to use the IoT Central REST API to manage devices description: How to use the IoT Central REST API to add devices in an application--++ Last updated 06/22/2022 |
| iot-central | Howto Manage Organizations With Rest Api | https://github.com/MicrosoftDocs/azure-docs/commits/main/articles/iot-central/core/howto-manage-organizations-with-rest-api.md | Title: Use the REST API to manage organizations in Azure IoT Central description: How to use the IoT Central REST API to manage organizations in an application--++ Last updated 03/08/2022 |
| iot-central | Howto Upload File Rest Api | https://github.com/MicrosoftDocs/azure-docs/commits/main/articles/iot-central/core/howto-upload-file-rest-api.md | Title: Use the REST API to add upload storage account configuration in Azure IoT Central description: How to use the IoT Central REST API to add upload storage account configuration in an application--++ Last updated 05/12/2022 |
| iot-hub-device-update | Components Enumerator | https://github.com/MicrosoftDocs/azure-docs/commits/main/articles/iot-hub-device-update/components-enumerator.md | Title: 'Register components with Device Update: Contoso Virtual Vacuum component enumerator | Microsoft Docs' description: Follow a Contoso Virtual Vacuum example to implement your own component enumerator by using proxy update.--++ Last updated 08/25/2022 |
| iot-hub-device-update | Device Update Agent Overview | https://github.com/MicrosoftDocs/azure-docs/commits/main/articles/iot-hub-device-update/device-update-agent-overview.md | Title: Understand Device Update for Azure IoT Hub Agent| Microsoft Docs description: Understand Device Update for Azure IoT Hub Agent.--++ Last updated 2/12/2021 |
| iot-hub-device-update | Device Update Agent Provisioning | https://github.com/MicrosoftDocs/azure-docs/commits/main/articles/iot-hub-device-update/device-update-agent-provisioning.md | Title: Provisioning Device Update for Azure IoT Hub Agent| Microsoft Docs description: Provisioning Device Update for Azure IoT Hub Agent--++ Last updated 1/26/2022 |
| iot-hub-device-update | Device Update Azure Real Time Operating System | https://github.com/MicrosoftDocs/azure-docs/commits/main/articles/iot-hub-device-update/device-update-azure-real-time-operating-system.md | Title: Device Update for Azure RTOS | Microsoft Docs description: Get started with Device Update for Azure RTOS.--++ Last updated 3/18/2021 |
| iot-hub-device-update | Device Update Configuration File | https://github.com/MicrosoftDocs/azure-docs/commits/main/articles/iot-hub-device-update/device-update-configuration-file.md | Title: Understand Device Update for Azure IoT Hub Configuration File| Microsoft Docs description: Understand Device Update for Azure IoT Hub Configuration File.--++ Last updated 06/27/2022 |
| iot-hub-device-update | Device Update Configure Repo | https://github.com/MicrosoftDocs/azure-docs/commits/main/articles/iot-hub-device-update/device-update-configure-repo.md | Title: 'Configure package repository for package updates | Microsoft Docs' description: Follow an example to configure package repository for package updates.--++ Last updated 8/8/2022 |
| iot-hub-device-update | Device Update Howto Proxy Updates | https://github.com/MicrosoftDocs/azure-docs/commits/main/articles/iot-hub-device-update/device-update-howto-proxy-updates.md | Title: Complete a proxy update by using Device Update for Azure IoT Hub | Microsoft Docs description: Get started with Device Update for Azure IoT Hub by using the Device Update binary agent for proxy updates.--++ Last updated 1/26/2022 |
| iot-hub-device-update | Device Update Multi Step Updates | https://github.com/MicrosoftDocs/azure-docs/commits/main/articles/iot-hub-device-update/device-update-multi-step-updates.md | Title: Using multiple steps for Updates with Device Update for Azure IoT Hub| Microsoft Docs description: Using multiple steps for Updates with Device Update for Azure IoT Hub--++ Last updated 11/12/2021 |
| iot-hub-device-update | Device Update Proxy Updates | https://github.com/MicrosoftDocs/azure-docs/commits/main/articles/iot-hub-device-update/device-update-proxy-updates.md | Title: Using Proxy Updates with Device Update for Azure IoT Hub| Microsoft Docs description: Using Proxy Updates with Device Update for Azure IoT Hub--++ Last updated 11/12/2021 |
| iot-hub-device-update | Device Update Raspberry Pi | https://github.com/MicrosoftDocs/azure-docs/commits/main/articles/iot-hub-device-update/device-update-raspberry-pi.md | Title: Device Update for IoT Hub tutorial using the Raspberry Pi 3 B+ reference Yocto image | Microsoft Docs description: Get started with Device Update for Azure IoT Hub by using the Raspberry Pi 3 B+ reference Yocto image.--++ Last updated 1/26/2022 |
| iot-hub-device-update | Device Update Simulator | https://github.com/MicrosoftDocs/azure-docs/commits/main/articles/iot-hub-device-update/device-update-simulator.md | Title: Device Update for Azure IoT Hub tutorial using the Ubuntu (18.04 x64) simulator reference agent | Microsoft Docs description: Get started with Device Update for Azure IoT Hub using the Ubuntu (18.04 x64) simulator reference agent.--++ Last updated 1/26/2022 |
| iot-hub | Iot Hub Devguide Identity Registry | https://github.com/MicrosoftDocs/azure-docs/commits/main/articles/iot-hub/iot-hub-devguide-identity-registry.md | All these operations can use optimistic concurrency, as specified in [RFC7232](h An IoT Hub identity registry: -* Does not contain any application metadata. +* Doesn't contain any application metadata. > [!IMPORTANT]-> Only use the identity registry for device management and provisioning operations. High throughput operations at run time should not depend on performing operations in the identity registry. For example, checking the connection state of a device before sending a command is not a supported pattern. Make sure to check the [throttling rates](iot-hub-devguide-quotas-throttling.md) for the identity registry, and the [device heartbeat](iot-hub-devguide-identity-registry.md#device-heartbeat) pattern. +> Only use the identity registry for device management and provisioning operations. High throughput operations at run time should not depend on performing operations in the identity registry. For example, checking the connection state of a device before sending a command is not a supported pattern. Make sure to check the [throttling rates](iot-hub-devguide-quotas-throttling.md) for the identity registry. > [!NOTE] > It can take a few seconds for a device or module identity to be available for retrieval after creation. Please retry `get` operation of device or module identities in case of failures. You can disable devices by updating the **status** property of an identity in th * During a provisioning orchestration process. For more information, see [Device Provisioning](iot-hub-devguide-identity-registry.md#device-provisioning). -* If, for any reason, you think a device is compromised or has become unauthorized. +* If you think a device is compromised or has become unauthorized for any reason. -This feature is not available for modules. +This feature isn't available for modules. ## Import and export device identities The device data that a given IoT solution stores depends on the specific require *Device provisioning* is the process of adding the initial device data to the stores in your solution. To enable a new device to connect to your hub, you must add a device ID and keys to the IoT Hub identity registry. As part of the provisioning process, you might need to initialize device-specific data in other solution stores. You can also use the Azure IoT Hub Device Provisioning Service to enable zero-touch, just-in-time provisioning to one or more IoT hubs without requiring human intervention. To learn more, see the [provisioning service documentation](../iot-dps/index.yml). -## Device heartbeat --The IoT Hub identity registry contains a field called **connectionState**. Only use the **connectionState** field during development and debugging. IoT solutions should not query the field at run time. For example, do not query the **connectionState** field to check if a device is connected before you send a cloud-to-device message or an SMS. We recommend subscribing to the [**device disconnected** event](iot-hub-event-grid.md#event-types) on Event Grid to get alerts and monitor the device connection state. Use this [tutorial](iot-hub-how-to-order-connection-state-events.md) to learn how to integrate Device Connected and Device Disconnected events from IoT Hub in your IoT solution. --If your IoT solution needs to know if a device is connected, you can implement the *heartbeat pattern*. -In the heartbeat pattern, the device sends device-to-cloud messages at least once every fixed amount of time (for example, at least once every hour). Therefore, even if a device does not have any data to send, it still sends an empty device-to-cloud message (usually with a property that identifies it as a heartbeat). On the service side, the solution maintains a map with the last heartbeat received for each device. If the solution does not receive a heartbeat message within the expected time from the device, it assumes that there is a problem with the device. --A more complex implementation could include the information from [Azure Monitor](../azure-monitor/index.yml) and [Azure Resource Health](../service-health/resource-health-overview.md) to identify devices that are trying to connect or communicate but failing. To learn more about using these services with IoT Hub, see [Monitor IoT Hub](monitor-iot-hub.md) and [Check IoT Hub resource health](iot-hub-azure-service-health-integration.md#check-iot-hub-health-with-azure-resource-health). For more specific information about using Azure Monitor or Event Grid to monitor device connectivity, see [Monitor, diagnose, and troubleshoot device connectivity](iot-hub-troubleshoot-connectivity.md). When you implement the heartbeat pattern, make sure to check [IoT Hub Quotas and Throttles](iot-hub-devguide-quotas-throttling.md). --> [!NOTE] -> If an IoT solution uses the connection state solely to determine whether to send cloud-to-device messages, and messages are not broadcast to large sets of devices, consider using the simpler *short expiry time* pattern. This pattern achieves the same result as maintaining a device connection state registry using the heartbeat pattern, while being more efficient. If you request message acknowledgements, IoT Hub can notify you about which devices are able to receive messages and which are not. - ## Device and module lifecycle notifications -IoT Hub can notify your IoT solution when a device identity is created or deleted by sending lifecycle notifications. To do so, your IoT solution needs to create a route and to set the Data Source equal to *DeviceLifecycleEvents*. By default, no lifecycle notifications are sent, that is, no such routes pre-exist. By creating a route with Data Source equal to *DeviceLifecycleEvents*, lifecycle events will be sent for both device identities and module identities; however, the message contents will differ depending on whether the events are generated for module identities or device identities. It should be noted that for IoT Edge modules, the module identity creation flow is different than for other modules, as a result for IoT Edge modules the create notification is only sent if the corresponding IoT Edge Device for the updated IoT Edge module identity is running. For all other modules, lifecycle notifications are sent whenever the module identity is updated on the IoT Hub side. To learn more about the properties and body returned in the notification message, see [Non-telemetry event schemas](iot-hub-non-telemetry-event-schema.md). +IoT Hub can notify your IoT solution when a device identity is created or deleted by sending lifecycle notifications. To do so, your IoT solution needs to create a route and set the data source equal to *DeviceLifecycleEvents*. By default, no lifecycle notifications are sent, that is, no such routes pre-exist. By creating a route with Data Source equal to *DeviceLifecycleEvents*, lifecycle events will be sent for both device identities and module identities; however, the message contents will differ depending on whether the events are generated for module identities or device identities. It should be noted that for IoT Edge modules, the module identity creation flow is different than for other modules, as a result for IoT Edge modules the create notification is only sent if the corresponding IoT Edge Device for the updated IoT Edge module identity is running. For all other modules, lifecycle notifications are sent whenever the module identity is updated on the IoT Hub side. To learn more about the properties and body returned in the notification message, see [Non-telemetry event schemas](iot-hub-non-telemetry-event-schema.md). ## Device identity properties Device identities are represented as JSON documents with the following propertie | authentication |optional |A composite object containing authentication information and security materials. For more information, see [Authentication Mechanism](/rest/api/iothub/service/devices/get-identity#authenticationmechanism) in the REST API documentation. | | capabilities | optional | The set of capabilities of the device. For example, whether the device is an edge device or not. For more information, see [Device Capabilities](/rest/api/iothub/service/devices/get-identity#devicecapabilities) in the REST API documentation. | | deviceScope | optional | The scope of the device. In edge devices, auto generated and immutable. Deprecated in non-edge devices. However, in child (leaf) devices, set this property to the same value as the **parentScopes** property (the **deviceScope** of the parent device) for backward compatibility with previous versions of the API. For more information, see [IoT Edge as a gateway: Parent and child relationships](../iot-edge/iot-edge-as-gateway.md#parent-and-child-relationships).|-| parentScopes | optional | The scope of a child device's direct parent (the value of the **deviceScope** property of the parent device). In edge devices, the value is empty if the device has no parent. In non-edge devices, the property is not present if the device has no parent. For more information, see [IoT Edge as a gateway: Parent and child relationships](../iot-edge/iot-edge-as-gateway.md#parent-and-child-relationships). | -| status |required |An access indicator. Can be **Enabled** or **Disabled**. If **Enabled**, the device is allowed to connect. If **Disabled**, this device cannot access any device-facing endpoint. | +| parentScopes | optional | The scope of a child device's direct parent (the value of the **deviceScope** property of the parent device). In edge devices, the value is empty if the device has no parent. In non-edge devices, the property isn't present if the device has no parent. For more information, see [IoT Edge as a gateway: Parent and child relationships](../iot-edge/iot-edge-as-gateway.md#parent-and-child-relationships). | +| status |required |An access indicator. Can be **Enabled** or **Disabled**. If **Enabled**, the device is allowed to connect. If **Disabled**, this device can't access any device-facing endpoint. | | statusReason |optional |A 128 character-long string that stores the reason for the device identity status. All UTF-8 characters are allowed. | | statusUpdateTime |read-only |A temporal indicator, showing the date and time of the last status update. |-| connectionState |read-only |A field indicating connection status: either **Connected** or **Disconnected**. This field represents the IoT Hub view of the device connection status. **Important**: This field should be used only for development/debugging purposes. The connection state is updated only for devices using MQTT or AMQP. Also, it is based on protocol-level pings (MQTT pings, or AMQP pings), and it can have a maximum delay of only 5 minutes. For these reasons, there can be false positives, such as devices reported as connected but that are disconnected. | +| connectionState |read-only |A field indicating connection status: either **Connected** or **Disconnected**. This field represents the IoT Hub view of the device connection status. **Important**: This field should be used only for development/debugging purposes. The connection state is updated only for devices using MQTT or AMQP. Also, it's based on protocol-level pings (MQTT pings, or AMQP pings), and it can have a maximum delay of only 5 minutes. For these reasons, there can be false positives, such as devices reported as connected but that are disconnected. | | connectionStateUpdatedTime |read-only |A temporal indicator, showing the date and last time the connection state was updated. | | lastActivityTime |read-only |A temporal indicator, showing the date and last time the device connected, received, or sent a message. This property is eventually consistent, but could be delayed up to 5 to 10 minutes. For this reason, it shouldn't be used in production scenarios. | Module identities are represented as JSON documents with the following propertie | | | | | deviceId |required, read-only on updates |A case-sensitive string (up to 128 characters long) of ASCII 7-bit alphanumeric characters plus certain special characters: `- . + % _ # * ? ! ( ) , : = @ $ '`. | | moduleId |required, read-only on updates |A case-sensitive string (up to 128 characters long) of ASCII 7-bit alphanumeric characters plus certain special characters: `- . + % _ # * ? ! ( ) , : = @ $ '`. |-| generationId |required, read-only |An IoT hub-generated, case-sensitive string up to 128 characters long. This value is used to distinguish devices with the same **deviceId**, when they have been deleted and re-created. | +| generationId |required, read-only |An IoT hub-generated, case-sensitive string up to 128 characters long. This value is used to distinguish devices with the same **deviceId**, when they've been deleted and re-created. | | etag |required, read-only |A string representing a weak ETag for the device identity, as per [RFC7232](https://tools.ietf.org/html/rfc7232). | | authentication |optional |A composite object containing authentication information and security materials. For more information, see [Authentication Mechanism](/rest/api/iothub/service/modules/get-identity#authenticationmechanism) in the REST API documentation. |-| managedBy | optional | Identifies who manages this module. For instance, this value is "Iot Edge" if the edge runtime owns this module. | +| managedBy | optional | Identifies who manages this module. For instance, this value is "IoT Edge" if the edge runtime owns this module. | | cloudToDeviceMessageCount | read-only | The number of cloud-to-module messages currently queued to be sent to the module. |-| connectionState |read-only |A field indicating connection status: either **Connected** or **Disconnected**. This field represents the IoT Hub view of the device connection status. **Important**: This field should be used only for development/debugging purposes. The connection state is updated only for devices using MQTT or AMQP. Also, it is based on protocol-level pings (MQTT pings, or AMQP pings), and it can have a maximum delay of only 5 minutes. For these reasons, there can be false positives, such as devices reported as connected but that are disconnected. | +| connectionState |read-only |A field indicating connection status: either **Connected** or **Disconnected**. This field represents the IoT Hub view of the device connection status. **Important**: This field should be used only for development/debugging purposes. The connection state is updated only for devices using MQTT or AMQP. Also, it's based on protocol-level pings (MQTT pings, or AMQP pings), and it can have a maximum delay of only 5 minutes. For these reasons, there can be false positives, such as devices reported as connected but that are disconnected. | | connectionStateUpdatedTime |read-only |A temporal indicator, showing the date and last time the connection state was updated. | | lastActivityTime |read-only |A temporal indicator, showing the date and last time the device connected, received, or sent a message. | Module identities are represented as JSON documents with the following propertie ## Additional reference material -Other reference topics in the IoT Hub developer guide include: +Other reference articles in the IoT Hub developer guide include: * [IoT Hub endpoints](iot-hub-devguide-endpoints.md) describes the various endpoints that each IoT hub exposes for run-time and management operations. Other reference topics in the IoT Hub developer guide include: ## Next steps -Now that you have learned how to use the IoT Hub identity registry, you may be interested in the following IoT Hub developer guide topics: +Now that you've learned how to use the IoT Hub identity registry, you may be interested in the following IoT Hub developer guide articles: * [Control access to IoT Hub](iot-hub-devguide-security.md) |
| iot-hub | Monitor Device Connection State | https://github.com/MicrosoftDocs/azure-docs/commits/main/articles/iot-hub/monitor-device-connection-state.md | + + Title: Monitor device status - Azure IoT Hub +description: Use Event Grid or heartbeat patterns to monitor IoT Hub device connection states. ++++ Last updated : 10/18/2022+++# Monitor device connection status ++Azure IoT Hub supports several methods for monitoring the status of your devices. This article presents the different monitoring methods and provides guidance to help you choose the best option for your IoT solution. ++The following table introduces three ways to monitor your device connection status: ++| Method | Status frequency | Cost | Effort to build | +| | | | | +| Device twin connectionState property | Intermittent | Low | Low | +| Event Grid | 60 seconds | Low | Low | +| Custom device heartbeat pattern | Custom | High | High | ++Because of its reliability, low cost, and ease of use we recommend Event Grid as the preferred monitoring solution for most customers. ++However, there are certain limitations to monitoring with Event Grid that may disqualify it for some IoT solutions. Use this article to understand the benefits and limitations of each option. ++## Device twin connectionState ++Every IoT Hub device identity contains a property called **connectionState** that reports either **connected** or **disconnected**. This property represents IoT Hub's understanding of a device's connection status. ++The connection state property has several limitations: ++* The connection state is updated only for devices that use MQTT or AMQP. +* Updates to this property rely on protocol-level pings and may be delayed as much as five minutes. ++For these reasons, we recommend that you only use the **connectionState** field during development and debugging. IoT solutions shouldn't query the field at run time. For example, don't query the **connectionState** field to check if a device is connected before you send a cloud-to-device message or an SMS. ++## Event Grid ++We recommend Event Grid as the preferred monitoring solution for most customers. ++Subscribe to the **deviceConnected** and **deviceDisconnected** events on Event Grid to get alerts and monitor the device connection state. ++Use the following articles to learn how to integrate device connected and disconnected events in your IoT solution: ++* [React to IoT Hub events by using Event Grid](iot-hub-event-grid.md) +* [Order device connection events by using Cosmos DB](iot-hub-how-to-order-connection-state-events.md) ++Device connection state events are available for devices connecting using either the MQTT or AMQP protocol, or using either of these protocols over WebSockets. Requests made only with HTTPS won't trigger device connection state notifications. ++* For devices connecting using the Azure IoT SDKs for Java, Node, or Python: + * MQTT: connection state events are sent automatically. + * AMQP: a [cloud-to-device link](iot-hub-amqp-support.md#invoke-cloud-to-device-messages-service-client) should be created to reduce delays in reporting connection states. +* For devices connecting using the Azure IoT SDKs for .NET or C, connection state events won't be reported until an initial device-to-cloud message is sent or a cloud-to-device message is received. ++Outside of the Azure IoT SDKs, in MQTT these operations equate to SUBSCRIBE or PUBLISH operations on the appropriate messaging topics. Over AMQP these operations equate to attaching or transferring a message on the appropriate link paths. ++IoT Hub doesn't report each individual device connect and disconnect, but rather publishes the current connection state taken at a periodic 60-second snapshot. Receiving either the same connection state event with different sequence numbers or different connection state events both mean that there was a change in the device connection state during the 60-second window. ++### Event Grid limitations ++Using Event Grid to monitor your device status comes with the following limitations: ++* Event Grid doesn't report each individual device connect and disconnect event. Instead, it polls for device status every 60 seconds and publishes the most recent connection state if there was a state change. For this reason, state change reports may be delayed up to one minute and individual state changes may be unreported if multiple events happen within the 60-second window. +* Devices that use MQTT start reporting device status automatically. However, devices that use AMQP need [cloud-to-device link](iot-hub-amqp-support.md#invoke-cloud-to-device-messages-service-client) before they can report device status. +* The IoT C SDK doesn't have a connect method. Customers must send telemetry to begin reporting accurate device connection states. +* Event Grid exposes a public endpoint that can't be hidden. ++If any of these limitations affect your ability to use Event Grid for device status monitoring, then you should consider building a custom device heartbeat pattern instead. ++## Device heartbeat ++If you need to know the connection state of your devices but the limitations of Event Grid are too restricting for your solution, you can implement the *heartbeat pattern*. In the heartbeat pattern, the device sends device-to-cloud messages at least once every fixed amount of time (for example, at least once every hour). Even if a device doesn't have any data to send, it still sends an empty device-to-cloud message, usually with a property that identifies it as a heartbeat message. On the service side, the solution maintains a map with the last heartbeat received for each device. If the solution doesn't receive a heartbeat message within the expected time from the device, it assumes that there's a problem with the device. ++> [!NOTE] +> If an IoT solution uses the connection state solely to determine whether to send cloud-to-device messages, and messages are not broadcast to large sets of devices, consider using the simpler *short expiry time* pattern. This pattern achieves the same result as maintaining a device connection state registry using the heartbeat pattern, while being more efficient. If you request message acknowledgements, IoT Hub can notify you about which devices are able to receive messages and which are not. ++### Device heartbeat limitations ++Since heartbeat messages are implemented as device-to-cloud messages, they count against your [IoT Hub message quota and throttling limits](iot-hub-devguide-quotas-throttling.md). ++## Other monitoring options ++A more complex implementation could include the information from [Azure Monitor](../azure-monitor/index.yml) and [Azure Resource Health](../service-health/resource-health-overview.md) to identify devices that are trying to connect or communicate but failing. Azure Monitor dashboards are helpful for seeing the aggregate health of your devices, while Event Grid and heartbeat patterns make it easier to respond to individual device outages. ++To learn more about using these services with IoT Hub, see [Monitor IoT Hub](monitor-iot-hub.md) and [Check IoT Hub resource health](iot-hub-azure-service-health-integration.md). For more specific information about using Azure Monitor or Event Grid to monitor device connectivity, see [Monitor, diagnose, and troubleshoot device connectivity](iot-hub-troubleshoot-connectivity.md). |
| iot-hub | Monitor Iot Hub Reference | https://github.com/MicrosoftDocs/azure-docs/commits/main/articles/iot-hub/monitor-iot-hub-reference.md | This article is a reference for implementing Azure monitoring. The major sections in this reference article: * [**Metrics**](monitor-iot-hub-reference.md#metrics): lists of IoT Hub platform metrics by topic-* [**Metric dimensions**](monitor-iot-hub-reference.md#metric-dimensions): dimensions for routing and event grid metrics +* [**Metric dimensions**](monitor-iot-hub-reference.md#metric-dimensions): dimensions for routing and Event Grid metrics * [**Resource logs**](monitor-iot-hub-reference.md#resource-logs): logs by category types and schemas collected for Azure IoT Hub * [**Azure Monitor Logs tables**](monitor-iot-hub-reference.md#azure-monitor-logs-tables): discusses Azure Monitor Logs Kusto tables Select a topic to jump to its information on this page. - [Device metrics](#device-metrics) - [Device telemetry metrics](#device-telemetry-metrics) - [Device to cloud twin operations metrics](#device-to-cloud-twin-operations-metrics)-- [Event grid metrics](#event-grid-metrics)+- [Event Grid metrics](#event-grid-metrics) - [Jobs metrics](#jobs-metrics) - [Routing metrics](#routing-metrics) - [Twin query metrics](#twin-query-metrics) For metrics with a **Unit** value of **Count**, only total (sum) aggregation is For metrics with a **Unit** value of **Count**, only total (sum) aggregation is valid. Minimum, maximum, and average aggregations always return 1. For more information, see [Supported aggregations](#supported-aggregations). -### Event grid metrics +### Event Grid metrics |Metric Display Name|Metric|Unit|Aggregation Type|Description|Dimensions| ||||||| For metrics with a **Unit** value of **Count**, only total (sum) aggregation is | Routing Delivery Latency (preview) |RoutingDeliveryLatency| Milliseconds | Average |The routing delivery latency metric. Use the dimensions to identify the latency for a specific endpoint or for a specific routing source.| RoutingSource,<br>EndpointType,<br>EndpointName<br>*For more information, see [Metric dimensions](#metric-dimensions)*.| |Routing: blobs delivered to storage|d2c.endpoints.egress.storage.blobs|Count|Total|The number of times IoT Hub routing delivered blobs to storage endpoints.|None| |Routing: data delivered to storage|d2c.endpoints.egress.storage.bytes|Bytes|Total|The amount of data (bytes) IoT Hub routing delivered to storage endpoints.|None|-|Routing: message latency for Event Hub|d2c.endpoints.latency.eventHubs|Milliseconds|Average|The average latency (milliseconds) between message ingress to IoT Hub and message ingress into custom endpoints of type Event Hub. Messages routes to built-in endpoint (events) aren't included.|None| +|Routing: message latency for Event Hubs|d2c.endpoints.latency.eventHubs|Milliseconds|Average|The average latency (milliseconds) between message ingress to IoT Hub and message ingress into custom endpoints of type Event Hubs. Messages routes to built-in endpoint (events) aren't included.|None| |Routing: message latency for Service Bus Queue|d2c.endpoints.latency.serviceBusQueues|Milliseconds|Average|The average latency (milliseconds) between message ingress to IoT Hub and message ingress into a Service Bus queue endpoint.|None| |Routing: message latency for Service Bus Topic|d2c.endpoints.latency.serviceBusTopics|Milliseconds|Average|The average latency (milliseconds) between message ingress to IoT Hub and message ingress into a Service Bus topic endpoint.|None| |Routing: message latency for messages/events|d2c.endpoints.latency.builtIn.events|Milliseconds|Average|The average latency (milliseconds) between message ingress to IoT Hub and message ingress into the built-in endpoint (messages/events) and fallback route.|None| |Routing: message latency for storage|d2c.endpoints.latency.storage|Milliseconds|Average|The average latency (milliseconds) between message ingress to IoT Hub and message ingress into a storage endpoint.|None|-|Routing: messages delivered to Event Hub|d2c.endpoints.egress.eventHubs|Count|Total|The number of times IoT Hub routing successfully delivered messages to custom endpoints of type Event Hub. Messages routes to built-in endpoint (events) aren't included.|None| +|Routing: messages delivered to Event Hubs|d2c.endpoints.egress.eventHubs|Count|Total|The number of times IoT Hub routing successfully delivered messages to custom endpoints of type Event Hubs. Messages routes to built-in endpoint (events) aren't included.|None| |Routing: messages delivered to Service Bus Queue|d2c.endpoints.egress.serviceBusQueues|Count|Total|The number of times IoT Hub routing successfully delivered messages to Service Bus queue endpoints.|None| |Routing: messages delivered to Service Bus Topic|d2c.endpoints.egress.serviceBusTopics|Count|Total|The number of times IoT Hub routing successfully delivered messages to Service Bus topic endpoints.|None| |Routing: messages delivered to fallback|d2c.telemetry.egress.fallback|Count|Total|The number of times IoT Hub routing delivered messages to the endpoint associated with the fallback route.|None| For metrics with a **Unit** value of **Count**, only total (sum) aggregation is ## Metric dimensions -Azure IoT Hub has the following dimensions associated with some of its routing and event grid metrics. +Azure IoT Hub has the following dimensions associated with some of its routing and Event Grid metrics. |Dimension Name | Description| ||| This section lists all the resource log category types and schemas collected for The connections category tracks device connect and disconnect events from an IoT hub and errors. This category is useful for identifying unauthorized connection attempts and or alerting when you lose connection to devices. -> [!NOTE] -> For reliable connection status of devices check [Device heartbeat](iot-hub-devguide-identity-registry.md#device-heartbeat). +For reliable connection status of devices, see [Monitor device connection status](monitor-device-connection-state.md). ```json { Here, `durationMs` isn't calculated as IoT Hub's clock might not be in sync with #### IoT Hub ingress logs -IoT Hub records this log when message containing valid trace properties writes to internal or built-in Event Hub. +IoT Hub records this log when message containing valid trace properties writes to internal or built-in Event Hubs. ```json { |
| load-balancer | Cross Region Overview | https://github.com/MicrosoftDocs/azure-docs/commits/main/articles/load-balancer/cross-region-overview.md | Configure regional redundancy by adding a global frontend public IP address to y If one region fails, the traffic is routed to the next closest healthy regional load balancer. -The health probe of the cross-region load balancer gathers information about availability every 20 seconds. If one regional load balancer drops its availability to 0, cross-region load balancer will detect the failure. The regional load balancer is then taken out of rotation. +The health probe of the cross-region load balancer gathers information about availability of each regional load balancer every 20 seconds. If one regional load balancer drops its availability to 0, cross-region load balancer will detect the failure. The regional load balancer is then taken out of rotation. :::image type="content" source="./media/cross-region-overview/global-region-view.png" alt-text="Diagram of global region traffic view." border="true"::: Cross-region load balancer routes the traffic to the appropriate regional load b * Cross-region IPv6 frontend IP configurations aren't supported. -* UDP traffic is not supported on Cross-region Load Balancer. +* UDP traffic isn't supported on Cross-region Load Balancer. * A health probe can't be configured currently. A default health probe automatically collects availability information about the regional load balancer every 20 seconds. |
| load-balancer | Skus | https://github.com/MicrosoftDocs/azure-docs/commits/main/articles/load-balancer/skus.md | Azure Load Balancer has 3 SKUs - Basic, Standard, and Gateway. Each SKU is cater To compare and understand the differences between Basic and Standard SKU, see the following table. -| | Standard Load Balancer | Basic Load Balancer | Gateway Load Balancer +| | Standard Load Balancer | Basic Load Balancer | | | | | | **Scenario** | Equipped for load-balancing network layer traffic when high performance and ultra-low latency is needed. Routes traffic within and across regions, and to availability zones for high resiliency. | Equipped for small-scale applications that don't need high availability or redundancy. Not compatible with availability zones. | | **Backend type** | IP based, NIC based | NIC based | |
| logic-apps | Logic Apps Gateway Connection | https://github.com/MicrosoftDocs/azure-docs/commits/main/articles/logic-apps/logic-apps-gateway-connection.md | Title: Access data sources on premises -description: Connect to on-premises data sources from Azure Logic Apps by creating a data gateway resource in Azure portal. + Title: Connect to on-premises data sources +description: Access data sources on premises from Azure Logic Apps by creating a data gateway resource in the Azure portal. ms.suite: integration-+ Previously updated : 07/14/2021 Last updated : 10/19/2022+#Customer intent: As a logic apps developer, I want to create a data gateway resource in the Azure portal so that my logic app workflow can connect to on-premises data sources. # Connect to on-premises data sources from Azure Logic Apps -After you [install the *on-premises data gateway* on a local computer](../logic-apps/logic-apps-gateway-install.md) and before you can access data sources on premises from your logic apps, you have to create a gateway resource in Azure for your gateway installation. You can then select this gateway resource in the triggers and actions that you want to use for the [on-premises connectors](../connectors/managed.md#on-premises-connectors) available in Azure Logic Apps. Azure Logic Apps supports read and write operations through the data gateway. However, these operations have [limits on their payload size](/data-integration/gateway/service-gateway-onprem#considerations). -This article shows how to create your Azure gateway resource for a previously [installed gateway on your local computer](../logic-apps/logic-apps-gateway-install.md). For more information about the gateway, see [How the gateway works](../logic-apps/logic-apps-gateway-install.md#gateway-cloud-service). +In Azure Logic Apps, you can use some connectors to access on-premises data sources from your logic app workflows. However, before you can do so, you need to install the on-premises data gateway on a local computer. You also need to create a gateway resource in Azure for your gateway installation. You can then select this gateway resource when you use triggers and actions from connectors that can access on-premises data sources. > [!TIP]-> To directly access on-premises resources in Azure virtual networks without having to use the gateway, consider creating an -> [*integration service environment*](../logic-apps/connect-virtual-network-vnet-isolated-environment-overview.md) instead. +> To directly access on-premises resources in Azure virtual networks without having to use a gateway, +> consider creating an [integration service environment](connect-virtual-network-vnet-isolated-environment-overview.md) +> or a [Standard logic app workflow](create-single-tenant-workflows-azure-portal.md), which provides +> some built-in connectors that don't need the gateway to access on-premises data sources. -For information about how to use the gateway with other services, see these articles: +This how-to guide shows how to create your Azure gateway resource after you [install the on-premises gateway on your local computer](logic-apps-gateway-install.md). ++For more information, see the following documentation: ++* [Connectors that can access on-premises data sources](../connectors/managed.md#on-premises-connectors) +* [How the gateway works](logic-apps-gateway-install.md#gateway-cloud-service) ++For information about how to use a gateway with other services, see the following documentation: * [Microsoft Power Automate on-premises data gateway](/power-automate/gateway-reference) * [Microsoft Power BI on-premises data gateway](/power-bi/service-gateway-onprem) For information about how to use the gateway with other services, see these arti ## Supported data sources -In Azure Logic Apps, the on-premises data gateway supports the [on-premises connectors](../connectors/managed.md#on-premises-connectors) for these data sources: +In Azure Logic Apps, an on-premises data gateway supports [on-premises connectors](../connectors/managed.md#on-premises-connectors) for the following data sources: * [Apache Impala](/connectors/impala) * [BizTalk Server](/connectors/biztalk) In Azure Logic Apps, the on-premises data gateway supports the [on-premises conn * [SQL Server](/connectors/sql) * [Teradata](/connectors/teradata) -You can also create [custom connectors](../logic-apps/custom-connector-overview.md) that connect to data sources over HTTP or HTTPS by using REST or SOAP. Although the gateway itself doesn't incur extra costs, the [Logic Apps pricing model](../logic-apps/logic-apps-pricing.md) applies to these connectors and other operations in Azure Logic Apps. +You can also create [custom connectors](custom-connector-overview.md) that connect to data sources over HTTP or HTTPS by using REST or SOAP. Although a gateway itself doesn't incur extra costs, the [Azure Logic Apps pricing model](logic-apps-pricing.md) applies to connectors and other Azure Logic Apps operations. ++## Limitations ++Azure Logic Apps supports read and write operations through the data gateway, but these operations have [limits on their payload size](/data-integration/gateway/service-gateway-onprem#considerations). ## Prerequisites -* You already [installed the on-premises data gateway on a local computer](../logic-apps/logic-apps-gateway-install.md). This gateway installation must exist before you can create a gateway resource that links to this installation. +* You already [installed an on-premises data gateway on a local computer](logic-apps-gateway-install.md). This gateway installation must exist before you can create a gateway resource that links to this installation. You can install only one data gateway per local computer. -* You have the [same Azure account and subscription](../logic-apps/logic-apps-gateway-install.md#requirements) that you used for your gateway installation. This Azure account must belong only to a single [Azure Active Directory (Azure AD) tenant or directory](../active-directory/fundamentals/active-directory-whatis.md#terminology). You have to use the same Azure account and subscription to create your gateway resource in Azure because only the gateway administrator can create the gateway resource in Azure. Service principals currently aren't supported. +* You have the [same Azure account and subscription](logic-apps-gateway-install.md#requirements) that you used for your gateway installation. This Azure account must belong only to a single [Azure Active Directory (Azure AD) tenant or directory](../active-directory/fundamentals/active-directory-whatis.md#terminology). You have to use the same Azure account and subscription to create your gateway resource in Azure because only the gateway administrator can create the gateway resource in Azure. Service principals currently aren't supported. * When you create a gateway resource in Azure, you select a gateway installation to link with your gateway resource and only that gateway resource. Each gateway resource can link to only one gateway installation. You can't select a gateway installation that's already associated with another gateway resource. - * Your logic app and gateway resource don't have to exist in the same Azure subscription. In triggers and actions where you can use the gateway resource, you can select a different Azure subscription that has a gateway resource, but only if that subscription exists in the same Azure AD tenant or directory as your logic app. You also have to have administrator permissions on the gateway, which another administrator can set up for you. For more information, see [Data Gateway: Automation using PowerShell - Part 1](https://community.powerbi.com/t5/Community-Blog/Data-Gateway-Automation-using-PowerShell-Part-1/ba-p/1117330) and [PowerShell: Data Gateway - Add-DataGatewayClusterUser](/powershell/module/datagateway/add-datagatewayclusteruser). + * Your logic app resource and gateway resource don't have to exist in the same Azure subscription. In triggers and actions where you use the gateway resource, you can select a different Azure subscription that has a gateway resource, but only if that subscription exists in the same Azure AD tenant or directory as your logic app resource. You also have to have administrator permissions on the gateway, which another administrator can set up for you. For more information, see [Data Gateway: Automation using PowerShell - Part 1](https://community.powerbi.com/t5/Community-Blog/Data-Gateway-Automation-using-PowerShell-Part-1/ba-p/1117330) and [PowerShell: Data Gateway - Add-DataGatewayClusterUser](/powershell/module/datagateway/add-datagatewayclusteruser). > [!NOTE] > Currently, you can't share a gateway resource or installation across multiple subscriptions. You can also create [custom connectors](../logic-apps/custom-connector-overview. ## Create Azure gateway resource -After you install the gateway on a local computer, create the Azure resource for your gateway. +After you install a gateway on a local computer, create the Azure resource for your gateway. -1. Sign in to the [Azure portal](https://portal.azure.com) with the same Azure account that was used to install the gateway. +1. Sign in to the [Azure portal](https://portal.azure.com) with the same Azure account that you used to install the gateway. -1. In the Azure portal search box, enter "on-premises data gateway", and select **On-premises Data Gateways**. +1. In the Azure portal search box, enter **on-premises data gateway**, and then select **On-premises data gateways**. -  + :::image type="content" source="./media/logic-apps-gateway-connection/search-for-on-premises-data-gateway.png" alt-text="Screenshot of the Azure portal. In the search box, 'on-premises data gateway' is selected. In the results, 'On-premises data gateways' is selected."::: -1. Under **On-premises Data Gateways**, select **Add**. +1. Under **On-premises data gateways**, select **Create**. -  + :::image type="content" source="./media/logic-apps-gateway-connection/add-azure-data-gateway-resource.png" alt-text="Screenshot of the Azure portal. On the 'On-premises data gateways page,' the 'Create' button is selected."::: -1. Under **Create connection gateway**, provide this information for your gateway resource. When you're done, select **Create**. +1. Under **Create a gateway**, provide the following information for your gateway resource. When you're done, select **Review + create**. | Property | Description | |-|-|- | **Resource Name** | Provide a name for your gateway resource that contains only letters, numbers, hyphens (`-`), underscores (`_`), parentheses (`(`, `)`), or periods (`.`). | - | **Subscription** | Select the Azure subscription for the Azure account that was used for the gateway installation. The default subscription is based on the Azure account that you used to sign in. | - | **Resource group** | The [Azure resource group](../azure-resource-manager/management/overview.md) that you want to use | - | **Location** | The same region or location that was selected for the gateway cloud service during [gateway installation](../logic-apps/logic-apps-gateway-install.md). Otherwise, your gateway installation won't appear in the **Installation Name** list. Your logic app location can differ from your gateway resource location. | - | **Installation Name** | Select a gateway installation, which appears in the list only when these conditions are met: <p><p>- The gateway installation uses the same region as the gateway resource that you want to create. <br>- The gateway installation isn't linked to another Azure gateway resource. <br>- The gateway installation is linked to the same Azure account that you're using to create the gateway resource. <br>- Your Azure account belongs to a single [Azure Active Directory (Azure AD) tenant or directory](../active-directory/fundamentals/active-directory-whatis.md#terminology) and is the same account that you used for the gateway installation. <p><p>For more information, see the [Frequently asked questions](#faq) section. | - ||| + | **Subscription** | Select the Azure subscription for the Azure account that you used for the gateway installation. The default subscription is based on the Azure account that you used to sign in. | + | **Resource group** | Select the [Azure resource group](../azure-resource-manager/management/overview.md) that you want to use. | + | **Name** | Enter a name for your gateway resource that contains only letters, numbers, hyphens (`-`), underscores (`_`), parentheses (`(`, `)`), or periods (`.`). | + | **Region** | Select the same region or location that you selected for the gateway cloud service during [gateway installation](logic-apps-gateway-install.md). Otherwise, your gateway installation doesn't appear in the **Installation Name** list. Your logic app resource location can differ from your gateway resource location. | + | **Installation Name** | Select a gateway installation, which appears in the list only when these conditions are met: <p><p>- The gateway installation uses the same region as the gateway resource that you want to create. <br>- The gateway installation isn't linked to another Azure gateway resource. <br>- The gateway installation is linked to the same Azure account that you're using to create the gateway resource. <br>- Your Azure account belongs to a single [Azure AD tenant or directory](../active-directory/fundamentals/active-directory-whatis.md#terminology) and is the same account that you used for the gateway installation. <p><p>For more information, see [Frequently asked questions](#frequently-asked-questions). | ++ The following example shows a gateway installation that's in the same region as your gateway resource and is linked to the same Azure account: - Here is an example that shows a gateway installation that's in the same region as your gateway resource and is linked to the same Azure account: + :::image type="content" source="./media/logic-apps-gateway-connection/on-premises-data-gateway-create-connection.png" alt-text="Screenshot of the Azure portal 'Create a gateway' page. The 'Name,' 'Region,' and other boxes have values. The 'Review + create' button is selected."::: -  +1. On the validation page that appears, confirm all the information that you provided, and then select **Create**. <a name="connect-logic-app-gateway"></a> ## Connect to on-premises data -After you create your gateway resource and associate your Azure subscription with this resource, you can now create a connection between your logic app and your on-premises data source by using the gateway. +After you create your gateway resource and associate your Azure subscription with this resource, you can create a connection between your logic app workflow and your on-premises data source by using the gateway. ++1. In the Azure portal, create or open your logic app workflow in the designer. -1. In the Azure portal, create or open your logic app in the Logic App Designer. +1. Add a trigger or action from a connector that supports on-premises connections through the gateway. -1. Add a connector that supports on-premises connections. If this connector has both a [managed version](../connectors/managed.md#on-premises-connectors) and a [built-in version](../connectors/built-in.md), make sure that you use the managed version. + > [!NOTE] + > + > In Consumption logic app workflows, if a connector has a [managed version](../connectors/managed.md#on-premises-connectors) + > and a [built-in version](../connectors/built-in.md), use the managed version, which includes the gateway selection capability. + > In Standard logic app workflows, built-in connectors that connect to on-premises data sources don't need to use the gateway. -1. Select **Connect via on-premises data gateway**. +1. For the trigger or action, provide the following information: -1. Under **Gateway**, from the **Subscription** list, select your Azure subscription that has the gateway resource you want. + 1. If an option exists to connect through an on-premises data gateway, select that option. + 1. Under **Gateway**, from the **Subscription** list, select the Azure subscription that has your gateway resource. - Your logic app and gateway resource don't have to exist in the same Azure subscription. You can select from other Azure subscriptions that each have a gateway resource, but only if these subscriptions exist in the same Azure AD tenant or directory as your logic app, and you have administrator permissions on the gateway, which another administrator can set up for you. For more information, see [Data Gateway: Automation using PowerShell - Part 1](https://community.powerbi.com/t5/Community-Blog/Data-Gateway-Automation-using-PowerShell-Part-1/ba-p/1117330) and [PowerShell: Data Gateway - Add-DataGatewayClusterUser](/powershell/module/datagateway/add-datagatewayclusteruser). - -1. From the **Connection Gateway** list, which shows the available gateway resources in your selected subscription, select the gateway resource that you want. Each gateway resource is linked to a single gateway installation. + Your logic app resource and gateway resource don't have to exist in the same Azure subscription. You can select from other Azure subscriptions that each have a gateway resource, but only if: - > [!NOTE] - > The gateways list includes gateway resources in other regions because your - > logic app's location can differ from your gateway resource's location. + * These subscriptions exist in the same Azure AD tenant or directory as your logic app resource. + * You have administrator permissions on the gateway, which another administrator can set up for you. + + For more information, see [Data Gateway: Automation using PowerShell - Part 1](https://community.powerbi.com/t5/Community-Blog/Data-Gateway-Automation-using-PowerShell-Part-1/ba-p/1117330) and [PowerShell: Data Gateway - Add-DataGatewayClusterUser](/powershell/module/datagateway/add-datagatewayclusteruser). + + 1. From the **Connection Gateway** list, select the gateway resource that you want to use. This list shows the available gateway resources in your selected subscription. Each gateway resource is linked to a single gateway installation. -1. Provide a unique connection name and other required information, which depends on the connection that you want to create. + > [!NOTE] + > + > The **Connection Gateway** list includes gateway resources in other regions because + > your logic app resource's location can differ from your gateway resource's location. - A unique connection name helps you easily find that connection later, especially if you create multiple connections. If applicable, also include the qualified domain for your username. + 1. Provide a unique connection name and other required information, which depends on the connection that you want to create. - Here is an example: + A unique connection name helps you easily find your connection later, especially if you create multiple connections. If applicable, also include the qualified domain for your username. -  + The following example for a Consumption workflow shows sample information for a SQL Server connection: + + :::image type="content" source="./media/logic-apps-gateway-connection/logic-app-gateway-connection.png" alt-text="Screenshot of a SQL Server connector. The 'Subscription,' 'Connection Gateway,' 'Connection name,' and other boxes have values."::: 1. When you're done, select **Create**. -Your gateway connection is now ready for your logic app to use. +Your gateway connection is now ready for your logic app workflow to use. ## Edit connection -To update the settings for a gateway connection, you can edit your connection. +To update the settings for a gateway connection, you can edit your connection. This section continues using a Consumption workflow as the example. + +1. To find all the API connections for your logic app resource, on your logic app's menu, under **Development Tools**, select **API connections**. + + :::image type="content" source="./media/logic-apps-gateway-connection/logic-app-api-connections.png" alt-text="Screenshot of a logic app resource in the Azure portal. On the logic app navigation menu, 'API connections' is highlighted."::: -1. To find all the API connections for just your logic app, on your logic app's menu, under **Development Tools**, select **API connections**. --  --1. Select the gateway connection you want, and then select **Edit API connection**. +1. Select the gateway connection that you want to edit, and then select **Edit API connection**. > [!TIP] > If your updates don't take effect, try - > [stopping and restarting the gateway Windows service account](../logic-apps/logic-apps-gateway-install.md#restart-gateway) for your gateway installation. + > [stopping and restarting the gateway Windows service account](logic-apps-gateway-install.md#restart-gateway) + > for your gateway installation. -To find all API connections associated with your Azure subscription: +To find all API connections associated with your Azure subscription, use one of the following options: -* From the Azure portal menu, select **All services** > **Web** > **API Connections**. -* Or, from the Azure portal menu, select **All resources**. Set the **Type** filter to **API Connection**. +* In the Azure search box, enter **api connections**, and then select **API Connections**. +* From the Azure portal menu, select **All resources**. Set the **Type** filter to **API Connection**. <a name="change-delete-gateway-resource"></a> To find all API connections associated with your Azure subscription: To create a different gateway resource, link your gateway installation to a different gateway resource, or remove the gateway resource, you can delete the gateway resource without affecting the gateway installation. -1. From the Azure portal menu, select **All resources**, or search for and select **All resources** from any page. Find and select your gateway resource. --1. If not already selected, on your gateway resource menu, select **On-premises Data Gateway**. On the gateway resource toolbar, select **Delete**. +1. In the Azure portal, open your gateway resource. - For example: +1. On the gateway resource toolbar, select **Delete**. -  + :::image type="content" source="./media/logic-apps-gateway-connection/delete-on-premises-data-gateway.png" alt-text="Screenshot of an on-premises data gateway resource in the Azure portal. On the toolbar, 'Delete' is highlighted."::: <a name="faq"></a> To create a different gateway resource, link your gateway installation to a diff * Your Azure account doesn't belong to only a single [Azure AD tenant or directory](../active-directory/fundamentals/active-directory-whatis.md#terminology). Check that you're using the same Azure AD tenant or directory that you used during gateway installation. -* Your gateway resource and gateway installation don't exist in the same region. Make sure that your gateway installation uses the same region where you want to create the gateway resource in Azure. However, your logic app's location can differ from your gateway resource location. +* Your gateway resource and gateway installation don't exist in the same region. Make sure that your gateway installation uses the same region where you want to create the gateway resource in Azure. However, your logic app resource's location can differ from your gateway resource location. -* Your gateway installation is already associated with another gateway resource. Each gateway resource can link to only one gateway installation, which can link to only one Azure account and subscription. So, you can't select a gateway installation that's already associated with another gateway resource. These installations won't appear in the **Installation Name** list. +* Your gateway installation is already associated with another gateway resource. Each gateway resource can link to only one gateway installation, which can link to only one Azure account and subscription. So, you can't select a gateway installation that's already associated with another gateway resource. These installations don't appear in the **Installation Name** list. - To review your gateway registrations in the Azure portal, find all your Azure resources that have the **On-premises Data Gateways** resource type across *all* your Azure subscriptions. To unlink the gateway installation from the other gateway resource, see [Delete gateway resource](#change-delete-gateway-resource). + To review your gateway registrations in the Azure portal, find all your Azure resources that have the **On-premises data gateway** resource type across *all* your Azure subscriptions. To unlink a gateway installation from a different gateway resource, see [Delete gateway resource](#delete-gateway-resource). [!INCLUDE [existing-gateway-location-changed](../../includes/logic-apps-existing-gateway-location-changed.md)] |
| logic-apps | Logic Apps Gateway Install | https://github.com/MicrosoftDocs/azure-docs/commits/main/articles/logic-apps/logic-apps-gateway-install.md | Title: Install on-premises data gateway -description: Download and install the on-premises data gateway to access on-premises data in Azure Logic Apps. +description: Download and install the on-premises data gateway to access on-premises data in Azure Logic Apps. See how the data gateway works. ms.suite: integration Previously updated : 10/12/2022 Last updated : 10/31/2022 #Customer intent: As a software developer, I want to create logic app workflows that can access data in on-premises systems, which requires that I install and set up the on-premises data gateway. # Install on-premises data gateway for Azure Logic Apps -In Consumption logic app workflows, some connectors provide access on-premises data sources. However, before you can create these connections, you have to download and install the [on-premises data gateway](https://aka.ms/on-premises-data-gateway-installer) and then create an Azure resource for that gateway installation. The gateway works as a bridge that provides quick data transfer and encryption between on-premises data sources and your workflows. You can use the same gateway installation with other cloud services, such as Power Automate, Power BI, Power Apps, and Azure Analysis Services. +In Consumption logic app workflows, some connectors provide access to on-premises data sources. Before you can create these connections, you have to download and install the [on-premises data gateway](https://aka.ms/on-premises-data-gateway-installer) and then create an Azure resource for that gateway installation. The gateway works as a bridge that provides quick data transfer and encryption between on-premises data sources and your workflows. You can use the same gateway installation with other cloud services, such as Power Automate, Power BI, Power Apps, and Azure Analysis Services. -In Standard logic app workflows, [built-in service provider connectors](/azure/logic-apps/connectors/built-in/reference/) don't need the gateway to access your on-premises data source. Instead, you provide information that authenticates your identity and authorizes access to your data source. If a built-in connector isn't available for your data source, but a managed connector is available, you'll need the on-premises data gateway. +In Standard logic app workflows, [built-in service provider connectors](/azure/logic-apps/connectors/built-in/reference/) don't need the gateway to access your on-premises data source. Instead, you provide information that authenticates your identity and authorizes access to your data source. If a built-in connector isn't available for your data source, but a managed connector is available, you need the on-premises data gateway. -This article shows how to download, install, and set up your on-premises data gateway so that you can access on-premises data sources from Azure Logic Apps. You can also learn more about [how the data gateway works](#gateway-cloud-service) later in this topic. For more information about the gateway, see [What is an on-premises gateway](/data-integration/gateway/service-gateway-onprem)? To automate gateway installation and management tasks, visit the PowerShell gallery for the [DataGateway PowerShell cmdlets](https://www.powershellgallery.com/packages/DataGateway/3000.15.15). +This how-to guide shows how to download, install, and set up your on-premises data gateway so that you can access on-premises data sources from Azure Logic Apps. You can also learn more about [how the data gateway works](#how-the-gateway-works) later in this article. For more information about the gateway, see [What is an on-premises gateway](/data-integration/gateway/service-gateway-onprem)? To automate gateway installation and management tasks, see the [Data Gateway PowerShell cmdlets in the PowerShell gallery](https://www.powershellgallery.com/packages/DataGateway/3000.15.15). For information about how to use the gateway with these services, see these articles: For information about how to use the gateway with these services, see these arti ## Prerequisites -* An Azure account and subscription. If you don't have an Azure account with a subscription, [sign up for a free Azure account](https://azure.microsoft.com/free/?WT.mc_id=A261C142F). +* An Azure account and subscription. If you don't have a subscription, create a [free account](https://azure.microsoft.com/free/?WT.mc_id=A261C142F). - * Your Azure account needs to use either a work account or school account, which looks like `username@contoso.com`. You can't use Azure B2B (guest) accounts or personal Microsoft accounts, such as @hotmail.com or @outlook.com. + * Your Azure account needs to use either a work account or school account with the format `<username>@<organization>.com`. You can't use Azure B2B (guest) accounts or personal Microsoft accounts, such as accounts with hotmail.com or outlook.com domains. > [!NOTE]- > If you signed up for a Microsoft 365 offering and didn't provide your work email address, - > your address might look like `username@domain.onmicrosoft.com`. Your account is stored - > in an Azure AD tenant. In most cases, the User Principal Name (UPN) for your Azure account - > is the same as your email address. + > If you signed up for a Microsoft 365 offering and didn't provide your work email address, your address might have the format `username@domain.onmicrosoft.com`. In this case, your account is stored in an Azure Active Directory (Azure AD) tenant. In most cases, the user principal name (UPN) for your Azure account is the same as your email address. To use a [Visual Studio Standard subscription](https://visualstudio.microsoft.com/vs/pricing/) that's associated with a Microsoft account, first [create an Azure AD tenant](../active-directory/develop/quickstart-create-new-tenant.md) or use the default directory. Add a user with a password to the directory, and then give that user access to your Azure subscription. You can then sign in during gateway installation with this username and password. - * Your Azure account must belong only to a single [Azure Active Directory (Azure AD) tenant or directory](../active-directory/fundamentals/active-directory-whatis.md#terminology). You need to use the same Azure account for installing and administering the gateway on your local computer. + * Your Azure account must belong only to a single [Azure AD tenant or directory](../active-directory/fundamentals/active-directory-whatis.md#terminology). You need to use that account when you install and administer the gateway on your local computer. * When you install the gateway, you sign in with your Azure account, which links your gateway installation to your Azure account and only that account. You can't link the same gateway installation across multiple Azure accounts or Azure AD tenants. - * Later in the Azure portal, you need to use the same Azure account to create an Azure gateway resource that links to your gateway installation. You can link only one gateway installation and one Azure gateway resource to each other. However, your Azure account can link to different gateway installations that are each associated with an Azure gateway resource. Your logic apps can then use this gateway resource in triggers and actions that can access on-premises data sources. + * Later in the Azure portal, you need to use the same Azure account to create an Azure gateway resource that's associated with your gateway installation. You can link only one gateway installation and one Azure gateway resource to each other. However, you can use your Azure account to set up different gateway installations that are each associated with an Azure gateway resource. Your logic app workflows can then use these gateway resources in triggers and actions that can access on-premises data sources. * Local computer requirements: For information about how to use the gateway with these services, see these arti **Recommended requirements** - * 8-core CPU - * 8 GB memory + * An eight-core CPU + * 8 GB of memory * 64-bit version of Windows Server 2012 R2 or later * Solid-state drive (SSD) storage for spooling > [!NOTE] > The gateway doesn't support Windows Server Core. -* **Related considerations** +* Related considerations: * Install the on-premises data gateway only on a local computer, not a domain controller. You don't have to install the gateway on the same computer as your data source. You need only one gateway for all your data sources, so you don't need to install the gateway for each data source. For information about how to use the gateway with these services, see these arti * If you plan to use Windows authentication, make sure that you install the gateway on a computer that's a member of the same Active Directory environment as your data sources. - * The region that you select for your gateway installation is the same location that you must select when you later create the Azure gateway resource for your logic app. By default, this region is the same location as your Azure AD tenant that manages your Azure user account. However, you can change the location during gateway installation or later. + * The region that you select for your gateway installation is the same location that you must select when you later create the Azure gateway resource for your logic app workflow. By default, this region is the same location as your Azure AD tenant that manages your Azure user account. However, you can change the location during gateway installation or later. > [!IMPORTANT] > During gateway setup, the **Change Region** command is unavailable if you signed in with your Azure Government account, which is associated with an - > Azure Active Directory (Azure AD) tenant in the [Azure Government cloud](../azure-government/compare-azure-government-global-azure.md). The gateway + > Azure AD tenant in the [Azure Government cloud](../azure-government/compare-azure-government-global-azure.md). The gateway > automatically uses the same region as your user account's Azure AD tenant. > > To continue using your Azure Government account, but set up the gateway to work in the global multi-tenant Azure Commercial cloud instead, first sign > in during gateway installation with the `prod@microsoft.com` username. This solution forces the gateway to use the global multi-tenant Azure cloud, > but still lets you continue using your Azure Government account.- > - > The Azure gateway resource, which you create later, and your logic app resource must use the same Azure subscription, although these resources can exist in different resource groups. - * Your logic app resource and the Azure gateway resource, which you create after you install the gateway, must use the same Azure subscription. However, these resources can exist in different Azure resource groups. + * Your logic app resource and the Azure gateway resource, which you create after you install the gateway, must use the same Azure subscription. But these resources can exist in different Azure resource groups. * If you're updating your gateway installation, uninstall your current gateway first for a cleaner experience. - As a best practice, make sure that you're using a supported version. Microsoft releases a new update to the on-premises data gateway every month, and currently supports only the last six releases for the on-premises data gateway. If you experience issues with the version that you're using, try [upgrading to the latest version](https://aka.ms/on-premises-data-gateway-installer) as your issue might be resolved in the latest version. + As a best practice, make sure that you're using a supported version. Microsoft releases a new update to the on-premises data gateway every month, and currently supports only the last six releases for the on-premises data gateway. If you experience issues with the version that you're using, try [upgrading to the latest version](https://aka.ms/on-premises-data-gateway-installer). Your issue might be resolved in the latest version. * The gateway has two modes: standard mode and personal mode, which applies only to Power BI. You can't have more than one gateway running in the same mode on the same computer. - * Azure Logic Apps supports read and write operations through the gateway. However, these operations have [limits on their payload size](/data-integration/gateway/service-gateway-onprem#considerations). + * Logic Apps supports read and write operations through the gateway. However, these operations have [limits on their payload size](/data-integration/gateway/service-gateway-onprem#considerations). <a name="install-gateway"></a> For information about how to use the gateway with these services, see these arti 1. Review the minimum requirements, keep the default installation path, accept the terms of use, and then select **Install**. -  + :::image type="content" source="./media/logic-apps-gateway-install/review-and-accept-terms-of-use.png" alt-text="Screenshot of the gateway installer, with a minimum requirements link, an installation path, and a checkbox that's highlighted for accepting terms."::: -1. After the gateway successfully installs, provide the email address for your Azure account, and then select **Sign in**, for example: +1. After the gateway installation finishes, provide the email address for your Azure account, and then select **Sign in**. -  + :::image type="content" source="./media/logic-apps-gateway-install/sign-in-gateway-install.png" alt-text="Screenshot of the gateway installer, with a message about a successful installation, a box that contains an email address, and a 'Sign in' button."::: Your gateway installation can link to only one Azure account. -1. Select **Register a new gateway on this computer** > **Next**. This step registers your gateway installation with the [gateway cloud service](#gateway-cloud-service). +1. Select **Register a new gateway on this computer** > **Next**. This step registers your gateway installation with the [gateway cloud service](#how-the-gateway-works). -  + :::image type="content" source="./media/logic-apps-gateway-install/register-gateway-local-computer.png" alt-text="Screenshot of the gateway installer, with a message about registering the gateway. The 'Register a new gateway on this computer' option is selected."::: 1. Provide this information for your gateway installation: * A gateway name that's unique across your Azure AD tenant- * The recovery key, which must have at least eight characters, that you want to use - * Confirmation for your recovery key + * A recovery key that has at least eight characters + * Confirmation of the recovery key -  + :::image type="content" source="./media/logic-apps-gateway-install/gateway-name-recovery-key.png" alt-text="Screenshot of the gateway installer, with input boxes for the gateway name, a recovery key, and confirmation of the recovery key."::: > [!IMPORTANT]- > Save and keep your recovery key in a safe place. - > You need this key if you ever want to change the location, - > move, recover, or take over a gateway installation. + > Save your recovery key in a safe place. You need this key to move, recover, or take over a gateway installation or to change its location. - Note the option to **Add to an existing gateway cluster**, which you select when you install additional gateways for [high-availability scenarios](#high-availability). + Note the **Add to an existing gateway cluster** option. When you install additional gateways for [high-availability scenarios](#high-availability-support), you use this option. -1. Check the region for the gateway cloud service and [Azure Service Bus Messaging instance](../service-bus-messaging/service-bus-messaging-overview.md) that's used by your gateway installation. By default, this region is the same location as the Azure AD tenant for your Azure account. +1. Check the region for the gateway cloud service and [Azure Service Bus messaging instance](../service-bus-messaging/service-bus-messaging-overview.md) that your gateway installation uses. By default, this region is the same location as the Azure AD tenant for your Azure account. -  + :::image type="content" source="./media/logic-apps-gateway-install/confirm-gateway-region.png" alt-text="Screenshot of part of the gateway installer window. The gateway cloud service region is highlighted."::: -1. To accept the default region, select **Configure**. However, if the default region isn't the one that's closest to you, you can change the region. +1. To accept the default region, select **Configure**. But if the default region isn't the one that's closest to you, you can change the region. *Why change the region for your gateway installation?* - For example, to reduce latency, you might change your gateway's region to the same region as your logic app. Or, you might select the region closest to your on-premises data source. Your *gateway resource in Azure* and your logic app can have different locations. + For example, to reduce latency, you might change your gateway's region to the same region as your logic app workflow. Or, you might select the region that's closest to your on-premises data source. Your *gateway resource in Azure* and your logic app workflow can have different locations. 1. Next to the current region, select **Change Region**. -  + :::image type="content" source="./media/logic-apps-gateway-install/change-gateway-service-region.png" alt-text="Screenshot of part of the gateway installer window. Next to the gateway cloud service region, 'Change Region' is highlighted."::: - 1. On the next page, open the **Select Region** list, select the region you want, and select **Done**. + 1. On the next page, open the **Select Region** list, select the region you want, and then select **Done**. -  + :::image type="content" source="./media/logic-apps-gateway-install/select-region-gateway-install.png" alt-text="Screenshot of the gateway installer window. The 'Select Region' list is open. A 'Done' button is visible."::: 1. Review the information in the final confirmation window. This example uses the same account for Logic Apps, Power BI, Power Apps, and Power Automate, so the gateway is available for all these services. When you're ready, select **Close**. -  + :::image type="content" source="./media/logic-apps-gateway-install/finished-gateway-default-location.png" alt-text="Screenshot of the gateway installer window with a 'Close' button and green check marks for Power Apps, Power Automate, and Power BI."::: -1. Now [create the Azure resource for your gateway installation](../logic-apps/logic-apps-gateway-connection.md). +1. Now [create the Azure resource for your gateway installation](logic-apps-gateway-connection.md). <a name="communication-settings"></a> ## Check or adjust communication settings -The on-premises data gateway depends on [Azure Service Bus Messaging](../service-bus-messaging/service-bus-messaging-overview.md) for cloud connectivity and establishes the corresponding outbound connections to the gateway's associated Azure region. If your work environment requires that traffic goes through a proxy or firewall to access the internet, this restriction might prevent the on-premises data gateway from connecting to the gateway cloud service and Azure Service Bus Messaging. The gateway has several communication settings, which you can adjust. +The on-premises data gateway depends on [Service Bus messaging](../service-bus-messaging/service-bus-messaging-overview.md) to provide cloud connectivity and to establish the corresponding outbound connections to the gateway's associated Azure region. If your work environment requires that traffic goes through a proxy or firewall to access the internet, this restriction might prevent the on-premises data gateway from connecting to the gateway cloud service and Service Bus messaging. The gateway has several communication settings, which you can adjust. -An example scenario is where you use custom connectors that access on-premises resources by using the on-premises data gateway resource in Azure. If you also have a firewall that limits traffic to specific IP addresses, you need to set up the gateway installation to allow access for the corresponding *managed connectors [outbound IP addresses](logic-apps-limits-and-config.md#outbound)*. *All* logic apps in the same region use the same IP address ranges. +An example scenario is where you use custom connectors that access on-premises resources by using the on-premises data gateway resource in Azure. If you also have a firewall that limits traffic to specific IP addresses, you need to set up the gateway installation to allow access for the corresponding managed connector [outbound IP addresses](logic-apps-limits-and-config.md#outbound). *All* logic app workflows in the same region use the same IP address ranges. -For more information, see these topics: +For more information, see these articles: * [Adjust communication settings for the on-premises data gateway](/data-integration/gateway/service-gateway-communication) * [Configure proxy settings for the on-premises data gateway](/data-integration/gateway/service-gateway-proxy) For more information, see these topics: To avoid single points of failure for on-premises data access, you can have multiple gateway installations (standard mode only) with each on a different computer, and set them up as a cluster or group. That way, if the primary gateway is unavailable, data requests are routed to the second gateway, and so on. Because you can install only one standard gateway on a computer, you must install each additional gateway that's in the cluster on a different computer. All the connectors that work with the on-premises data gateway support high availability. -* You must already have at least one gateway installation with the same Azure account as the primary gateway and the recovery key for that installation. +* You must already have at least one gateway installation with the same Azure account as the primary gateway. You also need the recovery key for that installation. * Your primary gateway must be running the gateway update from November 2017 or later. -After you set up your primary gateway, when you go to install another gateway, select **Add to an existing gateway cluster**, select the primary gateway, which is the first gateway that you installed, and provide the recovery key for that gateway. For more information, see [High availability clusters for on-premises data gateway](/data-integration/gateway/service-gateway-install#add-another-gateway-to-create-a-cluster). +To install another gateway after you set up your primary gateway: ++1. In the gateway installer, select **Add to an existing gateway cluster**. ++1. In the **Available gateway clusters** list, select the first gateway that you installed. ++1. Enter the recovery key for that gateway. ++1. Select **Configure**. ++For more information, see [High availability clusters for on-premises data gateway](/data-integration/gateway/service-gateway-install#add-another-gateway-to-create-a-cluster). <a name="update-gateway-installation"></a> ## Change location, migrate, restore, or take over existing gateway -If you must change your gateway's location, move your gateway installation to a new computer, recover a damaged gateway, or take ownership for an existing gateway, you need the recovery key that was provided during gateway installation. +If you must change your gateway's location, move your gateway installation to a new computer, recover a damaged gateway, or take ownership for an existing gateway, you need the recovery key that you used during gateway installation. > [!NOTE]-> Before you restore the gateway on the computer that has the original gateway installation, -> you must first uninstall the gateway on that computer. This action disconnects the original gateway. -> If you remove or delete a gateway cluster for any cloud service, you can't restore that cluster. +> Before you restore the gateway on the computer that has the original gateway installation, you must first uninstall the gateway on that computer. This action disconnects the original gateway. If you remove or delete a gateway cluster for any cloud service, you can't restore that cluster. 1. Run the gateway installer on the computer that has the existing gateway. -1. After the installer opens, sign in with the same Azure account that was used to install the gateway. +1. When the installer prompts you, sign in with the same Azure account that you used to install the gateway. -1. Select **Migrate, restore, or takeover an existing gateway** > **Next**, for example: +1. Select **Migrate, restore, or takeover an existing gateway** > **Next**. -  + :::image type="content" source="./media/logic-apps-gateway-install/migrate-recover-take-over-gateway.png" alt-text="Screenshot of the gateway installer. The 'Migrate, restore, or takeover an existing gateway' option is selected and highlighted."::: -1. Select from the available clusters and gateways, and enter the recovery key for the selected gateway, for example: +1. Select from the available clusters and gateways, and enter the recovery key for the selected gateway. -  + :::image type="content" source="./media/logic-apps-gateway-install/select-existing-gateway.png" alt-text="Screenshot of the gateway installer. The 'Available gateway clusters,' 'Available gateways,' and 'Recovery key' boxes all have values."::: -1. To change the region, select **Change Region**, and select the new region. +1. To change the region, select **Change Region**, and then select the new region. -1. When you're ready, select **Configure** so that you can finish your task. +1. When you're ready, select **Configure**. ## Tenant-level administration To get visibility into all the on-premises data gateways in an Azure AD tenant, ## Restart gateway -By default, the gateway installation on your local computer runs as a Windows service account named "On-premises data gateway service". However, the gateway installation uses the `NT SERVICE\PBIEgwService` name for its "Log On As" account credentials and has "Log on as a service" permissions. +By default, the gateway installation on your local computer runs as a Windows service account named "On-premises data gateway service." However, the gateway installation uses the `NT SERVICE\PBIEgwService` name for its **Log On As** account credentials and has **Log on as a service** permissions. > [!NOTE]-> Your Windows service account differs from the account used for connecting to on-premises -> data sources and from the Azure account that you use when you sign in to cloud services. +> Your Windows service account differs from the account that's used for connecting to on-premises data sources and from the Azure account that you use when you sign in to cloud services. -Like any other Windows service, you can start and stop the gateway in various ways. For more information, see [Restart an on-premises data gateway](/data-integration/gateway/service-gateway-restart). +Like any other Windows service, you can start and stop a gateway in various ways. For more information, see [Restart an on-premises data gateway](/data-integration/gateway/service-gateway-restart). <a name="gateway-cloud-service"></a> ## How the gateway works -Users in your organization can access on-premises data for which they already have authorized access. However, before these users can connect to your on-premises data source, you need to install and set up an on-premises data gateway. Usually, an admin is the person who installs and sets up a gateway. These actions might require Server Administrator permissions or special knowledge about your on-premises servers. +Users in your organization can access on-premises data for which they already have authorized access. But before these users can connect to your on-premises data source, you need to install and set up an on-premises data gateway. Usually, an admin is the person who installs and sets up a gateway. These actions might require **Server Administrator** permissions or special knowledge about your on-premises servers. The gateway helps facilitate faster and more secure behind-the-scenes communication. This communication flows between a user in the cloud, the gateway cloud service, and your on-premises data source. The gateway cloud service encrypts and stores your data source credentials and gateway details. The service also routes queries and their results between the user, the gateway, and your on-premises data source. -The gateway works with firewalls and uses only outbound connections. All traffic originates as secured outbound traffic from the gateway agent. The gateway sends the data from on-premises sources on encrypted channels through [Azure Service Bus Messaging](../service-bus-messaging/service-bus-messaging-overview.md). This service bus creates a channel between the gateway and the calling service, but doesn't store any data. All data that travels through the gateway is encrypted. +The gateway works with firewalls and uses only outbound connections. All traffic originates as secured outbound traffic from the gateway agent. The gateway sends the data from on-premises sources on encrypted channels through [Service Bus messaging](../service-bus-messaging/service-bus-messaging-overview.md). This service bus creates a channel between the gateway and the calling service, but doesn't store any data. All data that travels through the gateway is encrypted. - > [!NOTE] > Depending on the cloud service, you might need to set up a data source for the gateway. These steps describe what happens when you interact with an element that's conne 1. The cloud service creates a query, along with the encrypted credentials for the data source. The service then sends the query and credentials to the gateway queue for processing. -1. The gateway cloud service analyzes the query and pushes the request to Azure Service Bus Messaging. +1. The gateway cloud service analyzes the query and pushes the request to Service Bus messaging. -1. Azure Service Bus Messaging sends the pending requests to the gateway. +1. Service Bus messaging sends the pending requests to the gateway. 1. The gateway gets the query, decrypts the credentials, and connects to one or more data sources with those credentials. These steps describe what happens when you interact with an element that's conne A stored credential is used to connect from the gateway to on-premises data sources. Regardless of the user, the gateway uses the stored credential to connect. There might be authentication exceptions for specific services, such as DirectQuery and LiveConnect for Analysis Services in Power BI. -### Azure Active Directory (Azure AD) +### Azure AD -Microsoft cloud services use [Azure AD](../active-directory/fundamentals/active-directory-whatis.md) to authenticate users. An Azure AD tenant contains usernames and security groups. Typically, the email address that you use for sign-in is the same as the User Principal Name (UPN) for your account. +Microsoft cloud services use [Azure AD](../active-directory/fundamentals/active-directory-whatis.md) to authenticate users. An Azure AD tenant contains usernames and security groups. Typically, the email address that you use for sign-in is the same as the UPN for your account. ### What is my UPN? If you're not a domain admin, you might not know your UPN. To find the UPN for y ### Synchronize an on-premises Active Directory with Azure AD -The UPN for your on-premises Active Directory accounts and Azure AD accounts must be the same. So, make sure that each on-premises Active Directory account matches your Azure AD account. The cloud services know only about accounts within Azure AD. So, you don't need to add an account to your on-premises Active Directory. If the account doesn't exist in Azure AD, you can't use that account. +You need to use the same UPN for your on-premises Active Directory accounts and Azure AD accounts. So, make sure that the UPN for each on-premises Active Directory account matches your Azure AD account UPN. The cloud services know only about accounts within Azure AD. So, you don't need to add an account to your on-premises Active Directory. If an account doesn't exist in Azure AD, you can't use that account. Here are ways that you can match your on-premises Active Directory accounts with Azure AD. Here are ways that you can match your on-premises Active Directory accounts with Create an account in the Azure portal or in the Microsoft 365 admin center. Make sure that the account name matches the UPN for the on-premises Active Directory account. -* Synchronize local accounts to your Azure AD tenant by using the Azure Active Directory Connect tool. +* Synchronize local accounts to your Azure AD tenant by using the Azure AD Connect tool. The Azure AD Connect tool provides options for directory synchronization and authentication setup. These options include password hash sync, pass-through authentication, and federation. If you're not a tenant admin or a local domain admin, contact your IT admin to get Azure AD Connect set up. Azure AD Connect ensures that your Azure AD UPN matches your local Active Directory UPN. This matching helps if you're using Analysis Services live connections with Power BI or single sign-on (SSO) capabilities. Here are ways that you can match your on-premises Active Directory accounts with ## Next steps -* [Connect to on-premises data from logic apps](../logic-apps/logic-apps-gateway-connection.md) -* [Enterprise integration features](../logic-apps/logic-apps-enterprise-integration-overview.md) +* [Connect to on-premises data from logic apps](logic-apps-gateway-connection.md) +* [Enterprise integration features](logic-apps-enterprise-integration-overview.md) * [Connectors for Azure Logic Apps](../connectors/apis-list.md) |
| machine-learning | How To Authenticate Batch Endpoint | https://github.com/MicrosoftDocs/azure-docs/commits/main/articles/machine-learning/batch-inference/how-to-authenticate-batch-endpoint.md | Batch endpoints support Azure Active Directory authentication, or `aad_token`. T ## How authentication works -To invoke a batch endpoint, the user must present a valid Azure Active Directory token representing a security principal. This principal can be a user principal or a service principal. In any case, once an endpoint is invoked, a batch deployment job is created under the identity associated with the token. The identity needs the following permissions in order to successfully create a job: +To invoke a batch endpoint, the user must present a valid Azure Active Directory token representing a security principal. This principal can be a __user principal__ or a __service principal__. In any case, once an endpoint is invoked, a batch deployment job is created under the identity associated with the token. The identity needs the following permissions in order to successfully create a job: > [!div class="checklist"] > * Read batch endpoints/deployments. You can either use one of the [built-in security roles](../../role-based-access- The following examples show different ways to start batch deployment jobs using different types of credentials: +> [!IMPORTANT] +> When working on a private link-enabled workspaces, batch endpoints can't be invoked from the UI in Azure ML studio. Please use the Azure ML CLI v2 instead for job creation. + ### Running jobs using user's credentials +In this case, we want to execute a batch endpoint using the identity of the user currently logged in. Follow these steps: ++> [!NOTE] +> When working on Azure ML studio, batch endpoints/deployments are always executed using the identity of the current user logged in. + # [Azure ML CLI](#tab/cli) -Use the Azure CLI to log in using either interactive or device code authentication: +1. Use the Azure CLI to log in using either interactive or device code authentication: -```azurecli -az login -``` + ```azurecli + az login + ``` -Once authenticated, use the following command to run a batch deployment job: +1. Once authenticated, use the following command to run a batch deployment job: -```azurecli -az ml batch-endpoint invoke --name $ENDPOINT_NAME --input https://azuremlexampledata.blob.core.windows.net/data/heart-disease-uci/data -``` + ```azurecli + az ml batch-endpoint invoke --name $ENDPOINT_NAME --input https://azuremlexampledata.blob.core.windows.net/data/heart-disease-uci/data + ``` # [Azure ML SDK for Python](#tab/sdk) -Use the Azure ML SDK for Python to log in using either interactive or device authentication: +1. Use the Azure ML SDK for Python to log in using either interactive or device authentication: -```python -from azure.ai.ml import MLClient -from azure.identity import InteractiveAzureCredentials + ```python + from azure.ai.ml import MLClient + from azure.identity import InteractiveAzureCredentials -subscription_id = "<subscription>" -resource_group = "<resource-group>" -workspace = "<workspace>" + subscription_id = "<subscription>" + resource_group = "<resource-group>" + workspace = "<workspace>" -ml_client = MLClient(InteractiveAzureCredentials(), subscription_id, resource_group, workspace) -``` + ml_client = MLClient(InteractiveAzureCredentials(), subscription_id, resource_group, workspace) + ``` -Once authenticated, use the following command to run a batch deployment job: +1. Once authenticated, use the following command to run a batch deployment job: -```python -job = ml_client.batch_endpoints.invoke( - endpoint_name, - input=Input(path="https://azuremlexampledata.blob.core.windows.net/data/heart-disease-uci/data") - ) -``` + ```python + job = ml_client.batch_endpoints.invoke( + endpoint_name, + input=Input(path="https://azuremlexampledata.blob.core.windows.net/data/heart-disease-uci/data") + ) + ``` -# [studio](#tab/studio) +# [REST](#tab/rest) -Jobs are always started using the identity of the user in the portal in studio. +When working with REST APIs, we recommend to using either a service principal or a managed identity to interact with the API. ### Running jobs using a service principal +In this case, we want to execute a batch endpoint using a service principal already created in Azure Active Directory. To complete the authentication, you will have to create a secret to perform the authentication. Follow these steps: + # [Azure ML CLI](#tab/cli) -For more details see [Sign in with Azure CLI](/cli/azure/authenticate-azure-cli). +1. Create a secret to use for authentication as explained at [Option 2: Create a new application secret](../../active-directory/develop/howto-create-service-principal-portal.md#option-2-create-a-new-application-secret). +1. For more details see [Sign in with Azure CLI](/cli/azure/authenticate-azure-cli). -```bash -az login --service-principal -u <app-id> -p <password-or-cert> --tenant <tenant> -``` + ```bash + az login --service-principal -u <app-id> -p <password-or-cert> --tenant <tenant> + ``` -Once authenticated, use the following command to run a batch deployment job: +1. Once authenticated, use the following command to run a batch deployment job: -```azurecli -az ml batch-endpoint invoke --name $ENDPOINT_NAME --input https://azuremlexampledata.blob.core.windows.net/data/heart-disease-uci/data -``` + ```azurecli + az ml batch-endpoint invoke --name $ENDPOINT_NAME --input https://azuremlexampledata.blob.core.windows.net/data/heart-disease-uci/data + ``` # [Azure ML SDK for Python](#tab/sdk) -To authenticate using a service principal, indicate the tenant ID, client ID and client secret of the service principal using environment variables as demonstrated here: --```python -from azure.ai.ml import MLClient -from azure.identity import EnvironmentCredential --os.environ["AZURE_TENANT_ID"] = "<TENANT_ID>" -os.environ["AZURE_CLIENT_ID"] = "<CLIENT_ID>" -os.environ["AZURE_CLIENT_SECRET"] = "<CLIENT_SECRET>" --subscription_id = "<subscription>" -resource_group = "<resource-group>" -workspace = "<workspace>" --ml_client = MLClient(DefaultAzureCredential(), subscription_id, resource_group, workspace) -``` --Once authenticated, use the following command to run a batch deployment job: --```python -job = ml_client.batch_endpoints.invoke( - endpoint_name, - input=Input(path="https://azuremlexampledata.blob.core.windows.net/data/heart-disease-uci/data") - ) -``` --# [studio](#tab/studio) --You can't run jobs using a service principal from studio. +1. Create a secret to use for authentication as explained at [Option 2: Create a new application secret](../../active-directory/develop/howto-create-service-principal-portal.md#option-2-create-a-new-application-secret). +1. To authenticate using a service principal, indicate the tenant ID, client ID and client secret of the service principal using environment variables as demonstrated: ++ ```python + from azure.ai.ml import MLClient + from azure.identity import EnvironmentCredential ++ os.environ["AZURE_TENANT_ID"] = "<TENANT_ID>" + os.environ["AZURE_CLIENT_ID"] = "<CLIENT_ID>" + os.environ["AZURE_CLIENT_SECRET"] = "<CLIENT_SECRET>" ++ subscription_id = "<subscription>" + resource_group = "<resource-group>" + workspace = "<workspace>" ++ ml_client = MLClient(DefaultAzureCredential(), subscription_id, resource_group, workspace) + ``` ++1. Once authenticated, use the following command to run a batch deployment job: ++ ```python + job = ml_client.batch_endpoints.invoke( + endpoint_name, + input=Input(path="https://azuremlexampledata.blob.core.windows.net/data/heart-disease-uci/data") + ) + ``` ++# [REST](#tab/rest) ++You can use the REST API of Azure Machine Learning to start a batch endpoints job using the user's credential. Follow these steps: ++1. Use the login service from Azure to get an authorization token. Authorization tokens are issued to a particular scope. The resource type for Azure Machine learning is `https://ml.azure.com`. The request would look as follows: + + __Request__: + + ```Body + POST /{TENANT_ID}/oauth2/token + Host:https://login.microsoftonline.com + grant_type=client_credentials&client_id=<CLIENT_ID>&client_secret=<CLIENT_SECRET>&resource=https://ml.azure.com + ``` + + > [!IMPORTANT] + > Notice that the resource scope for invoking a batch endpoints (`https://ml.azure.com1) is different from the resource scope used to manage them. All management APIs in Azure use the resource scope `https://management.azure.com`, including Azure Machine Learning. ++3. Once authenticated, use the query to run a batch deployment job: + + __Request__: + + ```http + POST jobs HTTP/1.1 + Host: <ENDPOINT_URI> + Authorization: Bearer <TOKEN> + Content-Type: application/json + ``` + __Body:__ + + ```json + { + "properties": { + "InputData": { + "mnistinput": { + "JobInputType" : "UriFolder", + "Uri": "https://pipelinedata.blob.core.windows.net/sampledata/mnist" + } + } + } + } + ``` job = ml_client.batch_endpoints.invoke( ) ``` -# [studio](#tab/studio) +# [REST](#tab/rest) ++You can use the REST API of Azure Machine Learning to start a batch endpoints job using a managed identity. The steps vary depending on the underlying service being used. Some examples include (but are not limited to): ++* [Managed identity for Azure Data Factory](../../data-factory/data-factory-service-identity.md) +* [How to use managed identities for App Service and Azure Functions](../../app-service/overview-managed-identity.md). +* [How to use managed identities for Azure resources on an Azure VM to acquire an access token](../../active-directory/managed-identities-azure-resources/how-to-use-vm-token.md). -You can't run jobs using a managed identity from studio. +You can also use the Azure CLI to get an authentication token for the managed identity and the pass it to the batch endpoints URI. ## Next steps * [Network isolation in batch endpoints](how-to-secure-batch-endpoint.md)+* [Invoking batch endpoints from Event Grid events in storage](how-to-use-event-grid-batch.md). +* [Invoking batch endpoints from Azure Data Factory](how-to-use-batch-azure-data-factory.md). |
| machine-learning | Concept Automated Ml | https://github.com/MicrosoftDocs/azure-docs/commits/main/articles/machine-learning/concept-automated-ml.md | |
| machine-learning | How To Attach Kubernetes Anywhere | https://github.com/MicrosoftDocs/azure-docs/commits/main/articles/machine-learning/how-to-attach-kubernetes-anywhere.md | Last updated 08/31/2022 [!INCLUDE [dev v2](../../includes/machine-learning-dev-v2.md)] -With AzureML CLI/Python SDK v2, AzureML introduced a new compute target - Kubernetes compute target. You can easily enable an existing **Azure Kubernetes Service** (AKS) cluster or **Azure Arc-enabled Kubernetes** (Arc Kubernetes) cluster to become a Kubenetes compute target in AzureML, and use it to train or deploy models. +With AzureML CLI/Python SDK v2, AzureML introduced a new compute target - Kubernetes compute target. You can easily enable an existing **Azure Kubernetes Service** (AKS) cluster or **Azure Arc-enabled Kubernetes** (Arc Kubernetes) cluster to become a Kubernetes compute target in AzureML, and use it to train or deploy models. :::image type="content" source="./media/how-to-attach-arc-kubernetes/machine-learning-anywhere-overview.png" alt-text="Diagram illustrating how Azure ML connects to Kubernetes." lightbox="./media/how-to-attach-arc-kubernetes/machine-learning-anywhere-overview.png"::: |
| machine-learning | How To Export Delete Data | https://github.com/MicrosoftDocs/azure-docs/commits/main/articles/machine-learning/how-to-export-delete-data.md | + + Title: Export or delete workspace data ++description: Learn how to export or delete your workspace with the Azure Machine Learning studio. +++++ Last updated : 10/21/2021++++++# Export or delete your Machine Learning service workspace data ++In Azure Machine Learning, you can export or delete your workspace data using either the portal's graphical interface or the Python SDK. This article describes both options. ++++## Control your workspace data ++In-product data stored by Azure Machine Learning is available for export and deletion. You can export and delete using Azure Machine Learning studio, CLI, and SDK. Telemetry data can be accessed through the Azure Privacy portal. ++In Azure Machine Learning, personal data consists of user information in job history documents. ++## Delete high-level resources using the portal ++When you create a workspace, Azure creates several resources within the resource group: ++- The workspace itself +- A storage account +- A container registry +- An Applications Insights instance +- A key vault ++These resources can be deleted by selecting them from the list and choosing **Delete** +++Job history documents, which may contain personal user information, are stored in the storage account in blob storage, in subfolders of `/azureml`. You can download and delete the data from the portal. +++## Export and delete machine learning resources using Azure Machine Learning studio ++Azure Machine Learning studio provides a unified view of your machine learning resources, such as notebooks, data assets, models, and jobs. Azure Machine Learning studio emphasizes preserving a record of your data and experiments. Computational resources such as pipelines and compute resources can be deleted using the browser. For these resources, navigate to the resource in question and choose **Delete**. ++Data assets can be unregistered and jobs can be archived, but these operations don't delete the data. To entirely remove the data, data assets and job data must be deleted at the storage level. Deleting at the storage level is done using the portal, as described previously. An individual Job can be deleted directly in studio. Deleting a Job deletes the Job's data. ++You can download training artifacts from experimental jobs using the Studio. Choose the **Job** in which you're interested. Choose **Output + logs** and navigate to the specific artifacts you wish to download. Choose **...** and **Download** or select **Download all**. ++You can download a registered model by navigating to the **Model** and choosing **Download**. +++## Next steps ++Learn more about [Managing a workspace](how-to-manage-workspace.md). |
| machine-learning | How To Github Actions Machine Learning | https://github.com/MicrosoftDocs/azure-docs/commits/main/articles/machine-learning/how-to-github-actions-machine-learning.md | You'll need to first define how to authenticate with Azure. You can use a [servi ### Generate deployment credentials -# [Service principal](#tab/userlevel) --Create a [service principal](../active-directory/develop/app-objects-and-service-principals.md#service-principal-object) with the [az ad sp create-for-rbac](/cli/azure/ad/sp#az-ad-sp-create-for-rbac) command in the [Azure CLI](/cli/azure/). Run this command with [Azure Cloud Shell](https://shell.azure.com/) in the Azure portal or by selecting the **Try it** button. --```azurecli-interactive -az ad sp create-for-rbac --name "myML" --role contributor \ - --scopes /subscriptions/<subscription-id>/resourceGroups/<group-name> \ - --sdk-auth -``` --In the example above, replace the placeholders with your subscription ID, resource group name, and app name. The output is a JSON object with the role assignment credentials that provide access to your App Service app similar to below. Copy this JSON object for later. --```output - { - "clientId": "<GUID>", - "clientSecret": "<GUID>", - "subscriptionId": "<GUID>", - "tenantId": "<GUID>", - (...) - } -``` --# [OpenID Connect](#tab/openid) --OpenID Connect is an authentication method that uses short-lived tokens. Setting up [OpenID Connect with GitHub Actions](https://docs.github.com/en/actions/deployment/security-hardening-your-deployments/about-security-hardening-with-openid-connect) is more complex process that offers hardened security. --1. If you don't have an existing application, register a [new Active Directory application and service principal that can access resources](../active-directory/develop/howto-create-service-principal-portal.md). Create the Active Directory application. -- ```azurecli-interactive - az ad app create --display-name myApp - ``` -- This command will output JSON with an `appId` that is your `client-id`. Save the value to use as the `AZURE_CLIENT_ID` GitHub secret later. -- You'll use the `objectId` value when creating federated credentials with Graph API and reference it as the `APPLICATION-OBJECT-ID`. --1. Create a service principal. Replace the `$appID` with the appId from your JSON output. -- This command generates JSON output with a different `objectId` and will be used in the next step. The new `objectId` is the `assignee-object-id`. - - Copy the `appOwnerTenantId` to use as a GitHub secret for `AZURE_TENANT_ID` later. -- ```azurecli-interactive - az ad sp create --id $appId - ``` --1. Create a new role assignment by subscription and object. By default, the role assignment will be tied to your default subscription. Replace `$subscriptionId` with your subscription ID, `$resourceGroupName` with your resource group name, and `$assigneeObjectId` with the generated `assignee-object-id`. Learn [how to manage Azure subscriptions with the Azure CLI](/cli/azure/manage-azure-subscriptions-azure-cli). -- ```azurecli-interactive - az role assignment create --role contributor --scope /subscriptions/$subscriptionId/resourceGroups/$resourceGroupName --subscription $subscriptionId --assignee-object-id $assigneeObjectId --assignee-principal-type ServicePrincipal - ``` --1. Run the following command to [create a new federated identity credential](/graph/api/application-post-federatedidentitycredentials?view=graph-rest-beta&preserve-view=true) for your active directory application. -- * Replace `APPLICATION-OBJECT-ID` with the **objectId (generated while creating app)** for your Active Directory application. - * Set a value for `CREDENTIAL-NAME` to reference later. - * Set the `subject`. The value of this is defined by GitHub depending on your workflow: - * Jobs in your GitHub Actions environment: `repo:< Organization/Repository >:environment:< Name >` - * For Jobs not tied to an environment, include the ref path for branch/tag based on the ref path used for triggering the workflow: `repo:< Organization/Repository >:ref:< ref path>`. For example, `repo:n-username/ node_express:ref:refs/heads/my-branch` or `repo:n-username/ node_express:ref:refs/tags/my-tag`. - * For workflows triggered by a pull request event: `repo:< Organization/Repository >:pull_request`. - - ```azurecli - az rest --method POST --uri 'https://graph.microsoft.com/beta/applications/<APPLICATION-OBJECT-ID>/federatedIdentityCredentials' --body '{"name":"<CREDENTIAL-NAME>","issuer":"https://token.actions.githubusercontent.com","subject":"repo:organization/repository:ref:refs/heads/main","description":"Testing","audiences":["api://AzureADTokenExchange"]}' - ``` - -To learn how to create a Create an active directory application, service principal, and federated credentials in Azure portal, see [Connect GitHub and Azure](/azure/developer/github/connect-from-azure#use-the-azure-login-action-with-openid-connect). -- ### Create secrets -# [Service principal](#tab/userlevel) --1. In [GitHub](https://github.com/), browse your repository, select **Settings > Secrets > Actions**. Select **New repository secret**. --2. Paste the entire JSON output from the Azure CLI command into the secret's value field. Give the secret the name `AZ_CREDS`. -- # [OpenID Connect](#tab/openid) --You need to provide your application's **Client ID**, **Tenant ID**, and **Subscription ID** to the login action. These values can either be provided directly in the workflow or can be stored in GitHub secrets and referenced in your workflow. Saving the values as GitHub secrets is the more secure option. --1. In [GitHub](https://github.com/), browse your repository, select **Settings > Secrets > Actions**. Select **New repository secret**. --1. Create secrets for `AZURE_CLIENT_ID`, `AZURE_TENANT_ID`, and `AZURE_SUBSCRIPTION_ID`. Use these values from your Active Directory application for your GitHub secrets: -- |GitHub Secret | Active Directory Application | - ||| - |AZURE_CLIENT_ID | Application (client) ID | - |AZURE_TENANT_ID | Directory (tenant) ID | - |AZURE_SUBSCRIPTION_ID | Subscription ID | --1. Save each secret by selecting **Add secret**. --- ## Step 3. Update `setup.sh` to connect to your Azure Machine Learning workspace |
| machine-learning | How To Identity Based Service Authentication | https://github.com/MicrosoftDocs/azure-docs/commits/main/articles/machine-learning/how-to-identity-based-service-authentication.md | Identity-based data access supports connections to **only** the following storag To access these storage services, you must have at least [Storage Blob Data Reader](../role-based-access-control/built-in-roles.md#storage-blob-data-reader) access to the storage account. Only storage account owners can [change your access level via the Azure portal](../storage/blobs/assign-azure-role-data-access.md). -If you prefer to not use your user identity (Azure Active Directory), you can also grant a workspace managed-system identity (MSI) permission to create the datastore. To do so, you must have Owner permissions to the storage account and [specify the MSI credentials when creating the datastore](how-to-datastore.md?tabs=cli-identity-based-access%2Ccli-adls-sp%2Ccli-azfiles-account-key%2Ccli-adlsgen1-sp). +### Access data for training jobs on compute using managed identity -If you're training a model on a remote compute target and want to access the data for training, the compute identity must be granted at least the Storage Blob Data Reader role from the storage service. Learn how to [set up managed identity on a compute cluster](#compute-cluster). +Certain machine learning scenarios involve working with private data. In such cases, data scientists may not have direct access to data as Azure AD users. In this scenario, the managed identity of a compute can be used for data access authentication. In this scenario, the data can only be accessed from a compute instance or a machine learning compute cluster executing a training job. With this approach, the admin grants the compute instance or compute cluster managed identity Storage Blob Data Reader permissions on the storage. The individual data scientists don't need to be granted access. -### Working with private data +To enable authentication with compute managed identity: -Certain machine learning scenarios involve working with private data. In such cases, data scientists may not have direct access to data as Azure AD users. In this scenario, the managed identity of a compute can be used for data access authentication. In this scenario, the data can only be accessed from a compute instance or a machine learning compute cluster executing a training job. + * Create compute with managed identity enabled. See the [compute cluster](#compute-cluster) section, or for compute instance, the [Assign managed identity (preview)](how-to-create-manage-compute-instance.md) section. + * Grant compute managed identity at least Storage Blob Data Reader role on the storage account. + * Create any datastores with identity-based authentication enabled. See [Create datastores](how-to-datastore.md). -With this approach, the admin grants the compute instance or compute cluster managed identity Storage Blob Data Reader permissions on the storage. The individual data scientists don't need to be granted access. For more information on configuring the managed identity for the compute cluster, see the [compute cluster](#compute-cluster) section. For information on using configuring Azure RBAC for the storage, see [role-based access controls](../storage/blobs/assign-azure-role-data-access.md). +Once the identity-based authentication is enabled, the compute managed identity is used by default when accessing data within your training jobs. Optionally, you can authenticate with user identity using the steps described in next section. ++For information on using configuring Azure RBAC for the storage, see [role-based access controls](../storage/blobs/assign-azure-role-data-access.md). ++### Access data for training jobs on compute clusters using user identity (preview) +++When training on [Azure Machine Learning compute clusters](how-to-create-attach-compute-cluster.md#what-is-a-compute-cluster), you can authenticate to storage with your user Azure Active Directory token. ++This authentication mode allows you to: +* Set up fine-grained permissions, where different workspace users can have access to different storage accounts or folders within storage accounts. +* Let data scientists re-use existing permissions on storage systems. +* Audit storage access because the storage logs show which identities were used to access data. ++> [!IMPORTANT] +> This functionality has the following limitations +> * Feature is only supported for experiments submitted via the [Azure Machine Learning CLI](how-to-configure-cli.md) +> * Only CommandJobs, and PipelineJobs with CommandSteps and AutoMLSteps are supported +> * User identity and compute managed identity cannot be used for authentication within same job. ++> [!WARNING] +> This feature is __public preview__ and is __not secure for production workloads__. Ensure that only trusted users have permissions to access your workspace and storage accounts. +> +> Preview features are provided without a service-level agreement, and are not recommended for production workloads. Certain features might not be supported or might have constrained capabilities. +> +> For more information, see [Supplemental Terms of Use for Microsoft Azure Previews](https://azure.microsoft.com/support/legal/preview-supplemental-terms/). ++The following steps outline how to set up identity-based data access for training jobs on compute clusters. ++1. Grant the user identity access to storage resources. For example, grant StorageBlobReader access to the specific storage account you want to use or grant ACL-based permission to specific folders or files in Azure Data Lake Gen 2 storage. ++1. Create an Azure Machine Learning datastore without cached credentials for the storage account. If a datastore has cached credentials, such as storage account key, those credentials are used instead of user identity. ++1. Submit a training job with property **identity** set to **type: user_identity**, as shown in following job specification. During the training job, the authentication to storage happens via the identity of the user that submits the job. ++ > [!NOTE] + > If the **identity** property is left unspecified and datastore does not have cached credentials, then compute managed identity becomes the fallback option. ++ ```yaml + command: | + echo "--census-csv: ${{inputs.census_csv}}" + python hello-census.py --census-csv ${{inputs.census_csv}} + code: src + inputs: + census_csv: + type: uri_file + path: azureml://datastores/mydata/paths/census.csv + environment: azureml:AzureML-sklearn-1.0-ubuntu20.04-py38-cpu@latest + compute: azureml:cpu-cluster + identity: + type: user_identity + ``` ### Work with virtual networks In this scenario, Azure Machine Learning service builds the training or inferenc description: Environment created from private ACR. ``` -## Scenario: Access data for training jobs on compute clusters (preview) ---When training on [Azure Machine Learning compute clusters](how-to-create-attach-compute-cluster.md#what-is-a-compute-cluster), you can authenticate to storage with your user Azure Active Directory token. --This authentication mode allows you to: -* Set up fine-grained permissions, where different workspace users can have access to different storage accounts or folders within storage accounts. -* Let data scientists re-use existing permissions on storage systems. -* Audit storage access because the storage logs show which identities were used to access data. --> [!IMPORTANT] -> This functionality has the following limitations -> * Feature is only supported for experiments submitted via the [Azure Machine Learning CLI](how-to-configure-cli.md) -> * Only CommandJobs, and PipelineJobs with CommandSteps and AutoMLSteps are supported -> * User identity and compute managed identity cannot be used for authentication within same job. --> [!WARNING] -> This feature is __public preview__ and is __not secure for production workloads__. Ensure that only trusted users have permissions to access your workspace and storage accounts. -> -> Preview features are provided without a service-level agreement, and are not recommended for production workloads. Certain features might not be supported or might have constrained capabilities. -> -> For more information, see [Supplemental Terms of Use for Microsoft Azure Previews](https://azure.microsoft.com/support/legal/preview-supplemental-terms/). --The following steps outline how to set up identity-based data access for training jobs on compute clusters. --1. Grant the user identity access to storage resources. For example, grant StorageBlobReader access to the specific storage account you want to use or grant ACL-based permission to specific folders or files in Azure Data Lake Gen 2 storage. --1. Create an Azure Machine Learning datastore without cached credentials for the storage account. If a datastore has cached credentials, such as storage account key, those credentials are used instead of user identity. --1. Submit a training job with property **identity** set to **type: user_identity**, as shown in following job specification. During the training job, the authentication to storage happens via the identity of the user that submits the job. -- > [!NOTE] - > If the **identity** property is left unspecified and datastore does not have cached credentials, then compute managed identity becomes the fallback option. -- ```yaml - command: | - echo "--census-csv: ${{inputs.census_csv}}" - python hello-census.py --census-csv ${{inputs.census_csv}} - code: src - inputs: - census_csv: - type: uri_file - path: azureml://datastores/mydata/paths/census.csv - environment: azureml:AzureML-sklearn-1.0-ubuntu20.04-py38-cpu@latest - compute: azureml:cpu-cluster - identity: - type: user_identity - ``` - ## Next steps * Learn more about [enterprise security in Azure Machine Learning](concept-enterprise-security.md) |
| machine-learning | How To Manage Quotas | https://github.com/MicrosoftDocs/azure-docs/commits/main/articles/machine-learning/how-to-manage-quotas.md | To request an exception from the Azure Machine Learning product team, use the st | Steps in a pipeline | 30,000 | | Workspaces per resource group | 800 | +### Azure Machine Learning integration with Synapse +Synapse spark clusters have a default limit of 12-2000, depending on your subscription offer type. This limit can be increased by submitting a support ticket and requesting for quota increase under the "Machine Learning Service: Spark vCore Quota" category + ### Virtual machines Each Azure subscription has a limit on the number of virtual machines across all services. Virtual machine cores have a regional total limit and a regional limit per size series. Both limits are separately enforced. |
| machine-learning | How To Train Model | https://github.com/MicrosoftDocs/azure-docs/commits/main/articles/machine-learning/how-to-train-model.md | The REST API examples in this article use `$SUBSCRIPTION_ID`, `$RESOURCE_GROUP`, Administrative REST requests a [service principal authentication token](how-to-manage-rest.md#retrieve-a-service-principal-authentication-token). You can retrieve a token with the following command. The token is stored in the `$TOKEN` environment variable: -```azurecli -TOKEN=$(az account get-access-token --query accessToken -o tsv) -``` The service provider uses the `api-version` argument to ensure compatibility. The `api-version` argument varies from service to service. Set the API version as a variable to accommodate future versions: :::code language="rest-api" source="~/azureml-examples-main/cli/deploy-rest.sh" id="api_version"::: +When you train using the REST API, data and training scripts must be uploaded to a storage account that the workspace can access. The following example gets the storage information for your workspace and saves it into variables so we can use it later: ++ ### 2. Create a compute resource for training You can use the stored run ID to return information about the job. The `--web` p # [REST API](#tab/restapi) -As part of job submission, the training scripts and data must be uploaded to a cloud storage location that your AzureML workspace can access. These examples don't cover the uploading process. For information on using the Blob REST API to upload files, see the [Put Blob](/rest/api/storageservices/put-blob) reference. +As part of job submission, the training scripts and data must be uploaded to a cloud storage location that your AzureML workspace can access. ++1. Use the following Azure CLI command to upload the training script. The command specifies the _directory_ that contains the files needed for training, not an individual file. If you'd like to use REST to upload the data instead, see the [Put Blob](/rest/api/storageservices/put-blob) reference: ++ ```azurecli + az storage blob upload-batch -d $AZUREML_DEFAULT_CONTAINER/testjob -s cli/jobs/single-step/scikit-learn/iris/src/ --account-name $AZURE_STORAGE_ACCOUNT + ``` -1. Create a versioned reference to the training data. In this example, the data is located at `https://azuremlexamples.blob.core.windows.net/datasets/iris.csv`. In your workspace, you might upload the file to the default storage for your workspace: +1. Create a versioned reference to the training data. In this example, the data is already in the cloud and located at `https://azuremlexamples.blob.core.windows.net/datasets/iris.csv`. For more information on referencing data, see [Data in Azure Machine Learning](concept-data.md): ```bash DATA_VERSION=$RANDOM As part of job submission, the training scripts and data must be uploaded to a c }" ``` -1. Register a versioned reference to the training script for use with a job. In this example, the script is located at `https://azuremlexamples.blob.core.windows.net/azureml-blobstore-c8e832ae-e49c-4084-8d28-5e6c88502655/testjob`. This `testjob` is the folder in Blob storage that contains the training script and any dependencies needed by the script. In the following example, the ID of the versioned training code is returned and stored in the `$TRAIN_CODE` variable: +1. Register a versioned reference to the training script for use with a job. In this example, the script location is the default storage account and container you uploaded to in step 1. The ID of the versioned training code is returned and stored in the `$TRAIN_CODE` variable: ```bash TRAIN_CODE=$(curl --location --request PUT "https://management.azure.com/subscriptions/$SUBSCRIPTION_ID/resourceGroups/$RESOURCE_GROUP/providers/Microsoft.MachineLearningServices/workspaces/$WORKSPACE/codes/train-lightgbm/versions/1?api-version=$API_VERSION" \ As part of job submission, the training scripts and data must be uploaded to a c --data-raw "{ \"properties\": { \"description\": \"Train code\",- \"codeUri\": \"https://azuremlexamples.blob.core.windows.net/azureml-blobstore-c8e832ae-e49c-4084-8d28-5e6c88502655/testjob\" + \"codeUri\": \"https://$AZURE_STORAGE_ACCOUNT.blob.core.windows.net/$AZUREML_DEFAULT_CONTAINER/testjob\" } }" | jq -r '.id') ``` |
| machine-learning | Migrate To V2 Execution Parallel Run Step | https://github.com/MicrosoftDocs/azure-docs/commits/main/articles/machine-learning/migrate-to-v2-execution-parallel-run-step.md | This article gives a comparison of scenario(s) in SDK v1 and SDK v2. In the foll For more information, see the documentation here: * [Parallel run step SDK v1 examples](https://github.com/Azure/MachineLearningNotebooks/tree/master/how-to-use-azureml/machine-learning-pipelines/parallel-run)-* [Parallel job SDK v2 examples](https://github.com/Azure/azureml-examples/blob/main/sdk/jobs/pipelines/1g_pipeline_with_parallel_nodes/pipeline_with_parallel_nodes.ipynb) +* [Parallel job SDK v2 examples](https://github.com/Azure/azureml-examples/blob/main/sdk/python/jobs/pipelines/1g_pipeline_with_parallel_nodes/pipeline_with_parallel_nodes.ipynb) |
| machine-learning | How To Export Delete Data | https://github.com/MicrosoftDocs/azure-docs/commits/main/articles/machine-learning/v1/how-to-export-delete-data.md | Title: Export or delete workspace data + Title: Export or delete workspace data (v1) description: Learn how to export or delete your workspace with the Azure Machine Learning studio, CLI, SDK, and authenticated REST APIs. -# Export or delete your Machine Learning service workspace data +# Export or delete your Machine Learning service workspace data (v1) In Azure Machine Learning, you can export or delete your workspace data using either the portal's graphical interface or the Python SDK. This article describes both options. |
| managed-grafana | Known Limitations | https://github.com/MicrosoftDocs/azure-docs/commits/main/articles/managed-grafana/known-limitations.md | Title: Azure Managed Grafana limitations description: Learn about current limitations in Azure Managed Grafana. Previously updated : 10/18/2022 Last updated : 10/31/2022 Managed Grafana has the following known limitations: * Azure Managed Grafana currently doesn't support the Grafana Role Based Access Control (RBAC) feature and the [RBAC API](https://grafana.com/docs/grafana/latest/developers/http_api/access_control/) is therefore disabled. +* Private endpoints are currently not available in Azure Managed Grafana. + ## Next steps > [!div class="nextstepaction"] |
| network-watcher | Network Watcher Alert Triggered Packet Capture | https://github.com/MicrosoftDocs/azure-docs/commits/main/articles/network-watcher/network-watcher-alert-triggered-packet-capture.md | |
| payment-hsm | Access Payshield Manager | https://github.com/MicrosoftDocs/azure-docs/commits/main/articles/payment-hsm/access-payshield-manager.md | + + Title: Access the payShield manager for your Azure Payment HSM +description: Access the payShield manager for your Azure Payment HSM ++++++ms.devlang: azurecli Last updated : 09/12/2022+++# Tutorial: Access the payShield manager for your payment HSM ++After you have [Created an Azure Payment HSM](create-payment-hsm.md), you can create a virtual machine on the same virtual network and use it to access the Thales payShield manager. ++In this tutorial, you learn how to: ++> [!div class="checklist"] +> * Create a subnet for your virtual machine +> * Create a virtual machine +> * Test Connectivity to your VM, and from the VM to your payment HSM +> * Log into the VM to access the payShield manager ++To complete this tutorial, you will need: ++- The name of your payment HSM's virtual network. This tutorial assumes the name used in the previous tutorial: "myVNet". +- The address space of your virtual network. This tutorial assumes the address space used in the previous tutorial: "10.0.0.0/16". ++## Create a VM subnet ++# [Azure CLI](#tab/azure-cli) ++Create a subnet for your virtual machine, on the same virtual network as your payment HSM, using the Azure CLI [az network vnet subnet create](/cli/azure/network/vnet/subnet#az-network-vnet-subnet-create) command. You must provide a value to the--address-prefixes argument that falls within the VNet's address space, but differs from the payment HSM subnet addresses. ++```azurecli-interactive +az network vnet subnet create -g "myResourceGroup" --vnet-name "myVNet" -n "myVMSubnet" --address-prefixes "10.0.1.0/24" +``` ++The Azure CLI [az network vnet show](/cli/azure/network/vnet/subnet#az-network-vnet-subnet-create) command will list two subnets associated with your VNet: the subnet with your payment HSM ("mySubnet"), and the newly created "myVMSubnet" subnet. ++```azurecli-interactive +az network vnet show -n "myVNet" -g "myResourceGroup" +``` ++# [Azure PowerShell](#tab/azure-powershell) ++First, save the details of your VNet to a variable using the Azure PowerShell [Get-AzVirtualNetwork](/powershell/module/az.network/get-azvirtualnetwork) cmdlet: ++```azurepowershell-interactive +$vnet = Get-AzVirtualNetwork -Name "myVNet" -ResourceGroupName "myResourceGroup" +``` ++Next, configure a subnet for your virtual machine, on the same virtual network as your payment HSM, using the Azure PowerShell [New-AzVirtualNetworkSubnetConfig](/powershell/module/az.network/new-azvirtualnetworksubnetconfig) command. You must provide a value to the `--address-prefixes` argument that falls within the VNet's address space, but differs from the payment HSM subnet addresses. ++```azurepowershell-interactive +$vmSubnet = New-AzVirtualNetworkSubnetConfig -Name "myVMSubnet" -AddressPrefix "10.0.1.0/24" +``` ++Lastly, add the subnet configuration to your VNet variable, and then pass the variable to the Azure PowerShell [Set-AzVirtualNetwork](/powershell/module/az.network/set-azvirtualnetwork) cmdlet: ++```azurepowershell-interactive +$vnet.Subnets.Add($vmSubnet) + +Set-AzVirtualNetwork -VirtualNetwork $vnet +``` ++The Azure PowerShell [Get-AzVirtualNetwork](/powershell/module/az.network/get-azvirtualnetwork) cmdlet will now list two subnets associated with your VNet: the subnet with your payment HSM ("mySubnet"), and the newly created "myVMSubnet" subnet. ++```azurepowershell-interactive +Get-AzVirtualNetwork -Name "myVNet" -ResourceGroupName "myResourceGroup" +``` ++# [Portal](#tab/azure-portal) ++++## Create a VM ++# [Azure CLI](#tab/azure-cli) ++Create a VM on your new subnet, using the Azure CLI [az vm create](/cli/azure/vm#az-vm-create) command. (In this example we will create a Linux VM, but you could also create a Windows VM by augmenting the instructions found at [Create a Windows virtual machine with the Azure CLI](../virtual-machines/windows/quick-create-cli.md) with the details below.) ++```azurecli-interactive +az vm create \ + --resource-group "myResourceGroup" \ + --name "myVM" \ + --image "UbuntuLTS" \ + --vnet-name "myVNet" \ + --subnet "myVMSubnet" \ + --admin-username "azureuser" \ + --generate-ssh-keys +``` ++Make a note of where the public SSH key is saved, and the value for "publicIpAddress". ++# [Azure PowerShell](#tab/azure-powershell) ++To create a VM on your new subnet, first set your credentials with the [Get-Credential](/powershell/module/microsoft.powershell.security/get-credential) cmdlet. Provide a username of "azureuser" and a password of your choice, saving the object as $cred. ++```azurepowershell-interactive +$cred = Get-Credential +``` ++Now create your VM using the Azure PowerShell [New-AzVm](/powershell/module/az.compute/new-azvm) command. (In this example we will create a Linux VM, but you could also create a Windows VM by augmenting the instructions found at [Create a Windows virtual machine with the Azure PowerShell](../virtual-machines/windows/quick-create-powershell.md) with the details below.) ++```azurepowershell-interactive +New-AzVm ` + -ResourceGroupName "myResourceGroup" ` + -Name "myVM" ` + -Location "eastus" ` + -Image "UbuntuLTS" ` + -PublicIpAddressName "myPubIP" ` + -VirtualNetworkName "myVNet" ` + -SubnetName "myVMSubnet" ` + -OpenPorts 22 ` + -Credential $cred ` + -GenerateSshKey ` + -SshKeyName "myVM_key" +``` ++Make a note of where the private SSH key is saved, and the value for "FullyQualifiedDomainName". ++# [Portal](#tab/azure-portal) ++To create a VM on your new subnet: ++1. select "Virtual machines" from the "Create a Resource" screen of the Azure portal: + :::image type="content" source="./media/portal-create-vm-1.png" alt-text="Screenshot of the portal resource picker."::: +1. On the "Basics" tab of the creation screen, select the resource group that contains your payment HSM ("myResourceGroup"): + :::image type="content" source="./media/portal-create-vm-2.png" alt-text="Screenshot of the portal main VM creation screen."::: +1. On the "Networking" tab of the creation screen, select the VNet that contains your payment HSM ("myVNet"), and the subnet you created above ("myVMSubnet"): + :::image type="content" source="./media/portal-create-vm-3.png" alt-text="Screenshot of the portal networking VM creation screen."::: +1. At the bottom of the networking tab, select "Review and create". +1. Review the details of your VM, and select "Create". +1. Select "Download private key and create resource", and save your VM's private key to a location where you can access it later. ++++## Test connectivity ++To access connectivity to your virtual machine, and from your VM to the management NIC IP (10.0.0.4) and host NIC IP, SSH into your VM. Connect to either the public IP address (for example, azureuser@20.127.60.92) or the fully qualified domain name (for example, azureuser@myvm-b82fbe.eastus.cloudapp.azure.com) ++> [!NOTE] +> If created your VM using Azure PowerShell, the Azure portal, or if you did not ask Azure CLI to auto-generate ssh keys when you created the VM, you will need to supply the private key to the ssh command using the "-i" flag (for example, `ssh -i "path/to/sshkey" azureuser@<publicIpAddress-or-FullyQualifiedDomainName>`). Note that the private key **must** be protected ("chmod 400 myVM_key.pem"). ++```bash +ssh azureuser@<publicIpAddress-or-FullyQualifiedDomainName> +``` ++If ssh hangs or refuses the connection, review your NSG rules to ensure that you are able to connect to your VM. ++If the connection is successful, you should be able to ping both the management NIC IP (10.0.0.4) and the host NIC IP (10.0.0.5) from your VM: ++```bash +azureuser@myVM:~$ ping 10.0.0.4 +PING 10.0.0.4 (10.0.0.4) 56(84) bytes of data. +64 bytes from 10.0.0.4: icmp_seq=1 ttl=63 time=1.34 ms +64 bytes from 10.0.0.4: icmp_seq=2 ttl=63 time=1.53 ms +64 bytes from 10.0.0.4: icmp_seq=3 ttl=63 time=1.40 ms +64 bytes from 10.0.0.4: icmp_seq=4 ttl=63 time=1.26 ms +^C + 10.0.0.4 ping statistics +4 packets transmitted, 4 received, 0% packet loss, time 3005ms +rtt min/avg/max/mdev = 1.263/1.382/1.531/0.098 ms ++azureuser@myVM:~$ ping 10.0.0.5 +PING 10.0.0.5 (10.0.0.5) 56(84) bytes of data. +64 bytes from 10.0.0.5: icmp_seq=1 ttl=63 time=1.33 ms +64 bytes from 10.0.0.5: icmp_seq=2 ttl=63 time=1.25 ms +64 bytes from 10.0.0.5: icmp_seq=3 ttl=63 time=1.15 ms +64 bytes from 10.0.0.5: icmp_seq=4 ttl=63 time=1.37 ms +``` ++## Access the payShield manager ++To access the payShield manager associated with your payment HSM, SSH into your VM using the -L (local) option. If you needed to use the -i option in the [test connectivity](#test-connectivity), you will need it again here. ++The -L option will bind your localhost to the HSM resource. Pass to the -L flag the string "44300:`<MGMT-IP-of-payment-HSM>`:443", where `<MGMT-IP-of-HSM-resource>` represents the Management IP of your payment HSM. ++```bash +ssh -L 44300:<MGMT-IP-of-payment-HSM>:443 azureuser@<publicIpAddress-or-FullyQualifiedDomainName> +``` ++For example, if you used "10.0.0.0" as the address prefix for your Payment HSM subnet, the Management IP will be "10.0.0.5" and your command would be: ++```bash +ssh -L 44300:10.0.0.5:443 azureuser@<publicIpAddress-or-FullyQualifiedDomainName> +``` ++Now go to a browser on your local machine and open <https://localhost:44300> to access the payShield manager. +++Here you can commission the device, install or generate LMKs, test the API, and so on. Follow payShield documentation, and contact Thales support if any issues related to payShield commission, setup, and API testing. ++## Next steps ++Advance to the next article to learn how to remove a commissioned payment HSM through the payShield manager. +> [!div class="nextstepaction"] +> [Remove a commissioned payment HSM](remove-payment-hsm.md) ++More resources: +- Read an [Overview of Payment HSM](overview.md) +- Find out how to [get started with Azure Payment HSM](getting-started.md) +- [Create a payment HSM](create-payment-hsm.md) |
| payment-hsm | Certification Compliance | https://github.com/MicrosoftDocs/azure-docs/commits/main/articles/payment-hsm/certification-compliance.md | -The Azure Payment HSM service is PCI DSS and PCI 3DS compliant. +The Azure Payment HSM service is PCI PIN, PCI DSS, and PCI 3DS compliant. -- [Azure - PCI DSS - 2022 Package](https://servicetrust.microsoft.com/ViewPage/MSComplianceGuideV3?command=Download&downloadType=Document&downloadId=b9cc20e0-38db-4953-aa58-9fb5cce26cc2&tab=7027ead0-3d6b-11e9-b9e1-290b1eb4cdeb&docTab=7027ead0-3d6b-11e9-b9e1-290b1eb4cdeb_PCI_DSS) ΓÇô Contains the official PCI DSS certification reports and shared responsibility matrices. The PCI DSS AOC includes the full list of PCI DSS certified Azure offerings and regions. Customers can leverage AzureΓÇÖs PCI DSS AOC during their PCI DSS assessment.-- [Azure - PCI 3DS - 2022 Package](https://servicetrust.microsoft.com/ViewPage/MSComplianceGuideV3?command=Download&downloadType=Document&downloadId=45ade37c-753c-4392-8321-adc49ecad12c&tab=7027ead0-3d6b-11e9-b9e1-290b1eb4cdeb&docTab=7027ead0-3d6b-11e9-b9e1-290b1eb4cdeb_PCI_DSS) ΓÇô Contains the official PCI 3DS certification report, shared responsibility matrix, and whitepaper. The PCI 3DS AOC includes the full list of PCI 3DS certified Azure offerings and regions. Customers can leverage AzureΓÇÖs PCI 3DS AOC during their PCI 3DS assessment.--Azure Payment HSMs can be deployed as part of a validated PCI P2PE and PCI PIN component or solution. Microsoft can provide evidence of proof for customer to meet their P2PE and PIN certification requirements. +- [Azure - PCI PIN - 2022 Package](https://servicetrust.microsoft.com/ViewPage/MSComplianceGuideV3?command=Download&downloadType=Document&downloadId=52eb9daa-f254-4914-aec6-46d40287a106) ΓÇô Microsoft Azure PCI PIN Attestation of Compliance (AOC) report for Azure Payment HSM. +- [Azure - PCI DSS - 2022 Package](https://servicetrust.microsoft.com/ViewPage/MSComplianceGuideV3?command=Download&downloadType=Document&downloadId=b9cc20e0-38db-4953-aa58-9fb5cce26cc2&tab=7027ead0-3d6b-11e9-b9e1-290b1eb4cdeb&docTab=7027ead0-3d6b-11e9-b9e1-290b1eb4cdeb_PCI_DSS) ΓÇô Contains the official PCI DSS certification reports and shared responsibility matrices. The PCI DSS AOC includes the full list of PCI DSS certified Azure offerings and regions. Customers can use Azure's PCI DSS AOC during their PCI DSS assessment. +- [Azure - PCI 3DS - 2022 Package](https://servicetrust.microsoft.com/ViewPage/MSComplianceGuideV3?command=Download&downloadType=Document&downloadId=45ade37c-753c-4392-8321-adc49ecad12c&tab=7027ead0-3d6b-11e9-b9e1-290b1eb4cdeb&docTab=7027ead0-3d6b-11e9-b9e1-290b1eb4cdeb_PCI_DSS) ΓÇô Contains the official PCI 3DS certification report, shared responsibility matrix, and whitepaper. The PCI 3DS AOC includes the full list of PCI 3DS certified Azure offerings and regions. Customers can use AzureΓÇÖs PCI 3DS AOC during their PCI 3DS assessment. Thales payShield 10K HSMs are certified to FIPS 140-2 Level 3 and PCI HSM v3. |
| payment-hsm | Change Performance Level | https://github.com/MicrosoftDocs/azure-docs/commits/main/articles/payment-hsm/change-performance-level.md | + + Title: How to change the performance level of an Azure Payment HSM +description: How to change the performance level of an Azure Payment HSM ++++ Last updated : 09/12/2022++++# How to change the performance level of a payment HSM ++Azure Payment HSM supports several SKUs; for a list, see [Azure Payment HSM overview: supported SKUs](overview.md#supported-skus). The performance license level of your payment HSM is initially determined by the SKU you specify during the creation process. ++You can change performance level of an existing payment HSM by changing its SKU. There will be no interruption in your production payment HSMs while performance level is being updated. ++The SKU of a payment HSM can be updated through ARMClient and PowerShell. ++## Updating the SKU via ARMClient ++You can update the SKU of your payment HSM using the [Azure Resource Manager client tool](https://github.com/projectkudu/ARMClient), which is a simple command line tool that calls the Azure Resource Manager API. Installation instructions are at <https://github.com/projectkudu/ARMClient>. ++Once installed, you can use the following command: ++```bash +armclient PATCH <resource-id>?api-version=2021-11-30 "{ 'sku': { 'name': '<sku>' } }" +``` ++For example: ++```bash +armclient PATCH /subscriptions/6cc6a46d-fc29-46c4-bd82-6afaf0e61b92/resourceGroups/myResourceGroup/providers/Microsoft.HardwareSecurityModules/dedicatedHSMs/myPaymentHSM?api-version=2021-11-30 "{ 'sku': { 'name': 'payShield10K_LMK1_CPS60' } }" +``` ++## Updating the SKU directly via PowerShell ++You can update the SKU of your payment HSM using the Azure PowerShell [Invoke-RestMethod](/powershell/module/microsoft.powershell.utility/invoke-restmethod) cmdlet: ++```azurepowershell-interactive +$sku="<sku>" +$resourceId="<resource-id>" +Invoke-RestMethod -Headers @{Authorization = "Bearer $((Get-AzAccessToken).Token)"} -Method PATCH -Uri "https://management.azure.com$($resourceId)?api-version=2021-11-30" -ContentType application/json -Body "{ 'sku': { 'name': '$sku' } }" +``` ++For example: ++```azurepowershell-interactive +$sku="payShield10K_LMK1_CPS60" +$resourceId="/subscriptions/6cc6a46d-fc29-46c4-bd82-6afaf0e61b92/resourceGroups/myResourceGroup/providers/Microsoft.HardwareSecurityModules/dedicatedHSMs/myPaymentHSM" +Invoke-RestMethod -Headers @{Authorization = "Bearer $((Get-AzAccessToken).Token)"} -Method PATCH -Uri "https://management.azure.com$($resourceId)?api-version=2021-11-30" -ContentType application/json -Body "{ 'sku': { 'name': '$sku' } }" +``` ++## Next steps ++- Read an [Overview of Payment HSM](overview.md) +- Find out how to [get started with Azure Payment HSM](getting-started.md) +- See the [Azure Payment HSM frequently asked questions](faq.yml) |
| payment-hsm | Create Different Ip Addresses | https://github.com/MicrosoftDocs/azure-docs/commits/main/articles/payment-hsm/create-different-ip-addresses.md | + + Title: Create an Azure Payment HSM with host and management port with IP addresses in different virtual networks using ARM template +description: Create an Azure Payment HSM with host and management port with IP addresses in different virtual networks using ARM template ++++++ms.devlang: azurecli Last updated : 09/12/2022+++# Create a payment HSM with host and management port with IP addresses in different virtual networks using ARM template ++This quickstart describes how to use an Azure Resource Manager template (ARM template) to create an Azure payment HSM. Azure Payment HSM is a "BareMetal" service delivered using [Thales payShield 10K payment hardware security modules (HSM)](https://cpl.thalesgroup.com/encryption/hardware-security-modules/payment-hsms/payshield-10k) to provide cryptographic key operations for real-time, critical payment transactions in the Azure cloud. Azure Payment HSM is designed specifically to help a service provider and an individual financial institution accelerate their payment system's digital transformation strategy and adopt the public cloud. For more information, see [Azure Payment HSM: Overview](/azure/payment-hsm/overview). ++This article describes how to create a payment HSM with the host and management port in same virtual network. You can instead: ++- [Create a payment HSM with the host and management port in same virtual network using an ARM template](quickstart-template.md) +- [Create a payment HSM with host and management port in different virtual network using an ARM template](create-different-vnet.md) +++## Prerequisites +++- You must register the "Microsoft.HardwareSecurityModules" and "Microsoft.Network" resource providers, as well as the Azure Payment HSM features. Steps for doing so are at [Register the Azure Payment HSM resource provider and resource provider features](register-payment-hsm-resource-providers.md). ++ To quickly ascertain if the resource providers and features are already registered, use the Azure CLI [az provider show](/cli/azure/provider#az-provider-show) command. (You will find the output of this command more readable if you display it in table-format.) ++ ```azurecli-interactive + az provider show --namespace "Microsoft.HardwareSecurityModules" -o table + + az provider show --namespace "Microsoft.Network" -o table + + az feature registration show -n "FastPathEnabled" --provider-namespace "Microsoft.Network" -o table + + az feature registration show -n "AzureDedicatedHsm" --provider-namespace "Microsoft.HardwareSecurityModules" -o table + ``` ++ You can continue with this quick start if all four of these commands return "Registered". +- You must have an Azure subscription. You can [create a free account](https://azure.microsoft.com/free/) if you don't have one. +++## Review the template ++The template used in this quickstart is azuredeploy.json: ++```json +{ + "$schema": "https://schema.management.azure.com/schemas/2019-04-01/deploymentTemplate.json#", + "contentVersion": "1.0.0.0", + "parameters": { + "resourceName": { + "type": "string", + "metadata": { + "description": "Azure Payment HSM resource name" + } + }, + "stampId": { + "type": "string", + "defaultValue": "stamp1", + "metadata": { + "description": "stamp id" + } + }, + "skuName": { + "type": "string", + "defaultValue": "payShield10K_LMK1_CPS60", + "metadata": { + "description": "PayShield SKU name. It must be one of the following: payShield10K_LMK1_CPS60, payShield10K_LMK1_CPS250, payShield10K_LMK1_CPS2500, payShield10K_LMK2_CPS60, payShield10K_LMK2_CPS250, payShield10K_LMK2_CPS2500" + } + }, + "vnetName": { + "type": "string", + "metadata": { + "description": "Host port virtual network name" + } + }, + "vnetAddressPrefix": { + "type": "string", + "metadata": { + "description": "Host port virtual network address prefix" + } + }, + "hsmSubnetName": { + "type": "string", + "metadata": { + "description": "Host port subnet name" + } + }, + "hsmSubnetPrefix": { + "type": "string", + "metadata": { + "description": "Host port subnet prefix" + } + }, + "hostPrivateIpAddress": { + "type": "string" + }, + "managementVnetName": { + "type": "string", + "metadata": { + "description": "Management port virtual network name" + } + }, + "managementVnetAddressPrefix": { + "type": "string", + "metadata": { + "description": "Management port virtual network address prefix" + } + }, + "managementHsmSubnetName": { + "type": "string", + "metadata": { + "description": "Management port subnet name" + } + }, + "managementHsmSubnetPrefix": { + "type": "string", + "metadata": { + "description": "Management port subnet prefix" + } + }, + "managementPrivateIpAddress": { + "type": "string" + } + }, + "variables": {}, + "resources": [ + { + "type": "Microsoft.HardwareSecurityModules/dedicatedHSMs", + "apiVersion": "2021-11-30", + "name": "[parameters('resourceName')]", + "location": "[resourceGroup().location]", + "dependsOn": [ + "[resourceId('Microsoft.Network/virtualNetworks/subnets', parameters('vnetName'), parameters('hsmSubnetName'))]", + "[resourceId('Microsoft.Network/virtualNetworks/subnets', parameters('managementVnetName'), parameters('managementHsmSubnetName'))]" + ], + "sku": { + "name": "[parameters('skuName')]" + }, + "properties": { + "networkProfile": { + "subnet": { + "id": "[resourceId('Microsoft.Network/virtualNetworks/subnets', parameters('vnetName'), parameters('hsmSubnetName'))]" + }, + "NetworkInterfaces": [{ + "privateIpaddress": "[parameters('hostPrivateIpAddress')]" + } + ] + }, + "managementNetworkProfile": { + "subnet": { + "id": "[resourceId('Microsoft.Network/virtualNetworks/subnets', parameters('managementVnetName'), parameters('managementHsmSubnetName'))]" + }, + "NetworkInterfaces": [{ + "privateIpaddress": "[parameters('managementPrivateIpAddress')]" + } + ] + }, + "stampId": "[parameters('stampId')]" + } + }, + { + "type": "Microsoft.Network/virtualNetworks", + "apiVersion": "2020-11-01", + "name": "[parameters('vnetName')]", + "location": "[resourceGroup().location]", + "tags": { + "fastpathenabled": "true" + }, + "properties": { + "addressSpace": { + "addressPrefixes": [ + "[parameters('vnetAddressPrefix')]" + ] + }, + "subnets": [ + { + "name": "[parameters('hsmSubnetName')]", + "properties": { + "addressPrefix": "[parameters('hsmSubnetPrefix')]", + "serviceEndpoints": [], + "delegations": [ + { + "name": "Microsoft.HardwareSecurityModules.dedicatedHSMs", + "properties": { + "serviceName": "Microsoft.HardwareSecurityModules/dedicatedHSMs" + } + } + ], + "privateEndpointNetworkPolicies": "Enabled", + "privateLinkServiceNetworkPolicies": "Enabled" + } + } + ], + "virtualNetworkPeerings": [], + "enableDdosProtection": false + } + }, + { + "type": "Microsoft.Network/virtualNetworks", + "apiVersion": "2020-11-01", + "name": "[parameters('managementVnetName')]", + "location": "[resourceGroup().location]", + "tags": { + "fastpathenabled": "true" + }, + "properties": { + "addressSpace": { + "addressPrefixes": [ + "[parameters('managementVnetAddressPrefix')]" + ] + }, + "subnets": [ + { + "name": "[parameters('managementHsmSubnetName')]", + "properties": { + "addressPrefix": "[parameters('managementHsmSubnetPrefix')]", + "serviceEndpoints": [], + "delegations": [ + { + "name": "Microsoft.HardwareSecurityModules.dedicatedHSMs", + "properties": { + "serviceName": "Microsoft.HardwareSecurityModules/dedicatedHSMs" + } + } + ], + "privateEndpointNetworkPolicies": "Enabled", + "privateLinkServiceNetworkPolicies": "Enabled" + } + } + ], + "virtualNetworkPeerings": [], + "enableDdosProtection": false + } + }, + { + "type": "Microsoft.Network/virtualNetworks/subnets", + "apiVersion": "2020-11-01", + "name": "[concat(parameters('vnetName'), '/', parameters('hsmSubnetName'))]", + "dependsOn": [ + "[resourceId('Microsoft.Network/virtualNetworks', parameters('vnetName'))]" + ], + "properties": { + "addressPrefix": "[parameters('hsmSubnetPrefix')]", + "serviceEndpoints": [], + "delegations": [ + { + "name": "Microsoft.HardwareSecurityModules.dedicatedHSMs", + "properties": { + "serviceName": "Microsoft.HardwareSecurityModules/dedicatedHSMs" + } + } + ], + "privateEndpointNetworkPolicies": "Enabled", + "privateLinkServiceNetworkPolicies": "Enabled" + } + }, + { + "type": "Microsoft.Network/virtualNetworks/subnets", + "apiVersion": "2020-11-01", + "name": "[concat(parameters('managementVnetName'), '/', parameters('managementHsmSubnetName'))]", + "dependsOn": [ + "[resourceId('Microsoft.Network/virtualNetworks', parameters('managementVnetName'))]" + ], + "properties": { + "addressPrefix": "[parameters('managementHsmSubnetPrefix')]", + "serviceEndpoints": [], + "delegations": [ + { + "name": "Microsoft.HardwareSecurityModules.dedicatedHSMs", + "properties": { + "serviceName": "Microsoft.HardwareSecurityModules/dedicatedHSMs" + } + } + ], + "privateEndpointNetworkPolicies": "Enabled", + "privateLinkServiceNetworkPolicies": "Enabled" + } + } + ] +} +``` ++The Azure resource defined in the template is: ++* **Microsoft.HardwareSecurityModules.dedicatedHSMs**: Create an Azure payment HSM. ++The corresponding azuredeploy.parameters.json file is: ++```json +{ + "$schema": "https://schema.management.azure.com/schemas/2015-01-01/deploymentParameters.json#", + "contentVersion": "1.0.0.0", + "parameters": { + "resourceName": { + "value": "myhsm1" + }, + "stampId": { + "value": "stamp1" + }, + "skuName": { + "value": "payShield10K_LMK1_CPS60" + }, + "vnetName": { + "value": "hsmHostVnet" + }, + "vnetAddressPrefix": { + "value": "10.0.0.0/16" + }, + "hsmSubnetName": { + "value": "hostSubnet" + }, + "hsmSubnetPrefix": { + "value": "10.0.0.0/24" + }, + "hostPrivateIpAddress": { + "value": "10.0.0.5" + }, + "managementVnetName": { + "value": "hsmMgmtVNet" + }, + "managementVnetAddressPrefix": { + "value": "10.1.0.0/16" + }, + "managementHsmSubnetName": { + "value": "mgmtSubnet" + }, + "managementHsmSubnetPrefix": { + "value": "10.1.0.0/24" + }, + "managementPrivateIpAddress": { + "value": "10.1.0.6" + } + } +} +``` ++## Deploy the template ++# [Azure CLI](#tab/azure-cli) ++In this example, you will use the Azure CLI to deploy an ARM template to create an Azure payment HSM. ++First, save the "azuredeploy.json" and "azuredeploy.parameters.json" files locally, for use in the next step. The contents of these files can be found in the [Review the template](#review-the-template) section. ++> [!NOTE] +> The steps below assume that the "azuredeploy.json" and "azuredeploy.parameters.json" file are in the directory from which you are running the commands. If the files are in another directory, you must adjust the file paths accordingly. ++Next, create an Azure resource group. +++Finally, use the Azure CLI [az deployment group create](/cli/azure/deployment/group#az-deployment-group-create) command to deploy your ARM template. ++```azurecli-interactive +az deployment group create --resource-group "MyResourceGroup" --name myPHSMDeployment --template-file "azuredeploy.json" +``` ++When prompted, supply the following values for the parameters: ++- **resourceName**: myPaymentHSM +- **vnetName**: myVNet +- **vnetAddressPrefix**: 10.0.0.0/16 +- **hsmSubnetName**: mySubnet +- **hsmSubnetPrefix**: 10.0.0.0/24 +- **hostPrivateIpAddress**: 10.0.0.5 +- **managementVnetName**: MGMTVNet +- **managementVnetAddressPrefix**: 10.1.0.0/16 +- **managementHsmSubnetName**: MGMTSubnet +- **managementHsmSubnetPrefix**: 10.1.0.0/24 +- **managementPrivateIpAddress**: 10.1.0.6 ++# [Azure PowerShell](#tab/azure-powershell) ++In this example, you will use the Azure PowerShell to deploy an ARM template to create an Azure payment HSM. ++First, save the "azuredeploy.json" and "azuredeploy.parameters.json" files locally, for use in the next step. The contents of these files can be found in the [Review the template](#review-the-template) section. ++> [!NOTE] +> The steps below assume that the "azuredeploy.json" and "azuredeploy.parameters.json" file are in the directory from which you are running the commands. If the files are in another directory, you must adjust the file paths accordingly. ++Next, create an Azure resource group. +++Now, set the following variables for use in the deploy step: ++```powershell-interactive +$deploymentName = "myPHSMDeployment" +$resourceGroupName = "myResourceGroup" +$templateFilePath = "azuredeploy.json" +$templateParametersPath = "azuredeploy.parameters.json" +$resourceName = "myPaymentHSM" +$skuName = "payShield10K_LMK1_CPS250" +$stampId = "stamp1" +$hostVnetName = "myVNet" +$hostVnetAddressPrefix = "10.0.0.0/16" +$hostSubnetName = "mySubnet" +$hostSubnetPrefix = "10.0.0.0/24" +$hostPrivateIpAddress = "10.0.0.5" +$mgmtVnetName = "MGMTVNet" +$mgmtVnetAddressPrefix = "10.1.0.0/16" +$mgmtSubnetName = "MGMTSubnet" +$mgmtSubnetPrefix = "10.1.0.0/24" +$mgmtPrivateIpAddress = "10.1.0.6" +``` ++Finally, use the Azure PowerShell [New-AzResourceGroupDeployment](/powershell/module/az.resources/new-azresourcegroupdeployment) cmdlet to deploy your ARM template. ++```azurepowershell-interactive +New-AzureRmResourceGroupDeployment -Name $deploymentName -ResourceGroupName $resourceGroupName -TemplateFile $templateFilePath -TemplateParameterFile $templateParametersPath -resourceName $resourceName -skuName $skuName -stampId $stampId -vnetName $hostVnetName -vnetAddressPrefix $hostVnetAddressPrefix -hsmSubnetName $hostSubnetName -hsmSubnetPrefix $hostSubnetPrefix -hostPrivateIpAddress $hostPrivateIpAddress -managementVnetName $mgmtVnetName -managementVnetAddressPrefix $mgmtVnetAddressPrefix -managementHsmSubnetName $mgmtSubnetName -managementHsmSubnetPrefix $mgmtSubnetPrefix -managementPrivateIpAddress $mgmtPrivateIpAddress +``` ++++## Validate the deployment ++# [Azure CLI](#tab/azure-cli) ++You can verify that the payment HSM was created with the Azure CLI [az dedicated-hsm list](/cli/azure/dedicated-hsm#az-dedicated-hsm-list) command. You will find the output easier to read if you format the results as a table: ++```azurecli-interactive +az dedicated-hsm list -o table +``` ++# [Azure PowerShell](#tab/azure-powershell) ++You can verify that the payment HSM was created with the Azure PowerShell [Get-AzDedicatedHsm](/powershell/module/az.dedicatedhsm/get-azdedicatedhsm) cmdlet. ++```azurepowershell-interactive +Get-AzDedicatedHsm +``` +++You should see the name of your newly created payment HSM. ++## Next steps ++Advance to the next article to learn how to access the payShield manager for your payment HSM +> [!div class="nextstepaction"] +> [Access the payShield manager](access-payshield-manager.md) ++More resources: ++- Read an [Overview of Payment HSM](overview.md) +- Find out how to [get started with Azure Payment HSM](getting-started.md) +- See some common [deployment scenarios](deployment-scenarios.md) +- Learn about [Certification and compliance](certification-compliance.md) +- Read the [frequently asked questions](faq.yml) |
| payment-hsm | Create Different Vnet | https://github.com/MicrosoftDocs/azure-docs/commits/main/articles/payment-hsm/create-different-vnet.md | + + Title: Create an Azure Payment HSM with host and management port in different VNets using ARM template +description: Create an Azure Payment HSM with host and management port in different VNets using ARM template ++++++ms.devlang: azurecli Last updated : 09/12/2022+++# Create a payment HSM with host and management port in different virtual networks using ARM template ++This quickstart describes how to use an Azure Resource Manager template (ARM template) to create an Azure payment HSM. Azure Payment HSM is a "BareMetal" service delivered using [Thales payShield 10K payment hardware security modules (HSM)](https://cpl.thalesgroup.com/encryption/hardware-security-modules/payment-hsms/payshield-10k) to provide cryptographic key operations for real-time, critical payment transactions in the Azure cloud. Azure Payment HSM is designed specifically to help a service provider and an individual financial institution accelerate their payment system's digital transformation strategy and adopt the public cloud. For more information, see [Azure Payment HSM: Overview](/azure/payment-hsm/overview). ++This article describes how to create a payment HSM with the host and management port in same virtual network. You can instead: +- [Create a payment HSM with the host and management port in same virtual network using an ARM template](quickstart-template.md) +- [Create HSM resource with host and management port with IP addresses in different virtual networks using ARM template](create-different-ip-addresses.md) +++## Prerequisites +++- You must register the "Microsoft.HardwareSecurityModules" and "Microsoft.Network" resource providers, as well as the Azure Payment HSM features. Steps for doing so are at [Register the Azure Payment HSM resource provider and resource provider features](register-payment-hsm-resource-providers.md). ++ To quickly ascertain if the resource providers and features are already registered, use the Azure CLI [az provider show](/cli/azure/provider#az-provider-show) command. (You will find the output of this command more readable if you display it in table-format.) ++ ```azurecli-interactive + az provider show --namespace "Microsoft.HardwareSecurityModules" -o table + + az provider show --namespace "Microsoft.Network" -o table + + az feature registration show -n "FastPathEnabled" --provider-namespace "Microsoft.Network" -o table + + az feature registration show -n "AzureDedicatedHsm" --provider-namespace "Microsoft.HardwareSecurityModules" -o table + ``` ++ You can continue with this quick start if all four of these commands return "Registered". +- You must have an Azure subscription. You can [create a free account](https://azure.microsoft.com/free/) if you don't have one. +++## Review the template ++The template used in this quickstart is azuredeploy.json: ++```json +{ + "$schema": "https://schema.management.azure.com/schemas/2019-04-01/deploymentTemplate.json#", + "contentVersion": "1.0.0.0", + "parameters": { + "resourceName": { + "type": "String", + "metadata": { + "description": "Azure Payment HSM resource name" + } + }, + "stampId": { + "type": "string", + "defaultValue": "stamp1", + "metadata": { + "description": "stamp id" + } + }, + "skuName": { + "type": "string", + "defaultValue": "payShield10K_LMK1_CPS60", + "metadata": { + "description": "PayShield SKU name. It must be one of the following: payShield10K_LMK1_CPS60, payShield10K_LMK1_CPS250, payShield10K_LMK1_CPS2500, payShield10K_LMK2_CPS60, payShield10K_LMK2_CPS250, payShield10K_LMK2_CPS2500" + } + }, + "vnetName": { + "type": "string", + "metadata": { + "description": "Host port virtual network name" + } + }, + "vnetAddressPrefix": { + "type": "string", + "metadata": { + "description": "Host port virtual network address prefix" + } + }, + "hsmSubnetName": { + "type": "String", + "metadata": { + "description": "Host port subnet name" + } + }, + "hsmSubnetPrefix": { + "type": "string", + "metadata": { + "description": "Host port subnet prefix" + } + }, + "managementVnetName": { + "type": "string", + "metadata": { + "description": "Management port virtual network name" + } + }, + "managementVnetAddressPrefix": { + "type": "string", + "metadata": { + "description": "Management port virtual network address prefix" + } + }, + "managementHsmSubnetName": { + "type": "String", + "metadata": { + "description": "Management port subnet name" + } + }, + "managementHsmSubnetPrefix": { + "type": "string", + "metadata": { + "description": "Management port subnet prefix" + } + } + }, + "variables": {}, + "resources": [ + { + "type": "Microsoft.HardwareSecurityModules/dedicatedHSMs", + "apiVersion": "2021-11-30", + "name": "[parameters('resourceName')]", + "location": "[resourceGroup().location]", + "dependsOn": [ + "[resourceId('Microsoft.Network/virtualNetworks/subnets', parameters('vnetName'), parameters('hsmSubnetName'))]", + "[resourceId('Microsoft.Network/virtualNetworks/subnets', parameters('managementVnetName'), parameters('managementHsmSubnetName'))]" + ], + "sku": { + "name": "[parameters('skuName')]" + }, + "properties": { + "networkProfile": { + "subnet": { + "id": "[resourceId('Microsoft.Network/virtualNetworks/subnets', parameters('vnetName'), parameters('hsmSubnetName'))]" + } + }, + "managementNetworkProfile": { + "subnet": { + "id": "[resourceId('Microsoft.Network/virtualNetworks/subnets', parameters('managementVnetName'), parameters('managementHsmSubnetName'))]" + } + }, + "stampId": "[parameters('stampId')]" + } + }, + { + "type": "Microsoft.Network/virtualNetworks", + "apiVersion": "2020-11-01", + "name": "[parameters('vnetName')]", + "location": "[resourceGroup().location]", + "tags": { + "fastpathenabled": "true" + }, + "properties": { + "addressSpace": { + "addressPrefixes": [ + "[parameters('vnetAddressPrefix')]" + ] + }, + "subnets": [ + { + "name": "[parameters('hsmSubnetName')]", + "properties": { + "addressPrefix": "[parameters('hsmSubnetPrefix')]", + "serviceEndpoints": [], + "delegations": [ + { + "name": "Microsoft.HardwareSecurityModules.dedicatedHSMs", + "properties": { + "serviceName": "Microsoft.HardwareSecurityModules/dedicatedHSMs" + } + } + ], + "privateEndpointNetworkPolicies": "Enabled", + "privateLinkServiceNetworkPolicies": "Enabled" + } + } + ], + "virtualNetworkPeerings": [], + "enableDdosProtection": false + } + }, + { + "type": "Microsoft.Network/virtualNetworks", + "apiVersion": "2020-11-01", + "name": "[parameters('managementVnetName')]", + "location": "[resourceGroup().location]", + "tags": { + "fastpathenabled": "true" + }, + "properties": { + "addressSpace": { + "addressPrefixes": [ + "[parameters('managementVnetAddressPrefix')]" + ] + }, + "subnets": [ + { + "name": "[parameters('managementHsmSubnetName')]", + "properties": { + "addressPrefix": "[parameters('managementHsmSubnetPrefix')]", + "serviceEndpoints": [], + "delegations": [ + { + "name": "Microsoft.HardwareSecurityModules.dedicatedHSMs", + "properties": { + "serviceName": "Microsoft.HardwareSecurityModules/dedicatedHSMs" + } + } + ], + "privateEndpointNetworkPolicies": "Enabled", + "privateLinkServiceNetworkPolicies": "Enabled" + } + } + ], + "virtualNetworkPeerings": [], + "enableDdosProtection": false + } + }, + { + "type": "Microsoft.Network/virtualNetworks/subnets", + "apiVersion": "2020-11-01", + "name": "[concat(parameters('vnetName'), '/', parameters('hsmSubnetName'))]", + "dependsOn": [ + "[resourceId('Microsoft.Network/virtualNetworks', parameters('vnetName'))]" + ], + "properties": { + "addressPrefix": "[parameters('hsmSubnetPrefix')]", + "serviceEndpoints": [], + "delegations": [ + { + "name": "Microsoft.HardwareSecurityModules.dedicatedHSMs", + "properties": { + "serviceName": "Microsoft.HardwareSecurityModules/dedicatedHSMs" + } + } + ], + "privateEndpointNetworkPolicies": "Enabled", + "privateLinkServiceNetworkPolicies": "Enabled" + } + }, + { + "type": "Microsoft.Network/virtualNetworks/subnets", + "apiVersion": "2020-11-01", + "name": "[concat(parameters('managementVnetName'), '/', parameters('managementHsmSubnetName'))]", + "dependsOn": [ + "[resourceId('Microsoft.Network/virtualNetworks', parameters('managementVnetName'))]" + ], + "properties": { + "addressPrefix": "[parameters('managementHsmSubnetPrefix')]", + "serviceEndpoints": [], + "delegations": [ + { + "name": "Microsoft.HardwareSecurityModules.dedicatedHSMs", + "properties": { + "serviceName": "Microsoft.HardwareSecurityModules/dedicatedHSMs" + } + } + ], + "privateEndpointNetworkPolicies": "Enabled", + "privateLinkServiceNetworkPolicies": "Enabled" + } + } + ] +} +``` ++The Azure resource defined in the template is: ++* **Microsoft.HardwareSecurityModules.dedicatedHSMs**: Create an Azure payment HSM. ++The corresponding azuredeploy.parameters.json file is: ++```json +{ + "$schema": "https://schema.management.azure.com/schemas/2015-01-01/deploymentParameters.json#", + "contentVersion": "1.0.0.0", + "parameters": { + "resourceName": { + "value": "myPHSM" + }, + "stampId": { + "value": "stamp1" + }, + "skuName": { + "value": "payShield10K_LMK1_CPS60" + }, + "vnetName": { + "value": "myVNet" + }, + "vnetAddressPrefix": { + "value": "10.0.0.0/16" + }, + "hsmSubnetName": { + "value": "mySubnet" + }, + "hsmSubnetPrefix": { + "value": "10.0.0.0/24" + }, + "managementVnetName": { + "value": "MGMTVNet" + }, + "managementVnetAddressPrefix": { + "value": "10.1.0.0/16" + }, + "managementHsmSubnetName": { + "value": "MGMTSubnet" + }, + "managementHsmSubnetPrefix": { + "value": "10.1.0.0/24" + } + } +} +``` ++## Deploy the template ++# [Azure CLI](#tab/azure-cli) ++In this example, you will use the Azure CLI to deploy an ARM template to create an Azure payment HSM. ++First, save the "azuredeploy.json" and "azuredeploy.parameters.json" files locally, for use in the next step. The contents of these files can be found in the [Review the template](#review-the-template) section. ++> [!NOTE] +> The steps below assume that the "azuredeploy.json" and "azuredeploy.parameters.json" file are in the directory from which you are running the commands. If the files are in another directory, you must adjust the file paths accordingly. ++Next, create an Azure resource group. +++Finally, use the Azure CLI [az deployment group create](/cli/azure/deployment/group#az-deployment-group-create) command to deploy your ARM template. ++```azurecli-interactive +az deployment group create --resource-group "MyResourceGroup" --name myPHSMDeployment --template-file "azuredeploy.json" +``` ++When prompted, supply the following values for the parameters: ++- **resourceName**: myPaymentHSM +- **vnetName**: myVNet +- **vnetAddressPrefix**: 10.0.0.0/16 +- **hsmSubnetName**: mySubnet +- **hsmSubnetPrefix**: 10.0.0.0/24 +- **managementVnetName**: MGMTVNet +- **managementVnetAddressPrefix**: 10.1.0.0/16 +- **managementHsmSubnetName**: MGMTSubnet +- **managementHsmSubnetPrefix**: 10.1.0.0/24 ++# [Azure PowerShell](#tab/azure-powershell) ++In this example, you will use the Azure PowerShell to deploy an ARM template to create an Azure payment HSM. ++First, save the "azuredeploy.json" and "azuredeploy.parameters.json" files locally, for use in the next step. The contents of these files can be found in the [Review the template](#review-the-template) section. ++> [!NOTE] +> The steps below assume that the "azuredeploy.json" and "azuredeploy.parameters.json" file are in the directory from which you are running the commands. If the files are in another directory, you must adjust the file paths accordingly. ++Next, create an Azure resource group. +++Now, set the following variables for use in the deploy step: ++```powershell-interactive +$deploymentName = "myPHSMDeployment" +$resourceGroupName = "myResourceGroup" +$templateFilePath = "azuredeploy.json" +$templateParametersPath = "azuredeploy.parameters.json" +$resourceName = "myPaymentHSM" +$skuName = "payShield10K_LMK1_CPS250" +$stampId = "stamp1" +$hostVnetName = "myVNet" +$hostVnetAddressPrefix = "10.0.0.0/16" +$hostSubnetName = "mySubnet" +$hostSubnetPrefix = "10.0.0.0/24" +$mgmtVnetName = "MGMTVNet" +$mgmtVnetAddressPrefix = "10.1.0.0/16" +$mgmtSubnetName = "MGMTSubnet" +$mgmtSubnetPrefix = "10.1.0.0/24" +``` ++Finally, use the Azure PowerShell [New-AzResourceGroupDeployment](/powershell/module/az.resources/new-azresourcegroupdeployment) cmdlet to deploy your ARM template. ++```azurepowershell-interactive +New-AzureRmResourceGroupDeployment -Name $deploymentName -ResourceGroupName $resourceGroupName -TemplateFile $templateFilePath -TemplateParameterFile $templateParametersPath -resourceName $resourceName -skuName $skuName -stampId $stampId -vnetName $hostVnetName -vnetAddressPrefix $hostVnetAddressPrefix -hsmSubnetName $hostSubnetName -hsmSubnetPrefix $hostSubnetPrefix -managementVnetName $mgmtVnetName -managementVnetAddressPrefix $mgmtVnetAddressPrefix -managementHsmSubnetName $mgmtSubnetName -managementHsmSubnetPrefix $mgmtSubnetPrefix +``` ++++## Validate the deployment ++# [Azure CLI](#tab/azure-cli) ++You can verify that the payment HSM was created with the Azure CLI [az dedicated-hsm list](/cli/azure/dedicated-hsm#az-dedicated-hsm-list) command. You will find the output easier to read if you format the results as a table: ++```azurecli-interactive +az dedicated-hsm list -o table +``` ++# [Azure PowerShell](#tab/azure-powershell) ++You can verify that the payment HSM was created with the Azure PowerShell [Get-AzDedicatedHsm](/powershell/module/az.dedicatedhsm/get-azdedicatedhsm) cmdlet. ++```azurepowershell-interactive +Get-AzDedicatedHsm +``` +++You should see the name of your newly created payment HSM. ++## Next steps ++Advance to the next article to learn how to access the payShield manager for your payment HSM +> [!div class="nextstepaction"] +> [Access the payShield manager](access-payshield-manager.md) ++More resources: ++- Read an [Overview of Payment HSM](overview.md) +- Find out how to [get started with Azure Payment HSM](getting-started.md) +- See some common [deployment scenarios](deployment-scenarios.md) +- Learn about [Certification and compliance](certification-compliance.md) +- Read the [frequently asked questions](faq.yml) |
| payment-hsm | Create Payment Hsm | https://github.com/MicrosoftDocs/azure-docs/commits/main/articles/payment-hsm/create-payment-hsm.md | + + Title: Create an Azure Payment HSM with Azure Payment HSM +description: Create an Azure Payment HSM with Azure Payment HSM ++++++ms.devlang: azurecli Last updated : 09/12/2022+++# Tutorial: Create a payment HSM ++Azure Payment HSM Service is a "BareMetal" service delivered using Thales payShield 10K payment hardware security modules (HSM) to provide cryptographic key operations for real-time, critical payment transactions in the Azure cloud. This article describes how to create an Azure Payment HSM with the host and management port in same virtual network. ++In this tutorial, you learn how to: ++> [!div class="checklist"] +> * Create a resource group +> * Create a virtual network and subnet for your payment HSM +> * Create a payment HSM +> * Retrieve information about your payment HSM ++> [!NOTE] +> If you wish to reuse an existing VNet, verify that you have met all of the [Prerequisites](#prerequisites) and then read [How to reuse an existing virtual network](reuse-vnet.md). ++## Prerequisites +++# [Azure CLI](#tab/azure-cli) ++- You must register the "Microsoft.HardwareSecurityModules" and "Microsoft.Network" resource providers, as well as the Azure Payment HSM features. Steps for doing so are at [Register the Azure Payment HSM resource provider and resource provider features](register-payment-hsm-resource-providers.md). ++ To quickly ascertain if the resource providers and features are already registered, use the Azure CLI [az provider show](/cli/azure/provider#az-provider-show) command. (You will find the output of this command more readable if you display it in table-format.) ++ ```azurecli-interactive + az provider show --namespace "Microsoft.HardwareSecurityModules" -o table + + az provider show --namespace "Microsoft.Network" -o table + + az feature registration show -n "FastPathEnabled" --provider-namespace "Microsoft.Network" -o table + + az feature registration show -n "AzureDedicatedHsm" --provider-namespace "Microsoft.HardwareSecurityModules" -o table + ``` ++ You can continue with this quick start if all four of these commands return "Registered". +- You must have an Azure subscription. You can [create a free account](https://azure.microsoft.com/free/) if you don't have one. +++# [Azure PowerShell](#tab/azure-powershell) ++- You must register the "Microsoft.HardwareSecurityModules" and "Microsoft.Network" resource providers, as well as the Azure Payment HSM features. Steps for doing so are at [Register the Azure Payment HSM resource provider and resource provider features](register-payment-hsm-resource-providers.md). ++ To quickly ascertain if the resource providers and features are already registered, use the Azure PowerShell [Get-AzProviderFeature](/powershell/module/az.resources/get-azproviderfeature) cmdlet: ++```azurepowershell-interactive +Get-AzProviderFeature -FeatureName "AzureDedicatedHsm" -ProviderNamespace Microsoft.HardwareSecurityModules ++Get-AzProviderFeature -FeatureName "FastPathEnabled" -ProviderNamespace Microsoft.Network +``` ++ You can continue with this quick start if the "RegistrationState" of both commands returns "Registered". ++- You must have an Azure subscription. You can [create a free account](https://azure.microsoft.com/free/) if you don't have one. + ++- You must install the Az.DedicatedHsm PowerShell module: ++ ```azurepowershell-interactive + Install-Module -Name Az.DedicatedHsm + ``` ++++## Create a resource group ++# [Azure CLI](#tab/azure-cli) +++# [Azure PowerShell](#tab/azure-powershell) +++++## Create a virtual network and subnet ++# [Azure CLI](#tab/azure-cli) ++Before creating a payment HSM, you must first create a virtual network and a subnet. To do so, use the Azure CLI [az network vnet create](/cli/azure/network/vnet#az-network-vnet-create) command: ++```azurecli-interactive +az network vnet create -g "myResourceGroup" -n "myVNet" --address-prefixes "10.0.0.0/16" --tags "fastpathenabled=True" --subnet-name "myPHSMSubnet" --subnet-prefix "10.0.0.0/24" +``` ++Afterward, use the Azure CLI [az network vnet subnet update](/cli/azure/network/vnet/subnet#az-network-vnet-subnet-update) command to update the subnet and give it a delegation of "Microsoft.HardwareSecurityModules/dedicatedHSMs": ++```azurecli-interactive +az network vnet subnet update -g "myResourceGroup" --vnet-name "myVNet" -n "myPHSMSubnet" --delegations "Microsoft.HardwareSecurityModules/dedicatedHSMs" +``` ++To verify that the VNet and subnet were created correctly, use the Azure CLI [az network vnet subnet show](/cli/azure/network/vnet/subnet#az-network-vnet-subnet-show) command: ++```azurecli-interactive +az network vnet subnet show -g "myResourceGroup" --vnet-name "myVNet" -n myPHSMSubnet +``` ++Make note of the subnet's ID, as you will need it for the next step. The ID of the subnet will end with the name of the subnet: ++```json +"id": "/subscriptions/<subscriptionID>/resourceGroups/myResourceGroup/providers/Microsoft.Network/virtualNetworks/myVNet/subnets/myPHSMSubnet", +``` ++# [Azure PowerShell](#tab/azure-powershell) ++Before creating a payment HSM, you must first create a virtual network and a subnet. ++First, set some variables for use in the subsequent operations: ++```azurepowershell-interactive +$VNetAddressPrefix = @("10.0.0.0/16") +$SubnetAddressPrefix = "10.0.0.0/24" +$tags = @{fastpathenabled="true"} +``` ++Use the Azure PowerShell [New-AzDelegation](/powershell/module/az.network/new-azdelegation) cmdlet to create a service delegation to be added to your subnet, and save the output to the `$myDelegation` variable: ++```azurepowershell-interactive +$myDelegation = New-AzDelegation -Name "myHSMDelegation" -ServiceName "Microsoft.HardwareSecurityModules/dedicatedHSMs" +``` ++Use the Azure PowerShell [New-AzVirtualNetworkSubnetConfig](/powershell/module/az.network/new-azvirtualnetworksubnetconfig) cmdlet to create a virtual network subnet configuration, and save the output to the `$myPHSMSubnet` variable: ++```azurepowershell-interactive +$myPHSMSubnetConfig = New-AzVirtualNetworkSubnetConfig -Name "myPHSMSubnet" -AddressPrefix $SubnetAddressPrefix -Delegation $myDelegation +``` ++> [!NOTE] +> The New-AzVirtualNetworkSubnetConfig cmdlet will generate a warning, which you can safely ignore. ++To create an Azure Virtual Network, use the Azure PowerShell [New-AzVirtualNetwork](/powershell/module/az.network/new-azvirtualnetwork) cmdlet: ++```azurepowershell-interactive +New-AzVirtualNetwork -Name "myVNet" -ResourceGroupName "myResourceGroup" -Location "EastUS" -Tag $tags -AddressPrefix $VNetAddressPrefix -Subnet $myPHSMSubnetConfig +``` ++To verify that the VNet was created correctly, use the Azure PowerShell [Get-AzVirtualNetwork](/powershell/module/az.network/get-azvirtualnetwork) cmdlet: ++```azurepowershell-interactive +Get-AzVirtualNetwork -Name "myVNet" -ResourceGroupName "myResourceGroup" +``` ++Make note of the subnet's ID, as you will need it for the next step. The ID of the subnet will end with the name of the subnet: ++```json +"Id": "/subscriptions/<subscriptionID>/resourceGroups/myResourceGroup/providers/Microsoft.Network/virtualNetworks/myVNet/subnets/myPHSMSubnet", +``` ++++## Create a payment HSM ++# [Azure CLI](#tab/azure-cli) ++To create a payment HSM, use the [az dedicated-hsm create](/cli/azure/dedicated-hsm#az-dedicated-hsm-create) command. The following example creates a payment HSM named `myPaymentHSM` in the `eastus` region, `myResourceGroup` resource group, and specified subscription, virtual network, and subnet: ++```azurecli-interactive +az dedicated-hsm create \ + --resource-group "myResourceGroup" \ + --name "myPaymentHSM" \ + --location "EastUS" \ + --subnet id="<subnet-id>" \ + --stamp-id "stamp1" \ + --sku "payShield10K_LMK1_CPS60" +``` ++# [Azure PowerShell](#tab/azure-powershell) ++To create a payment HSM, use the [New-AzDedicatedHsm](/powershell/module/az.dedicatedhsm/new-azdedicatedhsm) cmdlet and the VNet ID from the previous step: ++```azurepowershell-interactive +New-AzDedicatedHsm -Name "myPaymentHSM" -ResourceGroupName "myResourceGroup" -Location "East US" -Sku "payShield10K_LMK1_CPS60" -StampId "stamp1" -SubnetId "<subnet-id>" +``` ++The output of the payment HSM creation will look like this: ++```Output +Name Provisioning State SKU Location +- -- +myHSM Succeeded payShield10K_LMK1_CPS60 East US +``` ++++## View your payment HSM ++# [Azure CLI](#tab/azure-cli) ++To see your payment HSM and its properties, use the Azure CLI [az dedicated-hsm show](/cli/azure/dedicated-hsm#az-dedicated-hsm-show) command. ++```azurecli-interactive +az dedicated-hsm show --resource-group "myResourceGroup" --name "myPaymentHSM" +``` ++To list all of your payment HSMs, use the [az dedicated-hsm list](/cli/azure/dedicated-hsm#az-dedicated-hsm-list) command. (You will find the output of this command more readable if you display it in table-format.) ++```azurecli-interactive +az dedicated-hsm list --resource-group "myResourceGroup" -o table +``` ++# [Azure PowerShell](#tab/azure-powershell) ++To see your payment HSM and its properties, use the Azure PowerShell [Get-AzDedicatedHsm](/powershell/module/az.dedicatedhsm/get-azdedicatedhsm) cmdlet. ++```azurepowershell-interactive +Get-AzDedicatedHsm -Name "myPaymentHSM" -ResourceGroup "myResourceGroup" +``` ++To list all of your payment HSMs, use the [Get-AzDedicatedHsm](/powershell/module/az.dedicatedhsm/get-azdedicatedhsm) cmdlet with no parameters. ++To get more information on your payment HSM, you can use the [Get-AzResource](/powershell/module/az.dedicatedhsm/get-azdedicatedhsm) cmdlet, specifying the resource group, and "Microsoft.HardwareSecurityModules/dedicatedHSMs" as the resource type: ++```azurepowershell-interactive +Get-AzResource -ResourceGroupName "myResourceGroup" -ResourceType "Microsoft.HardwareSecurityModules/dedicatedHSMs" +``` ++++## Next steps ++Advance to the next article to learn how to access the payShield manager for your payment HSM +> [!div class="nextstepaction"] +> [Access the payShield manager](access-payshield-manager.md) ++Additional information: ++- Read an [Overview of Payment HSM](overview.md) +- Find out how to [get started with Azure Payment HSM](getting-started.md) +- See some common [deployment scenarios](deployment-scenarios.md) +- Learn about [Certification and compliance](certification-compliance.md) +- Read the [frequently asked questions](faq.yml) + |
| payment-hsm | Deployment Scenarios | https://github.com/MicrosoftDocs/azure-docs/commits/main/articles/payment-hsm/deployment-scenarios.md | Microsoft deploys payment hardware security modules (HSM) in stamps within a reg Thales doesn't provide PayShield SDK to customers, which supports HA over a cluster (a collection of HSMs initialized with same LMK). However, the customers usage scenario of the Thales PayShield devices is like a Stateless Server. Thus, no synchronization is required between HSMs during application runtime. Customers handle the HA using their custom client. One implementation would be to load balance between healthy HSMs connected to the application. Customers are responsible for implementing high availability by provisioning multiple devices, load balancing them, and using any kind of available backup mechanism to back up keys. -## Recommended high availability deployment +> [!IMPORTANT] +> - Virtual network peering does not support cross-region communication between payment HSM instances. A payment HSM instance in one region cannot communicate with a payment HSM instance in another region. +> - NSGs are not supported for payment HSM subnet. +> - Customers can allocate a maximum of two payment HSMs from each stamp in one region under same subscription. +> - If customer does not have a High Availability setup in their production environment, the customer will not be able to receive S2 support from Microsoft side. +> - Please ensure your Microsoft Cloud Solution Architect has reviewed your payment HSM deployment architecture design and readiness before production launch. +## High availability deployment -For High Availability, customer must allocate HSM between stamp 1 and stamp 2 (in other words, no two HSMs from same stamp) -## Recommended disaster recovery deployment +For High Availability, customer must allocate HSMs between stamp 1 and stamp 2 (in other words, no two HSMs from same stamp) +## Disaster recovery deployment + This scenario caters to regional-level failure. The usual strategy is to completely switch the application stack (and its HSMs), rather than trying to reach an HSM in Region 2 from application in Region 1 due to latency. This scenario caters to regional-level failure. The usual strategy is to complet - Learn more about [Azure Payment HSM](overview.md) - Find out how to [get started with Azure Payment HSM](getting-started.md)-- Learn about [Certification and compliance](certification-compliance.md)+- Learn how to [Create a payment HSM](create-payment-hsm.md) - Read the [frequently asked questions](faq.yml) |
| payment-hsm | Getting Started | https://github.com/MicrosoftDocs/azure-docs/commits/main/articles/payment-hsm/getting-started.md | -To get started with Azure Payment HSM (preview), contact your Microsoft sales representative and request access [via email](mailto:paymentHSMRequest@microsoft.com). Upon approval, you'll be provided with onboarding instructions. +This article provides steps and information necessary to get started with Azure Payment HSM. + ## Availability -The Azure Public Preview is currently available in **East US** and **North Europe**. +Azure Payment HSM is currently available in the following regions: ++- East US +- West US +- South Central US +- Central US +- North Europe +- West Europe -## Prerequisites +## Prerequisites Azure Payment HSM customers must have: Azure Payment HSM customers must have: ## Cost -The HSM devices will be charged based on the service pricing page. All other Azure resources for networking and virtual machines will incur regular Azure costs too. +The HSM devices will be charged based on the [Azure Payment HSM pricing page](https://azure.microsoft.com/pricing/details/payment-hsm/). All other Azure resources for networking and virtual machines will incur regular Azure costs too. ## payShield customization considerations If you are using payShield on-premises today with a custom firmware, a porting exercise is required to update the firmware to a version compatible with the Azure deployment. Please contact your Thales account manager to request a quote. Ensure that the following information is provided:+ - Customization hardware platform (e.g., payShield 9000 or payShield 10K) - Customization firmware number For details on Azure Payment HSM prerequisites, support channels, and division o ## Next steps - Learn more about [Azure Payment HSM](overview.md)-- See some common [deployment scenarios](deployment-scenarios.md)-- Learn about [Certification and compliance](certification-compliance.md)+- Find out how to [get started with Azure Payment HSM](getting-started.md) +- Learn how to [Create a payment HSM](create-payment-hsm.md) - Read the [frequently asked questions](faq.yml) |
| payment-hsm | Overview | https://github.com/MicrosoftDocs/azure-docs/commits/main/articles/payment-hsm/overview.md |  Title: What is Azure Payment HSM? -description: Learn how Azure Payment HSM is an Azure service that provide cryptographic key operations for real-time, critical payment transactions +description: Learn how Azure Payment HSM is an Azure service that provides cryptographic key operations for real-time, critical payment transactions tags: azure-resource-manager-Azure Payment HSM Service is a "BareMetal" service delivered using [Thales payShield 10K payment hardware security modules (HSM)](https://cpl.thalesgroup.com/encryption/hardware-security-modules/payment-hsms/payshield-10k) to provide cryptographic key operations for real-time, critical payment transactions in the Azure cloud. Azure Payment HSM is designed specifically to help a service provider and an individual financial institution accelerate their payment system's digital transformation strategy and adopt the public cloud. It meets the most stringent security, audit compliance, low latency, and high-performance requirements by the Payment Card Industry (PCI). +Azure Payment HSM is a "BareMetal" service delivered using [Thales payShield 10K payment hardware security modules (HSM)](https://cpl.thalesgroup.com/encryption/hardware-security-modules/payment-hsms/payshield-10k)—physical devices that provide cryptographic key operations for real-time, critical payment transactions in the Azure cloud. Azure Payment HSM is designed specifically to help a service provider and an individual financial institution accelerate their payment system's digital transformation strategy and adopt the public cloud. It meets the most stringent security, audit compliance, low latency, and high-performance requirements by the Payment Card Industry (PCI). Payment HSMs are provisioned and connected directly to users' virtual network, and HSMs are under users' sole administration control. HSMs can be easily provisioned as a pair of devices and configured for high availability. Users of the service utilize [Thales payShield Manager](https://cpl.thalesgroup.com/encryption/hardware-security-modules/payment-hsms/payshield-manager) for secure remote access to the HSMs as part of their Azure-based subscription. Multiple subscription options are available to satisfy a broad range of performance and multiple application requirements that can be upgraded quickly in line with end-user business growth. Azure payment HSM service offers highest performance level 2500 CPS. -Azure Payment HSM a highly specialized service. Therefore, we recommend that you fully understand the key concepts, including [pricing](https://azure.microsoft.com/services/payment-hsm/) and [support](getting-started.md#support). +> [!IMPORTANT] +> Azure Payment HSM a highly specialized service. We highly recommend that you review the [Azure Payment HSM pricing page](https://azure.microsoft.com/services/payment-hsm/) and [Getting started with Azure Payment HSM](getting-started.md#support). ## Why use Azure Payment HSM? -Momentum is building as financial institutions move some or all of their payment applications to the cloud. This entails a migration from the legacy on-premises (on-prem) applications and HSMs to a cloud-based infrastructure that isn't generally under their direct control. Often it means a subscription service rather than perpetual ownership of physical equipment and software. Corporate initiatives for efficiency and a scaled-down physical presence are the drivers for this. Conversely, with cloud-native organizations, the adoption of cloud-first without any on-premises presence is their fundamental business model. Whatever the reason, end users of a cloud-based payment infrastructure expect reduced IT complexity, streamlined security compliance, and flexibility to scale their solution seamlessly as their business grows. +Momentum is building as financial institutions move some or all of their payment applications to the cloud, requiring a migration from the legacy on-premises applications and HSMs to a cloud-based infrastructure that isn't generally under their direct control. Often it means a subscription service rather than perpetual ownership of physical equipment and software. Corporate initiatives for efficiency and a scaled-down physical presence are the drivers for this shift. Conversely, with cloud-native organizations, the adoption of cloud-first without any on-premises presence is their fundamental business model. Whatever the reason, end users of a cloud-based payment infrastructure expect reduced IT complexity, streamlined security compliance, and flexibility to scale their solution seamlessly as their business grows. -The cloud offers significant benefits, but challenges when migrating a legacy on-premises payment application (involving payment HSMs) to the cloud must be addressed. Some of these are: +The cloud offers significant benefits, but challenges when migrating a legacy on-premises payment application (involving payment HSMs) to the cloud must be addressed: - Shared responsibility and trust – what potential loss of control in some areas is acceptable? - Latency – how can an efficient, high-performance link between the application and HSM be achieved? Azure Payment HSM addresses these challenges and delivers a compelling value pro ### Enhanced security and compliance -End users of the service can leverage Microsoft security and compliance investments to increase their security posture. Microsoft maintains PCI DSS and PCI 3DS compliant Azure data centers, including those which house Azure Payment HSM solutions. The Azure Payment HSM solution can be deployed as part of a validated PCI P2PE / PCI PIN component or solution, helping to simplify ongoing security audit compliance. Thales payShield 10K HSMs deployed in the security infrastructure are certified to FIPS 140-2 Level 3 and PCI HSM v3. +End users of the service can use Microsoft security and compliance investments to increase their security posture. Microsoft maintains PCI DSS and PCI 3DS compliant Azure data centers, including those which house Azure Payment HSM solutions. The Azure Payment HSM solution can be deployed as part of a validated PCI P2PE / PCI PIN component or solution, helping to simplify ongoing security audit compliance. Thales payShield 10K HSMs deployed in the security infrastructure are certified to FIPS 140-2 Level 3 and PCI HSM v3. ### Customer-managed HSM in Azure -The Azure Payment HSM is a part of a subscription service that offers single-tenant HSMs for the service customer to have complete administrative control and exclusive access to the HSM. The customer could be a payment service provider acting on behalf of multiple financial institutions or a financial institution that wishes to directly access the Azure Payment HSM service. Once the HSM is allocated to a customer, Microsoft has no access to customer data. Likewise, when the HSM is no longer required, customer data is zeroized and erased as soon as the HSM is released to ensure complete privacy and security is maintained. The customer is responsible for ensuring sufficient HSM subscriptions are active to meet their requirements for backup, disaster recovery, and resilience to achieve the same performance available on their on-premises HSMs. +The Azure Payment HSM is a part of a subscription service that offers single-tenant HSMs for the service customer to have complete administrative control and exclusive access to the HSM. The customer could be a payment service provider acting on behalf of multiple financial institutions or a financial institution that wishes to directly access the Azure Payment HSM service. Once the HSM is allocated to a customer, Microsoft has no access to customer data. Likewise, when the HSM is no longer required, customer data is zeroized and erased as soon as the HSM is released, to ensure complete privacy and security is maintained. The customer is responsible for ensuring sufficient HSM subscriptions are active to meet their requirements for backup, disaster recovery, and resilience to achieve the same performance available on their on-premises HSMs. ### Accelerate digital transformation and innovation in cloud -For existing Thales payShield customers wishing to add a cloud option, the Azure Payment HSM solution offers native access to a payment HSM in Azure for "lift and shift" while still experiencing the low latency they're accustomed to via their on-premises payShield HSMs. The solution also offers high-performance transactions for mission-critical payment applications. Consequently, customers can continue their digital transformation strategy by leveraging technology innovation in the cloud. Existing Thales payShield customers can utilize their existing remote management solutions (payShield Manager and payShield TMD together with associated smart card readers and smart cards as appropriate) to work with the Azure Payment HSM service. Customers new to payShield can source the hardware accessories from Thales or one of its partners before deploying their HSM as part of the subscription service. +For existing Thales payShield customers wishing to add a cloud option, the Azure Payment HSM solution offers native access to a payment HSM in Azure for "lift and shift" while still experiencing the low latency they're accustomed to via their on-premises payShield HSMs. The solution also offers high-performance transactions for mission-critical payment applications. ++Customers can continue their digital transformation strategy by using technology innovation in the cloud. Existing Thales payShield customers can utilize their existing remote management solutions (payShield Manager and payShield TMD together with associated smart card readers and smart cards as appropriate) to work with the Azure Payment HSM service. Customers new to payShield can source the hardware accessories from Thales or one of its partners before deploying their HSM as part of the subscription service. ## Typical use cases With benefits including low latency and the ability to quickly add more HSM capacity as required, the cloud service is a perfect fit for a broad range of use cases, including:-Payment processing ++- Payment processing - Card & mobile payment authorization - PIN & EMV cryptogram validation - 3D-Secure authentication -Payment credential issuing +Payment credential issuing: + - Cards - Mobile secure elements - Wearables - Connected devices - Host card emulation (HCE) applications -Securing keys & authentication data +Securing keys & authentication data: + - POS, mPOS & SPOC key management - Remote key loading (for ATM & POS/mPOS devices) - PIN generation & printing - PIN routing -Sensitive data protection +Sensitive data protection: + - Point-to-point encryption (P2PE) - Security tokenization (for PCI DSS compliance) - EMV payment tokenization ## Suitable for both existing and new payment HSM users -The solution provides clear benefits for both Payment HSM users with a legacy on-premises HSM footprint and those new payment ecosystem entrants with no legacy infrastructure to support and who may choose a cloud-native approach from the outset. +The solution provides clear benefits for both Payment HSM users with a legacy, on-premises HSM footprint, and those new payment ecosystem entrants with no legacy infrastructure to support and who may choose a cloud-native approach from the outset. ++Benefits for existing on-premises HSM users: -Benefits for existing on-premises HSM users - Requires no modifications to payment applications or HSM software to migrate existing applications to the Azure solution - Enables more flexibility and efficiency in HSM utilization - Simplifies HSM sharing between multiple teams, geographically dispersed - Reduces physical HSM footprint in their legacy data centers - Improves cash flow for new projects -Benefits for new payment participants +Benefits for new payment participants: + - Avoids introduction of on-premises HSM infrastructure - Lowers upfront investment via the Azure subscription model - Offers access to latest certified hardware and software on-demand +## Supported SKUs ++Azure Payment HSM supports the following SKUs: ++- payShield10K_LMK1_CPS60 +- payShield10K_LMK1_CPS250 +- payShield10K_LMK1_CPS2500 +- payShield10K_LMK2_CPS60 +- payShield10K_LMK2_CPS250 +- payShield10K_LMK2_CPS2500 + ## Glossary | Term | Definition | |
| payment-hsm | Peer Vnets | https://github.com/MicrosoftDocs/azure-docs/commits/main/articles/payment-hsm/peer-vnets.md | + + Title: How to peer Azure Payment HSM virtual networks +description: How to peer Azure Payment HSM virtual networks ++++++ Last updated : 01/25/2022++++# How to peer payment HSM virtual networks ++Peering allows you to seamlessly connect two or more virtual networks, so they appear as a single network for connectivity purposes. For full details, see [Virtual network peering](../virtual-network/virtual-network-peering-overview.md). ++The `fastpathenabled` tag must be enabled on any virtual networks that the Payment HSM uses, peered or otherwise. For instance, to peer a virtual network of a payment HSM with a virtual network of a VM, you must first add the `fastpathenabled` tag to the latter. Unfortunately, adding the `fastpathenabled` tag through the Azure portal is insufficientΓÇöit must be done from the commandline. ++## Adding the `fastpathenabled` tag ++# [Azure CLI](#tab/azure-cli) ++First, find the resource ID on the virtual network you wish to tag with the Azure CLI [az network vnet show](/cli/azure/network/vnet#az-network-vnet-show) command: ++```azurecli-interactive +az network vnet show -g "myResourceGroup" -n "myVNet" +``` ++The resource ID will be in the format "/subscriptions/`<subscription-id>`/resourceGroups/`<resource-group-name>`/providers/Microsoft.Network/virtualNetworks/`<vnet-name>`". ++Now, use the Azure CLI [az tags create](/cli/azure/tag#az-tag-create) command to add the `fastpathenabled` tag to the virtual network: ++```azurecli-interactive +az tag create --resource-id "<resource-id>" --tags "fastpathenabled=True" +``` ++Afterward, if you run [az network vnet show](/cli/azure/network/vnet#az-network-vnet-show) again, you will see this output: ++```json + "tags": { + "fastpathenabled": "True" + }, +``` ++# [Azure PowerShell](#tab/azure-powershell) ++First, find the resource ID on the virtual network you wish to tag with the Azure PowerShell [Get-AzVirtualNetwork](/powershell/module/az.network/get-azvirtualnetwork) cmdlet: ++```azurepowershell-interactive +Get-AzVirtualNetwork -ResourceGroupName "myResourceGroup" -Name "myVNet" +``` ++The resource ID will be in the format "/subscriptions/`<subscription-id>`/resourceGroups/`<resource-group-name>`/providers/Microsoft.Network/virtualNetworks/`<vnet-name>`". ++Now, use the Azure PowerShell [Update-AzTag](/powershell/module/az.resources/update-aztag) cmdlet to add the `fastpathenabled` tag to the virtual network: ++```azurepowershell-interactive +Update-AzTag -ResourceId "<resource-id>" -Tag -Tag @{`fastpathenabled`="True"} -Operation Merge +``` ++Afterward, if you run [Get-AzVirtualNetwork](/powershell/module/az.network/get-azvirtualnetwork) again, you will see this output: ++```bash +Tags : + Name Value + =============== ===== + fastpathenabled True +``` ++++## Peering the payment HSM and VM virtual networks ++# [Azure CLI](#tab/azure-cli) ++To peer the payment HSM virtual network with the VM virtual network, use the Azure CLI [az network peering create](/cli/azure/network/vnet/peering#az-network-vnet-peering-create) command to peer the payment HSM VNet to VM VNet and vice versa:: ++```azurecli-interactive +# Peer payment HSM VNet to VM VNet +az network vnet peering create -g "myResourceGroup" -n "VNet2VMVNetPeering" --vnet-name "myVNet" --remote-vnet "myVMVNet" --allow-vnet-access ++# Peer VM VNet to payment HSM VNet +az network vnet peering create -g "myResourceGroup" -n "VMVNet2VNetPeering" --vnet-name "myVMVNet" --remote-vnet "myVNet" --allow-vnet-access +``` ++# [Azure PowerShell](#tab/azure-powershell) ++To peer the payment HSM virtual network with the VM virtual network, first use the Azure PowerShell [Get-AzVirtualNetwork](/powershell/module/az.network/get-azvirtualnetwork) cmdlet to save the details of the virtual networks into variables ++```azurepowershell-interactive +$myvnet = Get-AzVirtualNetwork -ResourceGroupName "myResourceGroup" -Name "myVNet" +$myvmvnet = Get-AzVirtualNetwork -ResourceGroupName "myResourceGroup" -Name "myVMVNet" +``` ++Then use the Azure PowerShell [Add-AzVirtualNetworkPeering](/powershell/module/az.network/add-azvirtualnetworkpeering) cmdlet to peer the payment HSM VNet to VM VNet and vice versa: ++```azurecli-powershell +# Peer payment HSM VNet to VM VNet +Add-AzVirtualNetworkPeering -Name "VNet2VMVNetPeering" -VirtualNetwork $myvnet -RemoteVirtualNetworkId $myvmvnet.Id ++# Peer VM VNet to payment HSM VNet +Add-AzVirtualNetworkPeering -Name 'VMVNet2VNetPeering' -VirtualNetwork $myvmvnet -RemoteVirtualNetworkId $myvnet.Id +``` ++++## Next steps +- Read an [Overview of Payment HSM](overview.md) +- Find out how to [Get started with Azure Payment HSM](getting-started.md) +- Learn how to [Create a payment HSM](create-payment-hsm.md) +- See the [Azure Payment HSM frequently asked questions](faq.yml) |
| payment-hsm | Quickstart Cli | https://github.com/MicrosoftDocs/azure-docs/commits/main/articles/payment-hsm/quickstart-cli.md | + + Title: Quickstart - Create an Azure Payment HSM with the Azure CLI +description: Create, show, list, update, and delete Azure Payment HSMs by using the Azure CLI. ++++++ms.devlang: azurecli Last updated : 09/12/2022+++# Quickstart: Create an Azure Payment HSM with the Azure CLI ++This article describes how to create, update, and delete an Azure Payment HSM by using the [az dedicated-hsm](/cli/azure/dedicated-hsm) Azure CLI command. ++## Prerequisites +++- You must register the "Microsoft.HardwareSecurityModules" and "Microsoft.Network" resource providers, as well as the Azure Payment HSM features. Steps for doing so are at [Register the Azure Payment HSM resource provider and resource provider features](register-payment-hsm-resource-providers.md). ++ To quickly ascertain if the resource providers and features are already registered, use the Azure CLI [az provider show](/cli/azure/provider#az-provider-show) command. (You will find the output of this command more readable if you display it in table-format.) ++ ```azurecli-interactive + az provider show --namespace "Microsoft.HardwareSecurityModules" -o table + + az provider show --namespace "Microsoft.Network" -o table + + az feature registration show -n "FastPathEnabled" --provider-namespace "Microsoft.Network" -o table + + az feature registration show -n "AzureDedicatedHsm" --provider-namespace "Microsoft.HardwareSecurityModules" -o table + ``` ++ You can continue with this quick start if all four of these commands return "Registered". ++- You must have an Azure subscription. You can [create a free account](https://azure.microsoft.com/free/) if you don't have one. + + If you have more than one Azure subscription, set the subscription to use for billing with the Azure CLI [az account set](/cli/azure/account#az-account-set) command. + + ```azurecli-interactive + az account set --subscription <subscription-id> + ``` +++## Create a resource group +++## Create a virtual network and subnet ++Before creating a payment HSM, you must first create a virtual network and a subnet. To do so, use the Azure CLI [az network vnet create](/cli/azure/network/vnet#az-network-vnet-create) command: ++```azurecli-interactive +az network vnet create -g "myResourceGroup" -n "myVNet" --address-prefixes "10.0.0.0/16" --tags "fastpathenabled=True" --subnet-name "myPHSMSubnet" --subnet-prefix "10.0.0.0/24" +``` ++Afterward, use the Azure CLI [az network vnet subnet update](/cli/azure/network/vnet/subnet#az-network-vnet-subnet-create) command to update the subnet and give it a delegation of "Microsoft.HardwareSecurityModules/dedicatedHSMs": ++```azurecli-interactive +az network vnet subnet update -g "myResourceGroup" --vnet-name "myVNet" -n "myPHSMSubnet" --delegations "Microsoft.HardwareSecurityModules/dedicatedHSMs" +``` ++To verify that the VNet and subnet were created correctly, use the Azure CLI [az network vnet show](/cli/azure/network/vnet) command: ++```azurecli-interactive +az network vnet show -n "myVNet" -g "myResourceGroup" +``` ++Make note of the value returned as "id", as you will need it for the next step. The "id" will be in the format: ++```json +"id": "/subscriptions/<subscriptionID>/resourceGroups/myResourceGroup/providers/Microsoft.Network/virtualNetworks/myVNet/subnets/myPHSMSubnet", +``` ++## Create a payment HSM ++To create a payment HSM, use the [az dedicated-hsm create](/cli/azure/dedicated-hsm#az-dedicated-hsm-create) command. The following example creates a payment HSM named `myPaymentHSM` in the `eastus` region, `myResourceGroup` resource group, and specified subscription, virtual network, and subnet: ++```azurecli-interactive +az dedicated-hsm create \ + --resource-group "myResourceGroup" \ + --name "myPaymentHSM" \ + --location "EastUS" \ + --subnet id="<subnet-id>" \ + --stamp-id "stamp1" \ + --sku "payShield10K_LMK1_CPS60" +``` ++## Get a payment HSM ++To see your payment HSM and its properties, use the Azure CLI [az dedicated-hsm show](/cli/azure/dedicated-hsm#az-dedicated-hsm-show) command. ++```azurecli-interactive +az dedicated-hsm show --resource-group "myResourceGroup" --name "myPaymentHSM" +``` ++To list all of your payment HSMs, use the [az dedicated-hsm list](/cli/azure/dedicated-hsm#az-dedicated-hsm-list) command. (You will find the output of this command more readable if you display it in table-format.) ++```azurecli-interactive +az dedicated-hsm list --resource-group "myResourceGroup" -o table +``` ++## Remove a payment HSM ++To remove your payment HSM, use the [az dedicated-hsm delete](/cli/azure/dedicated-hsm#az-dedicated-hsm-delete) command. The following example deletes the `myPaymentHSM` payment HSM from the `myResourceGroup` resource group: ++```azurecli-interactive +az dedicated-hsm delete --name "myPaymentHSM" -g "myResourceGroup" +``` ++## Delete the resource group +++## Next steps ++In this quickstart, you created a payment HSM, viewed and updated its properties, and deleted it. To learn more about Payment HSM and how to integrate it with your applications, continue on to the articles below. ++- Read an [Overview of Payment HSM](overview.md) +- Find out how to [get started with Azure Payment HSM](getting-started.md) +- See some common [deployment scenarios](deployment-scenarios.md) +- Learn about [Certification and compliance](certification-compliance.md) +- Read the [frequently asked questions](faq.yml) |
| payment-hsm | Quickstart Powershell | https://github.com/MicrosoftDocs/azure-docs/commits/main/articles/payment-hsm/quickstart-powershell.md | + + Title: Quickstart - Create an Azure Payment HSM with Azure PowerShell +description: Create, show, list, update, and delete Azure Payment HSMs by using Azure PowerShell ++++ Last updated : 09/12/2022++ms.devlang: azurepowershell +++# Quickstart: Create an Azure Payment HSM with Azure PowerShell ++This article describes how you can create an Azure Payment HSM using the [Az.DedicatedHsm](/powershell/module/az.dedicatedhsm) PowerShell module. ++## Prerequisites +++- You must register the "Microsoft.HardwareSecurityModules" and "Microsoft.Network" resource providers, as well as the Azure Payment HSM features. Steps for doing so are at [Register the Azure Payment HSM resource provider and resource provider features](register-payment-hsm-resource-providers.md). ++ To quickly ascertain if the resource providers and features are already registered, use the Azure PowerShell [Get-AzProviderFeature](/powershell/module/az.resources/get-azproviderfeature) cmdlet: ++```azurepowershell-interactive +Get-AzProviderFeature -FeatureName "AzureDedicatedHsm" -ProviderNamespace Microsoft.HardwareSecurityModules ++Get-AzProviderFeature -FeatureName "FastPathEnabled" -ProviderNamespace Microsoft.Network +``` ++You can continue with this quick start if the "RegistrationState" of both commands returns "Registered". ++- You must have an Azure subscription. You can [create a free account](https://azure.microsoft.com/free/) if you don't have one. + + If you have more than one Azure subscription, set the subscription to use for billing with the Azure PowerShell [Set-AzContext](/powershell/module/az.accounts/set-azcontext) cmdlet. + + ```azurepowershell-interactive + Set-AzContext -Subscription "<subscription-id>" + ``` +++- You must install the Az.DedicatedHsm PowerShell module: ++ ```azurepowershell-interactive + Install-Module -Name Az.DedicatedHsm + ``` ++## Create a resource group +++## Create a virtual network and subnet ++Before creating a payment HSM, you must first create a virtual network and a subnet. ++First, set some variables for use in the subsequent operations: ++```azurepowershell-interactive +$VNetAddressPrefix = @("10.0.0.0/16") +$SubnetAddressPrefix = "10.0.0.0/24" +$tags = @{fastpathenabled="true"} +``` ++Use the Azure PowerShell [New-AzDelegation](/powershell/module/az.network/new-azdelegation) cmdlet to create a service delegation to be added to your subnet, and save the output to the `$myDelegation` variable: ++```azurepowershell-interactive +$myDelegation = New-AzDelegation -Name "myHSMDelegation" -ServiceName "Microsoft.HardwareSecurityModules/dedicatedHSMs" +``` ++Use the Azure PowerShell [New-AzVirtualNetworkSubnetConfig](/powershell/module/az.network/new-azvirtualnetworksubnetconfig) cmdlet to create a virtual network subnet configuration, and save the output to the `$myPHSMSubnet` variable: ++```azurepowershell-interactive +$myPHSMSubnetConfig = New-AzVirtualNetworkSubnetConfig -Name "myPHSMSubnet" -AddressPrefix $SubnetAddressPrefix -Delegation $myDelegation +``` ++> [!NOTE] +> The New-AzVirtualNetworkSubnetConfig cmdlet will generate a warning, which you can safely ignore. ++To create an Azure Virtual Network, use the Azure PowerShell [New-AzVirtualNetwork](/powershell/module/az.network/new-azvirtualnetwork) cmdlet: ++```azurepowershell-interactive +New-AzVirtualNetwork -Name "myVNet" -ResourceGroupName "myResourceGroup" -Location "EastUS" -Tag $tags -AddressPrefix $VNetAddressPrefix -Subnet $myPHSMSubnetConfig +``` ++To verify that the VNet was created correctly, use the Azure PowerShell [Get-AzVirtualNetwork](/powershell/module/az.network/get-azvirtualnetwork) cmdlet: ++```azurepowershell-interactive +Get-AzVirtualNetwork -Name "myVNet" -ResourceGroupName "myResourceGroup" +``` ++Make note of the value returned as "Id", as you will need it for the next step. The "Id" will be in the format: ++```json +"Id": "/subscriptions/<subscriptionID>/resourceGroups/myResourceGroup/providers/Microsoft.Network/virtualNetworks/myVNet/subnets/myPHSMSubnet", +``` ++## Create a payment HSM ++To create a payment HSM, use the [New-AzDedicatedHsm](/powershell/module/az.dedicatedhsm/new-azdedicatedhsm) cmdlet and the VNet ID from the previous step: ++```azurepowershell-interactive +New-AzDedicatedHsm -Name "myPaymentHSM" -ResourceGroupName "myResourceGroup" -Location "East US" -Sku "payShield10K_LMK1_CPS60" -StampId "stamp1" -SubnetId "<subnet-id>" +``` ++The output of the payment HSM creation will look like this: ++```Output +Name Provisioning State SKU Location +- -- +myHSM Succeeded payShield10K_LMK1_CPS60 East US +``` ++## Get a payment HSM ++To see your payment HSM and its properties, use the Azure PowerShell [Get-AzDedicatedHsm](/powershell/module/az.dedicatedhsm/get-azdedicatedhsm) cmdlet. ++```azurepowershell-interactive +Get-AzDedicatedHsm -Name "myPaymentHSM" -ResourceGroup "myResourceGroup" +``` ++To list all of your payment HSMs, use the [Get-AzDedicatedHsm](/powershell/module/az.dedicatedhsm/get-azdedicatedhsm) cmdlet with no parameters. ++To get more information on your payment HSM, you can use the [Get-AzResource](/powershell/module/az.dedicatedhsm/get-azdedicatedhsm) cmdlet, specifying the resource group, and "Microsoft.HardwareSecurityModules/dedicatedHSMs" as the resource type: ++```azurepowershell-interactive +Get-AzResource -ResourceGroupName "myResourceGroup" -ResourceType "Microsoft.HardwareSecurityModules/dedicatedHSMs" +``` ++## Remove a payment HSM ++To remove your payment HSM, use the Azure PowerShell [Remove-AzDedicatedHsm](/powershell/module/az.dedicatedhsm/remove-azdedicatedhsm) cmdlet. The following example deletes the `myPaymentHSM` payment HSM from the `myResourceGroup` resource group: ++```azurepowershell-interactive +Remove-AzDedicatedHsm -Name "myPaymentHSM" -ResourceGroupName "myResourceGroup" +``` ++## Delete the resource group +++## Next steps ++In this quickstart, you created a payment HSM, viewed and updated its properties, and deleted it. To learn more about Payment HSM and how to integrate it with your applications, continue on to the articles below. ++- Read an [Overview of Payment HSM](overview.md) +- Find out how to [get started with Azure Payment HSM](getting-started.md) +- See some common [deployment scenarios](deployment-scenarios.md) +- Learn about [Certification and compliance](certification-compliance.md) +- Read the [frequently asked questions](faq.yml) |
| payment-hsm | Quickstart Template | https://github.com/MicrosoftDocs/azure-docs/commits/main/articles/payment-hsm/quickstart-template.md | + + Title: Azure Quickstart - Create an Azure Payment HSM using an Azure Resource Manager template +description: Quickstart showing how to create Azure Payment HSM using Resource Manager template +++ Last updated : 09/22/2022+++tags: azure-resource-manager ++#Customer intent: As a security admin who is new to Azure, I want to create a payment HSM using an Azure Resource Manager template. +++# Quickstart: Create an Azure payment HSM using an ARM template ++This quickstart describes how to use an Azure Resource Manager template (ARM template) to create an Azure payment HSM. Azure Payment HSM is a "BareMetal" service delivered using [Thales payShield 10K payment hardware security modules (HSM)](https://cpl.thalesgroup.com/encryption/hardware-security-modules/payment-hsms/payshield-10k) to provide cryptographic key operations for real-time, critical payment transactions in the Azure cloud. Azure Payment HSM is designed specifically to help a service provider and an individual financial institution accelerate their payment system's digital transformation strategy and adopt the public cloud. For more information, see [Azure Payment HSM: Overview](/azure/payment-hsm/overview). ++This article describes how to create a payment HSM with the host and management port in same virtual network. You can instead: +- [Create a payment HSM with host and management port in different virtual network using an ARM template](create-different-vnet.md) +- [Create HSM resource with host and management port with IP addresses in different virtual networks using ARM template](create-different-ip-addresses.md) +++## Prerequisites +++- You must register the "Microsoft.HardwareSecurityModules" and "Microsoft.Network" resource providers, as well as the Azure Payment HSM features. Steps for doing so are at [Register the Azure Payment HSM resource provider and resource provider features](register-payment-hsm-resource-providers.md). ++ To quickly ascertain if the resource providers and features are already registered, use the Azure CLI [az provider show](/cli/azure/provider#az-provider-show) command. (You will find the output of this command more readable if you display it in table-format.) ++ ```azurecli-interactive + az provider show --namespace "Microsoft.HardwareSecurityModules" -o table + + az provider show --namespace "Microsoft.Network" -o table + + az feature registration show -n "FastPathEnabled" --provider-namespace "Microsoft.Network" -o table + + az feature registration show -n "AzureDedicatedHsm" --provider-namespace "Microsoft.HardwareSecurityModules" -o table + ``` ++ You can continue with this quick start if all four of these commands return "Registered". +- You must have an Azure subscription. You can [create a free account](https://azure.microsoft.com/free/) if you don't have one. +++## Review the template ++The template used in this quickstart is azuredeploy.json: ++```json +{ + "$schema": "https://schema.management.azure.com/schemas/2019-04-01/deploymentTemplate.json#", + "contentVersion": "1.0.0.0", + "parameters": { + "resourceName": { + "type": "String", + "metadata": { + "description": "Azure Payment HSM resource name" + } + }, + "stampId": { + "type": "string", + "defaultValue": "stamp1", + "metadata": { + "description": "stamp id" + } + }, + "location": { + "type": "string", + "defaultValue": "[resourceGroup().location]", + "metadata": { + "description": "Location for all resources." + } + }, + "skuName": { + "type": "string", + "defaultValue": "payShield10K_LMK1_CPS60", + "metadata": { + "description": "PayShield SKU name. It must be one of the following: payShield10K_LMK1_CPS60, payShield10K_LMK1_CPS250, payShield10K_LMK1_CPS2500, payShield10K_LMK2_CPS60, payShield10K_LMK2_CPS250, payShield10K_LMK2_CPS2500" + } + }, + "vnetName": { + "type": "string", + "metadata": { + "description": "Virtual network name" + } + }, + "vnetAddressPrefix": { + "type": "string", + "metadata": { + "description": "Virtual network address prefix" + } + }, + "hsmSubnetName": { + "type": "String", + "metadata": { + "description": "Subnet name" + } + }, + "hsmSubnetPrefix": { + "type": "string", + "metadata": { + "description": "Subnet prefix" + } + } + }, + "variables": {}, + "resources": [ + { + "type": "Microsoft.HardwareSecurityModules/dedicatedHSMs", + "apiVersion": "2021-11-30", + "name": "[parameters('resourceName')]", + "location": "[parameters('location')]", + "dependsOn": [ + "[resourceId('Microsoft.Network/virtualNetworks/subnets', parameters('vnetName'), parameters('hsmSubnetName'))]" + ], + "sku": { + "name": "[parameters('skuName')]" + }, + "properties": { + "networkProfile": { + "subnet": { + "id": "[resourceId('Microsoft.Network/virtualNetworks/subnets', parameters('vnetName'), parameters('hsmSubnetName'))]" + } + }, + "managementNetworkProfile": { + "subnet": { + "id": "[resourceId('Microsoft.Network/virtualNetworks/subnets', parameters('vnetName'), parameters('hsmSubnetName'))]" + } + }, + "stampId": "[parameters('stampId')]" + } + }, + { + "type": "Microsoft.Network/virtualNetworks", + "apiVersion": "2020-11-01", + "name": "[parameters('vnetName')]", + "location": "[parameters('location')]", + "tags": { + "fastpathenabled": "true" + }, + "properties": { + "addressSpace": { + "addressPrefixes": [ + "[parameters('vnetAddressPrefix')]" + ] + }, + "subnets": [ + { + "name": "[parameters('hsmSubnetName')]", + "properties": { + "addressPrefix": "[parameters('hsmSubnetPrefix')]", + "delegations": [ + { + "name": "Microsoft.HardwareSecurityModules.dedicatedHSMs", + "properties": { + "serviceName": "Microsoft.HardwareSecurityModules/dedicatedHSMs" + } + } + ], + "privateEndpointNetworkPolicies": "Enabled", + "privateLinkServiceNetworkPolicies": "Enabled" + } + } + ], + "enableDdosProtection": false + } + }, + { + "type": "Microsoft.Network/virtualNetworks/subnets", + "apiVersion": "2020-11-01", + "name": "[concat(parameters('vnetName'), '/', parameters('hsmSubnetName'))]", + "dependsOn": [ + "[resourceId('Microsoft.Network/virtualNetworks', parameters('vnetName'))]" + ], + "properties": { + "addressPrefix": "[parameters('hsmSubnetPrefix')]", + "delegations": [ + { + "name": "Microsoft.HardwareSecurityModules.dedicatedHSMs", + "properties": { + "serviceName": "Microsoft.HardwareSecurityModules/dedicatedHSMs" + } + } + ], + "privateEndpointNetworkPolicies": "Enabled", + "privateLinkServiceNetworkPolicies": "Enabled" + } + } + ] +} +``` ++The Azure resource defined in the template is: ++* **Microsoft.HardwareSecurityModules.dedicatedHSMs**: Create an Azure payment HSM. ++The corresponding azuredeploy.parameters.json file is: ++```json +{ + "$schema": "https://schema.management.azure.com/schemas/2015-01-01/deploymentParameters.json#", + "contentVersion": "1.0.0.0", + "parameters": { + "resourceName": { + "value": "myhsm1" + }, + "stampId": { + "value": "stamp1" + }, + "skuName": { + "value": "payShield10K_LMK1_CPS60" + }, + "vnetName": { + "value": "myHsmVnet" + }, + "vnetAddressPrefix": { + "value": "10.0.0.0/16" + }, + "hsmSubnetName": { + "value": "myHsmSubnet" + }, + "hsmSubnetPrefix": { + "value": "10.0.0.0/24" + } + } +} +``` ++## Deploy the template ++# [Azure CLI](#tab/azure-cli) ++In this example, you will use the Azure CLI to deploy an ARM template to create an Azure payment HSM. ++First, save the "azuredeploy.json" and "azuredeploy.parameters.json" files locally, for use in the next step. The contents of these files can be found in the [Review the template](#review-the-template) section. ++> [!NOTE] +> The steps below assume that the "azuredeploy.json" and "azuredeploy.parameters.json" file are in the directory from which you are running the commands. If the files are in another directory, you must adjust the file paths accordingly. ++Next, create an Azure resource group. +++Finally, use the Azure CLI [az deployment group create](/cli/azure/deployment/group#az-deployment-group-create) command to deploy your ARM template. ++```azurecli-interactive +az deployment group create --resource-group "MyResourceGroup" --name myPHSMDeployment --template-file "azuredeploy.json" +``` ++When prompted, supply the following values for the parameters: ++- **resourceName**: myPaymentHSM +- **vnetName**: myVNet +- **vnetAddressPrefix**: 10.0.0.0/16 +- **hsmSubnetName**: mySubnet +- **hsmSubnetPrefix**: 10.0.0.0/24 ++# [Azure PowerShell](#tab/azure-powershell) ++In this example, you will use the Azure PowerShell to deploy an ARM template to create an Azure payment HSM. ++First, save the "azuredeploy.json" and "azuredeploy.parameters.json" files locally, for use in the next step. The contents of these files can be found in the [Review the template](#review-the-template) section. ++> [!NOTE] +> The steps below assume that the "azuredeploy.json" and "azuredeploy.parameters.json" file are in the directory from which you are running the commands. If the files are in another directory, you must adjust the file paths accordingly. ++Next, create an Azure resource group. +++Now, set the following variables for use in the deploy step: ++```powershell-interactive +$deploymentName = "myPHSMDeployment" +$resourceGroupName = "myResourceGroup" +$templateFilePath = "azuredeploy.json" +$templateParametersPath = "azuredeploy.parameters.json" +$resourceName = "myPaymentHSM" +$vnetName = "myVNet" +$vnetAddressPrefix = "10.0.0.0/16" +$subnetName = "mySubnet" +$subnetPrefix = "10.0.0.0/24" +``` ++Finally, use the Azure PowerShell [New-AzResourceGroupDeployment](/powershell/module/az.resources/new-azresourcegroupdeployment) cmdlet to deploy your ARM template. ++```azurepowershell-interactive +New-AzResourceGroupDeployment -Name $deploymentName -ResourceGroupName $resourceGroupName -TemplateFile $templateFilePath -TemplateParameterFile $templateParametersPath -resourceName $resourceName -vnetName $vnetName -vnetAddressPrefix $vnetAddressPrefix -hsmSubnetName $subnetName -hsmSubnetPrefix $subnetPrefix +``` +++## Validate the deployment ++# [Azure CLI](#tab/azure-cli) ++You can verify that the payment HSM was created with the Azure CLI [az dedicated-hsm list](/cli/azure/dedicated-hsm#az-dedicated-hsm-list) command. You will find the output easier to read if you format the results as a table: ++```azurecli-interactive +az dedicated-hsm list -o table +``` ++# [Azure PowerShell](#tab/azure-powershell) ++You can verify that the payment HSM was created with the Azure PowerShell [Get-AzDedicatedHsm](/powershell/module/az.dedicatedhsm/get-azdedicatedhsm) cmdlet. ++```azurepowershell-interactive +Get-AzDedicatedHsm +``` +++You should see the name of your newly created payment HSM. ++## Clean up resources ++# [Azure CLI](#tab/azure-cli) +++# [Azure PowerShell](#tab/azure-powershell) +++++## Next steps ++In this quickstart, you deployed an Azure Resource Manager template to create a payment HSM, verified the deployment, and deleted the payment HSM. To learn more about Azure Payment HSM and how to integrate it with your applications, continue on to the articles below. ++- Read an [Overview of Payment HSM](overview.md) +- Find out how to [get started with Azure Payment HSM](getting-started.md) +- See some common [deployment scenarios](deployment-scenarios.md) +- Learn about [Certification and compliance](certification-compliance.md) +- Read the [frequently asked questions](faq.yml) |
| payment-hsm | Register Payment Hsm Resource Providers | https://github.com/MicrosoftDocs/azure-docs/commits/main/articles/payment-hsm/register-payment-hsm-resource-providers.md | + + Title: Register the Azure Payment HSM resource providers +description: Register the Azure Payment HSM resource providers ++++ Last updated : 09/12/2022++++# Register the Azure Payment HSM resource providers and resource provider features ++Before using Azure Payment HSM, you must first register the Azure Payment HSM resource provider and the resource provider features. A resource provider is a service that supplies Azure resources. ++## Register the resource providers and features ++# [Azure CLI](#tab/azure-cli) ++Use the Azure CLI [az provider register](/cli/azure/provider#az-provider-register) command to register the Azure Payment HSM 'Microsoft.HardwareSecurityModules' resource provider, and the Azure CLI [az feature registration create](/cli/azure/feature/registration#az-feature-registration-create) command to register the "AzureDedicatedHsm" feature. ++```azurecli-interactive +az provider register --namespace "Microsoft.HardwareSecurityModules" ++az feature registration create --namespace "Microsoft.HardwareSecurityModules" --name "AzureDedicatedHsm" +``` ++You must also register the "Microsoft.Network" resource provider and the "FastPathEnabled" feature. ++```azurecli-interactive +az provider register --namespace "Microsoft.Network" ++az feature registration create --namespace "Microsoft.Network" --name "FastPathEnabled" +``` ++> [!IMPORTANT] +> After registering the "FastPathEnabled" feature, you **must** contact the [Azure Payment HSM support team](support-guide.md#microsoft-support) team to have your registration approved. In your message to Microsoft support, include your subscription ID. ++You can verify that your registrations are complete with the Azure CLI [az provider show](/cli/azure/provider#az-provider-show) command. (You will find the output of this command more readable if you display it in table-format.) ++```azurecli-interactive +az provider show --namespace "Microsoft.HardwareSecurityModules" -o table ++az provider show --namespace "Microsoft.Network" -o table ++az feature registration show -n "FastPathEnabled" --provider-namespace "Microsoft.Network" -o table ++az feature registration show -n "AzureDedicatedHsm" --provider-namespace "Microsoft.HardwareSecurityModules" -o table +``` ++# [Azure PowerShell](#tab/azure-powershell) ++Use the Azure PowerShell [Register-AzResourceProvider](/powershell/module/az.resources/register-azresourceprovider) cmdlet to register the "Microsoft.HardwareSecurityModules" resource provider and the "AzureDedicatedHsm" feature. ++```azurepowershell-interactive +Register-AzResourceProvider -ProviderNamespace Microsoft.HardwareSecurityModules ++Register-AzProviderFeature -FeatureName "AzureDedicatedHsm" -ProviderNamespace Microsoft.HardwareSecurityModules +``` ++You must also register the "Microsoft.Network" resource provider and the "FastPathEnabled" feature. ++```azurepowershell-interactive +Register-AzResourceProvider -ProviderNamespace Microsoft.Network ++Register-AzProviderFeature -FeatureName "FastPathEnabled" -ProviderNamespace Microsoft.Network +``` ++> [!IMPORTANT] +> After registering the "FastPathEnabled" feature, you **must** contact the [Azure Payment HSM support team](support-guide.md#microsoft-support) team to have your registration approved. In your message to Microsoft support, include your subscription ID. ++You can verify that your registrations are complete with the Azure PowerShell [Get-AzProviderFeature](/powershell/module/az.resources/get-azproviderfeature) cmdlet: ++```azurepowershell-interactive +Get-AzProviderFeature -FeatureName "AzureDedicatedHsm" -ProviderNamespace Microsoft.HardwareSecurityModules ++Get-AzProviderFeature -FeatureName "FastPathEnabled" -ProviderNamespace Microsoft.Network +``` ++++## Next Steps ++- Learn more about [Azure Payment HSM](overview.md) +- Find out how to [get started with Azure Payment HSM](getting-started.md) +- Learn how to [Create a payment HSM](create-payment-hsm.md) +- Read the [frequently asked questions](faq.yml) |
| payment-hsm | Remove Payment Hsm | https://github.com/MicrosoftDocs/azure-docs/commits/main/articles/payment-hsm/remove-payment-hsm.md | + + Title: Remove a commissioned Azure Payment HSM +description: Remove a commissioned Azure Payment HSM ++++ Last updated : 09/12/2022++++# Tutorial: Remove a commissioned payment HSM ++Before deleting a payment HSM that has been commissioned, it must first be decommissioned. ++In this tutorial, you learn how to: ++> [!div class="checklist"] +> * Remove a commissioned payment HSM +> * Verify that the payment HSM has been deleted ++## Remove a payment HSM from the payShield manager ++Navigate to the payShield manager, following the steps in [Access the payShield manager](access-payshield-manager.md#access-the-payshield-manager). From there, select "Remove device". +++> [!IMPORTANT] +> The payment HSM must be in a Secure state before RELEASE button is enabled. To do this, login with both Left and Right Keys and change state to Secure. ++## Delete the payment HSM ++Once the payment HSM has been released, you can delete it using Azure CLI or Azure PowerShell. ++# [Azure CLI](#tab/azure-cli) ++To remove your payment HSM, use the [az dedicated-hsm delete](/cli/azure/dedicated-hsm#az-dedicated-hsm-delete) command. The following example deletes the `myPaymentHSM` payment HSM from the `myResourceGroup` resource group: ++```azurecli-interactive +az dedicated-hsm delete --name "myPaymentHSM" -g "myResourceGroup" +``` ++Afterward, you can verify that the payment HSM was deleted with the Azure CLI [az dedicated-hsm show](/cli/azure/dedicated-hsm#az-dedicated-hsm-show) command. ++```azurecli-interactive +az dedicated-hsm show --resource-group "myResourceGroup" --name "myPaymentHSM" +``` ++This will return a "resource not found" error. ++# [Azure PowerShell](#tab/azure-powershell) ++To remove your payment HSM, use the Azure PowerShell [Remove-AzDedicatedHsm](/powershell/module/az.dedicatedhsm/remove-azdedicatedhsm) cmdlet. The following example deletes the `myPaymentHSM` payment HSM from the `myResourceGroup` resource group: ++```azurepowershell-interactive +Remove-AzDedicatedHsm -Name "myPaymentHSM" -ResourceGroupName "myResourceGroup" +``` ++Afterward, you can verify that the payment HSM was deleted with the Azure PowerShell [Get-AzDedicatedHsm](/powershell/module/az.dedicatedhsm/get-azdedicatedhsm) cmdlet. ++```azurepowershell-interactive +Get-AzDedicatedHsm -Name "myPaymentHSM" -ResourceGroup "myResourceGroup" +``` ++This will return a "resource not found" error. ++++## Next steps ++- Read an [Overview of Payment HSM](overview.md) +- Find out how to [get started with Azure Payment HSM](getting-started.md) +- [Access the payShield manager for your payment HSM](access-payshield-manager.md) |
| payment-hsm | Reuse Vnet | https://github.com/MicrosoftDocs/azure-docs/commits/main/articles/payment-hsm/reuse-vnet.md | + + Title: How to reuse an existing virtual network for an Azure Payment HSM +description: How to reuse an existing virtual network for an Azure Payment HSM ++++ Last updated : 09/12/2022++++# How to reuse an existing virtual network ++You can create a payment HSM on an existing virtual network by skipping the "Create a resource group" and "Create a virtual network" steps of [Create a payment HSM with host and management port in same VNet](create-payment-hsm.md), and jumping directly to the creation of a subnet. ++## Create a subnet on an existing virtual network ++# [Azure CLI](#tab/azure-cli) ++To create a subnet, you must know the name, resource group, and address space of the existing virtual network. To find them, use the Azure CLI [az network vnet list](/cli/azure/network/vnet#az-network-vnet-list) command. You will find the output easier to read if you format it as a table using the -o flag: ++```azurecli-interactive +az network vnet list -o table +``` ++The value returned in the "Prefixes" column, before the backslash, is the address space. ++Now use the Azure CLI [az network vnet subnet create](/cli/azure/network/vnet/subnet#az-network-vnet-subnet-create) command to create a new subnet with a delegation of "Microsoft.HardwareSecurityModules/dedicatedHSMs". The address prefixes must fall within the VNet's address space: ++```azurecli-interactive +az network vnet subnet create -g "myResourceGroup" --vnet-name "myVNet" -n "myPHSMSubnet" --delegations "Microsoft.HardwareSecurityModules/dedicatedHSMs" --address-prefixes "10.0.0.0/24" +``` ++To verify that the VNet and subnet were created correctly, use the Azure CLI [az network vnet subnet show](/cli/azure/network/vnet/subnet#az-network-vnet-subnet-show) command: ++```azurecli-interactive +az network vnet subnet show -g "myResourceGroup" --vnet-name "myVNet" -n myPHSMSubnet +``` ++Make note of the subnet's ID, as you will need it for the next step. The ID of the subnet will end with the name of the subnet: ++```json +"id": "/subscriptions/<subscriptionID>/resourceGroups/myResourceGroup/providers/Microsoft.Network/virtualNetworks/myVNet/subnets/myPHSMSubnet", +``` ++# [Azure PowerShell](#tab/azure-powershell) ++To create a subnet, you must know the name, resource group, and address space of the existing virtual network. To find them, use the Azure PowerShell [Get-AzVirtualNetwork](/powershell/module/az.network/get-azvirtualnetwork) cmdlet ++```azurepowershell-interactive +Get-AzVirtualNetwork +``` ++Run [Get-AzVirtualNetwork](/powershell/module/az.network/get-azvirtualnetwork) again, this time providing the names of the resource group and the virtual network, and save the output to the `$vnet` variable: ++```azurepowershell-interactive +$vnet = Get-AzVirtualNetwork -Name "myVNet" -ResourceGroupName "myResourceGroup" +``` ++Use the Azure PowerShell [New-AzDelegation](/powershell/module/az.network/new-azdelegation) cmdlet to create a service delegation to be added to your new subnet, and save the output to the `$myDelegation` variable: ++```azurepowershell-interactive +$myDelegation = New-AzDelegation -Name "myHSMDelegation" -ServiceName "Microsoft.HardwareSecurityModules/dedicatedHSMs" +``` ++Use the Azure PowerShell [New-AzVirtualNetworkSubnetConfig](/powershell/module/az.network/new-azvirtualnetworksubnetconfig) cmdlet to create a virtual network subnet configuration, and save the output to the `$myPHSMSubnet` variable. The address prefixes must fall within the VNet's address space: ++```azurepowershell-interactive +$myPHSMSubnetConfig = New-AzVirtualNetworkSubnetConfig -Name "myPHSMSubnet" -AddressPrefix "10.0.0.0/24" -Delegation $myDelegation +``` ++> [!NOTE] +> The New-AzVirtualNetworkSubnetConfig cmdlet will generate a warning, which you can safely ignore. ++Add the new subnet, along with the 'fastpathenabled="True"' tag, to the $vnet variable: ++```azurepowershell-interactive +$vnet.Subnets.Add($myPHSMSubnetConfig) +$vnet.Tag = @{fastpathenabled="True"} +``` ++Lastly, update your virtual machine with the Azure PowerShell [Set-AzVirtualNetwork](/powershell/module/az.network/set-AzVirtualNetwork) cmdlet, passing to it the $vnet variable: ++```azurepowershell-interactive +Set-AzVirtualNetwork -VirtualNetwork $vnet +``` ++To verify that the subnet was added correctly, use the Azure PowerShell [Get-AzVirtualNetwork](/powershell/module/az.network/get-azvirtualnetwork) cmdlet: ++```azurepowershell-interactive +Get-AzVirtualNetwork -Name "myVNet" -ResourceGroupName "myResourceGroup" +``` ++Make note of the subnet's ID, as you will need it for the next step. The ID of the subnet will end with the name of the subnet: ++```json +"Id": "/subscriptions/<subscriptionID>/resourceGroups/myResourceGroup/providers/Microsoft.Network/virtualNetworks/myVNet/subnets/myPHSMSubnet", +``` ++++## Create a payment HSM ++Now that you've added a subnet to your existing virtual network, you can create a payment HSM by following the steps in [Create a payment HSM](create-payment-hsm.md#create-a-payment-hsm). You will need the resource group; name and address space of the virtual network; and name, address space, and ID of the subnet. ++## Next steps ++- Read an [Overview of Payment HSM](overview.md) +- Find out how to [get started with Azure Payment HSM](getting-started.md) +- See the [Azure Payment HSM frequently asked questions](faq.yml) |
| payment-hsm | Support Guide | https://github.com/MicrosoftDocs/azure-docs/commits/main/articles/payment-hsm/support-guide.md | -> [!IMPORTANT] -> There is no service-level agreement (SLA) during the Azure Payment HSM public preview. Use of this service for production workloads will not be supported until GA. +> [!NOTE] +> If a customer's production environment does not has a High Availability setup as shown in [Deployment scenarios: high availability deployment](deployment-scenarios.md#high-availability-deployment), customer will not receive S2 level support. ## Prerequisites Microsoft will work with Thales to ensure that customers meet the prerequisites ## Firmware and license support -The HSM base firmware installed in public preview is Thales payShield10K base software version 1.4a 1.8.3 with the Premium Package license. Versions below 1.4a 1.8.3. are not supported. Customers must ensure that they only upgrade to a firmware version that meets their compliance requirements. +The HSM base firmware installed is Thales payShield10K base software version 1.4a 1.8.3 with the Premium Package license. Versions below 1.4a 1.8.3. are not supported. Customers must ensure that they only upgrade to a firmware version that meets their compliance requirements. Customers are responsible for applying payShield security patches and upgrading payShield firmware for their provisioned HSMs, as needed. If customers have questions or require assistance, they should work with Thales support. Microsoft support can be contacted by creating a support ticket through the Azur Thales will provide payment application-level support including client software, HSM configuration and backup, and HSM operation support. -All Azure Payment HSM customers have Enhanced Support Plan with Thales. The [Thales Welcome Pack for Authentication and Encryption Products](https://supportportal.thalesgroup.com/csm?sys_kb_id=1d2bac074f13f340102400818110c7d9&id=kb_article_view&sysparm_rank=1&sysparm_tsqueryId=e7f1843d87f3c9107b0664e80cbb352e&sysparm_article=KB0019882) is an important reference for customers, as it explains the Thales support plan, scope, and responsiveness. Please download the [Thales Welcome Pack PDF](https://supportportal.thalesgroup.com/sys_attachment.do?sys_id=52681fca1b1e0110e2af520f6e4bcb96). +All Azure Payment HSM customers have Enhanced Support Plan with Thales. The [Thales Welcome Pack for Authentication and Encryption Products](https://supportportal.thalesgroup.com/csm?sys_kb_id=1d2bac074f13f340102400818110c7d9&id=kb_article_view&sysparm_rank=1&sysparm_tsqueryId=e7f1843d87f3c9107b0664e80cbb352e&sysparm_article=KB0019882) is an important reference for customers, as it explains the Thales support plan, scope, and responsiveness. Download the [Thales Welcome Pack PDF](https://supportportal.thalesgroup.com/sys_attachment.do?sys_id=52681fca1b1e0110e2af520f6e4bcb96). Thales support can be contacted through the [Thales CPL Customer Support Portal](https://supportportal.thalesgroup.com/csm). Depending on the nature of your issue or query, you may need to contact Microsof |--|--|--|--| | HSM provisioning, HSM networking, HSM hardware, management and host port connection | X | | | | HSM reset, HSM delete | X | | |-| HSM Tamper event | X | | Microsoft can recover logs from medium Tamper based on customer's request. It is highly recommended that customer should implement Realtime log replication and backup. | +| HSM Tamper event | X | | Microsoft can recover logs from medium Tamper based on customer's request. It is highly recommended that you implement real time log replication and backup. | | payShield manager operation, key management | | X | | | payShield applications, host commands | | X | | | payShield firmware upgrade, security patch | | X | Customers are responsible for upgrading their allocated HSM's firmware and applying security patches. Firmware versions below 1.4a 1.8.3. are not supported.<br><br>Microsoft is responsible for applying payShield security patches to unallocated HSMs. | Depending on the nature of your issue or query, you may need to contact Microsof | TMD | | X | The customer can purchase TMD through their Thales representatives. | | Hosted HSM End User Guide | | X | Customers must download "Hosted HSM End User Guide" from Thales support portal for more details on the changes to payShield to this service. | | payShield 10K documentation, TMD documentation | | X | |-| payShield audit and error logs backup | N/A | N/A | The customer is responsible for implementing their own mechanism to back up their audit and error logs. It is highly recommended that customer implement real time log replication and backup. | +| payShield audit and error logs backup | N/A | N/A | The customer is responsible for implementing their own mechanism to back up their audit and error logs. It is highly recommended that you implement real time log replication and backup. | | Key backup | N/A | N/A | Customers are responsible to implement their own mechanism to back up keys. | | Custom firmware | | X | If customers are using payShield on premise today with a custom firmware, a porting exercise is required to update the firmware to a version compatible with the Azure deployment. Contact Thales account manager to request a quote. Custom firmware will be supported by Thales support. | |
| postgresql | How To Deploy Github Action | https://github.com/MicrosoftDocs/azure-docs/commits/main/articles/postgresql/single-server/how-to-deploy-github-action.md | The file has two sections: |Section |Tasks | |||-|**Authentication** | 1. Define a service principal. <br /> 2. Create a GitHub secret. | +|**Authentication** | 1. Generate deployment credentials. | |**Deploy** | 1. Deploy the database. | ## Generate deployment credentials -You can create a [service principal](../../active-directory/develop/app-objects-and-service-principals.md) with the [az ad sp create-for-rbac](/cli/azure/ad/sp#az-ad-sp-create-for-rbac&preserve-view=true) command in the [Azure CLI](/cli/azure/). Run this command with [Azure Cloud Shell](https://shell.azure.com/) in the Azure portal or by selecting the **Try it** button. --Replace the placeholders `server-name` with the name of your PostgreSQL server hosted on Azure. Replace the `subscription-id` and `resource-group` with the subscription ID and resource group connected to your PostgreSQL server. --```azurecli-interactive - az ad sp create-for-rbac --name {server-name} --role contributor \ - --scopes /subscriptions/{subscription-id}/resourceGroups/{resource-group} \ - --sdk-auth -``` --The output is a JSON object with the role assignment credentials that provide access to your database similar to below. Copy this output JSON object for later. --```output - { - "clientId": "<GUID>", - "clientSecret": "<GUID>", - "subscriptionId": "<GUID>", - "tenantId": "<GUID>", - (...) - } -``` --> [!IMPORTANT] -> It is always a good practice to grant minimum access. The scope in the previous example is limited to the specific server and not the entire resource group. ## Copy the PostgreSQL connection string You will use the connection string as a GitHub secret. ## Configure the GitHub secrets -1. In [GitHub](https://github.com/), browse your repository. --1. Select **Settings > Secrets > New secret**. --1. Paste the entire JSON output from the Azure CLI command into the secret's value field. Give the secret the name `AZURE_CREDENTIALS`. -- When you configure the workflow file later, you use the secret for the input `creds` of the Azure Login action. For example: -- ```yaml - - uses: azure/login@v1 - with: - creds: ${{ secrets.AZURE_CREDENTIALS }} - ``` --1. Select **New secret** again. --1. Paste the connection string value into the secret's value field. Give the secret the name `AZURE_POSTGRESQL_CONNECTION_STRING`. ## Add your workflow You will use the connection string as a GitHub secret. on: push:- branches: [ master ] + branches: [ main ] pull_request:- branches: [ master ] + branches: [ main ] ``` -1. Rename your workflow `PostgreSQL for GitHub Actions` and add the checkout and login actions. These actions will checkout your site code and authenticate with Azure using the `AZURE_CREDENTIALS` GitHub secret you created earlier. +1. Rename your workflow `PostgreSQL for GitHub Actions` and add the checkout and login actions. These actions will checkout your site code and authenticate with Azure using the GitHub secret(s) you created earlier. ++ # [Service principal](#tab/userlevel) ```yaml name: PostgreSQL for GitHub Actions on: push:- branches: [ master ] + branches: [ main ] pull_request:- branches: [ master ] + branches: [ main ] jobs: build: You will use the connection string as a GitHub secret. with: creds: ${{ secrets.AZURE_CREDENTIALS }} ```+ # [OpenID Connect](#tab/openid) ++ ```yaml + name: PostgreSQL for GitHub Actions ++ on: + push: + branches: [ main ] + pull_request: + branches: [ main ] ++ jobs: + build: + runs-on: ubuntu-latest + steps: + - uses: actions/checkout@v1 + - uses: azure/login@v1 + with: + client-id: ${{ secrets.AZURE_CLIENT_ID }} + tenant-id: ${{ secrets.AZURE_TENANT_ID }} + subscription-id: ${{ secrets.AZURE_SUBSCRIPTION_ID }} + ``` + 2. Use the Azure PostgreSQL Deploy action to connect to your PostgreSQL instance. Replace `POSTGRESQL_SERVER_NAME` with the name of your server. You should have a PostgreSQL data file named `data.sql` at the root level of your repository. You will use the connection string as a GitHub secret. 3. Complete your workflow by adding an action to logout of Azure. Here is the completed workflow. The file will appear in the `.github/workflows` folder of your repository. + # [Service principal](#tab/userlevel) + ```yaml name: PostgreSQL for GitHub Actions on: push:- branches: [ master ] + branches: [ main ] pull_request:- branches: [ master ] + branches: [ main ] jobs: You will use the connection string as a GitHub secret. - uses: actions/checkout@v1 - uses: azure/login@v1 with:- creds: ${{ secrets.AZURE_CREDENTIALS }} + client-id: ${{ secrets.AZURE_CREDENTIALS }} ++ - uses: azure/postgresql@v1 + with: + server-name: POSTGRESQL_SERVER_NAME + connection-string: ${{ secrets.AZURE_POSTGRESQL_CONNECTION_STRING }} + sql-file: './data.sql' ++ # Azure logout + - name: logout + run: | + az logout + ``` ++ # [OpenID Connect](#tab/openid) ++ ```yaml + name: PostgreSQL for GitHub Actions ++ on: + push: + branches: [ main ] + pull_request: + branches: [ main ] +++ jobs: + build: + runs-on: ubuntu-latest + steps: + - uses: actions/checkout@v1 + - uses: azure/login@v1 + with: + client-id: ${{ secrets.AZURE_CLIENT_ID }} + tenant-id: ${{ secrets.AZURE_TENANT_ID }} + subscription-id: ${{ secrets.AZURE_SUBSCRIPTION_ID }} - uses: azure/postgresql@v1 with: You will use the connection string as a GitHub secret. run: | az logout ```+ + ## Review your deployment |
| private-5g-core | Collect Required Information For A Site | https://github.com/MicrosoftDocs/azure-docs/commits/main/articles/private-5g-core/collect-required-information-for-a-site.md | You can use this information to create a site in an existing private mobile netw ## Prerequisites -You must have completed all of the steps in [Allocate subnets and IP addresses](complete-private-mobile-network-prerequisites.md#allocate-subnets-and-ip-addresses), [Allocate User Equipment (UE) IP address pools](complete-private-mobile-network-prerequisites.md#allocate-user-equipment-ue-ip-address-pools), and [Order and set up your Azure Stack Edge Pro device(s)](complete-private-mobile-network-prerequisites.md#order-and-set-up-your-azure-stack-edge-pro-devices) for your new site. +You must have completed the steps in [Complete the prerequisite tasks for deploying a private mobile network](complete-private-mobile-network-prerequisites.md). ## Collect mobile network site resource values Collect all the values in the following table for the packet core instance that |Value |Field name in Azure portal | ||| |The core technology type the packet core instance should support (5G or 4G). |**Technology type**|- |The custom location that targets the Azure Kubernetes Service on Azure Stack HCI (AKS-HCI) cluster on the Azure Stack Edge Pro device in the site. You commissioned the AKS-HCI cluster as part of the steps in [Order and set up your Azure Stack Edge Pro device(s)](complete-private-mobile-network-prerequisites.md#order-and-set-up-your-azure-stack-edge-pro-devices).</br></br> If you're going to create your site using the Azure portal, collect the name of the custom location.</br></br> If you're going to create your site using an ARM template, collect the full resource ID of the custom location.|**Custom location**| + | The Azure Stack Edge resource representing the Azure Stack Edge Pro device in the site. You created this resource as part of the steps in [Order and set up your Azure Stack Edge Pro device(s)](complete-private-mobile-network-prerequisites.md#order-and-set-up-your-azure-stack-edge-pro-devices).</br></br> If you're going to create your site using the Azure portal, collect the name of the Azure Stack Edge resource.</br></br> If you're going to create your site using an ARM template, collect the full resource ID of the Azure Stack Edge resource. You can do this by navigating to the Azure Stack Edge resource, selecting **JSON View** and copying the contents of the **Resource ID** field. | **Azure Stack Edge device** | + |The custom location that targets the Azure Kubernetes Service on Azure Stack HCI (AKS-HCI) cluster on the Azure Stack Edge Pro device in the site. You commissioned the AKS-HCI cluster as part of the steps in [Order and set up your Azure Stack Edge Pro device(s)](complete-private-mobile-network-prerequisites.md#order-and-set-up-your-azure-stack-edge-pro-devices).</br></br> If you're going to create your site using the Azure portal, collect the name of the custom location.</br></br> If you're going to create your site using an ARM template, collect the full resource ID of the custom location. You can do this by navigating to the Custom location resource, selecting **JSON View** and copying the contents of the **Resource ID** field.|**Custom location**| ## Collect access network values Collect all the values in the following table to define the packet core instance's connection to the access network over the control plane and user plane interfaces. The field name displayed in the Azure portal will depend on the value you have chosen for **Technology type**, as described in [Collect packet core configuration values](#collect-packet-core-configuration-values). -> [!IMPORTANT] -> Where noted, you must use the same values you used when deploying the AKS-HCI cluster on your Azure Stack Edge Pro device. You did this as part of the steps in [Order and set up your Azure Stack Edge Pro device(s)](complete-private-mobile-network-prerequisites.md#order-and-set-up-your-azure-stack-edge-pro-devices). - |Value |Field name in Azure portal | |||- | The IP address for the control plane interface on the access network. For 5G, this interface is the N2 interface, whereas for 4G, it's the S1-MME interface. You identified this address in [Allocate subnets and IP addresses](complete-private-mobile-network-prerequisites.md#allocate-subnets-and-ip-addresses) and it must match the value you used when deploying the AKS-HCI cluster. |**N2 address (Signaling)** (for 5G) or **S1-MME address** (for 4G). | - | The name for the control plane interface on the access network. For 5G, this interface is the N2 interface, whereas for 4G, it's the S1-MME interface. The name must match the corresponding virtual network name on port 5 on your Azure Stack Edge Pro device. | **N2 interface name** (for 5G) or **S1-MME interface name** (for 4G). | - | The name for the user plane interface on the access network. For 5G, this interface is the N3 interface, whereas for 4G, it's the S1-U interface. The name must match the corresponding virtual network name on port 5 on your Azure Stack Edge Pro device. | **N3 interface name** (for 5G) or **S1-U interface name** (for 4G). | - | The network address of the access subnet in Classless Inter-Domain Routing (CIDR) notation. You identified this address in [Allocate subnets and IP addresses](complete-private-mobile-network-prerequisites.md#allocate-subnets-and-ip-addresses) and it must match the value you used when deploying the AKS-HCI cluster. |**N2 subnet** and **N3 subnet** (for 5G), or **S1-MME subnet** and **S1-U subnet** (for 4G).| - | The access subnet default gateway. You identified this in [Allocate subnets and IP addresses](complete-private-mobile-network-prerequisites.md#allocate-subnets-and-ip-addresses) and it must match the value you used when deploying the AKS-HCI cluster. |**N2 gateway** and **N3 gateway** (for 5G), or **S1-MME gateway** and **S1-U gateway** (for 4G).| + | The IP address for the control plane interface on the access network. For 5G, this interface is the N2 interface; for 4G, it's the S1-MME interface. You identified this address in [Allocate subnets and IP addresses](complete-private-mobile-network-prerequisites.md#allocate-subnets-and-ip-addresses). </br></br> This IP address must match the value you used when deploying the AKS-HCI cluster on your Azure Stack Edge Pro device. You did this as part of the steps in [Order and set up your Azure Stack Edge Pro device(s)](complete-private-mobile-network-prerequisites.md#order-and-set-up-your-azure-stack-edge-pro-devices). |**N2 address (Signaling)** (for 5G) or **S1-MME address** (for 4G). | + | The virtual network name on port 5 on your Azure Stack Edge Pro device corresponding to the control plane interface on the access network. For 5G, this interface is the N2 interface; for 4G, it's the S1-MME interface. | **ASE N2 virtual subnet** (for 5G) or **ASE S1-MME virtual subnet** (for 4G). | + | The virtual network name on port 5 on your Azure Stack Edge Pro device corresponding to the user plane interface on the access network. For 5G, this interface is the N3 interface; for 4G, it's the S1-U interface. | **ASE N3 virtual subnet** (for 5G) or **ASE S1-U virtual subnet** (for 4G). | ## Collect data network values Collect all the values in the following table to define the packet core instance's connection to the data network over the user plane interface. -> [!IMPORTANT] -> Where noted, you must use the same values you used when deploying the AKS-HCI cluster on your Azure Stack Edge Pro device. You did this as part of the steps in [Order and set up your Azure Stack Edge Pro device(s)](complete-private-mobile-network-prerequisites.md#order-and-set-up-your-azure-stack-edge-pro-devices). - |Value |Field name in Azure portal | ||| | The name of the data network. |**Data network name**|- | The name for the user plane interface on the data network. For 5G, this interface is the N6 interface, whereas for 4G, it's the SGi interface. The name must match the corresponding virtual network name on port 6 on your Azure Stack Edge Pro device. | **N6 interface name** (for 5G) or **SGi interface name** (for 4G). | - | The network address of the data subnet in CIDR notation. You identified this address in [Allocate subnets and IP addresses](complete-private-mobile-network-prerequisites.md#allocate-subnets-and-ip-addresses) and it must match the value you used when deploying the AKS-HCI cluster. | **N6 subnet** (for 5G) or **SGi subnet** (for 4G). | - |The data subnet default gateway. You identified this in [Allocate subnets and IP addresses](complete-private-mobile-network-prerequisites.md#allocate-subnets-and-ip-addresses) and it must match the value you used when deploying the AKS-HCI cluster. | **N6 gateway** (for 5G) or **SGi gateway** (for 4G). | + | The virtual network name on port 6 on your Azure Stack Edge Pro device corresponding to the user plane interface on the data network. For 5G, this interface is the N6 interface; for 4G, it's the SGi interface. | **ASE N6 virtual subnet** (for 5G) or **ASE SGi virtual subnet** (for 4G). | | The network address of the subnet from which dynamic IP addresses must be allocated to user equipment (UEs), given in CIDR notation. You won't need this address if you don't want to support dynamic IP address allocation for this site. You identified this in [Allocate user equipment (UE) IP address pools](complete-private-mobile-network-prerequisites.md#allocate-user-equipment-ue-ip-address-pools). The following example shows the network address format. </br></br>`198.51.100.0/24` </br></br>Note that the UE subnets aren't related to the access subnet. |**Dynamic UE IP pool prefixes**| | The network address of the subnet from which static IP addresses must be allocated to user equipment (UEs), given in CIDR notation. You won't need this address if you don't want to support static IP address allocation for this site. You identified this in [Allocate user equipment (UE) IP address pools](complete-private-mobile-network-prerequisites.md#allocate-user-equipment-ue-ip-address-pools). The following example shows the network address format. </br></br>`198.51.100.0/24` </br></br>Note that the UE subnets aren't related to the access subnet. |**Static UE IP pool prefixes**| | The Domain Name System (DNS) server addresses to be provided to the UEs connected to this data network. You identified this in [Allocate subnets and IP addresses](complete-private-mobile-network-prerequisites.md#allocate-subnets-and-ip-addresses). </br></br>This value may be an empty list if you don't want to configure a DNS server for the data network. In this case, UEs in this data network will be unable to resolve domain names. | **DNS Addresses** | |
| private-5g-core | Complete Private Mobile Network Prerequisites | https://github.com/MicrosoftDocs/azure-docs/commits/main/articles/private-5g-core/complete-private-mobile-network-prerequisites.md | For each site you're deploying, do the following. The following table contains the ports you need to open for Azure Private 5G Core local access. This includes local management access and control plane signaling. -You should set these up in addition to [the ports required for Azure Stack Edge (ASE)](../databox-online/azure-stack-edge-gpu-system-requirements.md#networking-port-requirements). +You should set these up in addition to the [ports required for Azure Stack Edge (ASE)](../databox-online/azure-stack-edge-gpu-system-requirements.md#networking-port-requirements). | Port | ASE interface | Description| |--|--|--| |
| private-5g-core | Create A Site | https://github.com/MicrosoftDocs/azure-docs/commits/main/articles/private-5g-core/create-a-site.md | In this step, you'll create the mobile network site resource representing the ph 1. In the **Packet core** section, set the fields as follows: - - Use the information you collected in [Collect packet core configuration values](collect-required-information-for-a-site.md#collect-packet-core-configuration-values) to fill out the **Technology type** and **Custom location** fields. + - Use the information you collected in [Collect packet core configuration values](collect-required-information-for-a-site.md#collect-packet-core-configuration-values) to fill out the **Technology type**, **Azure Stack Edge device**, and **Custom location** fields. - Select the recommended packet core version in the **Version** field. - Ensure **AKS-HCI** is selected in the **Platform** field. -1. Use the information you collected in [Collect access network values](collect-required-information-for-a-site.md#collect-access-network-values) to fill out the fields in the **Access network** section. Note the following: +1. Use the information you collected in [Collect access network values](collect-required-information-for-a-site.md#collect-access-network-values) to fill out the fields in the **Access network** section. Note: - - If this site will support 5G user equipment (UEs): - - **N2 interface name** and **N3 interface name** must match the corresponding virtual network names on port 5 on your Azure Stack Edge Pro device. - - **N2 subnet** must match **N3 subnet**. - - **N2 gateway** must match **N3 gateway**. - - If this site will support 4G UEs: - - **S1-MME interface name** and **S1-U interface name** must match the corresponding virtual network names on port 5 on your Azure Stack Edge Pro device. - - **S1-MME subnet** must match **S1-U subnet**. - - **S1-MME gateway** must match **S1-U gateway**. + - **ASE N2 virtual subnet** and **ASE N3 virtual subnet** (if this site will support 5G UEs) or **ASE S1-MME virtual subnet** and **ASE S1-U virtual subnet** (if this site will support 4G UEs) must match the corresponding virtual network names on port 5 on your Azure Stack Edge Pro device. -1. In the **Attached data networks** section, select **Add data network**. Use the information you collected in [Collect data network values](collect-required-information-for-a-site.md#collect-data-network-values) to fill out the fields. Note the following: - - **N6 interface name** (if this site will support 5G UEs) or **SGi interface name** (if this site will support 4G UEs) must match the corresponding virtual network name on port 6 on your Azure Stack Edge Pro device. +1. In the **Attached data networks** section, select **Add data network**. Use the information you collected in [Collect data network values](collect-required-information-for-a-site.md#collect-data-network-values) to fill out the fields. Note: + - **ASE N6 virtual subnet** (if this site will support 5G UEs) or **ASE SGi virtual subnet** (if this site will support 4G UEs) must match the corresponding virtual network name on port 6 on your Azure Stack Edge Pro device. - If you decided not to configure a DNS server, clear the **Specify DNS addresses for UEs?** checkbox. :::image type="content" source="media/create-a-site/create-site-add-data-network.png" alt-text="Screenshot of the Azure portal showing the Add data network screen."::: In this step, you'll create the mobile network site resource representing the ph If the validation fails, you'll see an error message and the **Configuration** tab(s) containing the invalid configuration will be flagged with red dots. Select the flagged tab(s) and use the error messages to correct invalid configuration before returning to the **Review + create** tab. -1. Once your configuration has been validated, you can select **Create** to create the site. The Azure portal will display the following confirmation screen when the site has been created. +2. Once your configuration has been validated, you can select **Create** to create the site. The Azure portal will display the following confirmation screen when the site has been created. :::image type="content" source="media/site-deployment-complete.png" alt-text="Screenshot of the Azure portal showing the confirmation of a successful deployment of a site."::: -1. Select **Go to resource group**, and confirm that it contains the following new resources: +3. Select **Go to resource group**, and confirm that it contains the following new resources: - A **Mobile Network Site** resource representing the site as a whole. - A **Packet Core Control Plane** resource representing the control plane function of the packet core instance in the site. |
| private-5g-core | Create Site Arm Template | https://github.com/MicrosoftDocs/azure-docs/commits/main/articles/private-5g-core/create-site-arm-template.md | Four Azure resources are defined in the template. [](https://portal.azure.com/#create/Microsoft.Template/uri/https%3A%2F%2Fraw.githubusercontent.com%2FAzure%2Fazure-quickstart-templates%2Fmaster%2Fquickstarts%2Fmicrosoft.mobilenetwork%2Fmobilenetwork-create-new-site%2Fazuredeploy.json) -1. Select or enter the following values, using the information you retrieved in [Prerequisites](#prerequisites). +2. Select or enter the following values, using the information you retrieved in [Prerequisites](#prerequisites). | Field | Value | |--|--| Four Azure resources are defined in the template. | **Existing Data Network Name** | Enter the name of the data network to which your private mobile network connects. | | **Site Name** | Enter a name for your site.| | **Site Plan** | Enter the billing plan for your site. This can be one of: G1, G2, G3, G4, or G5. |- | **Platform Type** | Ensure **AKS-HCI** is selected. | - | **Control Plane Access Interface Name** | Enter the name of the control plane interface on the access network. This must match the corresponding virtual network name on port 5 on your Azure Stack Edge Pro device. | + | **Azure Stack Edge Device** | Enter the resource ID of the Azure Stack Edge resource in the site. | + | **Control Plane Access Interface Name** | Enter the virtual network name on port 5 on your Azure Stack Edge Pro device corresponding to the control plane interface on the access network. For 5G, this interface is the N2 interface; for 4G, it's the S1-MME interface. | | **Control Plane Access Ip Address** | Enter the IP address for the control plane interface on the access network. |- | **User Plane Access Interface Name** | Enter the name of the user plane interface on the access network. This must match the corresponding virtual network name on port 5 on your Azure Stack Edge Pro device. | - | **User Plane Access Interface Ip Address** | Leave this field blank. | - | **Access Subnet** | Enter the network address of the access subnet in Classless Inter-Domain Routing (CIDR) notation. | - | **Access Gateway** | Enter the access subnet default gateway. | - | **User Plane Data Interface Name** | Enter the name of the user plane interface on the data network. This must match the corresponding virtual network name on port 6 on your Azure Stack Edge Pro device. | - | **User Plane Data Interface Ip Address** | Leave this field blank. | - | **User Plane Data Interface Subnet** | Enter the network address of the data subnet in CIDR notation. | - | **User Plane Data Interface Gateway** | Enter the data subnet default gateway. | + | **User Plane Access Interface Name** | Enter the virtual network name on port 5 on your Azure Stack Edge Pro device corresponding to the user plane interface on the access network. For 5G, this interface is the N3 interface; for 4G, it's the S1-U interface. | + | **User Plane Data Interface Name** | Enter the virtual network name on port 6 on your Azure Stack Edge Pro device corresponding to the user plane interface on the data network. For 5G, this interface is the N6 interface; for 4G, it's the SGi interface. | |**User Equipment Address Pool Prefix** | Enter the network address of the subnet from which dynamic IP addresses must be allocated to User Equipment (UEs) in CIDR notation. You can omit this if you don't want to support dynamic IP address allocation. | |**User Equipment Static Address Pool Prefix** | Enter the network address of the subnet from which static IP addresses must be allocated to User Equipment (UEs) in CIDR notation. You can omit this if you don't want to support static IP address allocation. | | **Core Network Technology** | Enter *5GC* for 5G, or *EPC* for 4G. | Four Azure resources are defined in the template. | **Dns Addresses** | Enter the DNS server addresses. You should only omit this if you don't need the UEs to perform DNS resolution, or if all UEs in the network will use their own locally configured DNS servers. | | **Custom Location** | Enter the resource ID of the custom location that targets the Azure Kubernetes Service on Azure Stack HCI (AKS-HCI) cluster on the Azure Stack Edge Pro device in the site. | -1. Select **Review + create**. -1. Azure will now validate the configuration values you've entered. You should see a message indicating that your values have passed validation. +3. Select **Review + create**. +4. Azure will now validate the configuration values you've entered. You should see a message indicating that your values have passed validation. If the validation fails, you'll see an error message and the **Configuration** tab(s) containing the invalid configuration will be flagged. Select the flagged tab(s) and use the error messages to correct invalid configuration before returning to the **Review + create** tab. -1. Once your configuration has been validated, you can select **Create** to create the site. The Azure portal will display a confirmation screen when the site has been created. +5. Once your configuration has been validated, you can select **Create** to create the site. The Azure portal will display a confirmation screen when the site has been created. ## Review deployed resources |
| private-5g-core | Deploy Private Mobile Network With Site Arm Template | https://github.com/MicrosoftDocs/azure-docs/commits/main/articles/private-5g-core/deploy-private-mobile-network-with-site-arm-template.md | The following Azure resources are defined in the template. |**Slice Name** | Leave this field unchanged. | |**Sim Group Name** | If you want to provision SIMs, enter the name of the SIM group to which the SIMs will be added. Otherwise, leave this field blank. | |**Sim Resources** | If you want to provision SIMs, paste in the contents of the JSON file containing your SIM information. Otherwise, leave this field unchanged. |- | **Platform Type** | Ensure **AKS-HCI** is selected. | - |**Control Plane Access Interface Name** | Enter the name of the control plane interface on the access network. This must match the corresponding virtual network name on port 5 on your Azure Stack Edge Pro device. | + | **Azure Stack Edge Device** | Enter the resource ID of the Azure Stack Edge resource in the site. | + |**Control Plane Access Interface Name** | Enter the virtual network name on port 5 on your Azure Stack Edge Pro device corresponding to the control plane interface on the access network. For 5G, this interface is the N2 interface; for 4G, it's the S1-MME interface. | |**Control Plane Access Ip Address** | Enter the IP address for the control plane interface on the access network. |- |**User Plane Access Interface Name** | Enter the name of the user plane interface on the access network. This must match the corresponding virtual network name on port 5 on your Azure Stack Edge Pro device. | - | **User Plane Access Interface Ip Address** | Leave this field blank. | - |**Access Subnet** | Enter the network address of the access subnet in Classless Inter-Domain Routing (CIDR) notation. | - |**Access Gateway** | Enter the access subnet default gateway. | - |**User Plane Data Interface Name** | Enter the name of the user plane interface on the data network. This must match the corresponding virtual network name on port 6 on your Azure Stack Edge Pro device. | - | **User Plane Data Interface Ip Address** | Leave this field blank. | - |**User Plane Data Interface Subnet** | Enter the network address of the data subnet in CIDR notation. | - |**User Plane Data Interface Gateway** | Enter the data subnet default gateway. | + |**User Plane Access Interface Name** | Enter the virtual network name on port 5 on your Azure Stack Edge Pro device corresponding to the user plane interface on the access network. For 5G, this interface is the N3 interface; for 4G, it's the S1-U interface. | + |**User Plane Data Interface Name** | Enter the virtual network name on port 6 on your Azure Stack Edge Pro device corresponding to the user plane interface on the data network. For 5G, this interface is the N6 interface; for 4G, it's the SGi interface. | |**User Equipment Address Pool Prefix** | Enter the network address of the subnet from which dynamic IP addresses must be allocated to User Equipment (UEs) in CIDR notation. You can omit this if you don't want to support dynamic IP address allocation. | |**User Equipment Static Address Pool Prefix** | Enter the network address of the subnet from which static IP addresses must be allocated to User Equipment (UEs) in CIDR notation. You can omit this if you don't want to support static IP address allocation. | |**Data Network Name** | Enter the name of the data network. | The following Azure resources are defined in the template. | **Dns Addresses** | Enter the DNS server addresses. You should only omit this if you don't need the UEs to perform DNS resolution, or if all UEs in the network will use their own locally configured DNS servers. | |**Custom Location** | Enter the resource ID of the custom location that targets the Azure Kubernetes Service on Azure Stack HCI (AKS-HCI) cluster on the Azure Stack Edge Pro device in the site.| -1. Select **Review + create**. -1. Azure will now validate the configuration values you've entered. You should see a message indicating that your values have passed validation. +2. Select **Review + create**. +3. Azure will now validate the configuration values you've entered. You should see a message indicating that your values have passed validation. If the validation fails, you'll see an error message and the **Configuration** tab(s) containing the invalid configuration will be flagged. Select the flagged tab(s) and use the error messages to correct invalid configuration before returning to the **Review + create** tab. -1. Once your configuration has been validated, you can select **Create** to deploy the resources. The Azure portal will display a confirmation screen when the deployment is complete. +4. Once your configuration has been validated, you can select **Create** to deploy the resources. The Azure portal will display a confirmation screen when the deployment is complete. ## Review deployed resources |
| private-5g-core | Provision Sims Azure Portal | https://github.com/MicrosoftDocs/azure-docs/commits/main/articles/private-5g-core/provision-sims-azure-portal.md | - - If you're using a JSON file, you'll need the full resource ID of the SIM policy. + - If you're using a JSON file, you'll need the full resource ID of the SIM policy. You can collect this by navigating to the SIM Policy resource, selecting **JSON View** and copying the contents of the **Resource ID** field. ## Collect the required information for your SIMs |
| purview | How To Enable Data Use Management | https://github.com/MicrosoftDocs/azure-docs/commits/main/articles/purview/how-to-enable-data-use-management.md | -* [Data owner access policies](concept-policies-data-owner.md) - access policies authored via Microsoft Purview data policy experience. +* [DevOps policies](concept-policies-devops.md) +* [Data owner access policies](concept-policies-data-owner.md) * [Self-service access policies](concept-self-service-data-access-policy.md) - access policies automatically generated by Microsoft Purview after a [self-service access request](how-to-request-access.md) is approved. To be able to create any data policy on a resource, Data use management must first be enabled on that resource. This article will explain how to enable Data use management on your resources in Microsoft Purview. |
| purview | How To Policies Data Owner Authoring Generic | https://github.com/MicrosoftDocs/azure-docs/commits/main/articles/purview/how-to-policies-data-owner-authoring-generic.md | Ensure you have the *Policy Author* permission as described [here](how-to-enable :::image type="content" source="./media/how-to-policies-data-owner-authoring-generic/select-asset.png" alt-text="Screenshot showing data owner can select the asset when creating or editing a policy statement."::: -1. Select the **Subjects** button and enter the subject identity as a principal, group, or MSI. Then select the **OK** button. This will take you back to the policy editor +1. Select the **Subjects** button and enter the subject identity as a principal, group, or MSI. Note that Microsoft 365 groups are not supported. Then select the **OK** button. This will take you back to the policy editor. :::image type="content" source="./media/how-to-policies-data-owner-authoring-generic/select-subject.png" alt-text="Screenshot showing data owner can select the subject when creating or editing a policy statement."::: |
| purview | How To Policies Devops Authoring Generic | https://github.com/MicrosoftDocs/azure-docs/commits/main/articles/purview/how-to-policies-devops-authoring-generic.md | To create a new DevOps policy, ensure first that you have the Microsoft Purview 1. Select the **Data source type** and then one of the listed data sources under **Data source name**. Then click on **Select**. This will take you back to the New Policy experience  -1. Select one of two roles, *SQL Performance monitor* or *SQL Security auditor*. Then select **Add/remove subjects**. This will open the Subject window. Type the name of an Azure AD principal (user, group or service principal) in the **Select subjects** box. Keep adding or removing subjects until you are satisfied. Select **Save**. This will take you back to the prior window. +1. Select one of two roles, *SQL Performance monitor* or *SQL Security auditor*. Then select **Add/remove subjects**. This will open the Subject window. Type the name of an Azure AD principal (user, group or service principal) in the **Select subjects** box. Note that Microsoft 365 groups are not supported. Keep adding or removing subjects until you are satisfied. Select **Save**. This will take you back to the prior window.  1. Select **Save** to save the policy. A policy has been created and automatically published. Enforcement will start at the data source within 5 minutes. |
| purview | Microsoft Purview Connector Overview | https://github.com/MicrosoftDocs/azure-docs/commits/main/articles/purview/microsoft-purview-connector-overview.md | The table below shows the supported capabilities for each data source. Select th || [SAP HANA](register-scan-sap-hana.md) | [Yes](register-scan-sap-hana.md#register) | No | No | No | No | || [Snowflake](register-scan-snowflake.md) | [Yes](register-scan-snowflake.md#register) | No | [Yes](register-scan-snowflake.md#lineage) | No | No | || [SQL Server](register-scan-on-premises-sql-server.md)| [Yes](register-scan-on-premises-sql-server.md#register) |[Yes](register-scan-on-premises-sql-server.md#scan) | No* | No| No |-|| SQL Server on Azure-Arc| No |No | No |[Yes (Preview)](how-to-policies-data-owner-arc-sql-server.md) | No | +|| **SQL Server on Azure-Arc**| No |No | No |Preview: [1.DevOps policies](how-to-policies-devops-arc-sql-server.md) [2.Data Owner](how-to-policies-data-owner-arc-sql-server.md) | No | || [Teradata](register-scan-teradata-source.md)| [Yes](register-scan-teradata-source.md#register)| [Yes](register-scan-teradata-source.md#scan)| [Yes*](register-scan-teradata-source.md#lineage) | No| No | |File|[Amazon S3](register-scan-amazon-s3.md)|[Yes](register-scan-amazon-s3.md)| [Yes](register-scan-amazon-s3.md)| Limited* | No| No | ||[HDFS](register-scan-hdfs.md)|[Yes](register-scan-hdfs.md)| [Yes](register-scan-hdfs.md)| No | No| No | The following file types are supported for scanning, for schema extraction, and > * The scanner supports scanning snappy compressed PARQUET types for schema extraction and classification. > * For GZIP file types, the GZIP must be mapped to a single csv file within. > Gzip files are subject to System and Custom Classification rules. We currently don't support scanning a gzip file mapped to multiple files within, or any file type other than csv. - > * For delimited file types (CSV, PSV, SSV, TSV, TXT), we do not support data type detection. The data type will be listed as "string" for all columns. \ + > * For delimited file types (CSV, PSV, SSV, TSV, TXT), we do not support data type detection. The data type will be listed as "string" for all columns. We only support comma(ΓÇÿ,ΓÇÖ), semicolon(ΓÇÿ;ΓÇÖ), vertical bar(ΓÇÿ|ΓÇÖ) and tab(ΓÇÿ\tΓÇÖ) as delimiter. If the field doesn't have quotes on the ends, or the field is a single quote char or there are quotes within the field, the row will be judged as error row. Rows that have different number of columns than the header row will be judged as error rows. (numbers of error rows / numbers of rows sampled ) must be less than 0.1. > * For Parquet files, if you are using a self-hosted integration runtime, you need to install the **64-bit JRE 8 (Java Runtime Environment) or OpenJDK** on your IR machine. Check our [Java Runtime Environment section at the bottom of the page](manage-integration-runtimes.md#java-runtime-environment-installation) for an installation guide. - Document file formats supported by extension: DOC, DOCM, DOCX, DOT, ODP, ODS, ODT, PDF, POT, PPS, PPSX, PPT, PPTM, PPTX, XLC, XLS, XLSB, XLSM, XLSX, XLT - The Microsoft Purview Data Map also supports custom file extensions and custom parsers. |
| purview | Register Scan Azure Multiple Sources | https://github.com/MicrosoftDocs/azure-docs/commits/main/articles/purview/register-scan-azure-multiple-sources.md | To manage a scan, do the following: ### Supported policies The following types of policies are supported on this data resource from Microsoft Purview:+- [DevOps policies](concept-policies-devops.md) - [Data owner policies](concept-policies-data-owner.md) Once your data source has the **Data Use Management** option set to **Enabled** ### Create a policy To create an access policy on an entire Azure subscription or resource group, follow these guide:+* [DevOps policy covering all sources in a subscription or resource group](./how-to-policies-devops-authoring-generic.md#create-a-new-devops-policy) * [Data owner policy covering all sources in a subscription or resource group](./how-to-policies-data-owner-resource-group.md#create-and-publish-a-data-owner-policy) - This guide will allow you to provision access on all enabled data sources in a resource group, or across an Azure subscription. The pre-requisite is that the subscription or resource group is registered with the Data use management option enabled. |
| purview | Register Scan Azure Sql Database | https://github.com/MicrosoftDocs/azure-docs/commits/main/articles/purview/register-scan-azure-sql-database.md | Scans can be managed or run again on completion ### Supported policies The following types of policies are supported on this data resource from Microsoft Purview:+- [DevOps policies](concept-policies-devops.md) - [Data owner policies](concept-policies-data-owner.md) ### Access policy pre-requisites on Azure SQL Database Once your data source has the **Data Use Management** option *Enabled*, it will ### Create a policy To create an access policy for Azure SQL Database, follow these guides:-* [Data owner policy on a single Azure SQL Database account](./how-to-policies-data-owner-azure-sql-db.md#create-and-publish-a-data-owner-policy) - This guide will allow you to provision access on a single Azure SQL Database account in your subscription. +* [DevOps policy on a single Azure SQL Database](./how-to-policies-devops-azure-sql-db.md#create-a-new-devops-policy) +* [Data owner policy on a single Azure SQL Database](./how-to-policies-data-owner-azure-sql-db.md#create-and-publish-a-data-owner-policy) - This guide will allow you to provision access on a single Azure SQL Database account in your subscription. * [Data owner policy covering all sources in a subscription or resource group](./how-to-policies-data-owner-resource-group.md) - This guide will allow you to provision access on all enabled data sources in a resource group, or across an Azure subscription. The pre-requisite is that the subscription or resource group is registered with the Data use management option enabled. ## Lineage (Preview) |
| security | Trusted Hardware Identity Management | https://github.com/MicrosoftDocs/azure-docs/commits/main/articles/security/fundamentals/trusted-hardware-identity-management.md | THIM defines the Azure security baseline for Azure Confidential computing (ACC) ## Frequently asked questions -**The "next update" date of the Azure-internal caching service API ,used by Microsoft Azure Attestation, seems to be out of date. Is it still in operation and can it be used?** +**The "next update" date of the Azure-internal caching service API, used by Microsoft Azure Attestation, seems to be out of date. Is it still in operation and can it be used?** The "tcbinfo" field contains the TCB information. The THIM service by default provides an older tcbinfo -- updating to the latest tcbinfo from Intel would cause attestation failures for those customers who have not migrated to the latest Intel SDK, and could results in outages. |
| sentinel | Deployment Solution Configuration | https://github.com/MicrosoftDocs/azure-docs/commits/main/articles/sentinel/sap/deployment-solution-configuration.md | By default, all analytics rules provided in the Microsoft Sentinel Solution for 5. Sensitive privilege user password change and login 6. Brute force (RFC) 7. Function module tested-8. The SAP audit log monitoring analytics rules +8. The SAP audit log monitoring analytics rules ++## Reduce the amount of SAP log ingestion ++To reduce the number of logs ingested into the Microsoft Sentinel workspace, you can stop ingestion for a specific log. To do this, edit the *systemconfig.ini* file, and for the relevant log, change the `True` value to `False`. ++For example, to stop the `ABAPJobLog`, change its value to `False`: ++``` +ABAPJobLog = False +``` ++You can also [stop the user master data tables](sap-solution-deploy-alternate.md#configuring-user-master-data-collection). ++> [!NOTE] +> +> Once you stop one of the logs, the workbooks and analytics queries that use that log may not work. +> [Understand which log each workbook uses](sap-solution-security-content.md#built-in-workbooks) and [understand which log each analytic rule uses](sap-solution-security-content.md#built-in-analytics-rules). ++## Stop log ingestion and disable the connector ++To stop ingesting SAP logs into the Microsoft Sentinel workspace, and to stop the data stream from the Docker container, run this command: ++``` +docker stop sapcon-[SID] +``` ++The Docker container stops and doesn't send any more SAP logs to the Microsoft Sentinel workspace. This both stops the ingestion and billing for the SAP system related to the connector. ++If you need to reenable the Docker container, run this command: ++``` +docker start sapcon-[SID] +``` |
| service-bus-messaging | Enable Partitions Premium | https://github.com/MicrosoftDocs/azure-docs/commits/main/articles/service-bus-messaging/enable-partitions-premium.md | - Title: Enable partitioning in Azure Service Bus Premium namespaces -description: This article explains how to enable partitioning in Azure Service Bus Premium namespaces by using Azure portal, PowerShell, CLI, and programming languages (C#, Java, Python, and JavaScript) - Previously updated : 10/12/2022 ----# Enable partitioning for an Azure Service Bus Premium namespace (Preview) -Service Bus partitions enable queues and topics, or messaging entities, to be partitioned across multiple message brokers. Partitioning means that the overall throughput of a partitioned entity is no longer limited by the performance of a single message broker. In addition, a temporary outage of a message broker, for example during an upgrade, doesn't render a partitioned queue or topic unavailable. Partitioned queues and topics can contain all advanced Service Bus features, such as support for transactions and sessions. For more information, see [Partitioned queues and topics](service-bus-partitioning.md). This article shows you different ways to enable duplicate partitioning for a Service Bus Premium namespace. All entities in this namespace will be partitioned. --> [!IMPORTANT] -> This feature is currently in PREVIEW. -> See the [Supplemental Terms of Use for Microsoft Azure Previews](https://azure.microsoft.com/support/legal/preview-supplemental-terms/) for legal terms that apply to Azure features that are in beta, preview, or otherwise not yet released into general availability. ---> [!NOTE] -> - Partitioning is available at entity creation for namespaces in the Premium SKU. Any previously existing partitioned entities in Premium namespaces continue to work as expected. -> - It's not possible to change the partitioning option on any existing namespace. You can only set the option when you create a namespace. -> - The assigned messaging units are always a multiplier of the amount of partitions in a namespace, and are equally distributed across the partitions. For example, in a namespace with 16MU and 4 partitions, each partition will be assigned 4MU. -> -> Some limitations may be encountered during public preview, which will be resolved before going into GA. -> - It is currently not possible to use JMS on partitioned entities. -> - Metrics are currently only available on an aggregated namespace level, not for individual partitions. -> - This feature is rolling out during Ignite 2022, and will initially be available in East US and North Europe, with more regions following later. --## Use Azure portal -When creating a **namespace** in the Azure portal, set the **Partitioning** to **Enabled** and choose the number of partitions, as shown in the following image. --## Use Azure Resource Manager template -To **create a namespace with partitioning enabled**, set `partitions` to a number larger than 1 in the namespace properties section. In the example below a partitioned namespace is created with 4 partitions, and 1 messaging unit assigned to each partition. For more information, see [Microsoft.ServiceBus namespaces template reference](/azure/templates/microsoft.servicebus/namespaces?tabs=json). --```json -{ - "$schema": "https://schema.management.azure.com/schemas/2019-04-01/deploymentTemplate.json#", - "contentVersion": "1.0.0.0", - "parameters": { - "serviceBusNamespaceName": { - "type": "string", - "metadata": { - "description": "Name of the Service Bus namespace" - } - }, - "location": { - "type": "string", - "defaultValue": "[resourceGroup().location]", - "metadata": { - "description": "Location for all resources." - } - } - }, - "resources": [ - { - "type": "Microsoft.ServiceBus/namespaces", - "apiVersion": "2022-10-01-preview", - "name": "[parameters('serviceBusNamespaceName')]", - "location": "[parameters('location')]", - "sku": { - "name": "Premium", - "capacity": 4 - }, - "properties": { - "premiumMessagingPartitions": 4 - } - } - ] -} -``` --## Next steps -Try the samples in the language of your choice to explore Azure Service Bus features. --- [Azure Service Bus client library samples for .NET (latest)](/samples/azure/azure-sdk-for-net/azuremessagingservicebus-samples/) -- [Azure Service Bus client library samples for Java (latest)](/samples/azure/azure-sdk-for-java/servicebus-samples/)-- [Azure Service Bus client library samples for Python](/samples/azure/azure-sdk-for-python/servicebus-samples/)-- [Azure Service Bus client library samples for JavaScript](/samples/azure/azure-sdk-for-js/service-bus-javascript/)-- [Azure Service Bus client library samples for TypeScript](/samples/azure/azure-sdk-for-js/service-bus-typescript/)--Find samples for the older .NET and Java client libraries below: -- [Azure Service Bus client library samples for .NET (legacy)](https://github.com/Azure/azure-service-bus/tree/master/samples/DotNet/Microsoft.Azure.ServiceBus/)-- [Azure Service Bus client library samples for Java (legacy)](https://github.com/Azure/azure-service-bus/tree/master/samples/Java/azure-servicebus) |
| service-bus-messaging | Service Bus Partitioning | https://github.com/MicrosoftDocs/azure-docs/commits/main/articles/service-bus-messaging/service-bus-partitioning.md | Currently Service Bus imposes the following limitations on partitioned queues an * Service Bus currently allows up to 100 partitioned queues or topics per namespace for the Basic and Standard SKU. Each partitioned queue or topic counts towards the quota of 10,000 entities per namespace. ## Next steps-You can enable partitioning by using Azure portal, PowerShell, CLI, Resource Manager template, .NET, Java, Python, and JavaScript. For more information, see [Enable partitioning (Basic / Standard)](enable-partitions-basic-standard.md) or [Enable partitioning (Premium)](enable-partitions-premium.md). +You can enable partitioning by using Azure portal, PowerShell, CLI, Resource Manager template, .NET, Java, Python, and JavaScript. For more information, see [Enable partitioning (Basic / Standard)](enable-partitions-basic-standard.md). Read about the core concepts of the AMQP 1.0 messaging specification in the [AMQP 1.0 protocol guide](service-bus-amqp-protocol-guide.md). |
| service-connector | Tutorial Django Webapp Postgres Cli | https://github.com/MicrosoftDocs/azure-docs/commits/main/articles/service-connector/tutorial-django-webapp-postgres-cli.md | Having issues? Refer first to the [Troubleshooting guide](../app-service/configu Django database migrations ensure that the schema in the PostgreSQL on Azure database matches with your code. -1. Run `az webpp ssh` to open an SSH session for the web app in the browser: +1. Run `az webapp ssh` to open an SSH session for the web app in the browser: ```azurecli az webapp ssh |
| service-health | Stay Informed Security | https://github.com/MicrosoftDocs/azure-docs/commits/main/articles/service-health/stay-informed-security.md | + + Title: Stay informed about Azure security issues +description: This article shows you where Azure customers receive Azure security notifications and three steps you can follow to ensure security alerts reach the right people in your organization. + Last updated : 10/27/2022++# Stay informed about Azure security issues ++With the increased adoption of cloud computing, customers rely increasingly on Azure to run their workload for critical and non-critical business applications. It is important for you as Azure customers to stay informed about Azure security issues or privacy breaches and take the right action to protect your environment. ++This article shows you where Azure customers receive Azure security notifications and three steps you can follow to ensure security alerts reach the right people in your organization. +++## View and manage Azure security notifications +++### Security issues affecting your Azure subscription workloads ++You receive security-related notifications affecting your Azure **subscription** workloads in two ways: ++**Security Advisory in [Azure Service Health](https://azure.microsoft.com/get-started/azure-portal/service-health/)** ++Service health notifications are published by Azure and contain information about the resources under your subscription. You can review these security advisories in the Service Health experience in the Azure portal and get notified about security advisories via your preferred channel by setting up Service Health alerts for this type of notification. You can create [Activity Log alerts](../service-health/alerts-activity-log-service-notifications-portal.md) on Service notifications by using the Azure portal. ++>[!Note] +>Depending on your requirements, you can configure various alerts to use the same [action group](../azure-monitor/alerts/action-groups.md) or different action groups. Action group types include sending a voice call, SMS, or email. You can also trigger various types of automated actions. For detailed information about notification and action types, see [Action-specific information](../azure-monitor/alerts/action-groups.md#action-specific-information). ++**Email Notification** ++If a security issue requires direct action taken by subscription admins/owners, or critical and sensitive resource information needs to be shared, we send an email notification to subscription admins/owners. ++>[!Note] +>You should ensure that there is a **contactable email address** as the [subscription administrator or subscription owner](../cost-management-billing/manage/add-change-subscription-administrator.md). This email address is used for security issues that would have impact at the subscription level. ++### Security issues affecting your Azure tenant workloads ++We typically communicate security-related information affecting your Azure **tenant** workloads via **Email Notification**. We send an email notification to Global admin and Technical Contacts ++>[!Note] +>You should ensure that there is a **contactable email address** entered for your organization's [Global Admin](../active-directory/roles/permissions-reference.md) and [Technical contact](../active-directory/fundamentals/active-directory-properties-area.md) on your tenant. This email address is used for security issues that would have impact at the tenant level. ++## Three steps to help you stay informed about Azure security issues ++**1. Check Contact on Subscription Admin Owner Role** ++Ensure that there is a **contactable email address** as the [subscription administrator or subscription owner](../cost-management-billing/manage/add-change-subscription-administrator.md). This email address is used for security issues that would have impact at the subscription level. ++**2. Check Contact on Tenant Global Admin and Technical Contact Role** ++Ensure that there is a **contactable email address** entered for your [Global Admin](../active-directory/roles/permissions-reference.md) and [Technical contact](../active-directory/fundamentals/active-directory-properties-area.md) on your tenant. This email address is used for security issues that would have an impact at the tenant level. ++**3. Create Azure Service Health Alerts for Subscription Notifications** ++Create **Azure Service Health** alerts for security events so that your organization can be alerted for any security event that Microsoft identifies. This is the same channel you would configure to be alerted of outages, or maintenance information on the platform: [Create Activity Log Alerts on Service Notifications using the Azure portal](../service-health/alerts-activity-log-service-notifications-portal.md). ++Depending on your requirements, you can configure various alerts to use the same [action group](../azure-monitor/alerts/action-groups.md) or different action groups. Action group types include sending a voice call, SMS, or email. You can also trigger various types of automated actions. For detailed information about notification and action types, see [Action-specific information](../azure-monitor/alerts/action-groups.md#action-specific-information). ++There's an important difference between Service Health security advisories and [Microsoft Defender for Cloud](../defender-for-cloud/defender-for-cloud-introduction.md) security notifications. Security advisories in Service Health provide notifications dealing with platform vulnerabilities and security and privacy breaches at the subscription and tenant level, while security notifications in Microsoft Defender for Cloud communicate vulnerabilities that pertain to affected individual Azure resources. ++More information about the Azure Service Health notifications can be found at: [What are Azure service health notifications? - Azure Service Health | Microsoft Learn](../service-health/service-health-notifications-properties.md) |
| spring-apps | Concept Outbound Type | https://github.com/MicrosoftDocs/azure-docs/commits/main/articles/spring-apps/concept-outbound-type.md | By default, Azure Spring Apps provisions a Standard SKU Load Balancer that you c ## Limitations -- You can only define `OutboundType` when you create a new Azure Spring Apps service instance, and you can't updated it afterwards. `OutboundType` works only with a VNet instance.+- You can only define `OutboundType` when you create a new Azure Spring Apps service instance, and you can't updated it afterwards. `OutboundType` works only with a virtual network. - Setting `outboundType` to `UserDefinedRouting` requires a user-defined route with valid outbound connectivity for your instance. - Setting `outboundType` to `UserDefinedRouting` implies that the ingress source IP routed to the load-balancer may not match the instance's outgoing egress destination address. The default `outboundType` value is `loadBalancer`. If `outboundType` is set to If `outboundType` is set to `userDefinedRouting`, Azure Spring Apps won't automatically configure egress paths. You must set up egress paths yourself. You could still find two load balancers in your resource group. They're only used for internal traffic and won't expose any public IP. You must prepare two route tables associated with two subnets: one to service the runtime and another for the user app. > [!IMPORTANT]-> An `outboundType` of `userDefinedRouting` requires a route for `0.0.0.0/0` and the next hop destination of a network virtual appliance in the route table. For more information, see [Customer responsibilities for running Azure Spring Apps in VNET](vnet-customer-responsibilities.md). +> An `outboundType` of `userDefinedRouting` requires a route for `0.0.0.0/0` and the next hop destination of a network virtual appliance in the route table. For more information, see [Customer responsibilities for running Azure Spring Apps in a virtual network](vnet-customer-responsibilities.md). ## See also |
| spring-apps | How To Access App From Internet Virtual Network | https://github.com/MicrosoftDocs/azure-docs/commits/main/articles/spring-apps/how-to-access-app-from-internet-virtual-network.md | If you don't want to use Application Gateway for advanced operations, you can ex - An Azure Spring Apps service instance deployed in a virtual network and an app created in it. For more information, see [Deploy Azure Spring Apps in a virtual network](./how-to-deploy-in-azure-virtual-network.md). -## Assign a public fully qualified domain name (FQDN) for your application in a VNet injection instance +## Assign a public fully qualified domain name (FQDN) for your application in a virtual network injection instance ### [Azure portal](#tab/azure-portal) You can use a public URL to access your application both inside and outside the To ensure the security of your applications when you expose a public endpoint for them, secure the endpoint by filtering network traffic to your service with a network security group. For more information, see [Tutorial: Filter network traffic with a network security group using the Azure portal](../virtual-network/tutorial-filter-network-traffic.md). A network security group contains security rules that allow or deny inbound network traffic to, or outbound network traffic from, several types of Azure resources. For each rule, you can specify source and destination, port, and protocol. > [!NOTE]-> If you couldn't access your application in VNet injection instance from internet after you have assigned a public FQDN, check your network security group first to see whether you have allowed such inbound traffic. +> If you couldn't access your application in a virtual network injection instance from internet after you have assigned a public FQDN, check your network security group first to see whether you have allowed such inbound traffic. ## Next steps - [Expose applications with end-to-end TLS in a virtual network](./expose-apps-gateway-end-to-end-tls.md) - [Troubleshooting Azure Spring Apps in virtual networks](./troubleshooting-vnet.md)-- [Customer responsibilities for running Azure Spring Apps in VNET](./vnet-customer-responsibilities.md)+- [Customer responsibilities for running Azure Spring Apps in a virtual network](./vnet-customer-responsibilities.md) |
| spring-apps | How To Appdynamics Java Agent Monitor | https://github.com/MicrosoftDocs/azure-docs/commits/main/articles/spring-apps/how-to-appdynamics-java-agent-monitor.md | The AppDynamics Agent will be upgraded regularly with JDK (quarterly). Agent upg * Existing applications using AppDynamics Agent before upgrade will be unchanged, but will require restart or redeploy to engage the new version of AppDynamics Agent. * Applications created after upgrade will use the new version of AppDynamics Agent. -## Configure VNet injection instance outbound traffic +## Configure virtual network injection instance outbound traffic -For VNet injection instances of Azure Spring Apps, make sure the outbound traffic is configured correctly for AppDynamics Agent. For details, see [SaaS Domains and IP Ranges](https://docs.appdynamics.com/display/PA). +For virtual network injection instances of Azure Spring Apps, make sure the outbound traffic is configured correctly for AppDynamics Agent. For details, see [SaaS Domains and IP Ranges](https://docs.appdynamics.com/display/PA). ## Understand the limitations |
| spring-apps | How To Configure Palo Alto | https://github.com/MicrosoftDocs/azure-docs/commits/main/articles/spring-apps/how-to-configure-palo-alto.md | This article describes how to use Azure Spring Apps with a Palo Alto firewall. For example, the [Azure Spring Apps reference architecture](./reference-architecture.md) includes an Azure Firewall to secure your applications. However, if your current deployments include a Palo Alto firewall, you can omit the Azure Firewall from the Azure Spring Apps deployment and use Palo Alto instead, as described in this article. -You should keep configuration information, such as rules and address wildcards, in CSV files in a Git repository. This article shows you how to use automation to apply these files to Palo Alto. To understand the configuration to be applied to Palo Alto, see [Customer responsibilities for running Azure Spring Apps in VNET](./vnet-customer-responsibilities.md). +You should keep configuration information, such as rules and address wildcards, in CSV files in a Git repository. This article shows you how to use automation to apply these files to Palo Alto. To understand the configuration to be applied to Palo Alto, see [Customer responsibilities for running Azure Spring Apps in a virtual network](./vnet-customer-responsibilities.md). > [!Note] > In describing the use of REST APIs, this article uses the PowerShell variable syntax to indicate names and values that are left to your discretion. Be sure to use the same values in all the steps. The rest of this article assumes you have the following two pre-configured netwo Next, create three CSV files. -Name the first file *AzureSpringAppsServices.csv*. This file should contain ingress ports for Azure Spring Apps. The values in the following example are for demonstration purposes only. For all of the required values, see the [Azure Spring Apps network requirements](./vnet-customer-responsibilities.md#azure-spring-apps-network-requirements) section of [Customer responsibilities for running Azure Spring Apps in VNET](./vnet-customer-responsibilities.md). +Name the first file *AzureSpringAppsServices.csv*. This file should contain ingress ports for Azure Spring Apps. The values in the following example are for demonstration purposes only. For all of the required values, see the [Azure Spring Apps network requirements](./vnet-customer-responsibilities.md#azure-spring-apps-network-requirements) section of [Customer responsibilities for running Azure Spring Apps in a virtual network](./vnet-customer-responsibilities.md). ```CSV name,protocol,port,tag |
| spring-apps | How To Dynatrace One Agent Monitor | https://github.com/MicrosoftDocs/azure-docs/commits/main/articles/spring-apps/how-to-dynatrace-one-agent-monitor.md | The Dynatrace OneAgent auto-upgrade is disabled and will be upgraded quarterly w * Existing applications using Dynatrace OneAgent before upgrade will be unchanged, but will require restart or redeploy to engage the new version of Dynatrace OneAgent. * Applications created after upgrade will use the new version of Dynatrace OneAgent. -## VNet injection instance outbound traffic configuration +## Virtual network injection instance outbound traffic configuration -For a VNet injection instance of Azure Spring Apps, you need to make sure the outbound traffic for Dynatrace communication endpoints is configured correctly for Dynatrace OneAgent. For information about how to get `communicationEndpoints`, see [Deployment API - GET connectivity information for OneAgent](https://www.dynatrace.com/support/help/dynatrace-api/environment-api/deployment/oneagent/get-connectivity-info/). For more information, see [Customer responsibilities for running Azure Spring Apps in VNET](vnet-customer-responsibilities.md). +For a virtual network injection instance of Azure Spring Apps, you need to make sure the outbound traffic for Dynatrace communication endpoints is configured correctly for Dynatrace OneAgent. For information about how to get `communicationEndpoints`, see [Deployment API - GET connectivity information for OneAgent](https://www.dynatrace.com/support/help/dynatrace-api/environment-api/deployment/oneagent/get-connectivity-info/). For more information, see [Customer responsibilities for running Azure Spring Apps in a virtual network](vnet-customer-responsibilities.md). ## Dynatrace support model |
| spring-apps | How To Self Diagnose Running In Vnet | https://github.com/MicrosoftDocs/azure-docs/commits/main/articles/spring-apps/how-to-self-diagnose-running-in-vnet.md | Title: "How to self-diagnose Azure Spring Apps VNET" -description: Learn how to self-diagnose and solve problems in Azure Spring Apps running in VNET. + Title: "How to self-diagnose Azure Spring Apps with virtual networks" +description: Learn how to self-diagnose and solve problems in Azure Spring Apps running in virtual networks. Last updated 01/25/2021 -# Self-diagnose running Azure Spring Apps in VNET +# Self-diagnose running Azure Spring Apps in virtual networks > [!NOTE] > Azure Spring Apps is the new name for the Azure Spring Cloud service. Although the service has a new name, you'll see the old name in some places for a while as we work to update assets such as screenshots, videos, and diagrams. **This article applies to:** ✔️ Basic/Standard tier ✔️ Enterprise tier -This article shows you how to use Azure Spring Apps diagnostics to diagnose and solve problems in Azure Spring Apps running in VNET. +This article shows you how to use Azure Spring Apps diagnostics to diagnose and solve problems in Azure Spring Apps running in virtual networks. Azure Spring Apps diagnostics supports interactive troubleshooting apps running in virtual networks without configuration. Azure Spring Apps diagnostics identifies problems and guides you to information that helps troubleshoot and resolve them. The following procedure starts diagnostics for networked applications. ## View a diagnostic report -After you select the **Networking** category, you can view two issues related to Networking specific to your VNet injected Azure Spring Apps: **DNS Resolution** and **Required Outbound Traffic**. +After you select the **Networking** category, you can view two issues related to Networking specific to your virtual-network injected Azure Spring Apps instances: **DNS Resolution** and **Required Outbound Traffic**.  |
| spring-apps | Quickstart | https://github.com/MicrosoftDocs/azure-docs/commits/main/articles/spring-apps/quickstart.md | At the end of this quickstart, you'll have a working spring app running on Azure ## Prerequisites - An Azure subscription. If you don't have a subscription, create a [free account](https://azure.microsoft.com/free/) before you begin.+- [Azure CLI](/cli/azure/install-azure-cli). Install the Azure Spring Apps extension with the following command: `az extension add --name spring` ## Provision an instance of Azure Spring Apps |
| spring-apps | Reference Architecture | https://github.com/MicrosoftDocs/azure-docs/commits/main/articles/spring-apps/reference-architecture.md | Azure Spring Apps requires two dedicated subnets: * Service runtime * Spring Boot applications -Each of these subnets requires a dedicated Azure Spring Apps cluster. Multiple clusters can't share the same subnets. The minimum size of each subnet is /28. The number of application instances that Azure Spring Apps can support varies based on the size of the subnet. You can find the detailed Virtual Network (VNET) requirements in the [Virtual network requirements][11] section of [Deploy Azure Spring Apps in a virtual network][17]. +Each of these subnets requires a dedicated Azure Spring Apps cluster. Multiple clusters can't share the same subnets. The minimum size of each subnet is /28. The number of application instances that Azure Spring Apps can support varies based on the size of the subnet. You can find the detailed virtual network requirements in the [Virtual network requirements][11] section of [Deploy Azure Spring Apps in a virtual network][17]. > [!WARNING]-> The selected subnet size can't overlap with the existing VNET address space, and shouldn't overlap with any peered or on-premises subnet address ranges. +> The selected subnet size can't overlap with the existing virtual network address space, and shouldn't overlap with any peered or on-premises subnet address ranges. ## Use cases The following list shows the CIS controls that address network security in this | 6.5 | Ensure that Network Watcher is 'Enabled'. | | 6.6 | Ensure that ingress using UDP is restricted from the internet. | -Azure Spring Apps requires management traffic to egress from Azure when deployed in a secured environment. You must allow the network and application rules listed in [Customer responsibilities for running Azure Spring Apps in VNET](./vnet-customer-responsibilities.md). +Azure Spring Apps requires management traffic to egress from Azure when deployed in a secured environment. You must allow the network and application rules listed in [Customer responsibilities for running Azure Spring Apps in a virtual network](./vnet-customer-responsibilities.md). #### Application security |
| spring-apps | Troubleshooting Vnet | https://github.com/MicrosoftDocs/azure-docs/commits/main/articles/spring-apps/troubleshooting-vnet.md | To set up the Azure Spring Apps service instance by using the Resource Manager t | Error Message | How to fix | ||| | Resources created by Azure Spring Apps were disallowed by policy. | Network resources will be created when deploy Azure Spring Apps in your own virtual network. Please check whether you have [Azure Policy](../governance/policy/overview.md) defined to block those creation. Resources failed to be created can be found in error message. |-| Required traffic is not allowlisted. | Please refer to [Customer Responsibilities for Running Azure Spring Apps in VNET](./vnet-customer-responsibilities.md) to ensure required traffic is allowlisted. | +| Required traffic is not allowlisted. | Please refer to [Customer responsibilities for running Azure Spring Apps in a virtual network](./vnet-customer-responsibilities.md) to ensure required traffic is allowlisted. | ## My application can't be registered |
| spring-apps | Vnet Customer Responsibilities | https://github.com/MicrosoftDocs/azure-docs/commits/main/articles/spring-apps/vnet-customer-responsibilities.md | Title: "Customer responsibilities running Azure Spring Apps in vnet" -description: This article describes customer responsibilities running Azure Spring Apps in vnet. + Title: "Customer responsibilities running Azure Spring Apps in a virtual network" +description: This article describes customer responsibilities running Azure Spring Apps in a virtual network. Last updated 11/02/2021 -# Customer responsibilities for running Azure Spring Apps in VNET +# Customer responsibilities for running Azure Spring Apps in a virtual network > [!NOTE] > Azure Spring Apps is the new name for the Azure Spring Cloud service. Although the service has a new name, you'll see the old name in some places for a while as we work to update assets such as screenshots, videos, and diagrams. |
| static-web-apps | Nextjs | https://github.com/MicrosoftDocs/azure-docs/commits/main/articles/static-web-apps/nextjs.md | The following example shows the GitHub Actions job that is enabled for static ex uses: azure/static-web-apps-deploy@latest with: azure_static_web_apps_api_token: ${{ secrets.AZURE_STATIC_WEB_APPS_TOKEN }}- repo_token: ${{ secrets.GITHUB_TOKEN }} # Used for Github integrations (i.e. PR comments) + repo_token: ${{ secrets.GITHUB_TOKEN }} # Used for GitHub integrations (i.e. PR comments) action: "upload" app_location: "/" # App source code path api_location: "" # Api source code path - optional |
| storage | Blobfuse2 How To Deploy | https://github.com/MicrosoftDocs/azure-docs/commits/main/articles/storage/blobs/blobfuse2-how-to-deploy.md | Title: Mount an Azure Blob Storage container on Linux by using BlobFuse2 (preview) + Title: Use BlobFuse to mount an Azure Blob Storage container on Linux - BlobFuse2 (preview) -description: Learn how to mount an Azure Blob Storage container on Linux by using BlobFuse2 (preview). +description: Learn how to use the latest version of BlobFuse, BlobFuse2, to mount an Azure Blob Storage container on Linux. Previously updated : 10/17/2022 Last updated : 10/31/2022+ -# Mount an Azure Blob Storage container on Linux by using BlobFuse2 (preview) --[BlobFuse2 (preview)](blobfuse2-what-is.md) is a virtual file system driver for Azure Blob Storage. BlobFuse2 allows you to access your existing Azure block blob data in your storage account through the Linux file system. For more information, see [What is BlobFuse2?](blobfuse2-what-is.md). -+# Mount an Azure Blob Storage container on Linux with BlobFuse2 (preview) This article shows you how to install and configure BlobFuse2, mount an Azure blob container, and access data in the container. The basic steps are: This article shows you how to install and configure BlobFuse2, mount an Azure bl - [Mount a blob container](#mount-a-blob-container) - [Access data](#access-data) + ## Install BlobFuse2 To install BlobFuse2, you have two basic options: |
| storage | Blobfuse2 What Is | https://github.com/MicrosoftDocs/azure-docs/commits/main/articles/storage/blobs/blobfuse2-what-is.md | Title: What is BlobFuse2 (preview)? + Title: What is BlobFuse? - BlobFuse2 (preview) -description: Get an overview of BlobFuse2 (preview) and how to use it, including migration options if you use BlobFuse v1. +description: An overview of how to use BlobFuse to mount an Azure Blob Storage container through the Linux file system. Previously updated : 10/17/2022 Last updated : 10/31/2022+ # What is BlobFuse2 (preview)? -BlobFuse2 (preview) is a virtual file system driver for Azure Blob Storage. Use BlobFuse2 to access your existing Azure block blob data in your storage account through the Linux file system. BlobFuse2 also supports storage accounts that have a hierarchical namespace enabled. +BlobFuse is a virtual file system driver for Azure Blob Storage. Use BlobFuse to access your existing Azure block blob data through the Linux file system. [!INCLUDE [storage-blobfuse2-preview](../../../includes/storage-blobfuse2-preview.md)] The BlobFuse2 project is [licensed under MIT](https://github.com/Azure/azure-sto ## Features -A full list of BlobFuse2 features is in the [BlobFuse2 README](https://github.com/Azure/azure-storage-fuse/blob/main/README.md#features). These are some of the key tasks you can do by using BlobFuse2: +A full list of BlobFuse2 features is in the [BlobFuse2 README](https://github.com/Azure/azure-storage-fuse/blob/main/README.md#features). These are some of the key tasks you can perform by using BlobFuse2: -- Mount an Azure Blob Storage container or Azure Data Lake Storage Gen2 file system on Linux-- Use basic file system operations like `mkdir`, `opendir`, `readdir`, `rmdir`, `open`, `read`, `create`, `write`, `close`, `unlink`, `truncate`, `stat`, and `rename`-- Use local file caching to improve subsequent access times-- Gain insights into mount activities and resource usage by using BlobFuse2 Health Monitor+- Mount an Azure Blob Storage container or Azure Data Lake Storage Gen2 file system on Linux. (BlobFuse2 supports storage accounts with either flat namespaces or hierarchical namespace configured.) +- Use basic file system operations like `mkdir`, `opendir`, `readdir`, `rmdir`, `open`, `read`, `create`, `write`, `close`, `unlink`, `truncate`, `stat`, and `rename`. +- Use local file caching to improve subsequent access times. +- Gain insights into mount activities and resource usage by using BlobFuse2 Health Monitor. Other key features in BlobFuse2 include: |
| storage | Storage Blobs Static Site Github Actions | https://github.com/MicrosoftDocs/azure-docs/commits/main/articles/storage/blobs/storage-blobs-static-site-github-actions.md | An Azure subscription and GitHub account. ## Generate deployment credentials -# [Service principal](#tab/userlevel) --You can create a [service principal](../../active-directory/develop/app-objects-and-service-principals.md#service-principal-object) with the [az ad sp create-for-rbac](/cli/azure/ad/sp#az-ad-sp-create-for-rbac) command in the [Azure CLI](/cli/azure/). Run this command with [Azure Cloud Shell](https://shell.azure.com/) in the Azure portal or by selecting the **Try it** button. --Replace the placeholder `myStaticSite` with the name of your site hosted in Azure Storage. --```azurecli-interactive - az ad sp create-for-rbac --name {myStaticSite} --role contributor --scopes /subscriptions/{subscription-id}/resourceGroups/{resource-group} --sdk-auth -``` --In the example, replace the placeholders with your subscription ID and resource group name. The output is a JSON object with the role assignment credentials that provide access to your storage account. Copy this JSON object for later. --```output - { - "clientId": "<GUID>", - "clientSecret": "<GUID>", - "subscriptionId": "<GUID>", - "tenantId": "<GUID>", - (...) - } -``` --> [!IMPORTANT] -> It is always a good practice to grant minimum access. The scope in the previous example is limited to the specific App Service app and not the entire resource group. --# [OpenID Connect](#tab/openid) --OpenID Connect is an authentication method that uses short-lived tokens. Setting up [OpenID Connect with GitHub Actions](https://docs.github.com/en/actions/deployment/security-hardening-your-deployments/about-security-hardening-with-openid-connect) is more complex process that offers hardened security. --1. If you do not have an existing application, register a [new Active Directory application and service principal that can access resources](../../active-directory/develop/howto-create-service-principal-portal.md). Create the Active Directory application. -- ```azurecli-interactive - az ad app create --display-name myApp - ``` -- This command will output JSON with an `appId` that is your `client-id`. Save the value to use as the `AZURE_CLIENT_ID` GitHub secret later. -- You will use the `objectId` value when creating federated credentials with Graph API and reference it as the `APPLICATION-OBJECT-ID`. --1. Create a service principal. Replace the `$appID` with the appId from your JSON output. -- This command generates JSON output with a different `objectId` and will be used in the next step. The new `objectId` is the `assignee-object-id`. - - Copy the `appOwnerTenantId` to use as a GitHub secret for `AZURE_TENANT_ID` later. -- ```azurecli-interactive - az ad sp create --id $appId - ``` --1. Create a new role assignment by subscription and object. By default, the role assignment will be tied to your default subscription. Replace `$subscriptionId` with your subscription ID, `$resourceGroupName` with your resource group name, and `$assigneeObjectId` with the generated `assignee-object-id`. Learn [how to manage Azure subscriptions with the Azure CLI](/cli/azure/manage-azure-subscriptions-azure-cli). -- ```azurecli-interactive - az role assignment create --role contributor --scope /subscriptions/$subscriptionId/resourceGroups/$resourceGroupName --subscription $subscriptionId --assignee-object-id $assigneeObjectId --assignee-principal-type ServicePrincipal - ``` --1. Run the following command to [create a new federated identity credential](/graph/api/application-post-federatedidentitycredentials?view=graph-rest-beta&preserve-view=true) for your active directory application. -- * Replace `APPLICATION-OBJECT-ID` with the **objectId (generated while creating app)** for your Active Directory application. - * Set a value for `CREDENTIAL-NAME` to reference later. - * Set the `subject`. The value of this is defined by GitHub depending on your workflow: - * Jobs in your GitHub Actions environment: `repo:< Organization/Repository >:environment:< Name >` - * For Jobs not tied to an environment, include the ref path for branch/tag based on the ref path used for triggering the workflow: `repo:< Organization/Repository >:ref:< ref path>`. For example, `repo:n-username/ node_express:ref:refs/heads/my-branch` or `repo:n-username/ node_express:ref:refs/tags/my-tag`. - * For workflows triggered by a pull request event: `repo:< Organization/Repository >:pull_request`. - - ```azurecli - az rest --method POST --uri 'https://graph.microsoft.com/beta/applications/<APPLICATION-OBJECT-ID>/federatedIdentityCredentials' --body '{"name":"<CREDENTIAL-NAME>","issuer":"https://token.actions.githubusercontent.com","subject":"repo:organization/repository:ref:refs/heads/main","description":"Testing","audiences":["api://AzureADTokenExchange"]}' - ``` - -To learn how to create a Create an active directory application, service principal, and federated credentials in Azure portal, see [Connect GitHub and Azure](/azure/developer/github/connect-from-azure#use-the-azure-login-action-with-openid-connect). ----## Configure the GitHub secret --# [Service principal](#tab/userlevel) --1. In [GitHub](https://github.com/), browse your repository. --1. Select **Settings > Secrets > New secret**. --1. Paste the entire JSON output from the Azure CLI command into the secret's value field. Give the secret a name like `AZURE_CREDENTIALS`. -- When you configure the workflow file later, you use the secret for the input `creds` of the Azure Login action. For example: -- ```yaml - - uses: azure/login@v1 - with: - creds: ${{ secrets.AZURE_CREDENTIALS }} - ``` --# [OpenID Connect](#tab/openid) --You need to provide your application's **Client ID**, **Tenant ID**, and **Subscription ID** to the login action. These values can either be provided directly in the workflow or can be stored in GitHub secrets and referenced in your workflow. Saving the values as GitHub secrets is the more secure option. --1. Open your GitHub repository and go to **Settings**. --1. Select **Settings > Secrets > New secret**. --1. Create secrets for `AZURE_CLIENT_ID`, `AZURE_TENANT_ID`, and `AZURE_SUBSCRIPTION_ID`. Use these values from your Active Directory application for your GitHub secrets: -- |GitHub Secret | Active Directory Application | - ||| - |AZURE_CLIENT_ID | Application (client) ID | - |AZURE_TENANT_ID | Directory (tenant) ID | - |AZURE_SUBSCRIPTION_ID | Subscription ID | --1. Save each secret by selecting **Add secret**. --+## Configure GitHub secrets ## Add your workflow |
| storage | Azure Defender Storage Configure | https://github.com/MicrosoftDocs/azure-docs/commits/main/articles/storage/common/azure-defender-storage-configure.md | Title: Configure Microsoft Defender for Storage + Title: Enable Microsoft Defender for Storage description: Configure Microsoft Defender for Storage to detect anomalies in account activity and be notified of potentially harmful attempts to access your account. -+ - Previously updated : 05/31/2022--+ Last updated : 10/24/2022++ -# Configure Microsoft Defender for Storage +# Enable Microsoft Defender for Storage -Microsoft Defender for Storage provides an additional layer of security intelligence that detects unusual and potentially harmful attempts to access or exploit storage accounts. This layer of protection allows you to address threats without being a security expert or managing security monitoring systems. +> [!NOTE] +> A new pricing plan is now available for Microsoft Defender for Cloud that charges you according to the number of storage accounts that you protect (per-storage). +> +> In the legacy pricing plan, the cost increases according to the number of analyzed transactions in the storage account (per-transaction). The new per-storage plan fixes costs per storage account, but accounts with an exceptionally high transaction volume incur an overage charge. +> +> For details about the pricing plans, see [Microsoft Defender for Cloud pricing page](https://azure.microsoft.com/pricing/details/defender-for-cloud/). -Security alerts are triggered when anomalies in activity occur. These security alerts are integrated with [Microsoft Defender for Cloud](https://azure.microsoft.com/services/defender-for-cloud/), and are also sent via email to subscription administrators, with details of suspicious activity and recommendations on how to investigate and remediate threats. -The service ingests resource logs of read, write, and delete requests to Blob storage and to Azure Files for threat detection. To investigate alerts from Microsoft Defender for Cloud, you can view related storage activity using Storage Analytics Logging. For more information, see **Configure logging** in [Monitor a storage account in the Azure portal](./manage-storage-analytics-logs.md#configure-logging). +**Microsoft Defender for Storage** is an Azure-native layer of security intelligence that detects unusual and potentially harmful attempts to access or exploit your storage accounts. It uses advanced threat detection capabilities and [Microsoft Threat Intelligence](https://go.microsoft.com/fwlink/?linkid=2128684) data to provide contextual security alerts. Those alerts also include steps to mitigate the detected threats and prevent future attacks. -## Availability +Microsoft Defender for Storage continuously analyzes the transactions of [Azure Blob Storage](https://azure.microsoft.com/services/storage/blobs/), [Azure Data Lake Storage](https://azure.microsoft.com/services/storage/data-lake-storage/), and [Azure Files](https://azure.microsoft.com/services/storage/files/) services. When potentially malicious activities are detected, security alerts are generated. Alerts are shown in Microsoft Defender for Cloud with the details of the suspicious activity, appropriate investigation steps, remediation actions, and security recommendations. ++Analyzed transactions of Azure Blob Storage include operation types such as `Get Blob`, `Put Blob`, `Get Container ACL`, `List Blobs`, and `Get Blob Properties`. Examples of analyzed Azure Files operation types include `Get File`, `Create File`, `List Files`, `Get File Properties`, and `Put Range`. ++**Defender for Storage doesn't access the Storage account data, doesn't require you to enable access logs, and has no impact on Storage performance.** ++Learn more about the [benefits, features, and limitations of Defender for Storage](../../defender-for-cloud/defender-for-storage-introduction.md). You can also learn more about Defender for Storage in the [Defender for Storage episode](../../defender-for-cloud/episode-thirteen.md) of the Defender for Cloud in the Field video series. -Microsoft Defender for Storage is currently available for Blob storage, Azure Files, and Azure Data Lake Storage Gen2. Account types that support Microsoft Defender for Storage include general-purpose v2, block blob, and Blob storage accounts. Microsoft Defender for Storage is available in all public clouds and US government clouds, but not in other sovereign or Azure Government cloud regions. +## Availability -Accounts with hierarchical namespaces enabled for Data Lake Storage support transactions using both the Azure Blob storage APIs and the Data Lake Storage APIs. Azure file shares support transactions over SMB. +|Aspect|Details| +|-|:-| +|Release state:|General availability (GA)| +|Pricing:|**Microsoft Defender for Storage** is billed as shown on the [pricing page](https://azure.microsoft.com/pricing/details/defender-for-cloud/)| +|Protected storage types:|[Blob Storage](../blobs/storage-blobs-introduction.md) (Standard/Premium StorageV2, Block Blobs) <br>[Azure Files](../files/storage-files-introduction.md) (over REST API and SMB)<br>[Azure Data Lake Storage Gen2](../blobs/data-lake-storage-introduction.md) (Standard/Premium accounts with hierarchical namespaces enabled)| +|Clouds:|:::image type="icon" source="../../defender-for-cloud/media/icons/yes-icon.png"::: Commercial clouds<br>:::image type="icon" source="../../defender-for-cloud/media/icons/yes-icon.png"::: Azure Government (Only for per-transaction plan)<br>:::image type="icon" source="../../defender-for-cloud/media/icons/no-icon.png"::: Azure China 21Vianet<br>:::image type="icon" source="../../defender-for-cloud/media/icons/no-icon.png"::: Connected AWS accounts| -For pricing details, including a free 30 day trial, see the [Microsoft Defender for Cloud pricing page](https://azure.microsoft.com/pricing/details/defender-for-cloud/). +## Set up Microsoft Defender for Storage for the per-storage pricing plan -The following list summarizes the availability of Microsoft Defender for Storage: +> [!NOTE] +> You can only enable the per-storage pricing plan at the subscription level. -- Release state:- - [Blob Storage](https://azure.microsoft.com/services/storage/blobs/) (general availability) - - [Azure Files](../files/storage-files-introduction.md) (general availability) - - Azure Data Lake Storage Gen2 (general availability) -- Clouds:- ✔ Commercial clouds<br> - ✔ Azure Government<br> - ✘ Azure China 21Vianet +With the Defender for Storage per-storage pricing plan, you can configure Microsoft Defender for Storage on your subscriptions in several ways. When the plan is enabled at the subscription level, Microsoft Defender for Storage is automatically enabled for all your existing and new storage accounts created under that subscription. -## Set up Microsoft Defender for Cloud +You can configure Microsoft Defender for Storage on your subscriptions in several ways: -You can configure Microsoft Defender for Storage in any of several ways, described in the following sections. +- [Azure portal](#azure-portal) +- [Bicep template](#bicep-template) +- [ARM template](#arm-template) +- [Terraform template](#terraform-template) +- [PowerShell](#powershell) +- [Azure CLI](#azure-cli) +- [REST API](#rest-api) -### [Microsoft Defender for Cloud](#tab/azure-security-center) +### Azure portal -Microsoft Defender for Storage is built into Microsoft Defender for Cloud. When you enable Microsoft Defender for Cloud's enhanced security features on your subscription, Microsoft Defender for Storage is automatically enabled for all of your storage accounts. To enable or disable Defender for Storage for individual storage accounts under a specific subscription: +To enable Microsoft Defender for Storage at the subscription level with the per-storage plan using the Azure portal: -1. Launch **Microsoft Defender for Cloud** in the [Azure portal](https://portal.azure.com). -1. From Defender for Cloud's main menu, select **Environment settings**. -1. Select the subscription for which you want to enable or disable Microsoft Defender for Cloud. -1. Select **Enable all Microsoft Defender plans** to enable Microsoft Defender for Cloud in the subscription. -1. Under **Select Microsoft Defender plans by resource type**, locate the **Storage** row, and select **Enabled** in the **Plan** column. -1. Save your changes. +1. Sign in to the [Azure portal](https://portal.azure.com/). - :::image type="content" source="media/azure-defender-storage-configure/enable-azure-defender-security-center.png" alt-text="Screenshot showing how to enable Microsoft Defender for Storage."::: +1. Navigate to **Microsoft Defender for Cloud** > **Environment settings**. +1. Select the subscription that you want to enable Defender for Storage for. -Microsoft Defender for Storage is now enabled for all storage accounts in this subscription. + :::image type="content" source="media/azure-defender-storage-configure/defender-for-cloud-select-subscription.png" alt-text="Screenshot showing how to select a subscription in Defender for Cloud." lightbox="media/azure-defender-storage-configure/defender-for-cloud-select-subscription.png"::: -### [Portal](#tab/azure-portal) +1. In the Defender plans page, to enable Defender for Storage either: -1. Launch the [Azure portal](https://portal.azure.com/). -1. Navigate to your storage account. Under **Security + networking**, select **Security**. -1. Select **Enable Microsoft Defender for Storage**. + - Select **Enable all Microsoft Defender plans** to enable Microsoft Defender for Cloud in the subscription. + - For Microsoft Defender for Storage, select **On** to turn on Defender for Storage, and select **Save**. - :::image type="content" source="media/azure-defender-storage-configure/enable-azure-defender-portal.png" alt-text="Screenshot showing how to enable a storage account for Microsoft Defender for Storage."::: + :::image type="content" source="media/azure-defender-storage-configure/enable-azure-defender-security-center.png" alt-text="Screenshot showing how to enable Defender for Storage in Defender for Cloud." lightbox="media/azure-defender-storage-configure/enable-azure-defender-security-center.png"::: Microsoft Defender for Storage is now enabled for this storage account. -### [Template](#tab/template) +To disable the plan, select **Off** for Defender for Storage in the Defender plans page. ++### Bicep template ++To enable Microsoft Defender for Storage at the subscription level with the per-storage plan using [Bicep](../../azure-resource-manager/bicep/overview.md), add the following to your Bicep template: ++```bicep +resource symbolicname 'Microsoft.Security/pricings@2022-03-01' = { + name: 'StorageAccounts' + properties: { + pricingTier: 'Standard' + subPlan: 'PerStorageAccount' + } +} +``` ++To disable the plan, set the `pricingTier` property value to `Free` and remove the `subPlan` property. ++Learn more about the [Bicep template AzAPI reference](/azure/templates/microsoft.security/pricings?pivots=deployment-language-bicep&source=docs). ++### ARM template ++To enable Microsoft Defender for Storage at the subscription level with the per-storage plan using an ARM template, add this JSON snippet to the resources section of your ARM template: ++```json +{ + "type": "Microsoft.Security/pricings", + "apiVersion": "2022-03-01", + "name": "StorageAccounts", + "properties": { + "pricingTier": "Standard", + "subPlan": "PerStorageAccount" + } +} +``` ++To disable the plan, set the `pricingTier` property value to `Free` and remove the `subPlan` property. ++Learn more about the [ARM template AzAPI reference](/azure/templates/microsoft.security/pricings?pivots=deployment-language-arm-template). ++### Terraform template ++To enable Microsoft Defender for Storage at the subscription level with the per-storage plan using a Terraform template, add this code snippet to your template with your subscription ID as the `parent_id` value: ++```terraform +resource "azapi_resource" "symbolicname" { + type = "Microsoft.Security/pricings@2022-03-01" + name = "StorageAccounts" + parent_id = "<subscriptionId>" + body = jsonencode({ + properties = { + pricingTier = "Standard" + subPlan = "PerStorageAccount" + } + }) +} +``` ++To disable the plan, set the `pricingTier` property value to `Free` and remove the `subPlan` property. ++Learn more about the [Terraform template AzAPI reference](/azure/templates/microsoft.security/pricings?pivots=deployment-language-terraform). ++### PowerShell ++To enable Microsoft Defender for Storage at the subscription level with the per-storage plan using PowerShell: ++1. If you don't have it already, [install the Azure Az PowerShell module](/powershell/azure/install-az-ps.md). +1. Use the `Connect-AzAccount` cmdlet to sign in to your Azure account. Learn more about [signing in to Azure with Azure PowerShell](/powershell/azure/authenticate-azureps.md). +1. Use these commands to register your subscription to the Microsoft Defender for Cloud Resource Provider: ++ ```powershell + Set-AzContext -Subscription <subscriptionId> + Register-AzResourceProvider -ProviderNamespace 'Microsoft.Security' + ``` ++ Replace `<subscriptionId>` with your subscription ID. ++1. Enable Microsoft Defender for Storage for your subscription with the `Set-AzSecurityPricing` cmdlet: ++ ```powershell + Set-AzSecurityPricing -Name "StorageAccounts" -PricingTier "Standard" -subPlan "PerStorageAccount" + ``` ++> [!TIP] +> You can use the [`GetAzSecurityPricing` (Az_Security)](/powershell/module/az.security/get-azsecuritypricing.md) to see all of the Defender for Cloud plans that are enabled for the subscription. -Use an Azure Resource Manager template to deploy an Azure Storage account with Microsoft Defender for Storage enabled. For more information, see [Storage account with advanced threat protection](https://azure.microsoft.com/resources/templates/storage-advanced-threat-protection-create/). +To disable the plan, set the `-PricingTier` property value to `Free` and remove the `subPlan` parameter. -### [Azure Policy](#tab/azure-policy) +Learn more about the [using PowerShell with Microsoft Defender for Cloud](../../defender-for-cloud/powershell-onboarding.md). -Use an Azure Policy to enable Microsoft Defender for Cloud across storage accounts under a specific subscription or resource group. +### Azure CLI -1. Launch the Azure **Policy - Definitions** page. -1. Search for the **Azure Defender for Storage should be enabled** policy, then select the policy to view the policy definition page. +To enable Microsoft Defender for Storage at the subscription level with the per-storage plan using Azure CLI: - :::image type="content" source="media/azure-defender-storage-configure/storage-defender-policy-definitions.png" alt-text="Locate built-in policy to enable Microsoft Defender for Storage for your storage accounts." lightbox="media/azure-defender-storage-configure/storage-defender-policy-definitions.png"::: +1. If you don't have it already, [install the Azure CLI](/cli/azure/install-azure-cli). +1. Use the `az login` command to sign in to your Azure account. Learn more about [signing in to Azure with Azure CLI](/cli/azure/authenticate-azure-cli). +1. Use these commands to set the subscription ID and name: -1. Select the **Assign** button for the built-in policy, then specify an Azure subscription. You can also optionally specify a resource group to further scope the policy assignment. + ```azurecli + az account set --subscription "<subscriptionId or name>" + ``` - :::image type="content" source="media/azure-defender-storage-configure/storage-defender-policy-assignment.png" alt-text="Select subscription and optionally resource group to scope the policy assignment." lightbox="media/azure-defender-storage-configure/storage-defender-policy-assignment.png"::: + Replace `<subscriptionId>` with your subscription ID. -1. Select **Review + create** to review the policy definition and then create it with the specified scope. +1. Enable Microsoft Defender for Storage for your subscription with the `az security pricing create` command: -### [PowerShell](#tab/azure-powershell) + ```azurecli + az security pricing create -n StorageAccounts --tier "standard" --subPlan "PerStorageAccount" + ``` -To enable Microsoft Defender for Storage for a storage account via PowerShell, first make sure you have installed the [Az.Security](https://www.powershellgallery.com/packages/Az.Security) module. Next, call the [Enable-AzSecurityAdvancedThreatProtection](/powershell/module/az.security/enable-azsecurityadvancedthreatprotection) command. Remember to replace values in angle brackets with your own values: +> [!TIP] +> You can use the [`az security pricing show`](/cli/azure/security/pricing#az-security-pricing-show) command to see all of the Defender for Cloud plans that are enabled for the subscription. -```azurepowershell -Enable-AzSecurityAdvancedThreatProtection -ResourceId "/subscriptions/<subscription-id>/resourceGroups/<resource-group>/providers/Microsoft.Storage/storageAccounts/<storage-account>/" +To disable the plan, set the `-tier` property value to `free` and remove the `subPlan` parameter. ++Learn more about the [az security pricing create](/cli/azure/security/pricing.md#az-security-pricing-create.md) command. ++### REST API ++To enable Microsoft Defender for Storage at the subscription level with the per-storage plan using the Microsoft Defender for Cloud REST API, create a PUT request with this endpoint and body: ++```http +PUT https://management.azure.com/subscriptions/{subscriptionId}/providers/Microsoft.Security/pricings/StorageAccounts?api-version=2022-03-01 ++{ + "properties": { + "pricingTier": "Standard" + "subPlan": "PerStorageAccount" + } +} ``` -To check the Microsoft Defender for Storage setting for a storage account via PowerShell, call the [Get-AzSecurityAdvancedThreatProtection](/powershell/module/az.security/get-azsecurityadvancedthreatprotection) command. Remember to replace values in angle brackets with your own values: +Replace `{subscriptionId}` with your subscription ID. ++> [!TIP] +> You can use the [Get](/rest/api/defenderforcloud/pricings/get.md) and [List](/rest/api/defenderforcloud/pricings/list.md) API requests to see all of the Defender for Cloud plans that are enabled for the subscription. ++To disable the plan, set the `-pricingTier` property value to `Free` and remove the `subPlan` parameter. ++Learn more about the [updating Defender plans with the REST API](/rest/api/defenderforcloud/pricings/update.md) in HTTP, Java, Go and JavaScript. -```azurepowershell -Get-AzSecurityAdvancedThreatProtection -ResourceId "/subscriptions/<subscription-id>/resourceGroups/<resource-group>/providers/Microsoft.Storage/storageAccounts/<storage-account>/" +## Set up Microsoft Defender for Storage for the per-transaction pricing plan ++For the Defender for Storage per-transaction pricing plan, we recommend that you [configure the plan for each subscription](#set-up-the-per-transaction-pricing-plan-for-a-subscription) so that all existing and new storage accounts are protected. If you want to only protect specific accounts, [configure the plan for each account](#set-up-the-per-transaction-pricing-plan-for-an-account). ++### Set up the per-transaction pricing plan for a subscription ++You can configure Microsoft Defender for Storage on your subscriptions in several ways: ++- [Bicep template](#bicep-template-1) +- [ARM template](#arm-template-1) +- [Terraform template](#terraform-template-1) +- [PowerShell](#powershell-1) +- [Azure CLI](#azure-cli-1) +- [REST API](#rest-api-1) ++#### Bicep template ++To enable Microsoft Defender for Storage at the subscription level with the per-transaction plan using [Bicep](../../azure-resource-manager/bicep/overview.md), add the following to your Bicep template: ++```bicep +resource symbolicname 'Microsoft.Security/pricings@2022-03-01' = { + name: 'StorageAccounts' + properties: { + pricingTier: 'Standard' + subPlan: 'PerTransaction' + } +} ``` -### [Azure CLI](#tab/azure-cli) +To disable the plan, set the `pricingTier` property value to `Free` and remove the `subPlan` property. -To enable Microsoft Defender for Storage for a storage account via Azure CLI, call the [az security atp storage update](/cli/azure/security/atp/storage#az-security-atp-storage-update) command. Remember to replace values in angle brackets with your own values: +Learn more about the [Bicep template AzAPI reference](/azure/templates/microsoft.security/pricings?pivots=deployment-language-bicep&source=docs). -```azurecli -az security atp storage update \ +#### ARM template ++To enable Microsoft Defender for Storage at the subscription level with the per-transaction plan using an ARM template, add this JSON snippet to the resources section of your ARM template: ++```json +{ + "type": "Microsoft.Security/pricings", + "apiVersion": "2022-03-01", + "name": "StorageAccounts", + "properties": { + "pricingTier": "Standard", + "subPlan": "PerTransaction" + } +} +``` ++To disable the plan, set the `pricingTier` property value to `Free` and remove the `subPlan` property. ++Learn more about the [ARM template AzAPI reference](/azure/templates/microsoft.security/pricings?pivots=deployment-language-arm-template). ++#### Terraform template ++To enable Microsoft Defender for Storage at the subscription level with the per-transaction plan using a Terraform template, add this code snippet to your template with your subscription ID as the `parent_id` value: ++```terraform +resource "azapi_resource" "symbolicname" { + type = "Microsoft.Security/pricings@2022-03-01" + name = "StorageAccounts" + parent_id = "<subscriptionId>" + body = jsonencode({ + properties = { + pricingTier = "Standard" + subPlan = "PerTransaction" + } + }) +} +``` ++To disable the plan, set the `pricingTier` property value to `Free` and remove the `subPlan` property. ++Learn more about the [ARM template AzAPI reference](/azure/templates/microsoft.security/pricings?pivots=deployment-language-arm-template). ++#### PowerShell ++To enable Microsoft Defender for Storage at the subscription level with the per-transaction plan using PowerShell: ++1. If you don't have it already, [install the Azure Az PowerShell module](/powershell/azure/install-az-ps.md). +1. Use the `Connect-AzAccount` cmdlet to sign in to your Azure account. Learn more about [signing in to Azure with Azure PowerShell](/powershell/azure/authenticate-azureps.md). +1. Use these commands to register your subscription to the Microsoft Defender for Cloud Resource Provider: ++ ```powershell + Set-AzContext -Subscription <subscriptionId> + Register-AzResourceProvider -ProviderNamespace 'Microsoft.Security' + ``` ++ Replace `<subscriptionId>` with your subscription ID. ++1. Enable Microsoft Defender for Storage for your subscription with the `Set-AzSecurityPricing` cmdlet: ++ ```powershell + Set-AzSecurityPricing -Name "StorageAccounts" -PricingTier "Standard" -subPlan "PerTransaction" + ``` ++> [!TIP] +> You can use the [`GetAzSecurityPricing` (Az_Security)](/powershell/module/az.security/get-azsecuritypricing.md) to see all of the Defender for Cloud plans that are enabled for the subscription. ++To disable the plan, set the `-PricingTier` property value to `Free` and remove the `subPlan` parameter. ++Learn more about the [using PowerShell with Microsoft Defender for Cloud](../../defender-for-cloud/powershell-onboarding.md). ++#### Azure CLI ++To enable Microsoft Defender for Storage at the subscription level with the per-transaction plan using Azure CLI: ++1. If you don't have it already, [install the Azure CLI](/cli/azure/install-azure-cli). +1. Use the `az login` command to sign in to your Azure account. Learn more about [signing in to Azure with Azure CLI](/cli/azure/authenticate-azure-cli). +1. Use these commands to set the subscription ID and name: ++ ```azurecli + az account set --subscription "<subscriptionId or name>" + ``` ++ Replace `<subscriptionId>` with your subscription ID. ++1. Enable Microsoft Defender for Storage for your subscription with the `az security pricing create` command: ++ ```azurecli + az security pricing create -n StorageAccounts --tier "standard" --subPlan "PerTransaction" + ``` ++> [!TIP] +> You can use the [`az security pricing show`](/cli/azure/security/pricing#az-security-pricing-show) command to see all of the Defender for Cloud plans that are enabled for the subscription. ++To disable the plan, set the `-tier` property value to `free` and remove the `subPlan` parameter. ++Learn more about the [`az security pricing create`](/cli/azure/security/pricing.md#az-security-pricing-create) command. ++#### REST API ++To enable Microsoft Defender for Storage at the subscription level with the per-transaction plan using the Microsoft Defender for Cloud REST API, create a PUT request with this endpoint and body: ++```http +PUT https://management.azure.com/subscriptions/{subscriptionId}/providers/Microsoft.Security/pricings/StorageAccounts?api-version=2022-03-01 ++{ +"properties": { + "pricingTier": "Standard" + "subPlan": "PerTransaction" + } +} +``` ++Replace `{subscriptionId}` with your subscription ID. ++To disable the plan, set the `-pricingTier` property value to `Free` and remove the `subPlan` parameter. ++Learn more about the [updating Defender plans with the REST API](/rest/api/defenderforcloud/pricings/update.md) in HTTP, Java, Go and JavaScript. ++### Set up the per-transaction pricing plan for an account ++You can configure Microsoft Defender for Storage on your accounts in several ways: ++- [Azure portal](#azure-portal-1) +- [ARM template](#arm-template-2) +- [PowerShell](#powershell-2) +- [Azure CLI](#azure-cli-2) ++#### Azure portal ++To enable Microsoft Defender for Storage for a specific account with the per-transaction plan using the Azure portal: ++1. Sign in to the [Azure portal](https://portal.azure.com/). +1. Navigate to your storage account. +1. In the Security + networking section of the Storage account menu, select **Microsoft Defender for Cloud**. +1. Select **Enable Defender on this storage account only**. +++Microsoft Defender for Storage is now enabled for this storage account. If you want to disable Defender for Storage on the account, select **Disable**. +++#### ARM template ++To enable Microsoft Defender for Storage for a specific storage account with the per-transaction plan using an ARM template, use [the prepared Azure template](https://azure.microsoft.com/resources/templates/storage-advanced-threat-protection-create/). ++If you want to disable Defender for Storage on the account: ++1. Sign in to the [Azure portal](https://portal.azure.com/). +1. Navigate to your storage account. +1. In the Security + networking section of the Storage account menu, select **Microsoft Defender for Cloud**. +1. Select **Disable**. ++#### PowerShell ++To enable Microsoft Defender for Storage for a specific storage account with the per-transaction plan using PowerShell: ++1. If you don't have it already, [install the Azure Az PowerShell module](/powershell/azure/install-az-ps.md). +1. Use the Connect-AzAccount cmdlet to sign in to your Azure account. Learn more about [signing in to Azure with Azure PowerShell](/powershell/azure/authenticate-azureps.md). +1. Enable Microsoft Defender for Storage for the desired storage account with the [`Enable-AzSecurityAdvancedThreatProtection`](/powershell/module/az.security/enable-azsecurityadvancedthreatprotection.md) cmdlet: ++ ```powershell + Enable-AzSecurityAdvancedThreatProtection -ResourceId "/subscriptions/<subscription-id>/resourceGroups/<resource-group>/providers/Microsoft.Storage/storageAccounts/<storage-account>/" + ``` ++ Replace `<subscriptionId>`, `<resource-group>`, and `<storage-account>` with the values for your environment. ++If you want to disable the per-transaction plan for a specific storage account, use the [`Disable-AzSecurityAdvancedThreatProtection`](/powershell/module/az.security/disable-azsecurityadvancedthreatprotection.md) cmdlet: ++```powershell +Disable-AzSecurityAdvancedThreatProtection -ResourceId "/subscriptions/<subscription-id>/resourceGroups/<resource-group>/providers/Microsoft.Storage/storageAccounts/<storage-account>/" +``` ++Learn more about the [using PowerShell with Microsoft Defender for Cloud](../../defender-for-cloud/powershell-onboarding.md). ++#### Azure CLI ++To enable Microsoft Defender for Storage for a specific storage account with the per-transaction plan using Azure CLI: ++1. If you don't have it already, [install the Azure CLI](/cli/azure/install-azure-cli). +1. Use the `az login` command to sign in to your Azure account. Learn more about [signing in to Azure with Azure CLI](/cli/azure/authenticate-azure-cli). +1. Enable Microsoft Defender for Storage for your subscription with the [`az security atp storage update`](/cli/azure/security/atp/storage.md) command: ++ ```azurecli + az security atp storage update \ --resource-group <resource-group> \ --storage-account <storage-account> \ --is-enabled true-``` + ``` ++> [!TIP] +> You can use the [`az security atp storage show`](/cli/azure/security/atp/storage.md) command to see if Defender for Storage is enabled on an account. -To check the Microsoft Defender for Storage setting for a storage account via Azure CLI, call the [az security atp storage show](/cli/azure/security/atp/storage#az-security-atp-storage-show) command. Remember to replace values in angle brackets with your own values: +To disable Microsoft Defender for Storage for your subscription, use the [`az security atp storage update`](/cli/azure/security/atp/storage.md) command: ```azurecli-az security atp storage show \ - --resource-group <resource-group> \ - --storage-account <storage-account> +az security atp storage update \ +--resource-group <resource-group> \ +--storage-account <storage-account> \ +--is-enabled false ``` -+Learn more about the [az security atp storage](/cli/azure/security/atp/storage#az-security-atp-storage-update) command. ++## FAQ - Microsoft Defender for Storage pricing plans ++### Can I switch from an existing per-transaction plan to the per-storage plan? ++Yes, you can migrate to the per-storage plan from the Azure portal or all the other supported enablement methods. To migrate to the per-storage plan, [enable the per-storage plan at the subscription level](#set-up-microsoft-defender-for-storage-for-the-per-storage-pricing-plan). ++### Can I return to the per-transaction plan after switching to the per-storage plan? ++Yes, you can enable the per-transaction to migrate back from the per-storage plan using all enablement methods except for the Azure portal. ++### Will you continue supporting the per-transaction plan? -## Explore security anomalies +Yes, you can [enable the per-transaction plan](#set-up-microsoft-defender-for-storage-for-the-per-transaction-pricing-plan) from all the enablement methods, except for the Azure portal. -When storage activity anomalies occur, you receive an email notification with information about the suspicious security event. Details of the event include: +### Can I exclude specific storage accounts from protections in the per-storage plan? -- The nature of the anomaly-- The storage account name-- The event time-- The storage type-- The potential causes-- The investigation steps-- The remediation steps+No, you can only enable the per-storage pricing plan for each subscription. All storage accounts in the subscription are protected. -The email also includes details on possible causes and recommended actions to investigate and mitigate the potential threat. +### How long does it take for the per-storage plan to be enabled? +When you enable Microsoft Defender for Storage at the subscription level for the per-storage or per-transaction plans, it takes up to 24 hours for the plan to be enabled. -You can review and manage your current security alerts from Microsoft Defender for Cloud's [Security alerts tile](../../defender-for-cloud/managing-and-responding-alerts.md). Select an alert for details and actions for investigating the current threat and addressing future threats. +### Is there any difference in the feature set of the per-storage plan compared to the legacy per-transaction plan? +No. Both the per-storage and per-transaction plans include the same features. The only difference is the pricing plan. -## Security alerts +### How can I estimate the cost of the pricing plans? -Alerts are generated by unusual and potentially harmful attempts to access or exploit storage accounts. For a list of alerts for Azure Storage, see [Alerts for Azure Storage](../../defender-for-cloud/alerts-reference.md#alerts-azurestorage). +To estimate the cost of each of the pricing plans for your environment, we created a [pricing estimation workbook](https://aka.ms/dfstoragecosttool) and a PowerShell script that you can run in your environment. ## Next steps -- [Introduction to Microsoft Defender for Storage](../../defender-for-cloud/defender-for-storage-introduction.md)-- [Microsoft Defender for Cloud](../../defender-for-cloud/defender-for-cloud-introduction.md)-- [Logs in Azure Storage accounts](/rest/api/storageservices/About-Storage-Analytics-Logging)+- Check out the [alerts for Azure Storage](../../defender-for-cloud/alerts-reference.md#alerts-azurestorage) +- Learn about the [features and benefits of Defender for Storage](../../defender-for-cloud/defender-for-storage-introduction.md) |
| storage | Storage Use Data Movement Library | https://github.com/MicrosoftDocs/azure-docs/commits/main/articles/storage/common/storage-use-data-movement-library.md | Title: Transfer data with the Data Movement library for .NET description: Use the Data Movement library to move or copy data to or from blob and file content. Copy data to Azure Storage from local files, or copy data within or between storage accounts. Easily migrate your data to Azure Storage. -+ ms.devlang: csharp Last updated 06/16/2020-+ |
| storage | Elastic San Create | https://github.com/MicrosoftDocs/azure-docs/commits/main/articles/storage/elastic-san/elastic-san-create.md | This article explains how to deploy and configure an elastic storage area networ ## Prerequisites -- If you're using Azure PowerShell, use `Install-Module -Name Az.Elastic-SAN -Scope CurrentUser -Repository PSGallery -Force -RequiredVersion .10-preview` to install the preview module.+- If you're using Azure PowerShell, use `Install-Module -Name Az.ElasticSan -Scope CurrentUser -Repository PSGallery -Force -RequiredVersion 0.1.0` to install the preview module. - If you're using Azure CLI, install the latest version. For installation instructions, see [How to install the Azure CLI](/cli/azure/install-azure-cli). - Once you've installed the latest version, run `az extension add -n elastic-san` to install the extension for Elastic SAN. |
| storage | Storage Files Identity Auth Azure Active Directory Enable | https://github.com/MicrosoftDocs/azure-docs/commits/main/articles/storage/files/storage-files-identity-auth-azure-active-directory-enable.md | description: Learn how to enable identity-based Kerberos authentication for hybr Previously updated : 10/20/2022 Last updated : 10/31/2022 Azure AD Kerberos authentication only supports using AES-256 encryption. ## Regional availability -Azure Files authentication with Azure AD Kerberos public preview is available in Azure public cloud in [all Azure regions](https://azure.microsoft.com/global-infrastructure/locations/) except China (Mooncake). +Azure Files authentication with Azure AD Kerberos is available in Azure public cloud in [all Azure regions](https://azure.microsoft.com/global-infrastructure/locations/) except China and Government clouds. ## Enable Azure AD Kerberos authentication for hybrid user accounts (preview) |
| synapse-analytics | Synapse Link For Sql Known Issues | https://github.com/MicrosoftDocs/azure-docs/commits/main/articles/synapse-analytics/synapse-link/synapse-link-for-sql-known-issues.md | This is the list of known limitations for Azure Synapse Link for SQL. * When enabling Azure Synapse Link for SQL on your Azure SQL Database, you should ensure that aggressive log truncation is disabled. ### SQL Server 2022 only-* Azure Synapse Link for SQL works with SQL Server on Linux, but HA scenarios with Linux Pacemaker aren't supported. Shelf hosted IR cannot be installed on Linux environment. * Azure Synapse Link for SQL can't be enabled on databases that are transactional replication publishers or distributors.-* If the SAS key of landing zone expires and gets rotated during the snapshot process, the new key won't get picked up. The snapshot will fail and restart automatically with the new key. -* Prior to breaking an Availability Group, disable any running links. Otherwise both databases will attempt to write their changes to the landing zone. * When using asynchronous replicas, transactions need to be written to all replicas prior to them being published to Azure Synapse Link for SQL. * Azure Synapse Link for SQL isn't supported on databases with database mirroring enabled. * Restoring an Azure Synapse Link for SQL-enabled database from on-premises to Azure SQL Managed Instance isn't supported. |
| synapse-analytics | Whats New | https://github.com/MicrosoftDocs/azure-docs/commits/main/articles/synapse-analytics/whats-new.md | description: Learn about the new features and documentation improvements for Azu Previously updated : 09/27/2022 Last updated : 10/31/2022 The following table lists the features of Azure Synapse Analytics that are curre | **Feature** | **Learn more**| |:-- |:-- |+| **Apache Spark Delta Lake tables in serverless SQL pools** | The ability to for serverless SQL pools to access Delta Lake tables created in Spark databases is in preview. For more information, see [Azure Synapse Analytics shared metadata tables](metadat).| +| **Apache Spark elastic pool storage** | Azure Synapse Analytics Spark pools now support elastic pool storage in preview. Elastic pool storage allows the Spark engine to monitor worker node temporary storage and attach more disks if needed. No action is required, and you should see fewer job failures as a result. For more information, see [Blog: Azure Synapse Analytics Spark elastic pool storage is available for public preview](https://techcommunity.microsoft.com/t5/azure-synapse-analytics-blog/azure-synapse-analytics-august-update-2022/ba-p/3535126#TOCREF_8).| +| **Apache Spark Optimized Write** | [Optimize Write is a Delta Lake on Azure Synapse](spark/optimize-write-for-apache-spark.md) feature reduces the number of files written by Apache Spark 3 (3.1 and 3.2) and aims to increase individual file size of the written data.| +| **Apache Spark R language support** | Built-in [R support for Apache Spark](spark/apache-spark-r-language.md) is now in preview. | | **Azure Synapse Data Explorer** | The [Azure Synapse Data Explorer](./data-explorer/data-explorer-overview.md) provides an interactive query experience to unlock insights from log and telemetry data. Connectors for Azure Data Explorer are available for Synapse Data Explorer. | | **Azure Synapse Link to SQL** | Azure Synapse Link is in preview for both SQL Server 2022 and Azure SQL Database. The Azure Synapse Link feature provides low- and no-code, near real-time data replication from your SQL-based operational stores into Azure Synapse Analytics. Provide BI reporting on operational data in near real-time, with minimal impact on your operational store. To learn more, read [Announcing the Public Preview of Azure Synapse Link for SQL](https://techcommunity.microsoft.com/t5/azure-synapse-analytics-blog/announcing-the-public-preview-of-azure-synapse-link-for-sql/ba-p/3372986) and [watch our YouTube video](https://www.youtube.com/embed/pgusZy34-Ek). | | **Browse ADLS Gen2 folders in the Azure Synapse Analytics workspace** | You can now browse an Azure Data Lake Storage Gen2 (ADLS Gen2) container or folder in your Azure Synapse Analytics workspace by connecting to a specific container or folder in Synapse Studio. To learn more, see [Browse an ADLS Gen2 folder with ACLs in Azure Synapse Analytics](how-to-access-container-with-access-control-lists.md).| The following table lists the features of Azure Synapse Analytics that are curre | **Embed ADX dashboards** | Azure Data Explorer dashboards be [embedded in an iFrame and hosted in third party apps](/azure/data-explorer/kusto/api/monaco/host-web-ux-in-iframe). | | **Ingest data from Azure Stream Analytics into Synapse Data Explorer** | You can now use a Streaming Analytics job to collect data from an event hub and send it to your Azure Data Explorer cluster using the Azure portal or an ARM template. For more information on this preview feature, see [Ingest data from Azure Stream Analytics into Azure Data Explorer](/azure/data-explorer/stream-analytics-connector). | | **Multi-column distribution in dedicated SQL pools** | You can now Hash Distribute tables on multiple columns for a more even distribution of the base table, reducing data skew over time and improving query performance. For more information on opting-in to the preview, see [CREATE TABLE distribution options](/sql/t-sql/statements/create-table-azure-sql-data-warehouse#TableDistributionOptions) or [CREATE TABLE AS SELECT distribution options](/sql/t-sql/statements/create-table-as-select-azure-sql-data-warehouse#table-distribution-options).|-| **SAP CDC connector preview** | A new data connector for SAP Change Data Capture (CDC) is now available in preview. For more information, see [Announcing Public Preview of the SAP CDC solution in Azure Data Factory and Azure Synapse Analytics](https://techcommunity.microsoft.com/t5/azure-data-factory-blog/announcing-public-preview-of-the-sap-cdc-solution-in-azure-dat).| -| **Spark Delta Lake tables in serverless SQL pools** | The ability to for serverless SQL pools to access Delta Lake tables created in Spark databases is in preview. For more information, see [Azure Synapse Analytics shared metadata tables](metadat).| -| **Spark elastic pool storage** | Azure Synapse Analytics Spark pools now support elastic pool storage in preview. Elastic pool storage allows the Spark engine to monitor worker node temporary storage and attach more disks if needed. No action is required, and you should see fewer job failures as a result. For more information, see [Blog: Azure Synapse Analytics Spark elastic pool storage is available for public preview](https://techcommunity.microsoft.com/t5/azure-synapse-analytics-blog/azure-synapse-analytics-august-update-2022/ba-p/3535126#TOCREF_8).| -| **Spark Optimized Write** | Optimize Write is a Delta Lake on Synapse feature that reduces the number of files written by Apache Spark 3 (3.1 and 3.2) and aims to increase individual file size of the written data. To learn more about the usage scenarios and how to enable this preview feature, read [The need for optimize write on Apache Spark](spark/optimize-write-for-apache-spark.md).| | **Time-To-Live in managed virtual network (VNet)** | Reserve compute for the time-to-live (TTL) in managed virtual network TTL period, saving time and improving efficiency. For more information on this preview, see [Announcing public preview of Time-To-Live (TTL) in managed virtual network](https://techcommunity.microsoft.com/t5/azure-data-factory-blog/announcing-public-preview-of-time-to-live-ttl-in-managed-virtual/ba-p/3552879).| | **User-Assigned managed identities** | Now you can use user-assigned managed identities in linked services for authentication in Synapse Pipelines and Dataflows.To learn more, see [Credentials in Azure Data Factory and Azure Synapse](../data-factory/credentials.md?context=%2Fazure%2Fsynapse-analytics%2Fcontext%2Fcontext&tabs=data-factory).| The following table lists the features of Azure Synapse Analytics that have tran |**Month** | **Feature** | **Learn more**| |:-- |:-- | :-- |+| October 2022 | **SAP CDC connector GA** | The data connector for SAP Change Data Capture (CDC) is now GA. For more information, see [Announcing Public Preview of the SAP CDC solution in Azure Data Factory and Azure Synapse Analytics](https://techcommunity.microsoft.com/t5/azure-data-factory-blog/announcing-public-preview-of-the-sap-cdc-solution-in-azure-dat).| | September 2022 | **MERGE T-SQL syntax** | [MERGE T-SQL syntax](/sql/t-sql/statements/merge-transact-sql?view=azure-sqldw-latest&preserve-view=true) has been a highly requested addition to the Synapse T-SQL library. As in SQL Server, the MERGE syntax encapsulates INSERTs/UPDATEs/DELETEs into a single high-performance statement. Available in dedicated SQL pools in version 10.0.17829 and above. For more, see the [MERGE T-SQL announcement blog](https://techcommunity.microsoft.com/t5/azure-synapse-analytics-blog/merge-t-sql-for-dedicated-sql-pools-is-now-ga/ba-p/3634331).| | July 2022 | **Apache Spark™ 3.2 for Synapse Analytics** | Apache Spark™ 3.2 for Synapse Analytics is now generally available. Review the [official release notes](https://spark.apache.org/releases/spark-release-3-2-0.html) and [migration guidelines between Spark 3.1 and 3.2](https://spark.apache.org/docs/latest/sql-migration-guide.html#upgrading-from-spark-sql-31-to-32) to assess potential changes to your applications. For more details, read [Apache Spark version support and Azure Synapse Runtime for Apache Spark 3.2](./spark/apache-spark-version-support.md). Highlights of what got better in Spark 3.2 in the [Azure Synapse Analytics July Update 2022](https://techcommunity.microsoft.com/t5/azure-synapse-analytics-blog/azure-synapse-analytics-july-update-2022/ba-p/3535089#TOCREF_1).| | July 2022 | **Apache Spark in Azure Synapse Intelligent Cache feature** | Intelligent Cache for Spark automatically stores each read within the allocated cache storage space, detecting underlying file changes and refreshing the files to provide the most recent data. To learn more, see how to [Enable/Disable the cache for your Apache Spark pool](./spark/apache-spark-intelligent-cache-concept.md).| This section summarizes recent new features and capabilities of [Apache Spark fo |:-- |:-- | :-- | | September 2022 | **New informative Livy error codes** | [More precise error codes](spark/apache-spark-handle-livy-error.md) describe the cause of failure and replaces the previous generic error codes. Previously, all errors in failing Spark jobs surfaced with a generic error code displaying LIVY_JOB_STATE_DEAD. | | September 2022 | **New query optimization techniques in Apache Spark for Azure Synapse Analytics** | Read the [findings from Microsoft's work](https://vldb.org/pvldb/vol15/p936-rajan.pdf) to gain considerable performance benefits across the board on the reference TPC-DS workload as well as a significant reduction in query plan generation time. |-| August 2022 | **Spark elastic pool storage** | Azure Synapse Analytics Spark pools now support elastic pool storage in preview. Elastic pool storage allows the Spark engine to monitor worker nodes temporary storage and attach additional disks if needed. No action is required, and you should see fewer job failures as a result. For more information, see [Blog: Azure Synapse Analytics Spark elastic pool storage is available for public preview](https://techcommunity.microsoft.com/t5/azure-synapse-analytics-blog/azure-synapse-analytics-august-update-2022/ba-p/3535126#TOCREF_8).| -| August 2022 | **Spark Optimized Write** | Optimize Write is a Delta Lake on Synapse preview feature that reduces the number of files written by Apache Spark 3 (3.1 and 3.2) and aims to increase individual file size of the written data. To learn more, see [The need for optimize write on Apache Spark](spark/optimize-write-for-apache-spark.md).| +| August 2022 | **Apache Spark elastic pool storage** | Azure Synapse Analytics Spark pools now support elastic pool storage in preview. Elastic pool storage allows the Spark engine to monitor worker nodes temporary storage and attach additional disks if needed. No action is required, and you should see fewer job failures as a result. For more information, see [Blog: Azure Synapse Analytics Spark elastic pool storage is available for public preview](https://techcommunity.microsoft.com/t5/azure-synapse-analytics-blog/azure-synapse-analytics-august-update-2022/ba-p/3535126#TOCREF_8).| +| August 2022 | **Apache Spark Optimized Write** | Optimize Write is a Delta Lake on Synapse preview feature that reduces the number of files written by Apache Spark 3 (3.1 and 3.2) and aims to increase individual file size of the written data. To learn more, see [The need for optimize write on Apache Spark](spark/optimize-write-for-apache-spark.md).| | July 2022 | **Apache Spark 2.4 enters retirement lifecycle** | With the general availability of the Apache Spark 3.2 runtime, the Azure Synapse runtime for Apache Spark 2.4 enters a 12-month retirement cycle. You should relocate your workloads to the newer Apache Spark 3.2 runtime within this period. Read more at [Apache Spark runtimes in Azure Synapse](spark/apache-spark-version-support.md).| | May 2022 | **Azure Synapse dedicated SQL pool connector for Apache Spark now available in Python** | Previously, the [Azure Synapse Dedicated SQL Pool Connector for Apache Spark](./spark/synapse-spark-sql-pool-import-export.md) was only available using Scala. Now, [the dedicated SQL pool connector for Apache Spark can be used with Python on Spark 3](https://techcommunity.microsoft.com/t5/azure-synapse-analytics-blog/azure-synapse-analytics-may-update-2022/ba-p/3430970#TOCREF_6). | | May 2022 | **Manage Azure Synapse Apache Spark configuration** | With the new [Apache Spark configurations](./spark/apache-spark-azure-create-spark-configuration.md) feature, you can create a standalone Spark configuration artifact with auto-suggestions and built-in validation rules. The Spark configuration artifact allows you to share your Spark configuration within and across Azure Synapse workspaces. You can also easily associate your Spark configuration with a Spark pool, a Notebook, and a Spark job definition for reuse and minimize the need to copy the Spark configuration in multiple places. | | April 2022 | **Apache Spark 3.2 for Synapse Analytics** | Apache Spark 3.2 for Synapse Analytics with preview availability. Review the [official Spark 3.2 release notes](https://spark.apache.org/releases/spark-release-3-2-0.html) and [migration guidelines between Spark 3.1 and 3.2](https://spark.apache.org/docs/latest/sql-migration-guide.html#upgrading-from-spark-sql-31-to-32) to assess potential changes to your applications. For more details, read [Apache Spark version support and Azure Synapse Runtime for Apache Spark 3.2](./spark/apache-spark-version-support.md). | | April 2022 | **Parameterization for Spark job definition** | You can now assign parameters dynamically based on variables, metadata, or specifying Pipeline specific parameters for the Spark job definition activity. For more details, read [Transform data using Apache Spark job definition](quickstart-transform-data-using-spark-job-definition.md#settings-tab). |-| April 2022 | **Spark notebook snapshot** | You can access a snapshot of the Notebook when there's a Pipeline Notebook run failure or when there's a long-running Notebook job. To learn more, read [Transform data by running a Synapse notebook](synapse-notebook-activity.md?tabs=classical#see-notebook-activity-run-history) and [Introduction to Microsoft Spark utilities](./spark/microsoft-spark-utilities.md?pivots=programming-language-scala#reference-a-notebook-1). | +| April 2022 | **Apache Spark notebook snapshot** | You can access a snapshot of the Notebook when there's a Pipeline Notebook run failure or when there's a long-running Notebook job. To learn more, read [Transform data by running a Synapse notebook](synapse-notebook-activity.md?tabs=classical#see-notebook-activity-run-history) and [Introduction to Microsoft Spark utilities](./spark/microsoft-spark-utilities.md?pivots=programming-language-scala#reference-a-notebook-1). | | March 2022 | **Synapse Spark Common Data Model (CDM) connector** | The CDM format reader/writer enables a Spark program to read and write CDM entities in a CDM folder via Spark dataframes. To learn more, see [how the CDM connector supports reading, writing data, examples, & known issues](./spark/data-sources/apache-spark-cdm-connector.md). | | March 2022 | **Performance optimization for Synapse Spark dedicated SQL pool connector** | New improvements to the [Azure Synapse Dedicated SQL Pool Connector for Apache Spark](spark/synapse-spark-sql-pool-import-export.md) reduce data movement and leverage `COPY INTO`. Performance tests indicated at least ~5x improvement over the previous version. No action is required from the user to leverage these enhancements. For more information, see [Blog: Synapse Spark Dedicated SQL Pool (DW) Connector: Performance Improvements](https://techcommunity.microsoft.com/t5/azure-synapse-analytics-blog/azure-synapse-analytics-march-update-2022/ba-p/3269194#TOCREF_10).| | March 2022 | **Support for all Spark Dataframe SaveMode choices** | The [Azure Synapse Dedicated SQL Pool Connector for Apache Spark](spark/synapse-spark-sql-pool-import-export.md) now supports all four Spark Dataframe SaveMode choices: Append, Overwrite, ErrorIfExists, Ignore. For more information on Spark SaveMode, read the [official Apache Spark documentation](https://spark.apache.org/docs/1.6.0/api/java/org/apache/spark/sql/SaveMode.html?wt.mc_id=azsynapseblog_mar2022_blog_azureeng). | This section summarizes recent new features and capabilities of Azure Synapse An |**Month** | **Feature** | **Learn more**| |:-- |:-- | :-- |+| October 2022 | **SAP CDC connector GA** | The data connector for SAP Change Data Capture (CDC) is now GA. For more information, see [Announcing Public Preview of the SAP CDC solution in Azure Data Factory and Azure Synapse Analytics](https://techcommunity.microsoft.com/t5/azure-data-factory-blog/announcing-public-preview-of-the-sap-cdc-solution-in-azure-dat).| | September 2022 | **Gantt chart view** | You can now view your activity runs with a Gantt chart in [Azure Data Factory Integration Runtime monitoring](../data-factory/monitor-integration-runtime.md). | | September 2022 | **Monitoring improvements** | We've released [a new bundle of improvements to the monitoring experience](https://techcommunity.microsoft.com/t5/azure-data-factory-blog/further-adf-monitoring-improvements/ba-p/3607669) based on community feedback. | | September 2022 | **Maximum column optimization in mapping dataflow** | For delimited text data sources such as CSVs, a new **maximum columns** setting allows you to [set the maximum number of columns](../data-factory/format-delimited-text.md#mapping-data-flow-properties). | This section summarizes recent improvements and features in SQL pools in Azure S |:-- |:-- | :-- | | September 2022 | **Auto-statistics for OPENROWSET in CSV datasets** | Serverless SQL pool will [automatically create statistics](sql/develop-tables-statistics.md#statistics-in-serverless-sql-pool) for CSV datasets when needed to ensure an optimal query execution plan for OPENROWSET queries. | | September 2022 | **MERGE T-SQL syntax** | [T-SQL MERGE syntax](/sql/t-sql/statements/merge-transact-sql?view=azure-sqldw-latest&preserve-view=true) has been a highly requested addition to the Synapse T-SQL library. MERGE encapsulates INSERTs/UPDATEs/DELETEs into a single statement. Available in dedicated SQL pools in version 10.0.17829 and above. For more, see the [MERGE T-SQL announcement blog](https://techcommunity.microsoft.com/t5/azure-synapse-analytics-blog/merge-t-sql-for-dedicated-sql-pools-is-now-ga/ba-p/3634331).|-| August 2022| **Spark Delta Lake tables in serverless SQL pools** | The ability to for serverless SQL pools to access Delta Lake tables created in Spark databases is in preview. For more information, see [Azure Synapse Analytics shared metadata tables](metadat).| +| August 2022| **Apache Spark Delta Lake tables in serverless SQL pools** | The ability to for serverless SQL pools to access Delta Lake tables created in Spark databases is in preview. For more information, see [Azure Synapse Analytics shared metadata tables](metadat).| | August 2022| **Multi-column distribution in dedicated SQL pools** | You can now Hash Distribute tables on multiple columns for a more even distribution of the base table, reducing data skew over time and improving query performance. For more information on opting-in to the preview, see [CREATE TABLE distribution options](/sql/t-sql/statements/create-table-azure-sql-data-warehouse#TableDistributionOptions) or [CREATE TABLE AS SELECT distribution options](/sql/t-sql/statements/create-table-as-select-azure-sql-data-warehouse#table-distribution-options).| | August 2022| **Distribution Advisor**| The Distribution Advisor is a new preview feature in Azure Synapse dedicated SQL pools Gen2 that analyzes queries and recommends the best distribution strategies for tables to improve query performance. For more information, see [Distribution Advisor in Azure Synapse SQL](sql/distribution-advisor.md).| | August 2022 | **Add SQL objects and users in Lake databases** | New capabilities announced for lake databases in serverless SQL pools: create schemas, views, procedures, inline table-valued functions. You can also database users from your Azure Active Directory domain and assign them to the db_datareader role. For more information, see [Access lake databases using serverless SQL pool in Azure Synapse Analytics](metadat).| |
| virtual-desktop | Per User Access Pricing | https://github.com/MicrosoftDocs/azure-docs/commits/main/articles/virtual-desktop/remote-app-streaming/per-user-access-pricing.md | To enroll your Azure subscription into per-user access pricing: 7. After enrollment is done, check the value in the **Per-user access pricing** column of the subscriptions list to make sure it's changed from ΓÇ£EnrollingΓÇ¥ to ΓÇ£Enrolled.ΓÇ¥ +## Licensing other products and services for use with Azure Virtual Desktop ++There are a few ways to enable your external users to access Office: ++- Users can sign in to Office with their own Office account. +- You can re-sell Office through your Cloud Service Provider (CSP). +- You can distribute Office by using a Service Provider Licensing Agreement (SPLA). + ## Next steps To learn more about per-user access pricing, see [Understanding licensing and per-user access pricing](licensing.md). If you want to learn how to estimate per-user app streaming costs for your deployment, see [Estimate per-user app streaming costs for Azure Virtual Desktop](streaming-costs.md). For estimating total deployment costs, see [Understanding total Azure Virtual Desktop deployment costs](total-costs.md). |
| virtual-machines | Concepts Restore Points | https://github.com/MicrosoftDocs/azure-docs/commits/main/articles/virtual-machines/concepts-restore-points.md | Title: Support matrix for VM restore points description: Support matrix for VM restore points-- Last updated 07/05/2022 |
| virtual-machines | Create Restore Points | https://github.com/MicrosoftDocs/azure-docs/commits/main/articles/virtual-machines/create-restore-points.md | Title: Create Virtual Machine restore points description: Creating Virtual Machine Restore Points with API--++ Last updated 02/14/2022 |
| virtual-machines | Disks Cross Tenant Customer Managed Keys | https://github.com/MicrosoftDocs/azure-docs/commits/main/articles/virtual-machines/disks-cross-tenant-customer-managed-keys.md | description: Learn how to use customer-managed keys with your Azure disks in dif Previously updated : 10/26/2022 Last updated : 10/31/2022 A disk encryption set with federated identity in a cross-tenant CMK workflow spa If you have questions about cross-tenant customer-managed keys with managed disks, email <crosstenantcmkvteam@service.microsoft.com>. -## Prerequisites -- Install the latest [Azure PowerShell module](/powershell/azure/install-az-ps).-- You must enable the preview on your subscription. Use the following command to enable the preview:- ```azurepowershell - Register-AzProviderFeature -FeatureName "EncryptionAtRestWithCrossTenantKey" -ProviderNamespace "Microsoft.Compute" - ``` -- It may take some time for the feature registration to complete. You can confirm if it has with the following command: - - ```azurepowershell - Get-AzProviderFeature -FeatureName "EncryptionAtRestWithCrossTenantKey" -ProviderNamespace "Microsoft.Compute" - ``` - ## Limitations -- Currently this feature is only available in the Central US, North Central US, West US, West Central US, East US, East US 2, and North Europe regions. - Managed Disks and the customer's Key Vault must be in the same Azure region, but they can be in different subscriptions. - This feature doesn't support Ultra Disks or Azure Premium SSD v2 managed disks.+- This feature isn't available in Azure China or Government clouds. [!INCLUDE [active-directory-msi-cross-tenant-cmk-overview](../../includes/active-directory-msi-cross-tenant-cmk-overview.md)] |
| virtual-machines | Maintenance And Updates | https://github.com/MicrosoftDocs/azure-docs/commits/main/articles/virtual-machines/maintenance-and-updates.md | For greater control on all maintenance activities including zero-impact and rebo Live migration is an operation that doesn't require a reboot and that preserves memory for the VM. It causes a pause or freeze, typically lasting no more than 5 seconds. Except for G, L, M, N, and H series, all infrastructure as a service (IaaS) VMs, are eligible for live migration. Eligible VMs represent more than 90 percent of the IaaS VMs that are deployed to the Azure fleet. > [!NOTE]-> You won't recieve a notification in the Azure portal for live migration operations that don't require a reboot. To see a list of live migrations that don't require a reboot, [query for scheduled events](./windows/scheduled-events.md#query-for-events). +> You won't receive a notification in the Azure portal for live migration operations that don't require a reboot. To see a list of live migrations that don't require a reboot, [query for scheduled events](./windows/scheduled-events.md#query-for-events). The Azure platform starts live migration in the following scenarios: - Planned maintenance |
| virtual-machines | Manage Restore Points | https://github.com/MicrosoftDocs/azure-docs/commits/main/articles/virtual-machines/manage-restore-points.md | Title: Manage Virtual Machine restore points description: Managing Virtual Machine Restore Points--++ |
| virtual-machines | Restore Point Troubleshooting | https://github.com/MicrosoftDocs/azure-docs/commits/main/articles/virtual-machines/restore-point-troubleshooting.md | description: Symptoms, causes, and resolutions of restore point failures related Last updated 07/13/2022 -- # Troubleshoot restore point failures: Issues with the agent or extension |
| virtual-machines | Virtual Machines Create Restore Points Cli | https://github.com/MicrosoftDocs/azure-docs/commits/main/articles/virtual-machines/virtual-machines-create-restore-points-cli.md | Title: Creating Virtual Machine Restore Points using Azure CLI description: Creating Virtual Machine Restore Points using Azure CLI--++ |
| virtual-machines | Virtual Machines Create Restore Points Portal | https://github.com/MicrosoftDocs/azure-docs/commits/main/articles/virtual-machines/virtual-machines-create-restore-points-portal.md | Title: Creating Virtual Machine Restore Points using Azure portal description: Creating Virtual Machine Restore Points using Azure portal--++ |
| virtual-machines | Virtual Machines Create Restore Points Powershell | https://github.com/MicrosoftDocs/azure-docs/commits/main/articles/virtual-machines/virtual-machines-create-restore-points-powershell.md | Title: Creating Virtual Machine Restore Points using PowerShell description: Creating Virtual Machine Restore Points using PowerShell--++ |
| virtual-machines | Virtual Machines Create Restore Points | https://github.com/MicrosoftDocs/azure-docs/commits/main/articles/virtual-machines/virtual-machines-create-restore-points.md | Title: Using Virtual Machine Restore Points description: Using Virtual Machine Restore Points--++ |
| virtual-machines | Get Started | https://github.com/MicrosoftDocs/azure-docs/commits/main/articles/virtual-machines/workloads/sap/get-started.md | ms.assetid: ad8e5c75-0cf6-4564-ae62-ea1246b4e5f2 vm-linux Previously updated : 10/27/2022 Last updated : 10/31/2022 In the SAP workload documentation space, you can find the following areas: ## Change Log +- October 31, 2022: Change in [SAP HANA scale-out with standby node on Azure VMs with ANF on SLES](./sap-hana-scale-out-standby-netapp-files-suse.md) to update the guideline for sizing `/hana/shared` - October 27, 2022: Adding Ev4 and Ev5 VM families and updated OS releases to table in [SAP ASE Azure Virtual Machines DBMS deployment for SAP workload](./dbms_guide_sapase.md) - October 20, 2022: Change in [HA for NFS on Azure VMs on SLES](./high-availability-guide-suse-nfs.md) and [HA for SAP NW on Azure VMs on SLES for SAP applications](./high-availability-guide-suse.md) to indicate that we are de-emphasizing SAP reference architectures, utilizing NFS clusters - October 18, 2022: Clarify some considerations around using Azure Availability Zones in [SAP workload configurations with Azure Availability Zones](./sap-ha-availability-zones.md) |
| virtual-machines | Sap Hana Scale Out Standby Netapp Files Suse | https://github.com/MicrosoftDocs/azure-docs/commits/main/articles/virtual-machines/workloads/sap/sap-hana-scale-out-standby-netapp-files-suse.md | To meet the SAP minimum throughput requirements for data and log, and the guidel | | | | | | /hana/log/ | 4 TiB | 2 TiB | v4.1 | | /hana/data | 6.3 TiB | 3.2 TiB | v4.1 |-| /hana/shared | Max (512 GB, 1xRAM) per 4 worker nodes | Max (512 GB, 1xRAM) per 4 worker nodes | v3 or v4.1 | +| /hana/shared | 1xRAM per 4 worker nodes | 1xRAM per 4 worker nodes | v3 or v4.1 | The SAP HANA configuration for the layout that's presented in this article, using Azure NetApp Files Ultra Storage tier, would be: |
| virtual-network | Ipv6 Overview | https://github.com/MicrosoftDocs/azure-docs/commits/main/articles/virtual-network/ip-services/ipv6-overview.md | The current IPv6 for Azure virtual network release has the following limitations - While it is possible to create NSG rules for IPv4 and IPv6 within the same NSG, it is not currently possible to combine an IPv4 Subnet with an IPv6 subnet in the same rule when specifying IP prefixes. - ICMPv6 is not currently supported in Network Security Groups. - Azure Virtual WAN currently supports IPv4 traffic only.+- Azure Firewall doesn't currently support IPv6. It can operate in a dual stack VNet using only IPv4, but the firewall subnet must be IPv4-only. ## Pricing |
| virtual-network | Troubleshoot Nat | https://github.com/MicrosoftDocs/azure-docs/commits/main/articles/virtual-network/nat-gateway/troubleshoot-nat.md | To get your virtual machine NIC out of a failed state, you can use one of the tw NAT gateway can't be associated with more than 16 public IP addresses. You can use any combination of public IP addresses and prefixes with NAT gateway up to a total of 16 IP addresses. The following IP prefix sizes can be used with NAT gateway: -* /28 (16 addresses) +* /28 (sixteen addresses) * /29 (eight addresses) To learn more about NAT gateway, see: * [NAT gateway resource](nat-gateway-resource.md) -* [Metrics and alerts for NAT gateway resources](nat-metrics.md). +* [Metrics and alerts for NAT gateway resources](nat-metrics.md). |